BMW 325xi (2006 year). Instruction - part 2
15
1 Microphone for voice command system
*
and for telephone in hands-free mode
*
2 Initiating an emergency call
*
3 Reading lamps
4 Glass sunroof, electric
*
5 Interior lamps
6 Passenger airbag status lamp
7 Control Display
8 Hazard warning flashers
9 DTC Dynamic Traction Control
10 Central locking system
11 Automatic climate control
12 Ejecting
>
Audio CD
>
Navigation DVD
13 Changing
>
>
Track
15 Controller
Can be turned, pressed, or moved horizon-
tally in four directions
16 Activating voice command system
*
22
17 Opening start menu on Control Display
17
18 Drive for navigation DVD
19 Switching audio sources on/off and adjust-
20 Drive for audio CDs
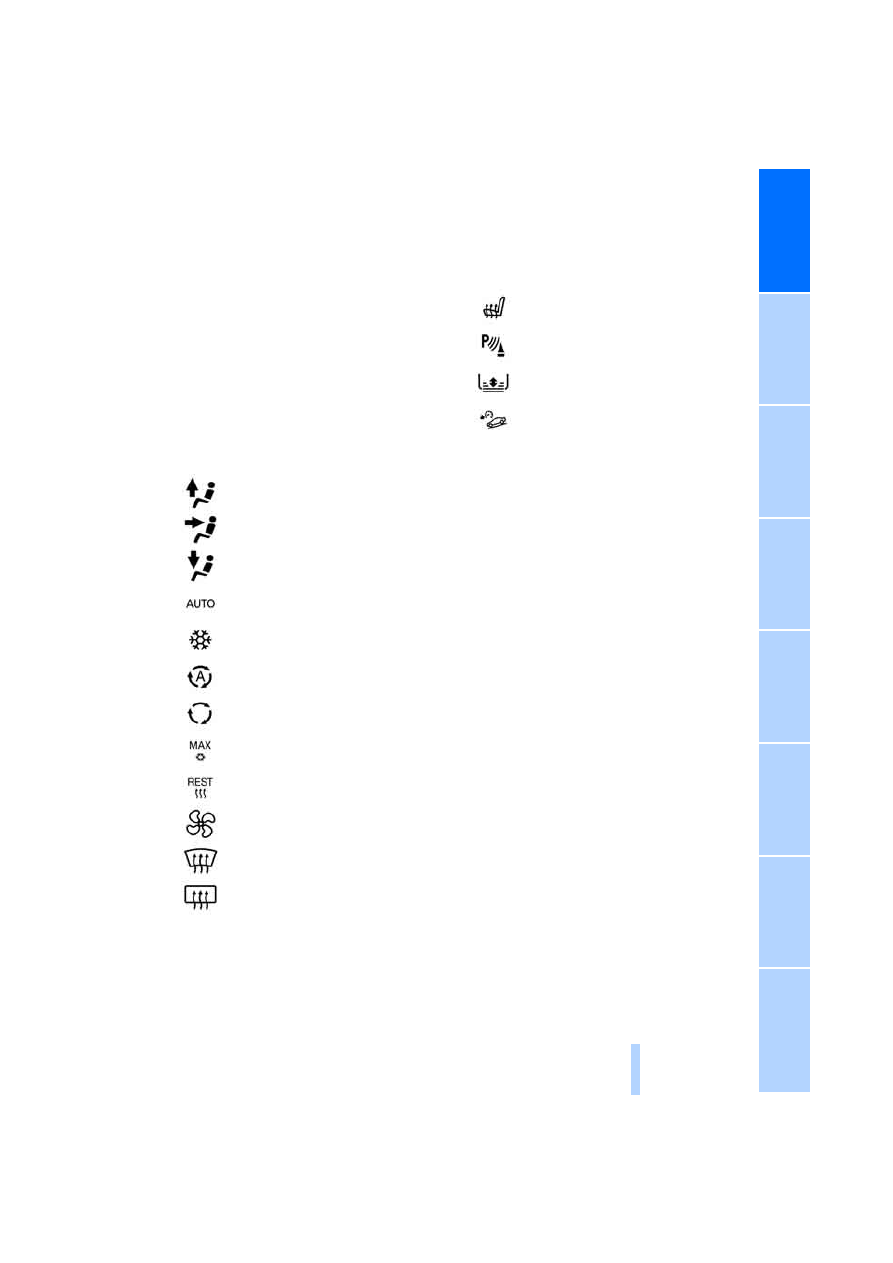
Air distribution to the
windshield
Air distribution to the upper body
area
Air distribution to the footwell
Automatic air distribution and flow
rate
Cooling function
AUC Automatic recirculated-air
control
Maximum cooling
Residual heat mode
Air flow rate
Defrosting windows
Rear window defroster
14
Heated seats
*
PDC Park Distance Control
Roller sun blind
*
Hill Descent Control HDC
*