BMW 3 (E46). Manual - part 158


  Index      BMW     BMW 3 (E46) - service repair manual 2006 year


Search            


Content   ..  156  157  158  159   ..


BMW 3 (E46). Manual - part 158


subframe.

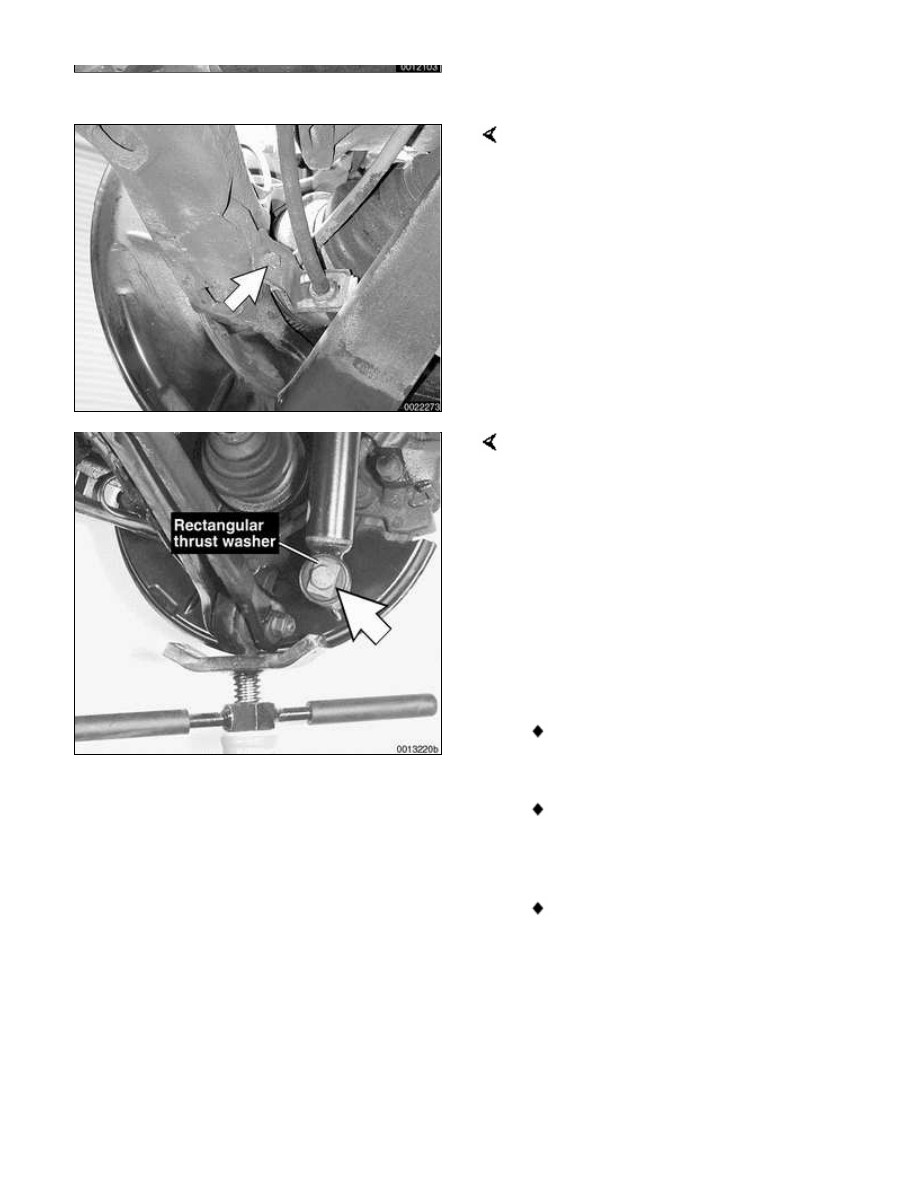
Remove rear brake line bracket
mounting bolt (arrow). Detach bracket
from trailing arm.

CAUTION!

Avoid damaging the brake hose by
stretching when the trailing arm is
lowered.

Support trailing arm from below using
an adjustable jackstand. Remove
shock absorber lower mounting bolt
(arrow).

 -

Lower trailing arm slowly and
carefully until the compressed coil
spring is fully unloaded. Remove
spring.

 -

If spring is to be reused:

Inspect spring for any surface
damage or corrosion.

Inspect top and bottom spring
seat rubber pads for signs of
damage.

Replace any parts showing
evidence of wear or damage.

Note:

In the "rough road package", the top
spring seat pad is 14.5 mm (0.57 in.)
thick.

 -

To install spring:

Coat top spring pad with
anti-friction paste (e.g., tire
mounting paste).

Slowly lift suspension back into
position, making sure coil spring is
correctly seated in upper and
lower spring seats.

When suspension has been lifted
sufficiently, reattach shock
absorber to trailing arm. Make
sure rectangular thrust washer on
lower shock absorber mounting
bolt is between bolt head and
shock absorber rubber.

Tighten lower shock absorber bolt
to its final torque once car is on
ground.

 -

Remainder of installation is
reverse of removal.

Tightening torques

Drive axle to final drive flange

M10x20 mm Torx
bolt

83 Nm (61 ft-lb)

M10x46 mm bolt
(black)

100 Nm (74 ft-lb)

M10x46 mm bolt
(silver) (always
replace)

80 Nm (59 ft-lb)

Road wheel to hub

100 ± 10 Nm

(74 ± 7 ft-lb)

Shock absorber to
trailing arm (car in
normal loaded

100 Nm (74 ft-lb)

Tightening torques

position)

330-3


Rear Suspension Arms,
Subframe and Bushings

The trailing arms, control arms and
their mounting bushings control the
position of the rear wheels. A damaged
suspension arm or worn bushings will
change the rear wheel alignment and
may adversely affect handling and
stability.

WARNING!

Do not attempt to straighten a
damaged suspension arm. Bending
or heating may weaken the original
part. If the suspension arm shows
any signs of damage or excessive
corrosion, it must be replaced.

Note:

If a rear brake line is disconnected to
remove a trailing arm, the complete
braking system must be bled as part of
the reinstallation procedure.


Rear suspension
arms, assembly

1

-

Rear subframe

2

-

Upper control
arm inner bolt
self-locking M12
nut

tighten to 77 Nm (57
ft-lb)

3

-

Upper control
arm


Content   ..  156  157  158  159   ..