Acura RSX Honda Integra. Manual - part 434
01
S6M6A00J22100030051KBAT00
S6M6A00J22117117351FAAT10
−
−
−
−
−
−
−
−
−
−
YES
NO
YES
NO
YES
NO
YES
NO
YES
NO
22-74
22-74
Gauges
Gauge Assembly Replacement
Coolant Temperature Gauge
Troubleshooting
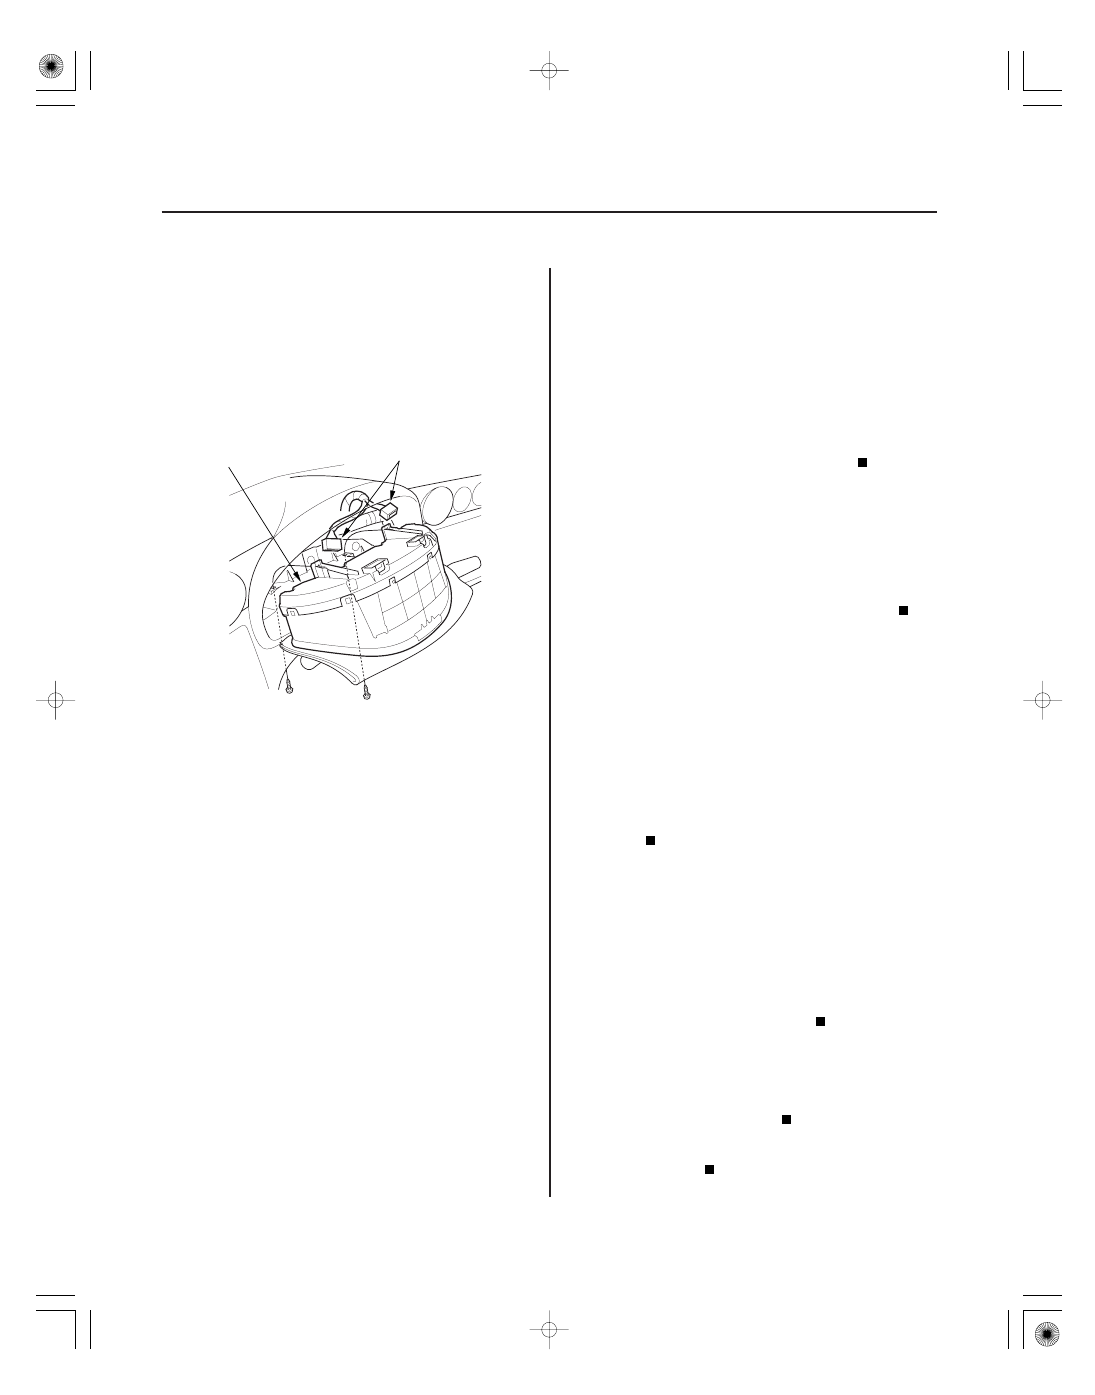
B
A
1. Remove the driver’s dashboard lower cover
(see page 20-63), then remove the upper column
cover (see page 17-25).
2. Place a clean shop towel under the gauge assembly
to prevent scratching it and the steering column
cover.
3. Remove the two mounting screws from the gauge
assembly (A).
4. Disconnect the connectors (B), and remove the
gauge assembly.
5. Install the gauge assembly in the reverse order of
removal.
Before testing, check the No. 9 (7.5 A) fuse in the under-
hood fuse/relay box and the No. 10 (7.5 A) fuse in the
under-dash fuse/relay box.
1. Start the engine, and check the Malfunction
Indicator Lamp (MIL).
Troubleshoot the cause of the PGM-FI
system DTC (see page 11-3), and recheck.
Go to step 2.
2. Check for a multiplex control unit DTC (see page
22-189).
Troubleshoot the cause of the multiplex
control unit DTC (see page 22-189), and recheck.
Go to step 3.
3. Do the communication line check with the self-
diagnostic procedure (see page 22-68).
The gauge cannot receive the signal from the
multiplex control unit and the ECM/PCM. Check for
an open in the WHT/GRN wire (gauge connector
terminal B13 or B11) or YEL wire (under-dash fuse/
relay box terminal E10 and ECM/PCM terminal (E24
or E13).
Go to step 4.
4. Does the gauge drive circuit check with the self-
diagnostic procedure (see page 22-68).
Go to step 5.
Replace the gauge assembly.
5. Substitute a known-good ECM/PCM, and recheck.
Replace the ECM/PCM.
Substitute a known-good gauge assembly. If
the symptom/indication goes away, replace the
gauge assembly.
Does the MIL come on?
Is a DT C indicated?
Is the wor d ‘‘Er r or ’’ indicated on the odo/ tr ip
display?
Does the temper atur e gauge needle sweep f r om
the minimum position to the maximum, then r etur n
to the minimum position?
Did the symptom/ indication go away?
05/06/27 18:03:23 61S6M040_220_0075