Acura RL (1996-2004 year). Manual - part 8
Exterior Body Parts
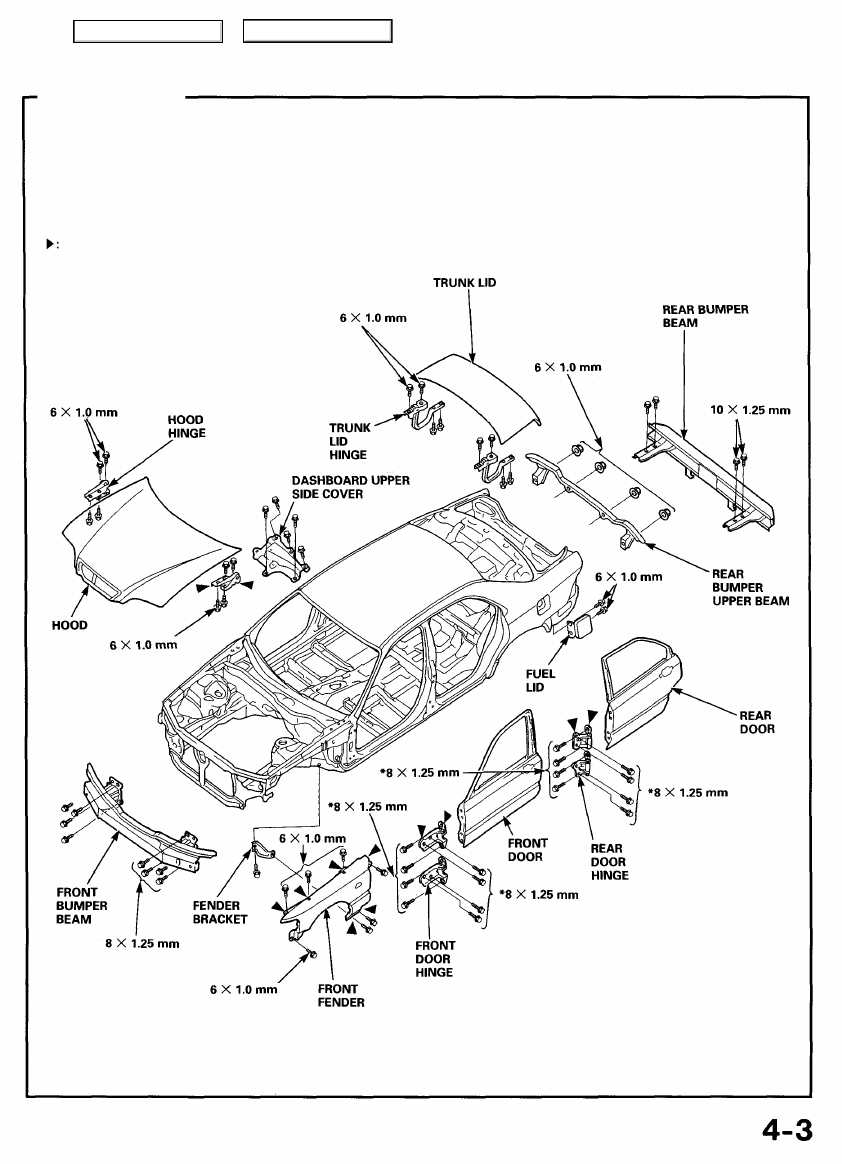
Replacement
Mounting bolts Torque:
6X1.0 mm : 9.8 N-m (1.0 kgf-m, 7.2 Ibf-ft)
8X1.25 mm : 22 N-m (2.2 kgf-m, 16 Ibf-ft)
*8X1.25 mm: 28 N-m (2.9 kgf-m, 21 Ibf-ft)
10 X 1.25 mm: 38N-m (3.9 kgf-m, 28 Ibf-ft)
Sealing locations
NOTE: Seal the following areas to prevent
water leak and rust.
Mastic sealer: 3M #08654
Use materials above or equivalents.
NOTE: Adjust the clearance with the doors, refer
to the Service Manual for door striker adjust-
ment.
Main Menu
Table of Contents