Acura RL. Manual - part 818


  Index      Acura     Acura RL - service repair manual 2005-2008 year


Search            


Content   ..  816  817  818  819   ..


Acura RL. Manual - part 818


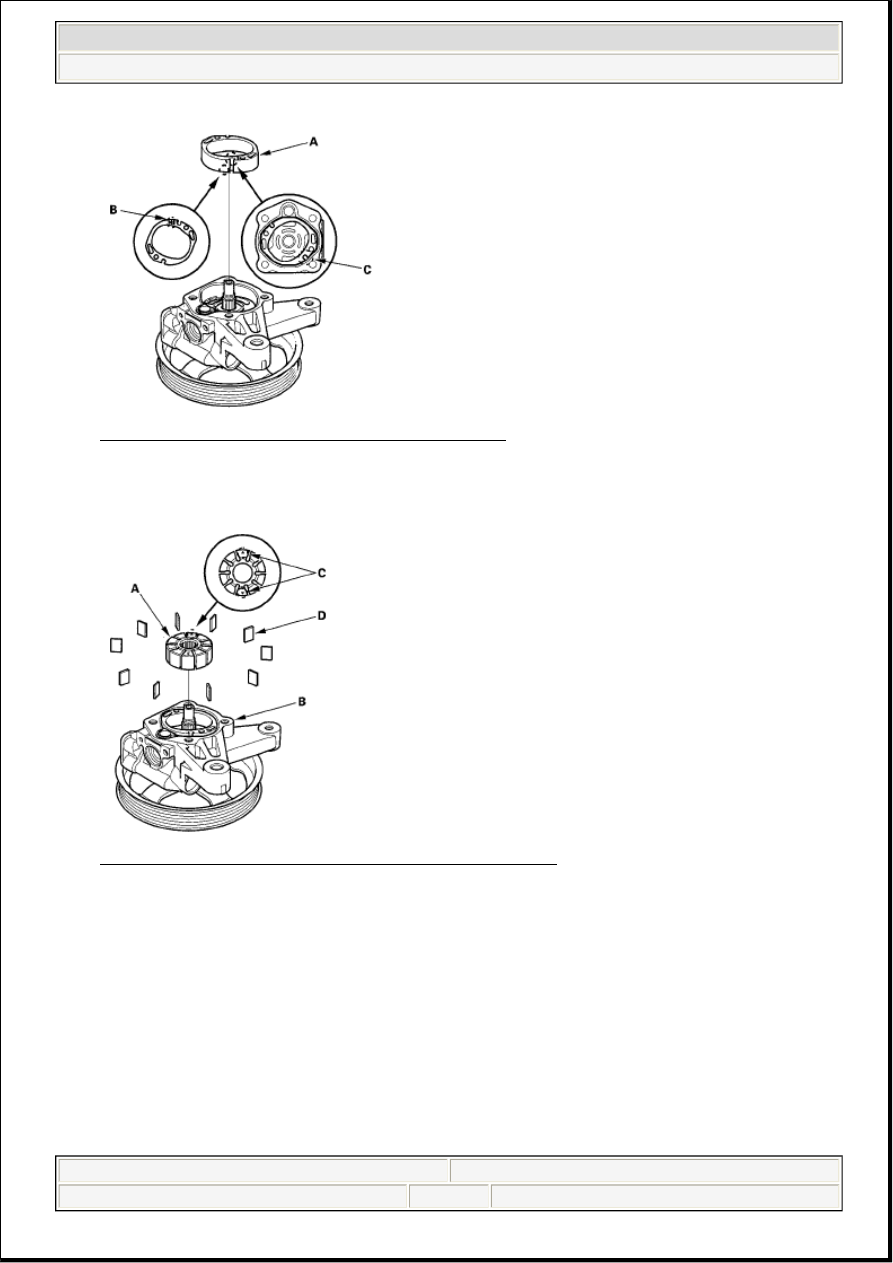
Fig. 27: Identifying Pump Cam Ring, Mark And Slot 
Courtesy of AMERICAN HONDA MOTOR CO., INC. 

19. Assemble pump rotor (A) to the pump housing (B) with its "delta " mark (C) facing up. 

Fig. 28: Identifying Pump Rotor, Pump Housing And Mark 
Courtesy of AMERICAN HONDA MOTOR CO., INC. 

20. Set the 10 vanes (D) in the grooves in the rotor.  

21. Install the snap ring (A). 


2007 Acura RL 

2005-08 STEERING Steering - RL


me 


Friday, June 05, 2009 2:20:15 PM

Page 23 

© 2005 Mitchell Repair Information Company, LLC. 

Fig. 29: Identifying Snap Ring 
Courtesy of AMERICAN HONDA MOTOR CO., INC. 

22. Coat the new pump cover seal (A) with power steering fluid, and position it in the pump housing. 

Fig. 30: Identifying Pump Cover Seal And Pump Cover 
Courtesy of AMERICAN HONDA MOTOR CO., INC. 

23. Install the pump cover (B) in the pump housing. Torque the bolts in a criss-cross pattern in two or 

more steps.  

24. Coat the flow control valve (A) with power steering fluid, then install it and the spring (B) in the 

pump housing. 


2007 Acura RL 

2005-08 STEERING Steering - RL


me 


Friday, June 05, 2009 2:20:15 PM

Page 24 

© 2005 Mitchell Repair Information Company, LLC. 

Fig. 31: Identifying Flow Control Valve And Spring 
Courtesy of AMERICAN HONDA MOTOR CO., INC. 

25. Coat the new 19.8 mm O-ring (C) with power steering fluid, and install it on the flow control valve 

cap (D), then install the cap on the pump housing, and tighten it to the specified torque.  

26. Coat the new 15.8 mm O-ring (A) with power steering fluid, and install it on the inlet joint (B). Install 

the inlet joint on the pump housing. 

Fig. 32: Identifying O-Ring And Inlet Joint 
Courtesy of AMERICAN HONDA MOTOR CO., INC. 

27. Check that the pump turns smoothly by turning the pulley by hand. If it turns hard, loosen the four 

flange bolts on the cover, then retighten them in same manner as in step 23. Turn the pump again by 
hand.  

STEERING WHEEL REMOVAL 

SRS components are located in this area. Review the SRS component locations (see COMPONENT 
LOCATION INDEX
 ) and the precautions and procedures (see PRECAUTIONS AND PROCEDURES 
before doing repairs or service. 

1. Make sure you have the anti-theft codes for the audio and the navigation system.  

2. Make sure the ignition switch is OFF, then disconnect the negative cable from the battery. 


2007 Acura RL 

2005-08 STEERING Steering - RL


me 


Friday, June 05, 2009 2:20:15 PM

Page 25 

© 2005 Mitchell Repair Information Company, LLC. 

3. Align the front wheels straight ahead, then remove the driver's airbag from the steering wheel (see 

DRIVER'S AIRBAG REPLACEMENT ).  

4. Disconnect the cable reel connector (A).  

5. Loosen the steering wheel nut (B). 

Fig. 33: Identifying Cable Reel Connector And Steering Wheel Nut 
Courtesy of AMERICAN HONDA MOTOR CO., INC. 

6. Install a commercially available steering wheel puller (A) on the steering wheel (B). Free the steering 

wheel from the steering column shaft by turning the pressure bolt (C) of the puller. 

Note these items when removing the steering wheel: 

Do not tap on the steering wheel or the steering column shaft when removing the steering 
wheel.  

If you thread the puller bolts (D) into the wheel hub more than five threads, the bolts will hit the 
cable reel and damage it. To prevent this, install a pair of jam nuts five threads up on each 
puller bolt. 

Fig. 34: Identifying Steering Wheel Puller, Steering Wheel And Pressure Bolt 
Courtesy of AMERICAN HONDA MOTOR CO., INC. 

7. Remove the steering wheel puller, then remove the steering wheel nut and steering wheel from the 


2007 Acura RL 

2005-08 STEERING Steering - RL


me 


Friday, June 05, 2009 2:20:15 PM

Page 26 

© 2005 Mitchell Repair Information Company, LLC. 


Content   ..  816  817  818  819   ..