Acura RL. Manual - part 419
 

  Index      Acura     Acura RL - service repair manual 2005-2008 year


Search            


Content   ..  417  418  419  420   ..


Acura RL. Manual - part 419


15. Install the timing belt (see TIMING BELT INSTALLATION ).  

16. Adjust the valve clearance (see VALVE CLEARANCE ADJUSTMENT ).  

17. Fill the radiator with engine coolant and bleed the air out (see step 8 under COOLANT CHECK ).  

18. Install the battery. Clean the battery posts and cable terminals, then assemble them and apply grease to 

prevent corrosion.  

19. Do the crankshaft position (CKP) pattern clear/CKP pattern learn procedure (see CRANK (CKP) 

PATTERN CLEAR/CRANK (CKP) PATTERN LEARN ).  

20. Enter the anti-theft codes for the audio system and the navigation system.  

21. Do the steering column position memorization procedure (see STEERING COLUMN POSITION 

MEMORIZATION ).  

REAR 

1. Remove the timing belt (see TIMING BELT REMOVAL ).  

2. Remove the rocker arm assembly (see ROCKER ARM ASSEMBLY REMOVAL ).  

3. Remove the rear camshaft pulley.  

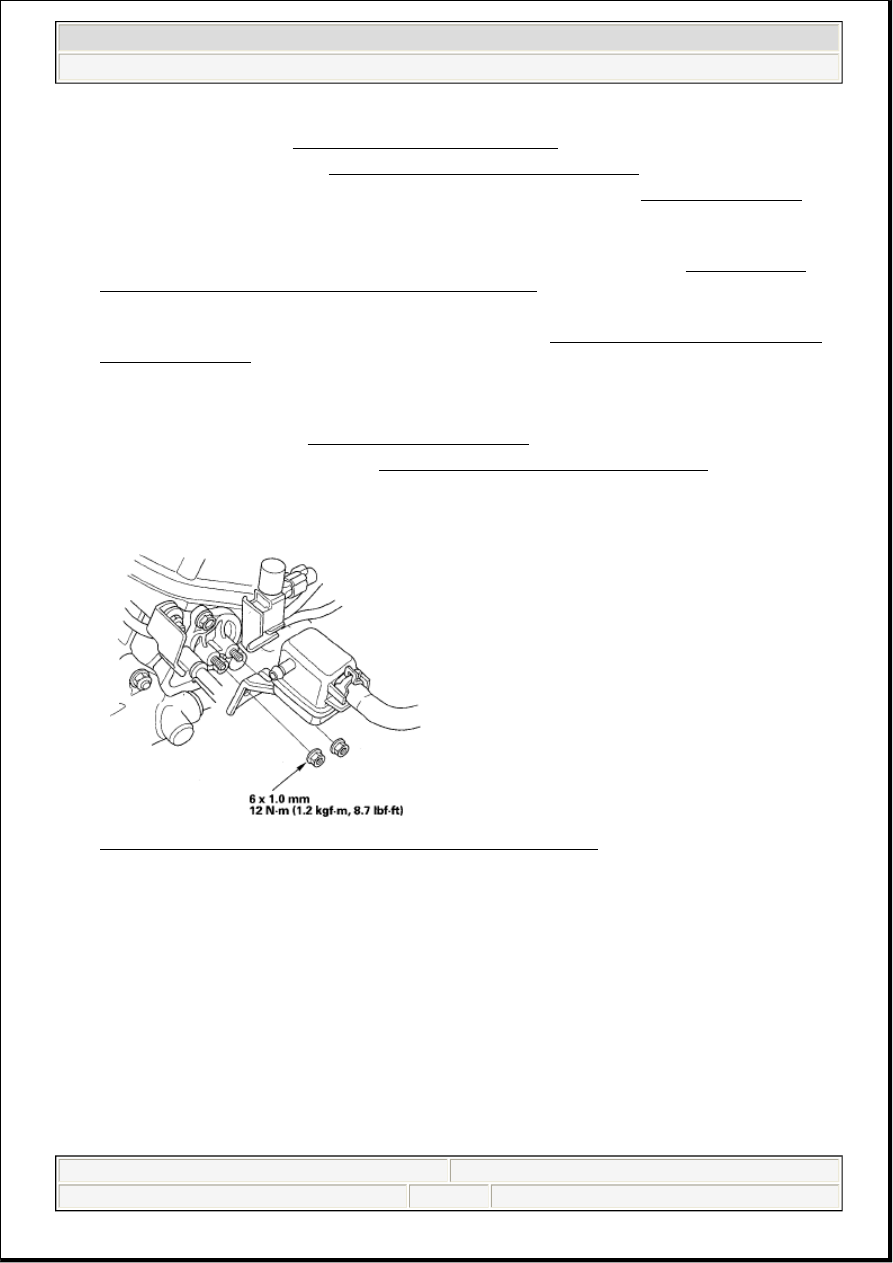
4. Remove the two nuts securing the purge joint. 

Fig. 93: Identifying Purge Joint Nuts With Torque Specifications 
Courtesy of AMERICAN HONDA MOTOR CO., INC. 

5. Remove the thrust cover (A), then remove the rear camshaft (B). 


2007 Acura RL 

2005-08 ENGINE Cylinder Head - RL


me 


Friday, June 05, 2009 3:18:37 PM

Page 49 

© 2005 Mitchell Repair Information Company, LLC. 

Fig. 94: Identifying Thrust Cover And Rear Camshaft With Torque Specifications 
Courtesy of AMERICAN HONDA MOTOR CO., INC. 

6. Install the rear camshaft in the reverse order of removal. Always use a new O-ring (C). Apply new 

engine oil to the journals and camshaft lobes.  

7. Apply new engine oil to the threads of the camshaft pulley mounting bolt, then install the rear 

camshaft pulley (see step 11 ).  

8. Install the rocker arm assembly, then tighten the mounting bolts (see step 8 ).  

9. Install the timing belt (see TIMING BELT INSTALLATION ).  

10. Adjust the valve clearance (see VALVE CLEARANCE ADJUSTMENT ).  

11. Do the crankshaft position (CKP) pattern clear/CKP pattern learn procedure (see CRANK (CKP) 

PATTERN CLEAR/CRANK (CKP) PATTERN LEARN ).  

CYLINDER HEAD INSPECTION FOR WARPAGE 

1. Remove the cylinder head (see CYLINDER HEAD REMOVAL ).  

2. Inspect the camshaft (see CAMSHAFT INSPECTION ).  

3. Check the cylinder head for warpage. Measure along the edges, and three ways across the center. 

If warpage is less than 0.05 mm (0.002 in.), cylinder head resurfacing is not required.  

If warpage is between 0.05 mm (0.002 in.) and 0.2 mm (0.008 in.), resurface the cylinder head.  

Maximum resurface limit is 0.2 mm (0.008 in.) based on a height of 121 mm (4.76 in.).  

Cylinder Head Height  

Standard (New): 120.95-121.05 mm (4.762-4.766 in.)


2007 Acura RL 

2005-08 ENGINE Cylinder Head - RL


me 


Friday, June 05, 2009 3:18:37 PM

Page 50 

© 2005 Mitchell Repair Information Company, LLC. 

Fig. 95: Checking Cylinder Head For Warpage 
Courtesy of AMERICAN HONDA MOTOR CO., INC. 

ROCKER ARM ASSEMBLY REMOVAL 

1. Remove the cylinder head cover (see CYLINDER HEAD COVER REMOVAL ).  

2. Loosen the adjusting screws (A). 

Fig. 96: Identifying Adjusting Screws 
Courtesy of AMERICAN HONDA MOTOR CO., INC.


2007 Acura RL 

2005-08 ENGINE Cylinder Head - RL


me 


Friday, June 05, 2009 3:18:37 PM

Page 51 

© 2005 Mitchell Repair Information Company, LLC. 

3. Remove the bolts and the rocker arm assembly. 

1. Loosen the rocker shaft mounting bolts two turns at a time, in a crisscross pattern, to prevent 

damaging the valves or rocker arm assembly.  

2. When removing the rocker arm assembly, do not remove the rocker shaft mounting bolts. The 

bolts will keep the springs and the rocker arms on the shafts. 

Fig. 97: Identifying Loosening Sequence Of Rocker Shaft Mounting Bolts 
Courtesy of AMERICAN HONDA MOTOR CO., INC. 

ROCKER ARM AND SHAFT DISASSEMBLY/REASSEMBLY 

NOTE:

Identify parts as they are removed so they can be reinstalled in their 
original locations.  

Inspect the rocker shafts and rocker arms (see ROCKER ARM AND 
SHAFT INSPECTION ).  

If reused, the rocker arms must be installed in their original location.  

When removing or installing the rocker arm assembly, do not remove the 
rocker shaft mounting bolts. The bolts will keep the springs and rocker 
arms on the shaft.  

Bundle the intake rocker arms with rubber bands to keep them together 
as a set.  

Prior to reassembling, clean all the parts in solvent, dry them and apply 
new engine oil to any contact points.  

When replacing the intake rocker arm assembly, remove the fastening 
hardware from the new intake rocker arm assembly. 


2007 Acura RL 

2005-08 ENGINE Cylinder Head - RL


me 


Friday, June 05, 2009 3:18:37 PM

Page 52 

© 2005 Mitchell Repair Information Company, LLC. 


Content   ..  417  418  419  420   ..