Acura RL. Manual - part 415


  Index      Acura     Acura RL - service repair manual 2005-2008 year


Search            


Content   ..  413  414  415  416   ..


Acura RL. Manual - part 415


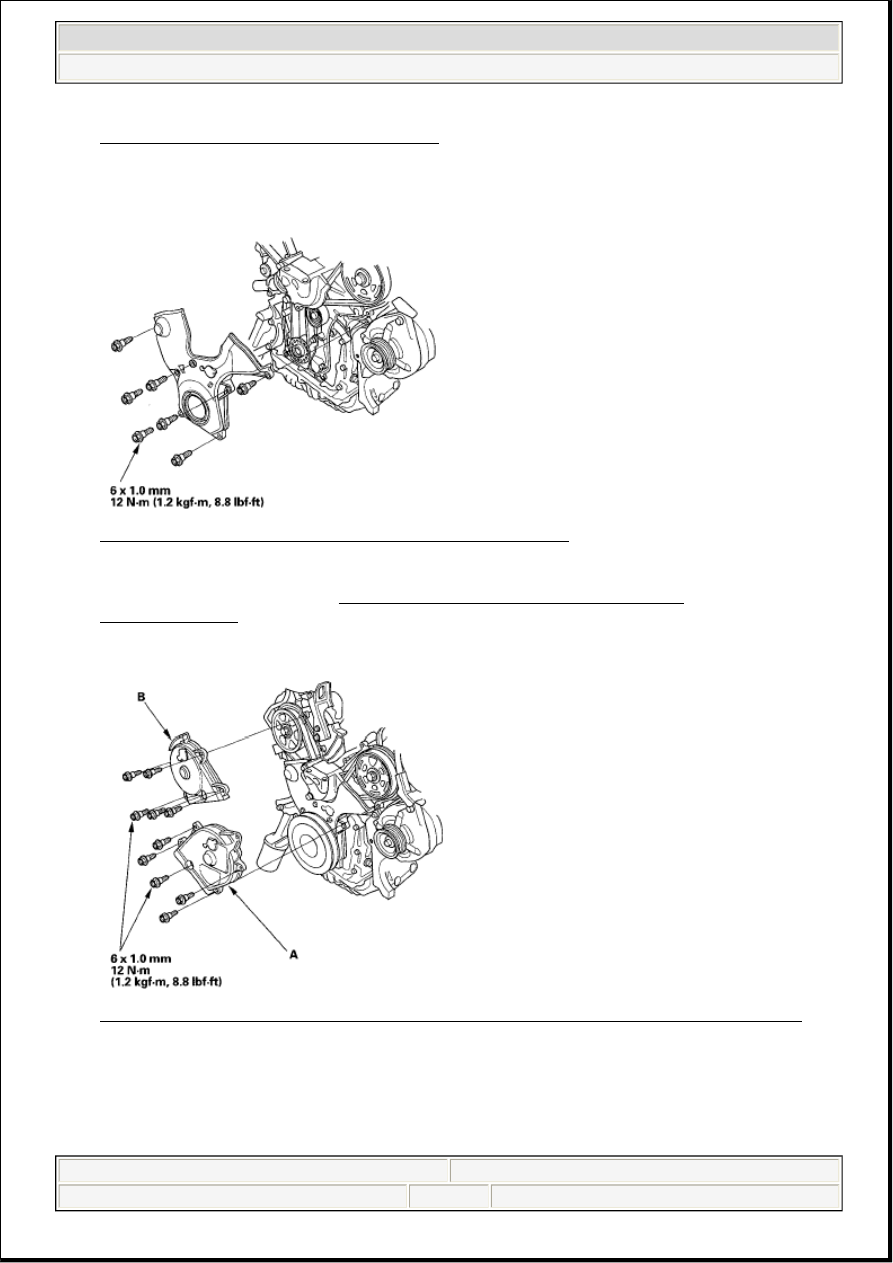
Fig. 62: Identifying Timing Belt Guide Plate
Courtesy of AMERICAN HONDA MOTOR CO., INC.
 

18. Install the lower cover. 

Fig. 63: Identifying Lower Cover With Torque Specifications 
Courtesy of AMERICAN HONDA MOTOR CO., INC. 

19. Install the crankshaft pulley (see CRANKSHAFT PULLEY REMOVAL AND 

INSTALLATION ).  

20. Install the front upper cover (A) and rear upper cover (B). 

Fig. 64: Identifying Front Upper Cover And Rear Upper Cover With Torque Specifications 
Courtesy of AMERICAN HONDA MOTOR CO., INC. 

21. Rotate the crankshaft pulley about six turns clockwise so the timing belt positions itself on the 

pulleys.  

22. Turn the crankshaft pulley so the white mark (A) lines up with the pointer (B). 


2007 Acura RL 

2005-08 ENGINE Cylinder Head - RL


me 


Friday, June 05, 2009 3:18:36 PM

Page 33 

© 2005 Mitchell Repair Information Company, LLC. 

Fig. 65: Identifying White Mark On Crankshaft Pulley 
Courtesy of AMERICAN HONDA MOTOR CO., INC. 

23. Check the camshaft pulley marks. 

If the camshaft pulley marks are at TDC, go to step 24.  

If the camshaft pulley marks are not at TDC, remove the timing belt and repeat steps 3 through 
23.  

FRONT  

Fig. 66: Identifying Camshaft Pulley Marks (Front) 
Courtesy of AMERICAN HONDA MOTOR CO., INC. 

REAR  


2007 Acura RL 

2005-08 ENGINE Cylinder Head - RL


me 


Friday, June 05, 2009 3:18:37 PM

Page 34 

© 2005 Mitchell Repair Information Company, LLC. 

Fig. 67: Identifying Camshaft Pulley Marks (Rear) 
Courtesy of AMERICAN HONDA MOTOR CO., INC. 

24. Install the upper bracket (A), then tighten the bolts in the numbered sequence shown. 

Fig. 68: Identifying Tightening Sequence Of Upper Bracket Bolts With Torque Specifications 
Courtesy of AMERICAN HONDA MOTOR CO., INC. 

25. Install the ground cable (B).  

26. Install the drive belt auto-tensioner (see DRIVE BELT AUTO-TENSIONER REPLACEMENT ).  

27. Install the drive belt (see DRIVE BELT INSPECTION ).  

28. Install the splash shield.  

29. Install the right front wheel.  

30. Do the crankshaft position (CKP) pattern clear/CKP pattern learn procedure (see CRANK (CKP) 

PATTERN CLEAR/CRANK (CKP) PATTERN LEARN ).  

TIMING BELT DRIVE PULLEY REPLACEMENT 

1. Remove the timing belt (see TIMING BELT REMOVAL ). 


2007 Acura RL 

2005-08 ENGINE Cylinder Head - RL


me 


Friday, June 05, 2009 3:18:37 PM

Page 35 

© 2005 Mitchell Repair Information Company, LLC. 

2. Remove the crankshaft position (CKP) sensor (see CKP SENSOR REPLACEMENT ).  

3. Remove the timing belt drive pulley. 

Fig. 69: Identifying Timing Belt Drive Pulley 
Courtesy of AMERICAN HONDA MOTOR CO., INC. 

4. Inspect the timing belt drive pulley and key for damage. If it is cracked or damaged, replace the 

timing belt drive pulley.  

5. Install the timing belt drive pulley.  

6. Install the CKP sensor (see CKP SENSOR REPLACEMENT ).  

7. Install the timing belt (see TIMING BELT INSTALLATION ).  

TIMING BELT ADJUSTER REPLACEMENT 

1. Remove the timing belt (see TIMING BELT REMOVAL ).  

2. Remove the battery clamp bolt from the back cover.  

3. Remove the auto-tensioner (see step 6 ).  

4. Remove the bolt (A), then remove the timing belt adjuster (B) and collar (C). 

Fig. 70: Identifying Timing Belt Adjuster And Collar With Torque Specifications 
Courtesy of AMERICAN HONDA MOTOR CO., INC. 

5. Install the timing belt adjuster.  

6. Install the timing belt (see TIMING BELT INSTALLATION ). 


2007 Acura RL 

2005-08 ENGINE Cylinder Head - RL


me 


Friday, June 05, 2009 3:18:37 PM

Page 36 

© 2005 Mitchell Repair Information Company, LLC. 


Content   ..  413  414  415  416   ..