Oracle VM VirtualBox. User Manual (Version 7.0.18) - page 2
4 Configuring Virtual Machines
One notable user of EFI is Apple Mac OS X. More recent Linux versions and Windows releases,
starting with Vista, also offer special versions that can be booted using EFI.
Another possible use of EFI in Oracle VM VirtualBox is development and testing of EFI appli-
cations, without booting any OS.
Note that the Oracle VM VirtualBox EFI support is experimental and will be enhanced as
EFI matures and becomes more widespread. Mac OS X, Linux, and newer Windows guests are
known to work fine. Windows 7 guests are unable to boot with the Oracle VM VirtualBox EFI
implementation.
4.14.1 Video Modes in EFI
EFI provides two distinct video interfaces: GOP (Graphics Output Protocol) and UGA (Universal
Graphics Adapter). Modern OSes, such as Mac OS X, generally use GOP, while some older
ones still use UGA. Oracle VM VirtualBox provides a configuration option to control the graphics
resolution for both interfaces, making the difference mostly irrelevant for users.
The default resolution is 1024x768. To select a graphics resolution for EFI, use the following
VBoxManage command:
VBoxManage setextradata "VM name" VBoxInternal2/EfiGraphicsResolution HxV
Determine the horizontal resolution H and the vertical resolution V from the following list of
default resolutions:
VGA
640x480, 32bpp, 4:3
SVGA
800x600, 32bpp, 4:3
XGA
1024x768, 32bpp, 4:3
XGA+
1152x864, 32bpp, 4:3
HD
1280x720, 32bpp, 16:9
WXGA
1280x800, 32bpp, 16:10
SXGA
1280x1024, 32bpp, 5:4
SXGA+
1400x1050, 32bpp, 4:3
WXGA+
1440x900, 32bpp, 16:10
HD+
1600x900, 32bpp, 16:9
UXGA
1600x1200, 32bpp, 4:3
WSXGA+
1680x1050, 32bpp, 16:10
86
4 Configuring Virtual Machines
Full HD
1920x1080,
32bpp,
16:9
WUXGA
1920x1200,
32bpp,
16:10
DCI 2K
2048x1080,
32bpp,
19:10
Full HD+
2160x1440,
32bpp,
3:2
Unnamed
2304x1440,
32bpp,
16:10
QHD
2560x1440,
32bpp,
16:9
WQXGA
2560x1600,
32bpp,
16:10
QWXGA+
2880x1800,
32bpp,
16:10
QHD+
3200x1800,
32bpp,
16:9
WQSXGA
3200x2048,
32bpp,
16:10
4K UHD
3840x2160,
32bpp,
16:9
WQUXGA
3840x2400,
32bpp,
16:10
DCI 4K
4096x2160,
32bpp,
19:10
HXGA
4096x3072,
32bpp,
4:3
UHD+
5120x2880,
32bpp,
16:9
WHXGA
5120x3200,
32bpp,
16:10
WHSXGA
6400x4096,
32bpp,
16:10
HUXGA
6400x4800,
32bpp,
4:3
8K UHD2
7680x4320,
32bpp,
16:9
If this list of default resolution does not cover your needs, see chapter 10.6.1, Custom VESA
Resolutions, page 340. Note that the color depth value specified in a custom video mode must
be specified. Color depths of 8, 16, 24, and 32 are accepted. EFI assumes a color depth of 32 by
default.
The EFI default video resolution settings can only be changed when the VM is powered off.
87
4 Configuring Virtual Machines
4.14.2 Specifying Boot Arguments
It is currently not possible to manipulate EFI variables from within a running guest. For example,
setting the boot-args variable by running the nvram tool in a Mac OS X guest will not work.
As an alternative method, VBoxInternal2/EfiBootArgs extradata can be passed to a VM in
order to set the boot-args variable. To change the boot-args EFI variable, use the following
command:
VBoxManage setextradata "VM name" VBoxInternal2/EfiBootArgs <value>
88
5 Guest Additions
The previous chapter covered getting started with Oracle VM VirtualBox and installing operating
systems in a virtual machine. For any serious and interactive use, the Oracle VM VirtualBox
Guest Additions will make your life much easier by providing closer integration between host
and guest and improving the interactive performance of guest systems. This chapter describes
the Guest Additions in detail.
5.1 Introduction to Guest Additions
As mentioned in chapter 2.2, Some Terminology, page 2, the Guest Additions are designed to
be installed inside a virtual machine after the guest operating system has been installed. They
consist of device drivers and system applications that optimize the guest operating system for
better performance and usability. See chapter 4.1, Supported Guest Operating Systems, page 68
for details on what guest operating systems are fully supported with Guest Additions by Oracle
VM VirtualBox.
The Oracle VM VirtualBox Guest Additions for all supported guest operating systems are pro-
vided as a single CD-ROM image file which is called VBoxGuestAdditions.iso. This image file
is located in the installation directory of Oracle VM VirtualBox. To install the Guest Additions for
a particular VM, you mount this ISO file in your VM as a virtual CD-ROM and install from there.
The Guest Additions offer the following features:
• Mouse pointer integration. To overcome the limitations for mouse support described in
chapter 2.9.2, Capturing and Releasing Keyboard and Mouse, page 19, this feature provides
you with seamless mouse support. You will only have one mouse pointer and pressing the
Host key is no longer required to free the mouse from being captured by the guest OS. To
make this work, a special mouse driver is installed in the guest that communicates with the
physical mouse driver on your host and moves the guest mouse pointer accordingly.
• Shared folders. These provide an easy way to exchange files between the host and the
guest. Much like ordinary Windows network shares, you can tell Oracle VM VirtualBox
to treat a certain host directory as a shared folder, and Oracle VM VirtualBox will make
it available to the guest operating system as a network share, irrespective of whether the
guest actually has a network. See chapter 5.3, Shared Folders, page 97.
• Better video support. While the virtual graphics card which Oracle VM VirtualBox emu-
lates for any guest operating system provides all the basic features, the custom video drivers
that are installed with the Guest Additions provide you with extra high and non-standard
video modes, as well as accelerated video performance.
In addition, with Windows, Linux, and Oracle Solaris guests, you can resize the virtual
machine’s window if the Guest Additions are installed. The video resolution in the guest
will be automatically adjusted, as if you had manually entered an arbitrary resolution in
the guest’s Display settings. See chapter 2.9.5, Resizing the Machine’s Window, page 21.
If the Guest Additions are installed, 3D graphics and 2D video for guest applications can
be accelerated. See chapter 5.5, Hardware-Accelerated Graphics, page 102.
• Seamless windows. With this feature, the individual windows that are displayed on the
desktop of the virtual machine can be mapped on the host’s desktop, as if the underlying
89
5 Guest Additions
application was actually running on the host. See chapter 5.6, Seamless Windows, page
103.
• Generic host/guest communication channels. The Guest Additions enable you to control
and monitor guest execution. The guest properties provide a generic string-based mecha-
nism to exchange data bits between a guest and a host, some of which have special mean-
ings for controlling and monitoring the guest. See chapter 5.7, Guest Properties, page 104.
Additionally, applications can be started in a guest from the host. See chapter 5.9, Guest
Control of Applications, page 108.
• Time synchronization. With the Guest Additions installed, Oracle VM VirtualBox can
ensure that the guest’s system time is better synchronized with that of the host.
For various reasons, the time in the guest might run at a slightly different rate than the
time on the host. The host could be receiving updates through NTP and its own time might
not run linearly. A VM could also be paused, which stops the flow of time in the guest for a
shorter or longer period of time. When the wall clock time between the guest and host only
differs slightly, the time synchronization service attempts to gradually and smoothly adjust
the guest time in small increments to either catch up or lose time. When the difference
is too great, for example if a VM paused for hours or restored from saved state, the guest
time is changed immediately, without a gradual adjustment.
The Guest Additions will resynchronize the time regularly. See chapter 10.11.3, Tuning
the Guest Additions Time Synchronization Parameters, page 350 for how to configure the
parameters of the time synchronization mechanism.
• Shared clipboard. With the Guest Additions installed, the clipboard of the guest operating
system can optionally be shared with your host operating system. See chapter 4.4, General
Settings, page 73.
• Automated logins. Also called credentials passing. See chapter 10.1, Automated Guest
Logins, page 332.
Each version of Oracle VM VirtualBox, even minor releases, ship with their own version of the
Guest Additions. While the interfaces through which the Oracle VM VirtualBox core communi-
cates with the Guest Additions are kept stable so that Guest Additions already installed in a VM
should continue to work when Oracle VM VirtualBox is upgraded on the host, for best results, it
is recommended to keep the Guest Additions at the same version.
The Windows and Linux Guest Additions therefore check automatically whether they have
to be updated. If the host is running a newer Oracle VM VirtualBox version than the Guest
Additions, a notification with further instructions is displayed in the guest.
To disable this update check for the Guest Additions of a given virtual machine, set the value
of its /VirtualBox/GuestAdd/CheckHostVersion guest property to 0. See chapter 5.7, Guest
Properties, page 104.
5.2 Installing and Maintaining Guest Additions
Guest Additions are available for virtual machines running Windows, Linux, Oracle Solaris, or
OS/2. The following sections describe the specifics of each variant in detail.
5.2.1 Guest Additions for Windows
The Oracle VM VirtualBox Windows Guest Additions are designed to be installed in a virtual
machine running a Windows operating system. The following versions of Windows guests are
supported:
90
5 Guest Additions
• Microsoft Windows NT 4.0 (any service pack)
• Microsoft Windows 2000 (any service pack)
• Microsoft Windows XP (any service pack)
• Microsoft Windows Server 2003 (any service pack)
• Microsoft Windows Server 2008
• Microsoft Windows Vista (all editions)
• Microsoft Windows 7 (all editions)
• Microsoft Windows 8 (all editions)
• Microsoft Windows 10 RTM build 10240
• Microsoft Windows Server 2012
5.2.1.1 Installing the Windows Guest Additions
In the Devices menu in the virtual machine’s menu bar, Oracle VM VirtualBox has a menu item
Insert Guest Additions CD Image, which mounts the Guest Additions ISO file inside your virtual
machine. A Windows guest should then automatically start the Guest Additions installer, which
installs the Guest Additions on your Windows guest.
For other guest operating systems, or if automatic start of software on a CD is disabled, you
need to do a manual start of the installer.
Note: For the basic Direct3D acceleration to work in a Windows guest, you have to
install the WDDM video driver available for Windows Vista or later.
For Windows 8 and later, only the WDDM Direct3D video driver is available. For basic
Direct3D acceleration to work in Windows XP guests, you have to install the Guest
Additions in Safe Mode. See chapter 15, Known Limitations, page 421 for details.
If you prefer to mount the Guest Additions manually, you can perform the following steps:
1. Start the virtual machine in which you have installed Windows.
2. Select Optical Drives from the Devices menu in the virtual machine’s menu bar and then
Choose/Create a Disk Image. This displays the Virtual Media Manager, described in
chapter 6.3, The Virtual Media Manager, page 115.
3. In the Virtual Media Manager, click Add and browse your host file system for the
VBoxGuestAdditions.iso file.
• On a Windows host, this file is in the Oracle VM VirtualBox installation directory,
usually in C:\Program files\Oracle\VirtualBox.
• On macOS hosts, this file is in the application bundle of Oracle VM VirtualBox. Right-
click on the Oracle VM VirtualBox icon in Finder and choose Show Package Contents.
The file is located in the Contents/MacOS folder.
• On a Linux host, this file is in the additions folder where you installed Oracle VM
VirtualBox, usually /opt/VirtualBox/.
• On Oracle Solaris hosts, this file is in the additions folder where you installed Oracle
VM VirtualBox, usually /opt/VirtualBox.
4. In the Virtual Media Manager, select the ISO file and click the Add button. This mounts the
ISO file and presents it to your Windows guest as a CD-ROM.
91
5 Guest Additions
Unless you have the Autostart feature disabled in your Windows guest, Windows will now
autostart the Oracle VM VirtualBox Guest Additions installation program from the Additions
ISO. If the Autostart feature has been turned off, choose VBoxWindowsAdditions.exe from the
CD/DVD drive inside the guest to start the installer.
The installer will add several device drivers to the Windows driver database and then invoke
the hardware detection wizard.
Depending on your configuration, it might display warnings that the drivers are not digitally
signed. You must confirm these in order to continue the installation and properly install the
Additions.
After installation, reboot your guest operating system to activate the Additions.
5.2.1.2 Updating the Windows Guest Additions
Windows Guest Additions can be updated by running the installation program again. This re-
places the previous Additions drivers with updated versions.
Alternatively, you can also open the Windows Device Manager and select Update Driver... for
the following devices:
• Oracle VM VirtualBox Graphics Adapter
• Oracle VM VirtualBox System Device
For each, choose the option to provide your own driver, click Have Disk and navigate to the
CD-ROM drive with the Guest Additions.
5.2.1.3 Unattended Installation of the Windows Guest Additions
You can configure unattended installation of the Oracle VM VirtualBox Guest Additions when
you create a new VM using the Create Virtual Machine wizard. Select the Guest Additions
check box on the Unattended Guest OS Install page of the wizard.
Guest Additions are installed automatically, following completion of the guest OS installation.
Installing Code Signing Certificates To avoid popups when performing an unattended in-
stallation of the Oracle VM VirtualBox Guest Additions, the code signing certificates used to sign
the drivers needs to be installed in the correct certificate stores on the guest operating system.
Failure to do this will cause a typical Windows installation to display multiple dialogs asking
whether you want to install a particular driver.
Note: On some legacy Windows versions, such as Windows 2000 and Windows XP, the
user intervention popups mentioned above are always displayed, even after importing
the Oracle certificates.
Installing the code signing certificates on a Windows guest can be done automatically. Use the
VBoxCertUtil.exe utility from the cert folder on the Guest Additions installation CD.
Use the following steps:
1. Log in as Administrator on the guest.
2. Mount the Oracle VM VirtualBox Guest Additions .ISO.
3. Open a command line window on the guest and change to the cert folder on the Oracle
VM VirtualBox Guest Additions CD.
4. Run the following command:
92
5 Guest Additions
VBoxCertUtil.exe add-trusted-publisher vbox*.cer --root vbox*.cer
This command installs the certificates to the certificate store. When installing the same
certificate more than once, an appropriate error will be displayed.
To allow for completely unattended guest installations, you can specify a command line pa-
rameter to the install launcher:
VBoxWindowsAdditions.exe /S
This automatically installs the right files and drivers for the corresponding platform, either
32-bit or 64-bit.
Note: By default on an unattended installation on a Vista or Windows 7 guest, there
will be the XPDM graphics driver installed. This graphics driver does not support Win-
dows Aero / Direct3D on the guest. Instead, the WDDM graphics driver needs to be
installed. To select this driver by default, add the command line parameter /with_wddm
when invoking the Windows Guest Additions installer. This is only required for Vista
and Windows 7.
Note: For Windows Aero to run correctly on a guest, the guest’s VRAM size needs to
be configured to at least 128 MB.
For more options regarding unattended guest installations, consult the command line help by
using the command:
VBoxWindowsAdditions.exe /?
5.2.1.4 Manual File Extraction
If you would like to install the files and drivers manually, you can extract the files from the
Windows Guest Additions setup as follows:
VBoxWindowsAdditions.exe /extract
To explicitly extract the Windows Guest Additions for another platform than the current run-
ning one, such as 64-bit files on a 32-bit system, you must use the appropriate platform in-
staller. Use VBoxWindowsAdditions-x86.exe or VBoxWindowsAdditions-amd64.exe with the
/extract parameter.
5.2.2 Guest Additions for Linux
Like the Windows Guest Additions, the Oracle VM VirtualBox Guest Additions for Linux are a set
of device drivers and system applications which may be installed in the guest operating system.
The following Linux distributions are officially supported:
• Oracle Linux as of version 5, including UEK kernels
• Fedora as of Fedora Core 4
• Red Hat Enterprise Linux as of version 3
• SUSE and openSUSE Linux as of version 9
• Ubuntu as of version 5.10
93
5 Guest Additions
Many other distributions are known to work with the Guest Additions.
The version of the Linux kernel supplied by default in SUSE and openSUSE 10.2, Ubuntu 6.10
(all versions) and Ubuntu 6.06 (server edition) contains a bug which can cause it to crash during
startup when it is run in a virtual machine. The Guest Additions work in those distributions.
Note that some Linux distributions already come with all or part of the Oracle VM VirtualBox
Guest Additions. You may choose to keep the distribution’s version of the Guest Additions but
these are often not up to date and limited in functionality, so we recommend replacing them with
the Guest Additions that come with Oracle VM VirtualBox. The Oracle VM VirtualBox Linux Guest
Additions installer tries to detect an existing installation and replace them but depending on how
the distribution integrates the Guest Additions, this may require some manual interaction. It is
highly recommended to take a snapshot of the virtual machine before replacing preinstalled
Guest Additions.
5.2.2.1 Installing the Linux Guest Additions
The Oracle VM VirtualBox Guest Additions for Linux are provided on the same virtual CD-ROM
file as the Guest Additions for Windows. See chapter 5.2.1.1, Installing the Windows Guest Addi-
tions, page 91. They also come with an installation program that guides you through the setup
process. However, due to the significant differences between Linux distributions, installation
may be slightly more complex when compared to Windows.
Installation generally involves the following steps:
1. Before installing the Guest Additions, you prepare your guest system for building external
kernel modules. This works as described in chapter 3.3.2, The Oracle VM VirtualBox Kernel
Modules, page 59, except that this step must be performed in your Linux guest instead of
on a Linux host system.
If you suspect that something has gone wrong, check that your guest is set up correctly and
run the following command as root:
rcvboxadd setup
2. Insert the VBoxGuestAdditions.iso CD file into your Linux guest’s virtual CD-ROM drive,
as described for a Windows guest in chapter 5.2.1.1, Installing the Windows Guest Additions,
page 91.
3. Change to the directory where your CD-ROM drive is mounted and run the following com-
mand as root:
sh ./VBoxLinuxAdditions.run
5.2.2.2 Unattended Installation of the Linux Guest Additions
You can configure unattended installation of the Oracle VM VirtualBox Guest Additions when
you create a new VM using the Create Virtual Machine wizard. Select the Guest Additions
check box on the Unattended Guest OS Install page of the wizard.
Guest Additions are installed automatically, following completion of the guest OS installation.
5.2.2.3 Graphics and Mouse Integration
In Linux and Oracle Solaris guests, Oracle VM VirtualBox graphics and mouse integration goes
through the X Window System. Oracle VM VirtualBox can use the X.Org variant of the system, or
XFree86 version 4.3 which is identical to the first X.Org release. During the installation process,
the X.Org display server will be set up to use the graphics and mouse drivers which come with
the Guest Additions.
94
5 Guest Additions
After installing the Guest Additions into a fresh installation of a supported Linux distribution
or Oracle Solaris system, many unsupported systems will work correctly too, the guest’s graphics
mode will change to fit the size of the Oracle VM VirtualBox window on the host when it is
resized. You can also ask the guest system to switch to a particular resolution by sending a video
mode hint using the VBoxManage tool.
Multiple guest monitors are supported in guests using the X.Org server version 1.3, which is
part of release 7.3 of the X Window System version 11, or a later version. The layout of the guest
screens can be adjusted as needed using the tools which come with the guest operating system.
If you want to understand more about the details of how the X.Org drivers are set up, in
particular if you wish to use them in a setting which our installer does not handle correctly, see
chapter 10.3.2, Guest Graphics and Mouse Driver Setup in Depth, page 337.
Starting from Oracle VM VirtualBox 7, Linux guest screen resize functionality for guests run-
ning VMSVGA graphics configuration has been changed. Since then, this functionality consists of
a standalone daemon called VBoxDRMClient and its Desktop Environment helper counterpart.
VBoxDRMClient runs as a root process and is a bridge between the host and the guest’s vmwgfx
driver. This means that VBoxDRMClient listens to screen resize hints from the host and forwards
them to the vmwgfx driver. This enables guest screen resize functionality to be available before
the user has performed a graphical login.
In order to perform Desktop Environment specific actions, such as setting the primary screen
in a multimonitor setup, a Desktop Environment helper is used. Once the user has performed
a graphical login operation, the helper daemon starts with user session scope and attempts to
connect to VBoxDRMClient using an IPC connection. When VBoxDRMClient has received a
corresponding command from the host, it is forwarded to the helper daemon over IPC and the
action is then performed.
By default, VBoxDRMClient allows any process to connect to its IPC socket. This can be re-
stricted by using the following steps:
1. The Guest Additions Linux installer creates a vboxdrmipc user group. A corresponding
user needs to be added to this group.
2. You must set the DRMIpcRestricted guest property, as follows:
VBoxManage guestproperty set "VM name" /VirtualBox/GuestAdd/DRMIpcRestricted 1 \
--flags RDONLYGUEST
It is important to set only the RDONLYGUEST flag for the property, so that it cannot be
changed from inside the guest.
Note: Both steps are required. If one of them is missing, all processes will have access
to the IPC socket.
Restricted mode can be disabled by unsetting the guest property, as follows:
VBoxManage guestproperty unset "VM name" /VirtualBox/GuestAdd/DRMIpcRestricted
5.2.2.4 Updating the Linux Guest Additions
The Guest Additions can simply be updated by going through the installation procedure again
with an updated CD-ROM image. This will replace the drivers with updated versions. You should
reboot after updating the Guest Additions.
95
5 Guest Additions
5.2.2.5 Uninstalling the Linux Guest Additions
If you have a version of the Guest Additions installed on your virtual machine and wish to remove
it without installing new ones, you can do so by inserting the Guest Additions CD image into the
virtual CD-ROM drive as described above. Then run the installer for the current Guest Additions
with the uninstall parameter from the path that the CD image is mounted on in the guest, as
follows:
sh ./VBoxLinuxAdditions.run uninstall
While this will normally work without issues, you may need to do some manual cleanup of
the guest in some cases, especially of the XFree86Config or xorg.conf file. In particular, if the
Additions version installed or the guest operating system were very old, or if you made your own
changes to the Guest Additions setup after you installed them.
You can uninstall the Additions as follows:
/opt/VBoxGuestAdditions-<version>/uninstall.sh
Replace /opt/VBoxGuestAdditions-version with the correct Guest Additions installation
directory.
5.2.3 Guest Additions for Oracle Solaris
Like the Windows Guest Additions, the Oracle VM VirtualBox Guest Additions for Oracle Solaris
take the form of a set of device drivers and system applications which may be installed in the
guest operating system.
The following Oracle Solaris distributions are officially supported:
• Oracle Solaris 11, including Oracle Solaris 11 Express
• Oracle Solaris 10 4/08 and later
Other distributions may work if they are based on comparable software releases.
5.2.3.1 Installing the Oracle Solaris Guest Additions
The Oracle VM VirtualBox Guest Additions for Oracle Solaris are provided on the same ISO CD-
ROM as the Additions for Windows and Linux. They come with an installation program that
guides you through the setup process.
Installation involves the following steps:
1. Mount the VBoxGuestAdditions.iso file as your Oracle Solaris guest’s virtual CD-ROM
drive, exactly the same way as described for a Windows guest in chapter 5.2.1.1, Installing
the Windows Guest Additions, page 91.
If the CD-ROM drive on the guest does not get mounted, as seen with some versions of
Oracle Solaris 10, run the following command as root:
svcadm restart volfs
2. Change to the directory where your CD-ROM drive is mounted and run the following com-
mand as root:
pkgadd -G -d ./VBoxSolarisAdditions.pkg
3. Choose 1 and confirm installation of the Guest Additions package. After the installation is
complete, log out and log in to X server on your guest, to activate the X11 Guest Additions.
96
5 Guest Additions
5.2.3.2 Unattended Installation of the Oracle Solaris Guest Additions
You can configure unattended installation of the Oracle VM VirtualBox Guest Additions when
you create a new VM using the Create Virtual Machine wizard. Select the Guest Additions
check box on the Unattended Guest OS Install page of the wizard.
Guest Additions are installed automatically, following completion of the guest OS installation.
5.2.3.3 Uninstalling the Oracle Solaris Guest Additions
The Oracle Solaris Guest Additions can be safely removed by removing the package from the
guest. Open a root terminal session and run the following command:
pkgrm SUNWvboxguest
5.2.3.4 Updating the Oracle Solaris Guest Additions
The Guest Additions should be updated by first uninstalling the existing Guest Additions and
then installing the new ones. Attempting to install new Guest Additions without removing the
existing ones is not possible.
5.2.4 Guest Additions for OS/2
Oracle VM VirtualBox also ships with a set of drivers that improve running OS/2 in a virtual
machine. Due to restrictions of OS/2 itself, this variant of the Guest Additions has a limited
feature set. See chapter 15, Known Limitations, page 421 for details.
The OS/2 Guest Additions are provided on the same ISO CD-ROM as those for the other
platforms. Mount the ISO in OS/2 as described previously. The OS/2 Guest Additions are located
in the directory \OS2.
We do not provide an automatic installer at this time. See the readme.txt file in the CD-ROM
directory, which describes how to install the OS/2 Guest Additions manually.
5.3 Shared Folders
With the shared folders feature of Oracle VM VirtualBox, you can access files of your host system
from within the guest system. This is similar to how you would use network shares in Windows
networks, except that shared folders do not require networking, only the Guest Additions. Shared
folders are supported with Windows 2000 or later, Linux, and Oracle Solaris guests. Oracle VM
VirtualBox includes experimental support for Mac OS X and OS/2 guests.
Shared folders physically reside on the host and are then shared with the guest, which uses a
special file system driver in the Guest Additions to talk to the host. For Windows guests, shared
folders are implemented as a pseudo-network redirector. For Linux and Oracle Solaris guests,
the Guest Additions provide a virtual file system.
To share a host folder with a virtual machine in Oracle VM VirtualBox, you must specify the
path of the folder and choose a share name that the guest can use to access the shared folder.
This happens on the host. In the guest you can then use the share name to connect to it and
access files.
There are several ways in which shared folders can be set up for a virtual machine:
• In the window of a running VM, you select Shared Folders from the Devices menu, or
click on the folder icon on the status bar in the bottom right corner.
• If a VM is not currently running, you can configure shared folders in the virtual machine’s
Settings window.
• From the command line, you can create shared folders using VBoxManage, as follows:
97
5 Guest Additions
VBoxManage sharedfolder add "VM name" --name "sharename" --hostpath "C:\test"
See chapter 9.42, VBoxManage sharedfolder, page 279.
There are two types of shares:
• Permanent shares, that are saved with the VM settings.
• Transient shares, that are added at runtime and disappear when the VM is powered
off. These can be created using a check box in VirtualBox Manager, or by using the
--transient option of the VBoxManage sharedfolder add command.
Shared folders can either be read-write or read-only. This means that the guest is either
allowed to both read and write, or just read files on the host. By default, shared folders are
read-write. Read-only folders can be created using a check box in the VirtualBox Manager, or
with the --readonly option of the VBoxManage sharedfolder add command.
Oracle VM VirtualBox shared folders also support symbolic links, also called symlinks, under
the following conditions:
• The host operating system must support symlinks. For example, a macOS, Linux, or Oracle
Solaris host is required.
• The guest VM must have a version of the Guest Additions installed which supports symlinks.
Currently only the Linux and Oracle Solaris Guest Additions support symlinks.
• For security reasons the guest OS is not allowed to create symlinks by default. If you trust
the guest OS to not abuse the functionality, you can enable the creation of symlinks for a
shared folder as follows:
VBoxManage setextradata <VM-name> VBoxInternal2/SharedFoldersEnableSymlinksCreate/<sharename> 1
If a symbolic link is created inside a shared folder on the host and the installed Guest Additions
don’t support symbolic links then the guest will see the target of the symlink as a file inside the
shared folder. For example, if a symlink is created to a file on a Linux host:
$ cd /SharedFolder && ln -s filename symlink-to-filename
And then the shared folder is viewed on a Windows guest there will be two identical files
listed, filename and symlink-to-filename.
5.3.1 Manual Mounting
You can mount the shared folder from inside a VM, in the same way as you would mount an
ordinary network share:
• In a Windows guest, shared folders are browseable and therefore visible in Windows Ex-
plorer. To attach the host’s shared folder to your Windows guest, open Windows Explorer
and look for the folder in My Networking Places, Entire Network, Oracle VM VirtualBox
Shared Folders. By right-clicking on a shared folder and selecting Map Network Drive
from the menu that pops up, you can assign a drive letter to that shared folder.
Alternatively, on the Windows command line, use the following command:
net use x: \\vboxsvr\sharename
While vboxsvr is a fixed name, note that vboxsrv would also work, replace x: with
the drive letter that you want to use for the share, and sharename with the share name
specified with VBoxManage.
98
5 Guest Additions
•
In a Linux guest, use the following command:
mount -t vboxsf [-o OPTIONS] sharename mountpoint
To mount a shared folder during boot, add the following entry to /etc/fstab:
sharename
mountpoint
vboxsf
defaults
0
0
•
In a Oracle Solaris guest, use the following command:
mount -F vboxfs [-o OPTIONS] sharename mountpoint
Replace sharename, use a lowercase string, with the share name specified with
VBoxManage or VirtualBox Manager. Replace mountpoint with the path where you want
the share to be mounted on the guest, such as /mnt/share. The usual mount rules apply.
For example, create this directory first if it does not exist yet.
Here is an example of mounting the shared folder for the user jack on Oracle Solaris:
$ id
uid=5000(jack) gid=1(other)
$ mkdir /export/home/jack/mount
$ pfexec mount -F vboxfs -o uid=5000,gid=1 jackshare /export/home/jack/mount
$ cd ~/mount
$ ls
sharedfile1.mp3 sharedfile2.txt
$
Beyond the standard options supplied by the mount command, the following are available:
iocharset CHARSET
This option sets the character set used for I/O operations. Note that on Linux guests, if the
iocharset option is not specified, then the Guest Additions driver will attempt to use the
character set specified by the CONFIG_NLS_DEFAULT kernel option. If this option is not
set either, then UTF-8 is used.
convertcp CHARSET
This option specifies the character set used for the shared folder name. This is UTF-8 by
default.
The generic mount options, documented in the mount manual page, apply also. Especially
useful are the options uid, gid and mode, as they can allow access by normal users in
read/write mode, depending on the settings, even if root has mounted the filesystem.
•
In an OS/2 guest, use the VBoxControl command to manage shared folders. For example:
VBoxControl sharedfolder use D: MyShareName
VBoxControl sharedfolder unuse D:
VBoxControl sharedfolder list
As with Windows guests, shared folders can also be accessed via UNC using \\VBoxSF\,
\\VBoxSvr\ or \\VBoxSrv\ as the server name and the shared folder name as sharename.
99
5 Guest Additions
5.3.2 Automatic Mounting
Oracle VM VirtualBox provides the option to mount shared folders automatically. When auto-
matic mounting is enabled for a shared folder, the Guest Additions service will mount it for you
automatically. For Windows or OS/2, a preferred drive letter can also be specified. For Linux or
Oracle Solaris, a mount point directory can also be specified.
If a drive letter or mount point is not specified, or is in use already, an alternative location is
found by the Guest Additions service. The service searches for an alternative location depending
on the guest OS, as follows:
• Windows and OS/2 guests. Search for a free drive letter, starting at Z:. If all drive letters
are assigned, the folder is not mounted.
• Linux and Oracle Solaris guests. Folders are mounted under the /media directory. The
folder name is normalized (no spaces, slashes or colons) and is prefixed with sf_.
For example, if you have a shared folder called myfiles, it will appear as
/media/sf_myfiles in the guest.
The guest properties /VirtualBox/GuestAdd/SharedFolders/MountDir and the more
generic /VirtualBox/GuestAdd/SharedFolders/MountPrefix can be used to override
the automatic mount directory and prefix. See chapter 5.7, Guest Properties, page 104.
Access to an automatically mounted shared folder is granted to everyone in a Windows guest,
including the guest user. For Linux and Oracle Solaris guests, access is restricted to members of
the group vboxsf and the root user.
5.4 Drag and Drop
Oracle VM VirtualBox enables you to drag and drop content from the host to the guest, and vice
versa. For this to work the latest version of the Guest Additions must be installed on the guest.
Drag and drop transparently allows copying or opening files, directories, and even certain
clipboard formats from one end to the other. For example, from the host to the guest or from the
guest to the host. You then can perform drag and drop operations between the host and a VM,
as it would be a native drag and drop operation on the host OS.
At the moment drag and drop is implemented for Windows-based and X-Windows-based sys-
tems, both on the host and guest side. As X-Windows supports many different drag and drop
protocols only the most common one, XDND, is supported for now. Applications using other
protocols, such as Motif or OffiX, will not be recognized by Oracle VM VirtualBox.
In the context of using drag and drop, the origin of the data is called the source. That is, where
the actual data comes from and is specified. The destination specifies where the data from the
source should go to. Transferring data from the source to the destination can be done in various
ways, such as copying, moving, or linking.
Note: At the moment only copying of data is supported. Moving or linking is not yet
implemented.
When transferring data from the host to the guest OS, the host in this case is the source,
whereas the guest OS is the destination. However, when transferring data from the guest OS to
the host, the guest OS this time became the source and the host is the destination.
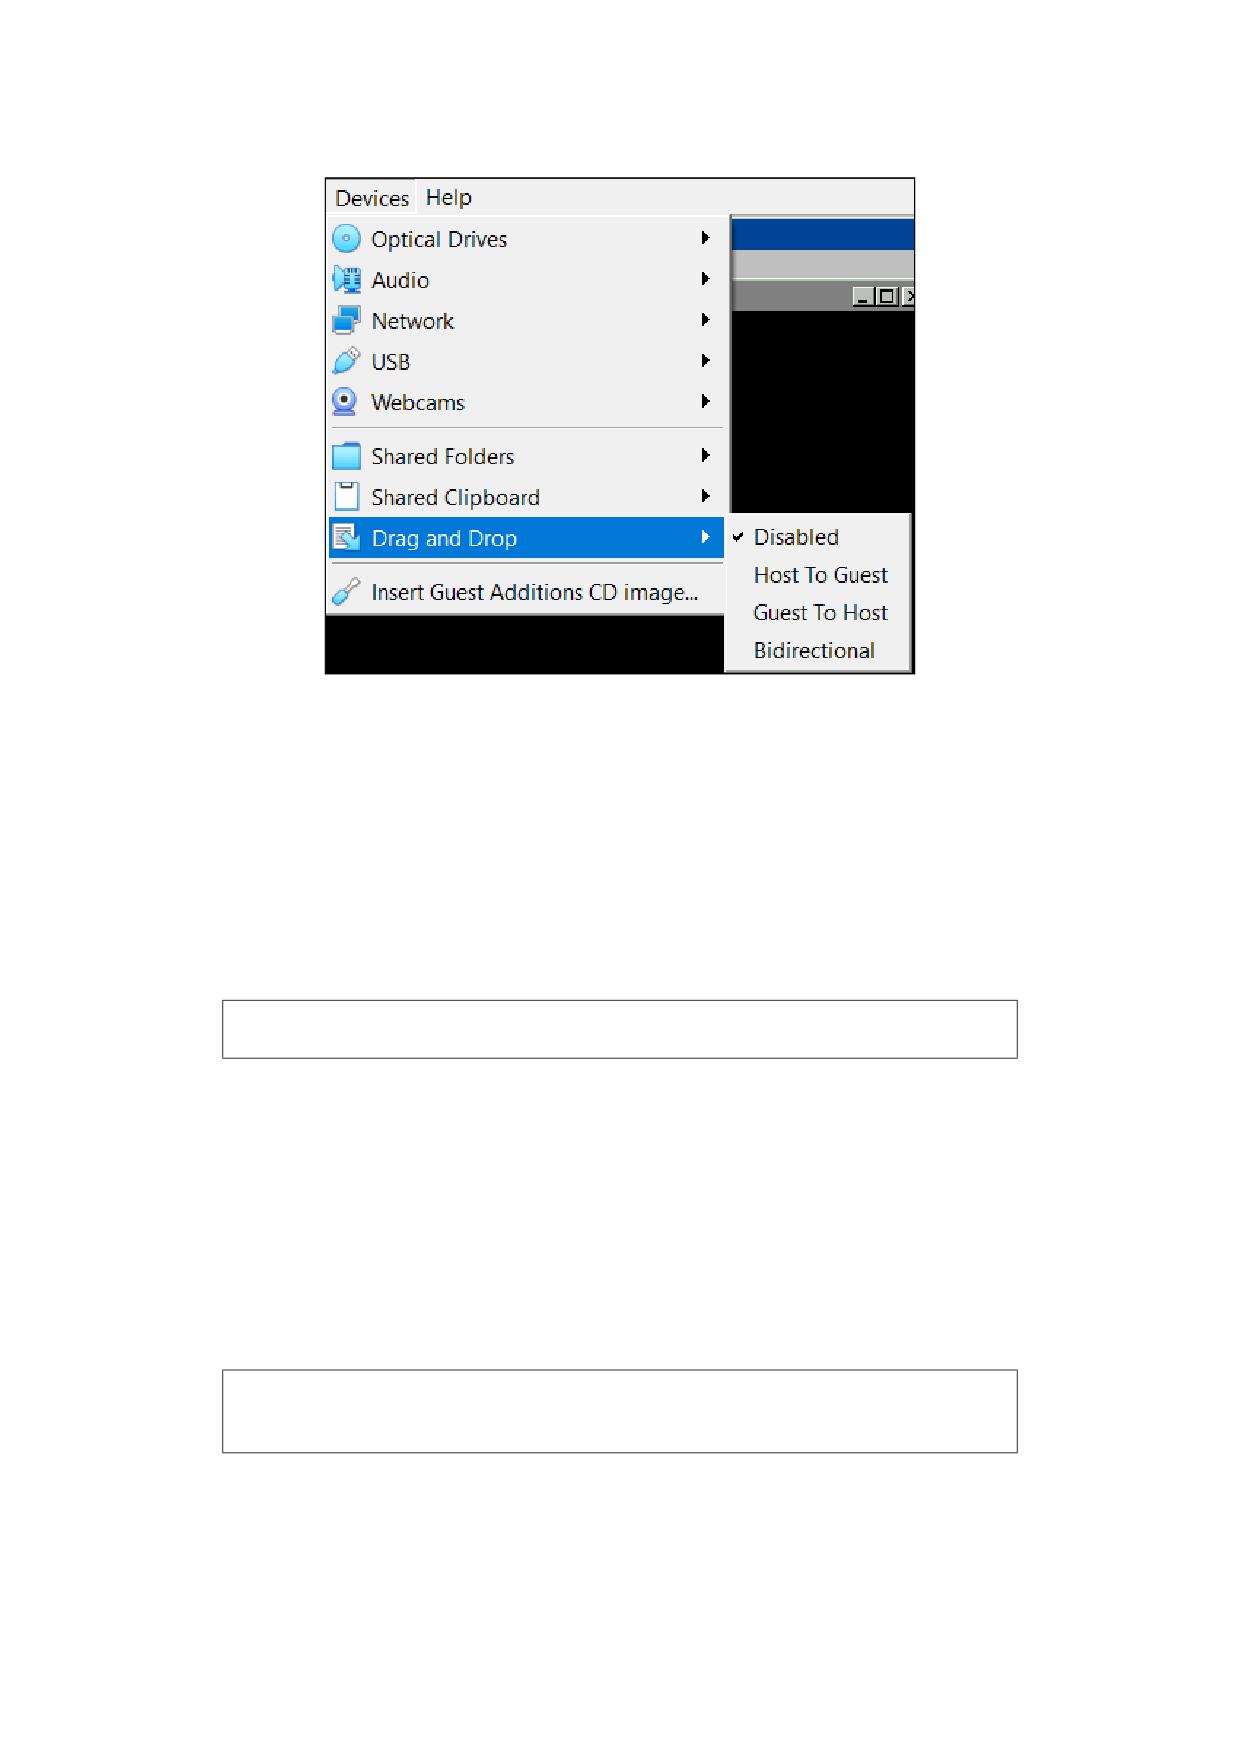
For security reasons drag and drop can be configured at runtime on a per-VM basis either using
the Drag and Drop menu item in the Devices menu of the virtual machine, as shown below, or
the VBoxManage command.
100
5 Guest Additions
The following drag and drop modes are available:
• Disabled. Disables the drag and drop feature entirely. This is the default when creating a
new VM.
• Host To Guest. Enables drag and drop operations from the host to the guest only.
• Guest To Host. Enables drag and drop operations from the guest to the host only.
• Bidirectional. Enables drag and drop operations in both directions: from the host to the
guest, and from the guest to the host.
Note: Drag and drop support depends on the frontend being used. At the moment,
only the VirtualBox Manager frontend provides this functionality.
To use the VBoxManage command to control the current drag and drop mode, see chapter
9, VBoxManage, page 154. The modifyvm and controlvm commands enable setting of a VM’s
current drag and drop mode from the command line.
5.4.1 Supported Formats
As Oracle VM VirtualBox can run on a variety of host operating systems and also supports a
wide range of guests, certain data formats must be translated after transfer. This is so that the
destination operating system, which receives the data, is able to handle them in an appropriate
manner.
Note: When dragging files no data conversion is done in any way. For example, when
transferring a file from a Linux guest to a Windows host the Linux-specific line endings
are not converted to Windows line endings.
The following formats are handled by the Oracle VM VirtualBox drag and drop service:
101
5 Guest Additions
• Plain text: From applications such as text editors, internet browsers and terminal win-
dows.
• Files: From file managers such as Windows Explorer, Nautilus, and Finder.
• Directories: For directories, the same formats apply as for files.
5.4.2 Known Limitations
The following limitations are known for drag and drop:
On Windows hosts, dragging and dropping content between UAC-elevated (User Account Con-
trol) programs and non-UAC-elevated programs is not allowed. If you start Oracle VM VirtualBox
with Administrator privileges then drag and drop will not work with Windows Explorer, which
runs with regular user privileges by default.
On Linux hosts and guests, programs can query for drag and drop data while the drag opera-
tion is still in progress. For example, on LXDE using the PCManFM file manager. This currently is
not supported. As a workaround, a different file manager, such as Nautilus, can be used instead.
5.5 Hardware-Accelerated Graphics
5.5.1 Hardware 3D Acceleration (OpenGL and Direct3D 8/9)
The Oracle VM VirtualBox Guest Additions contain experimental hardware 3D support for Win-
dows, Linux, and Oracle Solaris guests.
With this feature, if an application inside your virtual machine uses 3D features through the
OpenGL or Direct3D 8/9 programming interfaces, instead of emulating them in software, which
would be slow, Oracle VM VirtualBox will attempt to use your host’s 3D hardware. This works
for all supported host platforms, provided that your host operating system can make use of your
accelerated 3D hardware in the first place.
The 3D acceleration feature currently has the following preconditions:
• It is only available for certain Windows, Linux, and Oracle Solaris guests. In particular:
- 3D acceleration with Windows guests requires Windows 2000 or later. Apart from on
Windows 2000 guests, both OpenGL and Direct3D 8/9 are supported on an experi-
mental basis.
- OpenGL on Linux requires kernel 2.6.27 or later, as well as X.org server version 1.5 or
later. Ubuntu 10.10 and Fedora 14 have been tested and confirmed as working.
- OpenGL on Oracle Solaris guests requires X.org server version 1.5 or later.
• The Guest Additions must be installed.
Note: For the basic Direct3D acceleration to work in a Windows Guest, Oracle VM
VirtualBox needs to replace Windows system files in the virtual machine. As a result,
the Guest Additions installation program offers Direct3D acceleration as an option that
must be explicitly enabled. Also, you must install the Guest Additions in Safe Mode.
This does not apply to the WDDM Direct3D video driver available for Windows Vista
and later. See chapter 15, Known Limitations, page 421 for details.
• Because 3D support is still experimental at this time, it is disabled by default and must be
manually enabled in the VM settings. See chapter 4.6, Display Settings, page 77.
102
5 Guest Additions
Note: Untrusted guest systems should not be allowed to use the 3D acceleration fea-
tures of Oracle VM VirtualBox, just as untrusted host software should not be allowed
to use 3D acceleration. Drivers for 3D hardware are generally too complex to be made
properly secure and any software which is allowed to access them may be able to com-
promise the operating system running them. In addition, enabling 3D acceleration
gives the guest direct access to a large body of additional program code in the Ora-
cle VM VirtualBox host process which it might conceivably be able to use to crash the
virtual machine.
To enable Aero theme support, the Oracle VM VirtualBox WDDM video driver must be in-
stalled, which is available with the Guest Additions installation. The WDDM driver is not in-
stalled by default for Vista and Windows 7 guests and must be manually selected in the Guest
Additions installer by clicking No in the Would You Like to Install Basic Direct3D Support
dialog displayed when the Direct3D feature is selected.
The Aero theme is not enabled by default on Windows. See your Windows platform documen-
tation for details of how to enable the Aero theme.
Technically, Oracle VM VirtualBox implements 3D acceleration by installing an additional hard-
ware 3D driver inside the guest when the Guest Additions are installed. This driver acts as a
hardware 3D driver and reports to the guest operating system that the virtual hardware is ca-
pable of 3D hardware acceleration. When an application in the guest then requests hardware
acceleration through the OpenGL or Direct3D programming interfaces, these are sent to the host
through a special communication tunnel implemented by Oracle VM VirtualBox. The host then
performs the requested 3D operation using the host’s programming interfaces.
5.5.2 Hardware 2D Video Acceleration for Windows Guests
The Oracle VM VirtualBox Guest Additions contain experimental hardware 2D video acceleration
support for Windows guests.
With this feature, if an application such as a video player inside your Windows VM uses 2D
video overlays to play a movie clip, then Oracle VM VirtualBox will attempt to use your host’s
video acceleration hardware instead of performing overlay stretching and color conversion in
software, which would be slow. This currently works for Windows, Linux and macOS host plat-
forms, provided that your host operating system can make use of 2D video acceleration in the
first place.
Hardware 2D video acceleration currently has the following preconditions:
• Only available for Windows guests, running Windows XP or later.
• Guest Additions must be installed.
• Because 2D support is still experimental at this time, it is disabled by default and must be
manually enabled in the VM settings. See chapter 4.6, Display Settings, page 77.
Technically, Oracle VM VirtualBox implements this by exposing video overlay DirectDraw ca-
pabilities in the Guest Additions video driver. The driver sends all overlay commands to the host
through a special communication tunnel implemented by Oracle VM VirtualBox. On the host
side, OpenGL is then used to implement color space transformation and scaling.
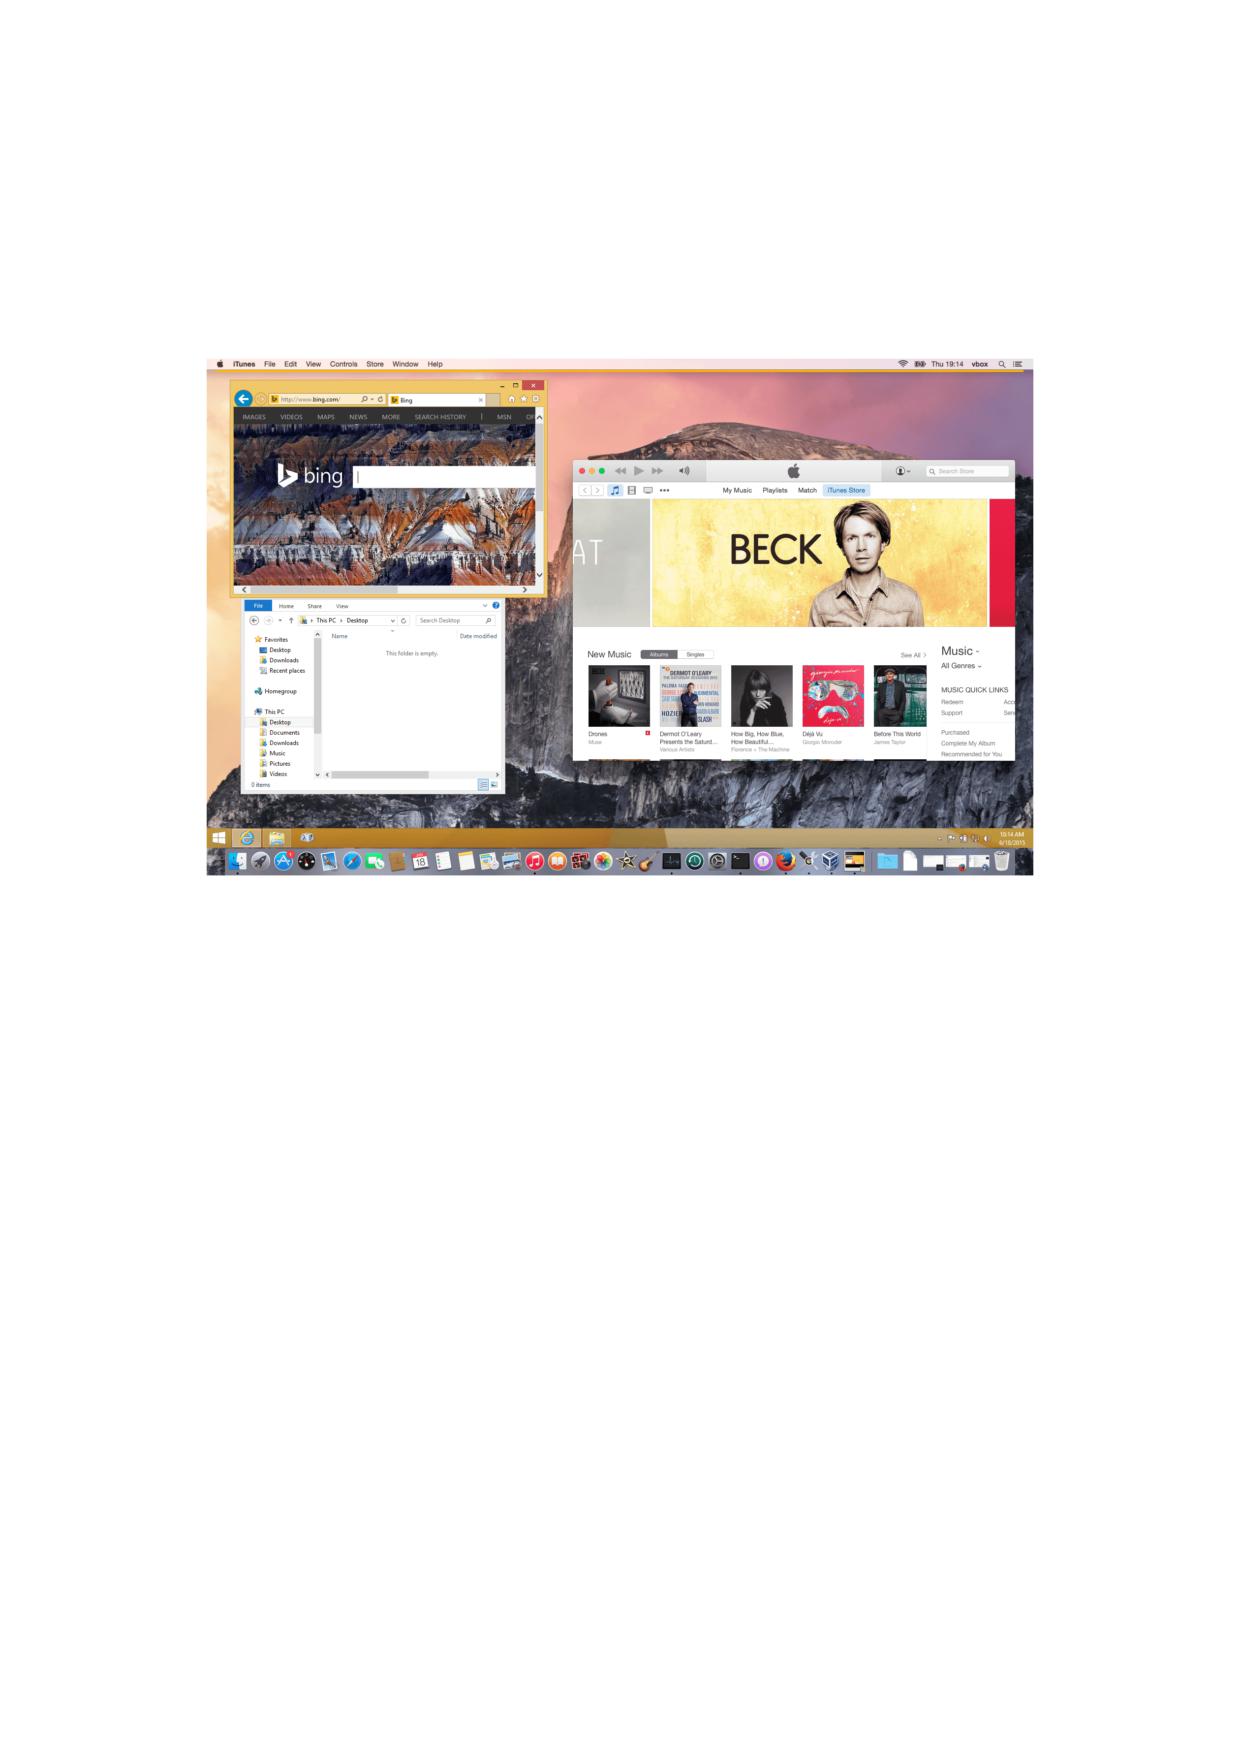
5.6 Seamless Windows
With the seamless windows feature of Oracle VM VirtualBox, you can have the windows that are
displayed within a virtual machine appear side by side next to the windows of your host. This
feature is supported for the following guest operating systems, provided that the Guest Additions
are installed:
103
5 Guest Additions
• Windows guests.
• Supported Linux or Oracle Solaris guests running the X Window System.
After seamless windows are enabled, Oracle VM VirtualBox suppresses the display of the desk-
top background of your guest, allowing you to run the windows of your guest operating system
seamlessly next to the windows of your host.
To enable seamless mode, after starting the virtual machine, press the Host key + L. The Host
key is normally the right control key. This will enlarge the size of the VM’s display to the size
of your host screen and mask out the guest operating system’s background. To disable seamless
windows and go back to the normal VM display, press the Host key + L again.
5.7 Guest Properties
Oracle VM VirtualBox enables requests of some properties from a running guest, provided that
the Oracle VM VirtualBox Guest Additions are installed and the VM is running. This provides the
following advantages:
• A number of predefined VM characteristics are automatically maintained by Oracle VM
VirtualBox and can be retrieved on the host. For example, to monitor VM performance and
statistics.
• Arbitrary string data can be exchanged between guest and host. This works in both direc-
tions.
To accomplish this, Oracle VM VirtualBox establishes a private communication channel be-
tween the Oracle VM VirtualBox Guest Additions and the host, and software on both sides can
use this channel to exchange string data for arbitrary purposes. Guest properties are simply
string keys to which a value is attached. They can be set, or written to, by either the host and
the guest. They can also be read from both sides.
In addition to establishing the general mechanism of reading and writing values, a set of prede-
fined guest properties is automatically maintained by the Oracle VM VirtualBox Guest Additions
104
5 Guest Additions
to allow for retrieving interesting guest data such as the guest’s exact operating system and ser-
vice pack level, the installed version of the Guest Additions, users that are currently logged into
the guest OS, network statistics and more. These predefined properties are all prefixed with
/VirtualBox/ and organized into a hierarchical tree of keys.
Some of this runtime information is shown when you select Session Information Dialog from
a virtual machine’s Machine menu.
A more flexible way to use this channel is with the VBoxManage guestproperty command.
See chapter 9.43, VBoxManage guestproperty, page 281. For example, to have all the available
guest properties for a given running VM listed with their respective values, use this command:
$ VBoxManage guestproperty enumerate "Windows Vista III"
VirtualBox Command Line Management Interface Version <version-number>
Name: /VirtualBox/GuestInfo/OS/Product, value: Windows Vista Business Edition,
timestamp: 1229098278843087000, flags:
Name: /VirtualBox/GuestInfo/OS/Release, value: 6.0.6001,
timestamp: 1229098278950553000, flags:
Name: /VirtualBox/GuestInfo/OS/ServicePack, value: 1,
timestamp: 1229098279122627000, flags:
Name: /VirtualBox/GuestAdd/InstallDir,
value: C:/Program Files/Oracle/VirtualBox
Guest Additions, timestamp: 1229098279269739000, flags:
Name: /VirtualBox/GuestAdd/Revision, value: 40720,
timestamp: 1229098279345664000, flags:
Name: /VirtualBox/GuestAdd/Version, value: <version-number>,
timestamp: 1229098279479515000, flags:
Name: /VirtualBox/GuestAdd/Components/VBoxControl.exe, value: <version-number>r40720,
timestamp: 1229098279651731000, flags:
Name: /VirtualBox/GuestAdd/Components/VBoxHook.dll, value: <version-number>r40720,
timestamp: 1229098279804835000, flags:
Name: /VirtualBox/GuestAdd/Components/VBoxDisp.dll, value: <version-number>r40720,
timestamp: 1229098279880611000, flags:
Name: /VirtualBox/GuestAdd/Components/VBoxMRXNP.dll, value: <version-number>r40720,
timestamp: 1229098279882618000, flags:
Name: /VirtualBox/GuestAdd/Components/VBoxService.exe, value: <version-number>r40720,
timestamp: 1229098279883195000, flags:
Name: /VirtualBox/GuestAdd/Components/VBoxTray.exe, value: <version-number>r40720,
timestamp: 1229098279885027000, flags:
Name: /VirtualBox/GuestAdd/Components/VBoxGuest.sys, value: <version-number>r40720,
timestamp: 1229098279886838000, flags:
Name: /VirtualBox/GuestAdd/Components/VBoxMouse.sys, value: <version-number>r40720,
timestamp: 1229098279890600000, flags:
Name: /VirtualBox/GuestAdd/Components/VBoxSF.sys, value: <version-number>r40720,
timestamp: 1229098279893056000, flags:
Name: /VirtualBox/GuestAdd/Components/VBoxVideo.sys, value: <version-number>r40720,
timestamp: 1229098279895767000, flags:
Name: /VirtualBox/GuestInfo/OS/LoggedInUsers, value: 1,
timestamp: 1229099826317660000, flags:
Name: /VirtualBox/GuestInfo/OS/NoLoggedInUsers, value: false,
timestamp: 1229098455580553000, flags:
Name: /VirtualBox/GuestInfo/Net/Count, value: 1,
timestamp: 1229099826299785000, flags:
Name: /VirtualBox/HostInfo/GUI/LanguageID, value: C,
timestamp: 1229098151272771000, flags:
Name: /VirtualBox/GuestInfo/Net/0/V4/IP, value: 192.168.2.102,
timestamp: 1229099826300088000, flags:
Name: /VirtualBox/GuestInfo/Net/0/V4/Broadcast, value: 255.255.255.255,
timestamp: 1229099826300220000, flags:
Name: /VirtualBox/GuestInfo/Net/0/V4/Netmask, value: 255.255.255.0,
timestamp: 1229099826300350000, flags:
Name: /VirtualBox/GuestInfo/Net/0/Status, value: Up,
timestamp: 1229099826300524000, flags:
Name: /VirtualBox/GuestInfo/OS/LoggedInUsersList, value: username,
timestamp: 1229099826317386000, flags:
105
5 Guest Additions
To query the value of a single property, use the get subcommand as follows:
$ VBoxManage guestproperty get "Windows Vista III" "/VirtualBox/GuestInfo/OS/Product"
VirtualBox Command Line Management Interface Version <version-number>
Value: Windows Vista Business Edition
To add or change guest properties from the guest, use the tool VBoxControl. This tool is in-
cluded in the Guest Additions. When started from a Linux guest, this tool requires root privileges
for security reasons.
$ sudo VBoxControl guestproperty enumerate
VirtualBox Guest Additions Command Line Management Interface Version <version-number>
Name: /VirtualBox/GuestInfo/OS/Release, value: 2.6.28-18-generic,
timestamp: 1265813265835667000, flags: <NULL>
Name: /VirtualBox/GuestInfo/OS/Version, value: #59-Ubuntu SMP Thu Jan 28 01:23:03 UTC 2010,
timestamp: 1265813265836305000, flags: <NULL>
For more complex needs, you can use the Oracle VM VirtualBox programming interfaces. See
chapter 12, Oracle VM VirtualBox Programming Interfaces, page 398.
5.7.1 Using Guest Properties to Wait on VM Events
The properties /VirtualBox/HostInfo/VBoxVer, /VirtualBox/HostInfo/VBoxVerExt or
/VirtualBox/HostInfo/VBoxRev can be waited on to detect that the VM state was restored
from saved state or snapshot:
$ VBoxControl guestproperty wait /VirtualBox/HostInfo/VBoxVer
Similarly the /VirtualBox/HostInfo/ResumeCounter can be used to detect that a VM was
resumed from the paused state or saved state.
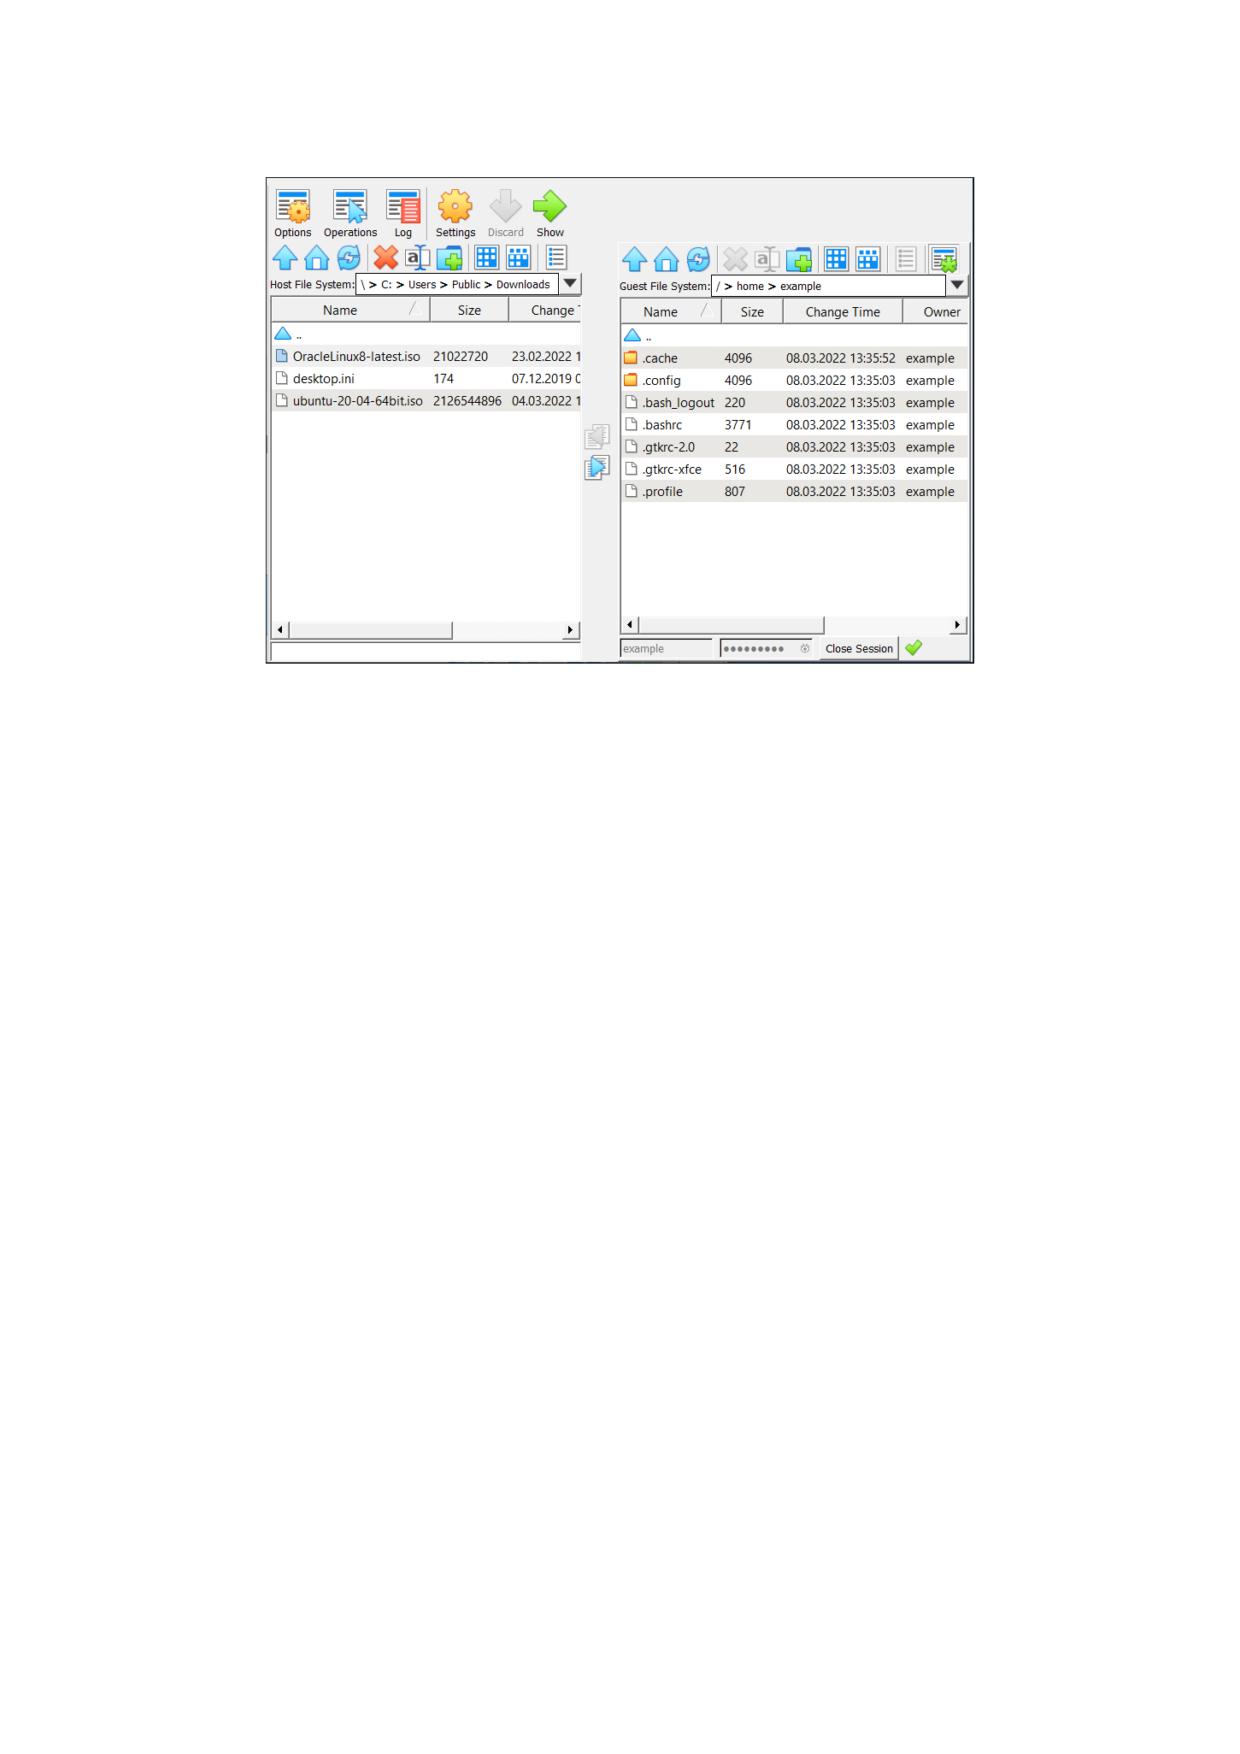
5.8 Guest Control File Manager
The Guest Control File Manager is a feature of the Guest Additions that enables easy copying and
moving of files between a guest and the host system. Other file management operations provide
support to create new folders and to rename or delete files.
This feature is useful when the VM window of a guest is not visible. For example, when the
guest is running in headless mode.
Note: To use the Guest Control File Manager, the guest must be running. For powered-
off guests, it is disabled automatically.
106
5 Guest Additions
The Guest Control File Manager works by mounting the host file system. Guest users must
authenticate and create a guest session before they can transfer files.
5.8.1 Using the Guest Control File Manager
The following steps describe how to use the Guest Control File Manager.
1. Open the Guest Control File Manager. Do either of the following:
• In the guest VM, select Machine, File Manager.
• In VirtualBox Manager, click on the machine name. Click File Manager in the machine
tools menu for the VM.
The left pane shows the files on the host system.
2. Create a guest session.
At the bottom of the Guest Control File Manager, enter authentication credentials for a user
on the guest system.
Click Create Session.
The contents of the guest VM file system appears in the right pane of the Guest Control File
Manager.
3. Transfer files between the guest and the host system by using the move and copy file
transfer icons.
You can copy and move files from the guest to the host system or from the host system to
the guest.
4. Close the Guest Control File Manager.
Click Close to end the guest session.
107
5 Guest Additions
5.9 Guest Control of Applications
The Guest Additions enable starting of applications inside a guest VM from the host system. This
feature can be used to automate deployment of software within the guest.
For this to work, the application needs to be installed on the guest. No additional software
needs to be installed on the host. Additionally, text mode output to stdout and stderr can be
shown on the host for further processing. There are options to specify user credentials and a
timeout value, in milliseconds, to limit the time the application is able to run.
The Guest Additions for Windows allow for automatic updating. This applies for already
installed Guest Additions versions. Also, copying files from host to the guest as well as remotely
creating guest directories is available.
To use these features, use the Oracle VM VirtualBox command line. See chapter 9.44, VBox-
Manage guestcontrol, page 284.
5.10 Memory Overcommitment
In server environments with many VMs, the Guest Additions can be used to share physical host
memory between several VMs. This reduces the total amount of memory in use by the VMs.
If memory usage is the limiting factor and CPU resources are still available, this can help with
running more VMs on each host.
5.10.1 Memory Ballooning
The Guest Additions can change the amount of host memory that a VM uses, while the machine
is running. Because of how this is implemented, this feature is called memory ballooning.
Note:
• Oracle VM VirtualBox supports memory ballooning only on 64-bit hosts. It is not
supported on macOS hosts.
• Memory ballooning does not work well with large pages en-
abled.
To
turn
off
large
pages
support
for
a VM,
run
VBoxManage modifyvm vmname --large-pages off
Normally, to change the amount of memory allocated to a virtual machine, you have to shut
down the virtual machine entirely and modify its settings. With memory ballooning, memory
that was allocated for a virtual machine can be given to another virtual machine without having
to shut the machine down.
When memory ballooning is requested, the Oracle VM VirtualBox Guest Additions, which run
inside the guest, allocate physical memory from the guest operating system on the kernel level
and lock this memory down in the guest. This ensures that the guest will not use that memory
any longer. No guest applications can allocate it, and the guest kernel will not use it either.
Oracle VM VirtualBox can then reuse this memory and give it to another virtual machine.
The memory made available through the ballooning mechanism is only available for reuse by
Oracle VM VirtualBox. It is not returned as free memory to the host. Requesting balloon memory
from a running guest will therefore not increase the amount of free, unallocated memory on
the host. Effectively, memory ballooning is therefore a memory overcommitment mechanism
for multiple virtual machines while they are running. This can be useful to temporarily start
another machine, or in more complicated environments, for sophisticated memory management
of many virtual machines that may be running in parallel depending on how memory is used by
the guests.
108
5 Guest Additions
At this time, memory ballooning is only supported through VBoxManage. Use the following
command to increase or decrease the size of the memory balloon within a running virtual ma-
chine that has Guest Additions installed:
VBoxManage controlvm "VM name" guestmemoryballoon n
where VM name is the name or UUID of the virtual machine in question and n is the amount
of memory to allocate from the guest in megabytes. See chapter 9.20, VBoxManage controlvm,
page 226.
You can also set a default balloon that will automatically be requested from the VM every time
after it has started up with the following command:
VBoxManage modifyvm "VM name" --guest-memory-balloon n
By default, no balloon memory is allocated. This is a VM setting, like other modifyvm settings,
and therefore can only be set while the machine is shut down. See chapter 9.10, VBoxManage
modifyvm, page 180.
5.10.2 Page Fusion
Whereas memory ballooning simply reduces the amount of RAM that is available to a VM, Page
Fusion works differently. It avoids memory duplication between several similar running VMs.
In a server environment running several similar VMs on the same host, lots of memory pages
are identical. For example, if the VMs are using identical operating systems. Oracle VM
VirtualBox’s Page Fusion technology can efficiently identify these identical memory pages and
share them between multiple VMs.
Note: Oracle VM VirtualBox supports Page Fusion only on 64-bit hosts, and it is not
supported on macOS hosts. Page Fusion currently works only with Windows 2000 and
later guests.
The more similar the VMs on a given host are, the more efficiently Page Fusion can reduce the
amount of host memory that is in use. It therefore works best if all VMs on a host run identical
operating systems. Instead of having a complete copy of each operating system in each VM, Page
Fusion identifies the identical memory pages in use by these operating systems and eliminates
the duplicates, sharing host memory between several machines. This is called deduplication. If a
VM tries to modify a page that has been shared with other VMs, a new page is allocated again for
that VM with a copy of the shared page. This is called copy on write. All this is fully transparent
to the virtual machine.
You may be familiar with this kind of memory overcommitment from other hypervisor prod-
ucts, which call this feature page sharing or same page merging. However, Page Fusion differs
significantly from those other solutions, whose approaches have several drawbacks:
• Traditional hypervisors scan all guest memory and compute checksums, also called hashes,
for every single memory page. Then, they look for pages with identical hashes and compare
the entire content of those pages. If two pages produce the same hash, it is very likely that
the pages are identical in content. This process can take rather long, especially if the system
is not idling. As a result, the additional memory only becomes available after a significant
amount of time, such as hours or sometimes days. Even worse, this kind of page sharing
algorithm generally consumes significant CPU resources and increases the virtualization
overhead by 10 to 20%.
Page Fusion in Oracle VM VirtualBox uses logic in the Oracle VM VirtualBox Guest Ad-
ditions to quickly identify memory cells that are most likely identical across VMs. It can
therefore achieve most of the possible savings of page sharing almost immediately and with
almost no overhead.
109
5 Guest Additions
• Page Fusion is also much less likely to be confused by identical memory that it will elimi-
nate, just to learn seconds later that the memory will now change and having to perform a
highly expensive and often service-disrupting reallocation.
At this time, Page Fusion can only be controlled with VBoxManage, and only while a VM is shut
down. To enable Page Fusion for a VM, use the following command:
VBoxManage modifyvm "VM name" --page-fusion on
You can observe Page Fusion operation using some metrics. RAM/VMM/Shared shows the total
amount of fused pages, whereas the per-VM metric Guest/RAM/Usage/Shared will return the
amount of fused memory for a given VM. See chapter 9.46, VBoxManage metrics, page 302 for
information on how to query metrics.
Note: Enabling Page Fusion might indirectly increase the chances for malicious guests
to successfully attack other VMs running on the same host. See chapter 14.3.4, Poten-
tially Insecure Operations, page 418.
5.11 Controlling Virtual Monitor Topology
5.11.1 X11/Wayland Desktop Environments
The Guest Additions provide services for controlling the guest system’s monitor topol-
ogy. Monitor topology means the resolution of each virtual monitor and its state (dis-
abled/enabled). The resolution of a virtual monitor can be modified from the host side ei-
ther by resizing the window that hosts the virtual monitor, by using the View menu or the
VBoxManage controlvm vmname setscreenlayout command. On guest operating systems
with X11/Wayland desktops this is put into effect by either of the following two services:
VBoxClient --vmsvga
VBoxDRMClient
The following are some details about guest screen resolution control functionality:
• On X11/Wayland desktops the resizing service is started during desktop session initial-
ization, that is desktop login. On X11 desktops VBoxClient --vmsvga handles screen
topology through the RandR extension. On Wayland clients VBoxDRMClient is used. The
decision is made automatically at each desktop session start.
• On 32-bit guest operating systems VBoxDRMClient is always used, in order to work around
bugs.
• Since the monitor topology control services are initialized during the desktop session
start, it is impossible to control the monitor resolution of display managers such as
GDM or LightDM. This default behavior can be changed by setting the guest property
/VirtualBox/GuestAdd/DRMResize of the virtual machine to any value. See chapter 5.7,
Guest Properties, page 104 for details of how to update guest properties. When this guest
property is set then VBoxDRMClient is started during the guest OS boot and stays active all
the time, for both the display manager login screen and the desktop session.
5.11.1.1 Known Limitations
VBoxDRMClient is not able to handle arbitrary guest monitor topologies. Specifically, disabling
a guest monitor that is not the last one invalidates the monitor topology due to limitations in
the vmwgfx.ko Linux kernel module. For example, when the guest is configured to have four
monitors it is not recommended to disable the second or third monitor.
110
6 Virtual Storage
As the virtual machine will most probably expect to see a hard disk built into its virtual computer,
Oracle VM VirtualBox must be able to present real storage to the guest as a virtual hard disk.
There are presently three methods by which to achieve this:
• Oracle VM VirtualBox can use large image files on a real hard disk and present them to a
guest as a virtual hard disk. This is the most common method, described in chapter 6.2,
Disk Image Files (VDI, VMDK, VHD, HDD), page 114.
• iSCSI storage servers can be attached to Oracle VM VirtualBox. This is described in chapter
6.10, iSCSI Servers, page 125.
• You can allow a virtual machine to access one of your host disks directly. This is an ad-
vanced feature, described in chapter 10.7.1, Using a Raw Host Hard Disk From a Guest,
page 341.
Each such virtual storage device, such as an image file, iSCSI target, or physical hard disk,
needs to be connected to the virtual hard disk controller that Oracle VM VirtualBox presents to
a virtual machine. This is explained in the next section.
6.1 Hard Disk Controllers
In a computing device, hard disks and CD/DVD drives are connected to a device called a hard
disk controller, which drives hard disk operation and data transfers. Oracle VM VirtualBox can
emulate the most common types of hard disk controllers typically found in computing devices:
IDE, SATA (AHCI), SCSI, SAS, USB-based, NVMe and virtio-scsi mass storage devices.
• IDE (ATA) controllers are a backwards-compatible yet very advanced extension of the disk
controller in the IBM PC/AT (1984). Initially, this interface worked only with hard disks,
but was later extended to also support CD-ROM drives and other types of removable media.
In physical PCs, this standard uses flat ribbon parallel cables with 40 or 80 wires. Each such
cable can connect two devices, called device 0 and device 1, to a controller. Typical PCs had
two connectors for such cables. As a result, support for up to four IDE devices was most
common: primary device 0, primary device 1, secondary device 0, and secondary device 1.
In Oracle VM VirtualBox, each virtual machine may have one IDE controller enabled, which
gives you up to four virtual storage devices that you can attach to the machine. By default,
one of these virtual storage devices, device 0 on the secondary channel, is preconfigured
to be the virtual machine’s virtual CD/DVD drive. However, you can change the default
setting.
Even if your guest OS has no support for SCSI or SATA devices, it should always be able to
see an IDE controller.
You can also select which exact type of IDE controller hardware Oracle VM VirtualBox
should present to the virtual machine: PIIX3, PIIX4, or ICH6. This makes no difference
in terms of performance, but if you import a virtual machine from another virtualization
product, the OS in that machine may expect a particular controller type and crash if it is
not found.
111
6 Virtual Storage
After you have created a new virtual machine with the New Virtual Machine wizard in
VirtualBox Manager, you will typically see one IDE controller in the machine’s Storage set-
tings. The virtual CD/DVD drive will be attached to one of the four ports of this controller.
•
Serial ATA (SATA) is a more recent standard than IDE. Compared to IDE, it supports both
much higher speeds and more devices per controller. Also, with physical hardware, devices
can be added and removed while the system is running. The standard interface for SATA
controllers is called Advanced Host Controller Interface (AHCI).
Like a real SATA controller, Oracle VM VirtualBox’s virtual SATA controller operates faster
and also consumes fewer CPU resources than the virtual IDE controller. Also, this enables
you to connect up to 30 virtual hard disks to one machine instead of just three, when
compared to the Oracle VM VirtualBox IDE controller with a DVD drive attached.
For this reason, depending on the selected guest OS, Oracle VM VirtualBox uses SATA as
the default for newly created virtual machines. One virtual SATA controller is created by
default, and the default disk that is created with a new VM is attached to this controller.
Warning: The entire SATA controller and the virtual disks attached to it, including
those in IDE compatibility mode, will not be seen by OSes that do not have device
support for AHCI. In particular, there is no support for AHCI in Windows versions before
Windows Vista. Legacy Windows versions such as Windows XP, even with SP3 installed,
will not see such disks unless you install additional drivers. It is possible to switch from
IDE to SATA after installation by installing the SATA drivers and changing the controller
type in the VM Settings window.
Oracle VM VirtualBox recommends the Intel Matrix Storage drivers, which can
be downloaded from http://downloadcenter.intel.com/Product_Filter.aspx?
ProductID=2101.
To add a SATA controller to a machine for which it has not been enabled by default, either
because it was created by an earlier version of Oracle VM VirtualBox, or because SATA is
not supported by default by the selected guest OS, do the following. Go to the Storage
page of the machine’s Settings window, click Add Controller under the Storage Tree box
and then select Add SATA Controller. The new controller appears as a separate PCI device
in the virtual machine, and you can add virtual disks to it.
To change the IDE compatibility mode settings for the SATA controller, see chapter 9.27,
VBoxManage storagectl, page 256.
•
SCSI is another established industry standard, standing for Small Computer System Inter-
face. SCSI is as a generic interface for data transfer between all kinds of devices, including
storage devices. SCSI is still used for connecting some hard disks and tape devices, but
it has mostly been displaced in commodity hardware. It is still in common use in high-
performance workstations and servers.
Primarily for compatibility with other virtualization software, Oracle VM VirtualBox op-
tionally supports LSI Logic and BusLogic SCSI controllers, to each of which up to fifteen
virtual hard disks can be attached.
To enable a SCSI controller, on the Storage page of a virtual machine’s Settings window,
click Add Controller under the Storage Tree box and then select Add SCSI Controller.
The new controller appears as a separate PCI device in the virtual machine.
Warning: As with the other controller types, a SCSI controller will only be seen by
OSes with device support for it. Windows 2003 and later ships with drivers for the LSI
Logic controller, while Windows NT 4.0 and Windows 2000 ships with drivers for the
BusLogic controller. Windows XP ships with drivers for neither.
112
6 Virtual Storage
•
Serial Attached SCSI (SAS) is another bus standard which uses the SCSI command set.
As opposed to SCSI physical devices, serial cables are used instead of parallel cables. This
simplifies physical device connections. In some ways, therefore, SAS is to SCSI what SATA
is to IDE: it enables more reliable and faster connections.
To support high-end guests which require SAS controllers, Oracle VM VirtualBox emulates
a LSI Logic SAS controller, which can be enabled much the same way as a SCSI controller.
At this time, up to 255 devices can be connected to the SAS controller.
Warning: As with SATA, the SAS controller will only be seen by OSes with device
support for it. In particular, there is no support for SAS in Windows before Windows
Vista. So Windows XP, even SP3, will not see such disks unless you install additional
drivers.
•
The USB mass storage device class is a standard to connect external storage devices like
hard disks or flash drives to a host through USB. All major OSes support these devices
and ship generic drivers making third-party drivers superfluous. In particular, legacy OSes
without support for SATA controllers may benefit from USB mass storage devices.
The virtual USB storage controller offered by Oracle VM VirtualBox works differently to
the other storage controller types. While most storage controllers appear as a single PCI
device to the guest with multiple disks attached to it, the USB-based storage controller
does not appear as virtual storage controller. Each disk attached to the controller appears
as a dedicated USB device to the guest.
Warning: Booting from drives attached using USB is only supported when EFI is used
as the BIOS lacks USB support.
•
Non volatile memory express (NVMe) is a standard for connecting non volatile memory
(NVM) directly over PCI Express to lift the bandwidth limitation of the previously used
SATA protocol for solid-state devices. Unlike other standards the command set is very
simple in order to achieve maximum throughput and is not compatible with ATA or SCSI.
OSes need to support NVMe devices to make use of them. For example, Windows 8.1
added native NVMe support. For Windows 7, native support was added with an update.
The NVMe controller is part of the extension pack.
Warning: Booting from drives attached using NVMe is only supported when EFI is used
as the BIOS lacks the appropriate driver.
•
Virtual I/O Device SCSI is a standard to connect virtual storage devices like hard disks
or optical drives to a VM. Recent Linux and Windows versions support these devices, but
Windows needs additional drivers. Currently virtio-scsi controller support is experimental.
Warning: The virtio-scsi controller will only be seen by OSes with device support for
it. In particular, there is no built-in support in Windows. So Windows will not see such
disks unless you install additional drivers.
In summary, Oracle VM VirtualBox gives you the following categories of virtual storage slots:
113
6 Virtual Storage
• Four slots attached to the traditional IDE controller, which are always present. One of these
is typically a virtual CD/DVD drive.
• 30 slots attached to the SATA controller, if enabled and supported by the guest OS.
• 15 slots attached to the SCSI controller, if enabled and supported by the guest OS.
• Up to 255 slots attached to the SAS controller, if enabled and supported by the guest OS.
• Eight slots attached to the virtual USB controller, if enabled and supported by the guest
OS.
• Up to 255 slots attached to the NVMe controller, if enabled and supported by the guest OS.
• Up to 256 slots attached to the virtio-scsi controller, if enabled and supported by the guest
OS.
Given this large choice of storage controllers, you may not know which one to choose. In
general, you should avoid IDE unless it is the only controller supported by your guest. Whether
you use SATA, SCSI, or SAS does not make any real difference. The variety of controllers is only
supplied by Oracle VM VirtualBox for compatibility with existing hardware and other hypervisors.
6.2 Disk Image Files (VDI, VMDK, VHD, HDD)
Disk image files reside on the host system and are seen by the guest systems as hard disks of a
certain geometry. When a guest OS reads from or writes to a hard disk, Oracle VM VirtualBox
redirects the request to the image file.
Like a physical disk, a virtual disk has a size, or capacity, which must be specified when the
image file is created. As opposed to a physical disk however, Oracle VM VirtualBox enables you
to expand an image file after creation, even if it has data already. See chapter 9.31, VBoxManage
modifymedium, page 262.
Oracle VM VirtualBox supports the following types of disk image files:
• VDI. Normally, Oracle VM VirtualBox uses its own container format for guest hard disks.
This is called a Virtual Disk Image (VDI) file. This format is used when you create a new
virtual machine with a new disk.
• VMDK. Oracle VM VirtualBox also fully supports the popular and open VMDK container
format that is used by many other virtualization products, such as VMware.
• VHD. Oracle VM VirtualBox also fully supports the VHD format used by Microsoft.
• HDD. Image files of Parallels version 2 (HDD format) are also supported.
Due to lack of documentation of the format, newer versions such as 3 and 4 are not sup-
ported. You can however convert such image files to version 2 format using tools provided
by Parallels.
Irrespective of the disk capacity and format, as mentioned in chapter 2.8, Creating Your First
Virtual Machine, page 13, there are two options for creating a disk image: fixed-size or dynami-
cally allocated.
• Fixed-size. If you create a fixed-size image, an image file will be created on your host
system which has roughly the same size as the virtual disk’s capacity. So, for a 10 GB disk,
you will have a 10 GB file. Note that the creation of a fixed-size image can take a long time
depending on the size of the image and the write performance of your hard disk.
114
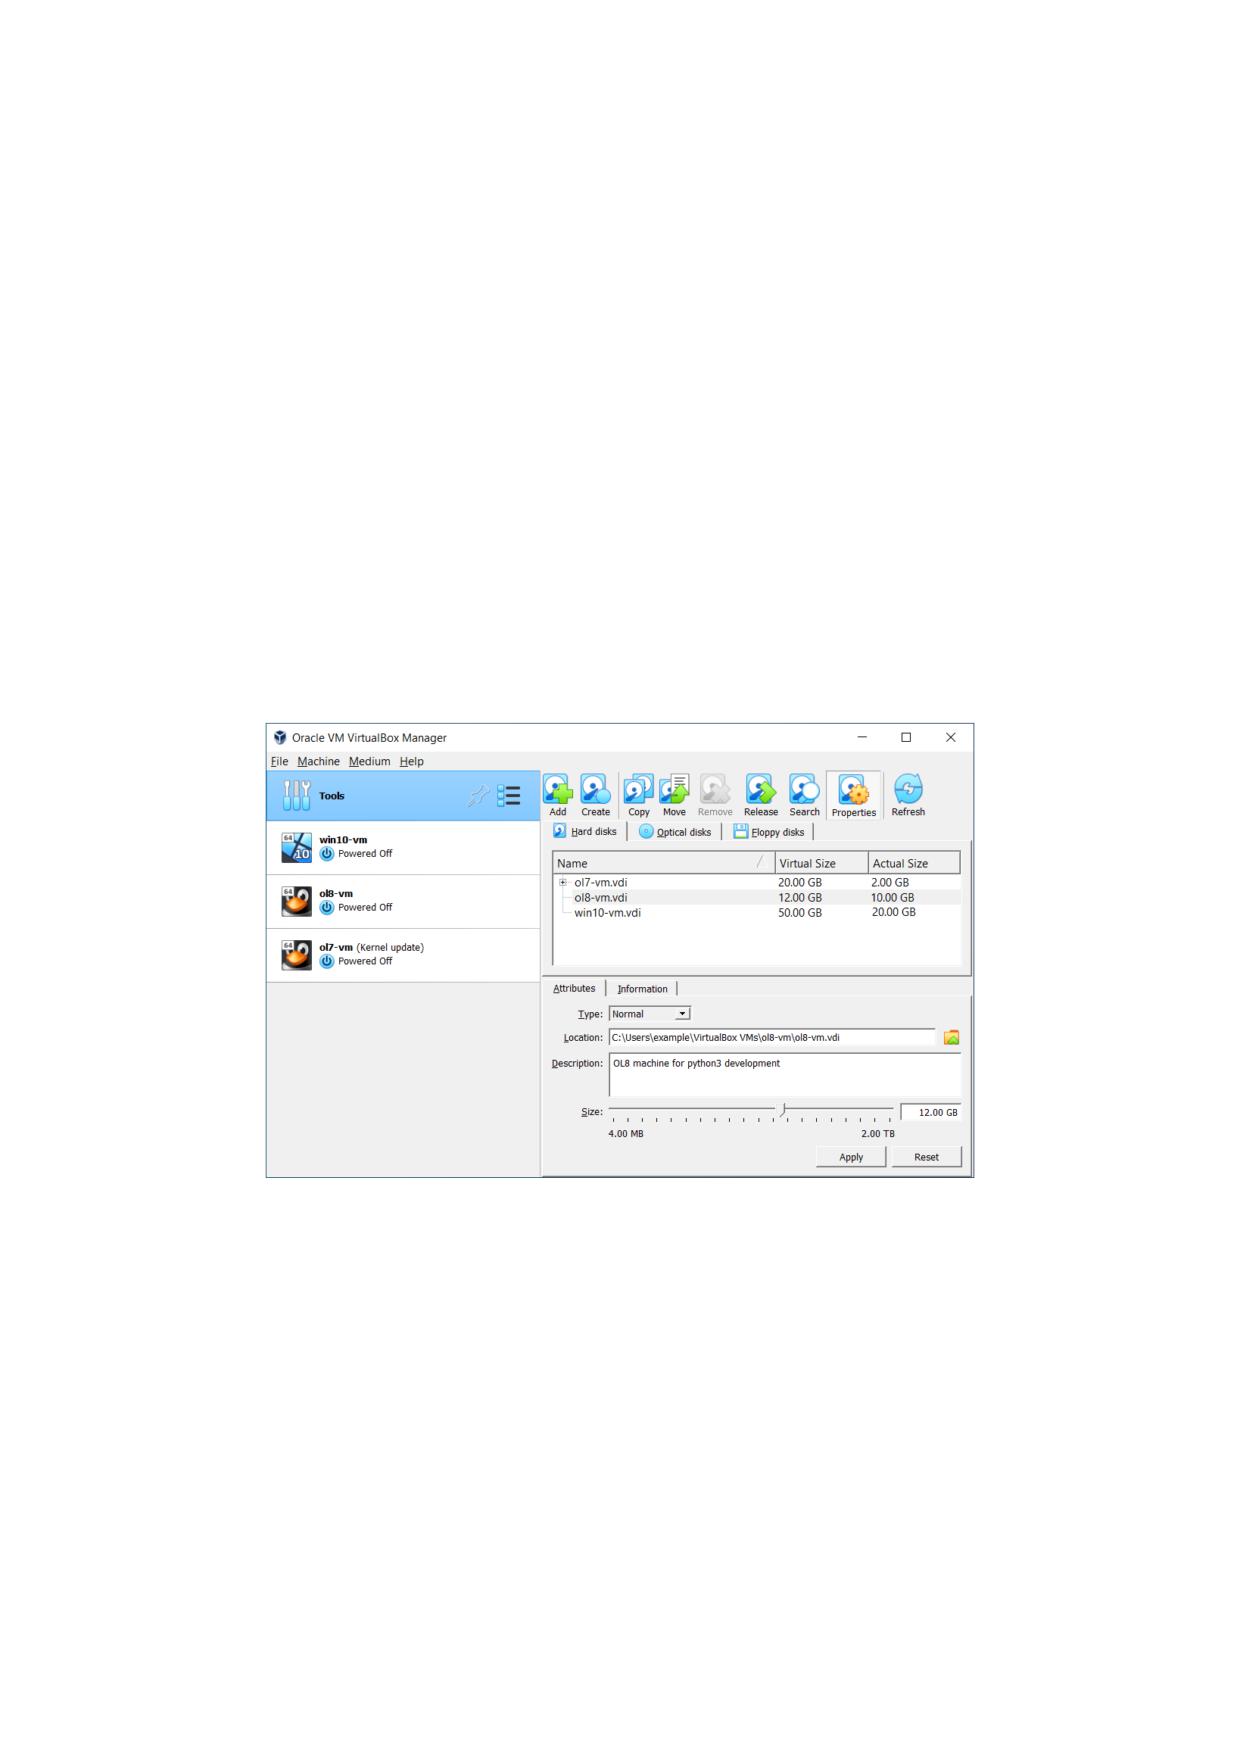
6 Virtual Storage
• Dynamically allocated. For more flexible storage management, use a dynamically allo-
cated image. This will initially be very small and not occupy any space for unused virtual
disk sectors, but will grow every time a disk sector is written to for the first time, until the
drive reaches the maximum capacity chosen when the drive was created. While this format
takes less space initially, the fact that Oracle VM VirtualBox needs to expand the image file
consumes additional computing resources, so until the disk file size has stabilized, write
operations may be slower than with fixed size disks. However, after a time the rate of
growth will slow and the average penalty for write operations will be negligible.
6.3 The Virtual Media Manager
Oracle VM VirtualBox keeps track of all the hard disk, CD/DVD-ROM, and floppy disk images
which are in use by virtual machines. These are often referred to as known media and come from
two sources:
• All media currently attached to virtual machines.
• Registered media, for compatibility with legacy Oracle VM VirtualBox versions.
The known media can be viewed and changed using the Virtual Media Manager tool, which
you access by clicking Media on the global Tools menu in VirtualBox Manager.
The known media are conveniently grouped in separate tabs for the supported formats. These
formats are:
• Hard disk images, either in Oracle VM VirtualBox’s own Virtual Disk Image (VDI) format,
or in the third-party formats listed in chapter 6.2, Disk Image Files (VDI, VMDK, VHD, HDD),
page 114.
• CD/DVD images in standard ISO format.
• Floppy images in standard RAW format.
For each image, the Virtual Media Manager shows you the full path of the image file and other
information, such as the virtual machine the image is currently attached to.
The Virtual Media Manager enables you to do the following:
115
6 Virtual Storage
•
Add an image to the known media.
•
Create a new disk image.
- For hard disks, the Create Virtual Hard Disk wizard is shown. See chapter 6.3.1,
Creating a Virtual Hard Disk Image, page 117.
- For optical disks, the VISO Creator tool is shown. See chapter 6.3.2, Creating a Virtual
Optical Disk Image, page 118.
- For floppy disks, the Floppy Disk Creator tool is shown. See chapter 6.3.3, Creating
a Virtual Floppy Disk Image, page 118.
•
Copy an image to create another one.
For virtual hard disks, you can specify one of the following target types: VDI, VHD, or
VMDK.
•
Move an image to another location.
A file dialog prompts you for the new image file location.
When you use the Virtual Media Manager to move a disk image, Oracle VM VirtualBox
updates all related configuration files automatically.
Note: Always use the Virtual Media Manager or the VBoxManage modifymedium com-
mand to move a disk image.
If you use a file management feature of the host OS to move a disk image to a new
location, run the VBoxManage modifymedium --setlocation command to configure
the new path of the disk image on the host file system. This command updates the
Oracle VM VirtualBox configuration automatically.
•
Remove an image from the known media. You can optionally delete the image file when
removing the image.
•
Release an image to detach it from a VM. This action only applies if the image is currently
attached to a VM as a virtual hard disk.
•
Clear all inaccessible disk images from the list. The disk images are released from the VMs
they are attached to and removed from the known media.
Note: This option is for optical disks and floppy disks only.
•
Search for an image by name or UUID.
•
View and edit the Properties of a disk image.
Available properties include the following:
- Type: Specifies the snapshot behavior of the disk. See chapter 6.4, Special Image Write
Modes, page 119.
- Location: Specifies the location of the disk image file on the host system. You can use
a file dialog to browse for the disk image location.
- Description: Specifies a short description of the disk image.
- Size: Specifies the size of the disk image. You can use the slider to increase or decrease
the disk image size.
116
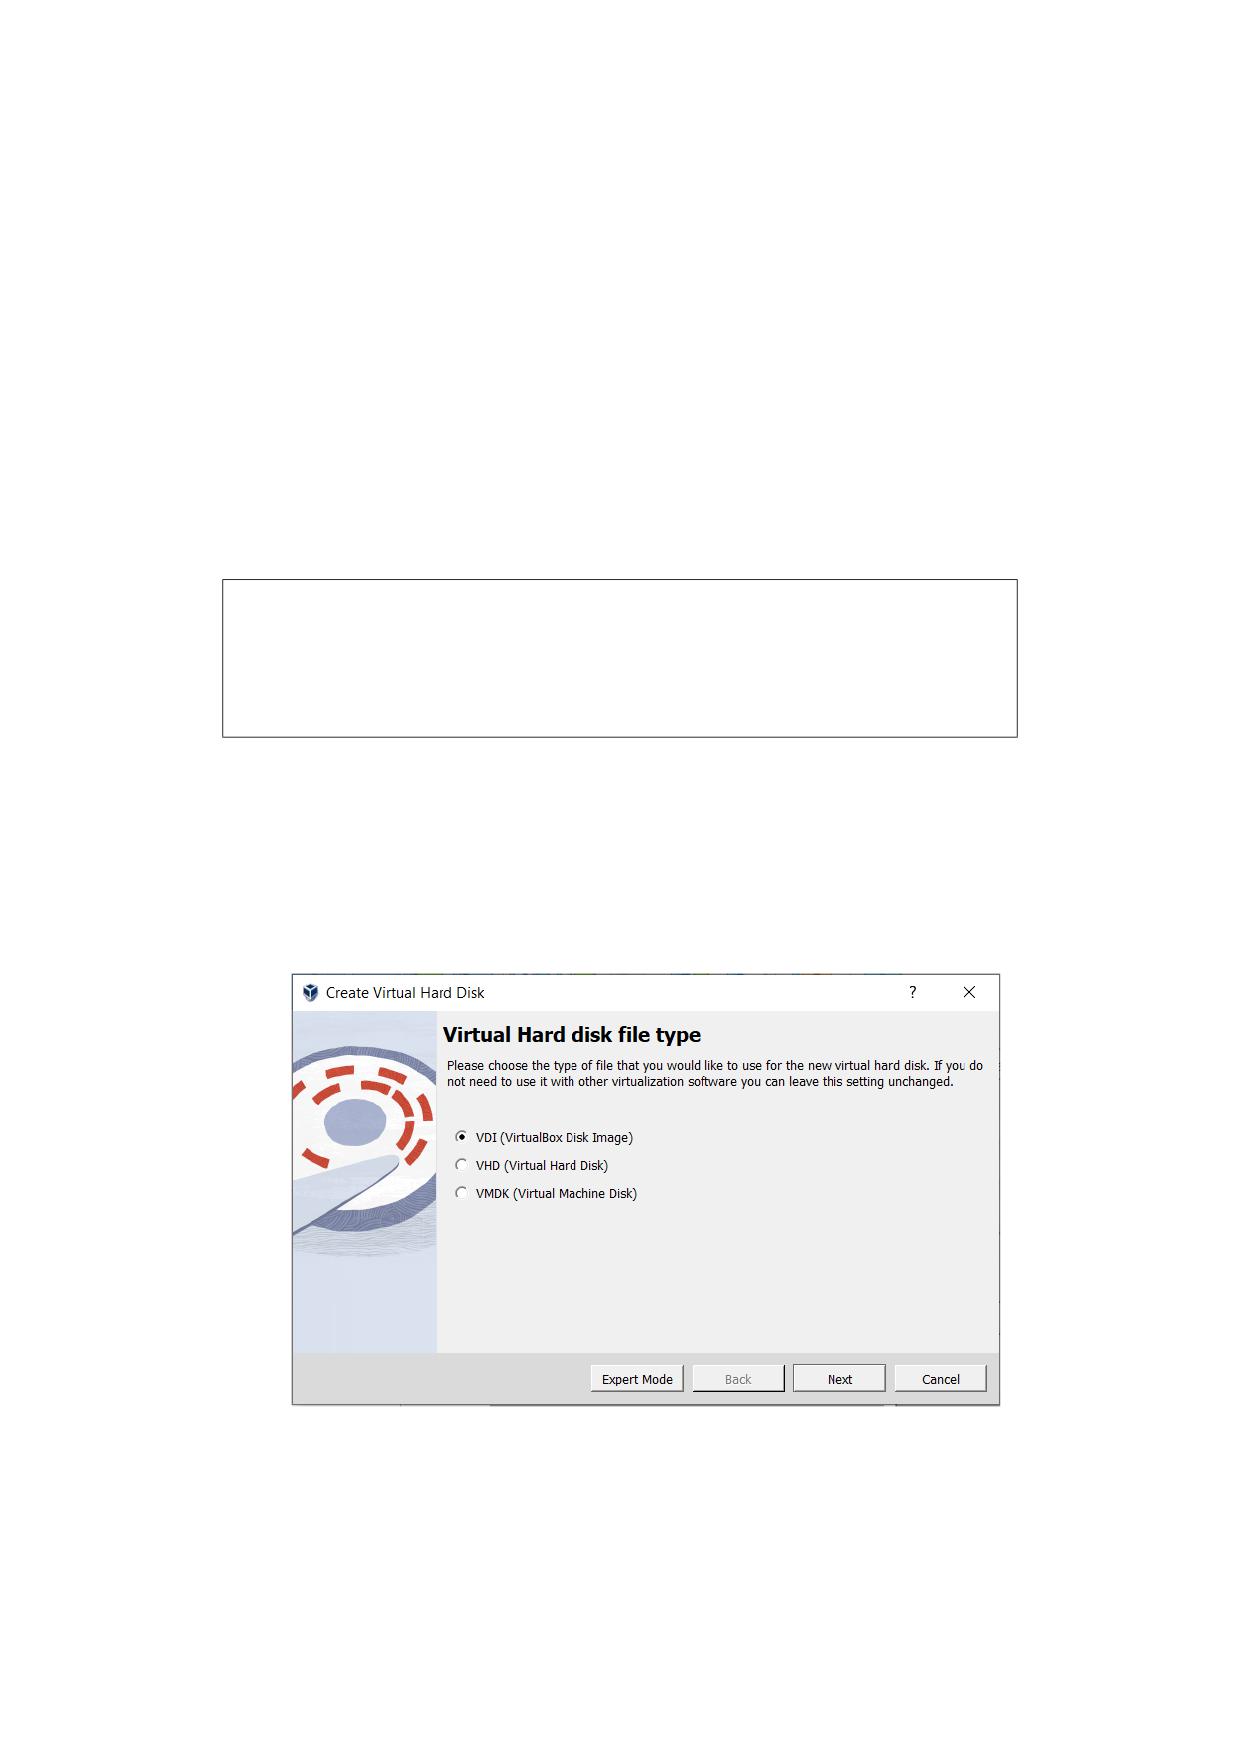
6 Virtual Storage
- Information: Specifies detailed information about the disk image.
• Refresh the property values of the selected disk image.
To perform these actions, highlight the medium in the Virtual Media Manager and then do one
of the following:
• Click an icon in the Virtual Media Manager toolbar.
• Right-click the medium and select an option.
Use the Storage page in a VM’s Settings window to create a new disk image. By default, disk
images are stored in the VM’s folder.
You can copy hard disk image files to other host systems and then import them in to VMs from
the host system. However, some Windows guest OSes may require that you configure the new
VM in a similar way to the old one.
Note: Do not simply make copies of virtual disk images. If you import such a second
copy into a VM, Oracle VM VirtualBox issues an error because Oracle VM VirtualBox
assigns a universally unique identifier (UUID) to each disk image to ensure that it is
only used one time. See chapter 6.6, Cloning Disk Images, page 122. Also, if you
want to copy a VM to another system, use the Oracle VM VirtualBox import and export
features. See chapter 2.15, Importing and Exporting Virtual Machines, page 30.
6.3.1 Creating a Virtual Hard Disk Image
Use the Create Virtual Hard Disk wizard to create a hard disk image.
1. Display the Hard Disks tab in Virtual Media Manager and click Create.
The Create Virtual Hard Disk wizard is shown.
2. On the Virtual Hard Disk File Type page, select a file type for the new virtual hard disk
image.
Click Next.
117
6 Virtual Storage
3. On the Storage on Physical Hard Disk page, select whether the size of the virtual hard
disk file is dynamically allocated or is of fixed size.
Click Next.
4. On the File Location and Size page, configure the location of the virtual hard disk file and
use the slider to set the size limit for the virtual hard disk.
Click Finish to create the virtual hard disk file.
The virtual hard disk image is created in the specified location and added to the Hard
Disks tab in Virtual Media Manager.
6.3.2 Creating a Virtual Optical Disk Image
Use the VISO Creator tool to create a virtual optical disk image. This enables you to create a
virtual ISO from selected files on the host.
1. Display the Optical Disks tab in Virtual Media Manager and click Create.
The VISO Creator tool is shown.
2. Create the virtual ISO file.
a) Configure the name of the ISO file.
Click Configuration and enter a name in the Viso Name field.
b) Add files to your virtual ISO.
In the Host File System pane, select files to copy from the host system to the virtual
ISO.
Click Add Items To VISO. The files are displayed in the VISO Content pane.
The following file operations are also available:
• To create folders on the virtual ISO, click Create New Directory.
• To remove files from the virtual ISO, select files in the VISO Content pane and
click Remove Items From VISO.
• To remove all files from the virtual ISO, click Reset the VISO Content.
3. Create the virtual ISO image.
Click Create.
A virtual ISO file with the specified name and content is created.
6.3.3 Creating a Virtual Floppy Disk Image
Use the Floppy Disk Creator tool to create a floppy disk image.
1. Display the Floppy Disks tab in Virtual Media Manager and click Create.
The Floppy Disk Creator tool is shown.
2. Configure the following settings:
• File Path: The name and location of the floppy disk image.
• Size: Select from the list of supported floppy disk sizes.
• Format Disk as FAT 12: This is the default format used for most floppy disks. For an
unformatted disk, do not select this option.
3. Create the floppy disk image file.
Click Create.
The floppy disk image is created in the specified location and added to the Floppy Disks
tab in Virtual Media Manager.
118
6 Virtual Storage
6.4 Special Image Write Modes
For each virtual disk image supported by Oracle VM VirtualBox, you can determine separately
how it should be affected by write operations from a virtual machine and snapshot operations.
This applies to all of the aforementioned image formats (VDI, VMDK, VHD, or HDD) and irre-
spective of whether an image is fixed-size or dynamically allocated.
By default, images are in normal mode. To mark an existing image with one of the non-
standard modes listed below, use VBoxManage modifymedium. See chapter 9.31, VBoxManage
modifymedium, page 262. Alternatively, use VBoxManage storageattach to attach the image
to a VM and specify the --mtype argument. See chapter 9.26, VBoxManage storageattach, page
252.
The available virtual disk image modes are as follows:
•
Normal images have no restrictions on how guests can read from and write to the disk.
This is the default image mode.
When you take a snapshot of your virtual machine as described in chapter 2.11, Snapshots,
page 24, the state of a normal hard disk is recorded together with the snapshot, and when
reverting to the snapshot, its state will be fully reset.
The image file itself is not reset. Instead, when a snapshot is taken, Oracle VM VirtualBox
freezes the image file and no longer writes to it. For the write operations from the VM, a
second, differencing image file is created which receives only the changes to the original
image. See chapter 6.5, Differencing Images, page 120.
While you can attach the same normal image to more than one virtual machine, only one
of these virtual machines attached to the same image file can be executed simultaneously,
as otherwise there would be conflicts if several machines write to the same image file.
•
Write-through hard disks are completely unaffected by snapshots. Their state is not saved
when a snapshot is taken, and not restored when a snapshot is restored.
•
Shareable hard disks are a variant of write-through hard disks. In principle they behave
exactly the same. Their state is not saved when a snapshot is taken, and not restored when
a snapshot is restored. The difference only shows if you attach such disks to several VMs.
Shareable disks may be attached to several VMs which may run concurrently. This makes
them suitable for use by cluster filesystems between VMs and similar applications which
are explicitly prepared to access a disk concurrently. Only fixed size images can be used in
this way, and dynamically allocated images are rejected.
Warning: This is an expert feature, and misuse can lead to data loss, as regular filesys-
tems are not prepared to handle simultaneous changes by several parties.
•
Immutable images only remember write accesses temporarily while the virtual machine is
running. All changes are lost when the virtual machine is powered on the next time. As a
result, as opposed to Normal images, the same immutable image can be used with several
virtual machines without restrictions.
Creating an immutable image makes little sense since it would be initially empty and lose
its contents with every machine restart. You would have a disk that is always unformatted
when the machine starts up. Instead, you can first create a normal image and then later
mark it as immutable when you decide that the contents are useful.
If you take a snapshot of a machine with immutable images, then on every machine power-
up, those images are reset to the state of the last (current) snapshot, instead of the state of
the original immutable image.
119
6 Virtual Storage
Note: As a special exception, immutable images are not reset if they are attached to
a machine in a saved state or whose last snapshot was taken while the machine was
running. This is called an online snapshot. As a result, if the machine’s current snapshot
is an online snapshot, its immutable images behave exactly like the a normal image.
To reenable the automatic resetting of such images, delete the current snapshot of the
machine.
Oracle VM VirtualBox never writes to an immutable image directly at all. All write oper-
ations from the machine are directed to a differencing image. The next time the VM is
powered on, the differencing image is reset so that every time the VM starts, its immutable
images have exactly the same content.
The differencing image is only reset when the machine is powered on from within Oracle
VM VirtualBox, not when you reboot by requesting a reboot from within the machine. This
is also why immutable images behave as described above when snapshots are also present,
which use differencing images as well.
If the automatic discarding of the differencing image on VM startup does not fit your needs,
you can turn it off using the autoreset parameter of VBoxManage modifymedium. See
chapter 9.31, VBoxManage modifymedium, page 262.
•
Multiattach mode images can be attached to more than one virtual machine at the same
time, even if these machines are running simultaneously. For each virtual machine to which
such an image is attached, a differencing image is created. As a result, data that is written
to such a virtual disk by one machine is not seen by the other machines to which the image
is attached. Each machine creates its own write history of the multiattach image.
Technically, a multiattach image behaves identically to an immutable image except the
differencing image is not reset every time the machine starts.
This mode is useful for sharing files which are almost never written, for instance picture
galleries, where every guest changes only a small amount of data and the majority of the
disk content remains unchanged. The modified blocks are stored in differencing images
which remain relatively small and the shared content is stored only once at the host.
•
Read-only images are used automatically for CD/DVD images, since CDs/DVDs can never
be written to.
The following scenario illustrates the differences between the various image modes, with re-
spect to snapshots.
Assume you have installed your guest OS in your VM, and you have taken a snapshot. Later,
your VM is infected with a virus and you would like to go back to the snapshot. With a normal
hard disk image, you simply restore the snapshot, and the earlier state of your hard disk image
will be restored as well and your virus infection will be undone. With an immutable hard disk,
all it takes is to shut down and power on your VM, and the virus infection will be discarded.
With a write-through image however, you cannot easily undo the virus infection by means of
virtualization, but will have to disinfect your virtual machine like a real computer.
You might find write-through images useful if you want to preserve critical data irrespective
of snapshots. As you can attach more than one image to a VM, you may want to have one
immutable image for the OS and one write-through image for your data files.
6.5 Differencing Images
The previous section mentioned differencing images and how they are used with snapshots,
immutable images, and multiple disk attachments. This section describes in more detail how
differencing images work.
120
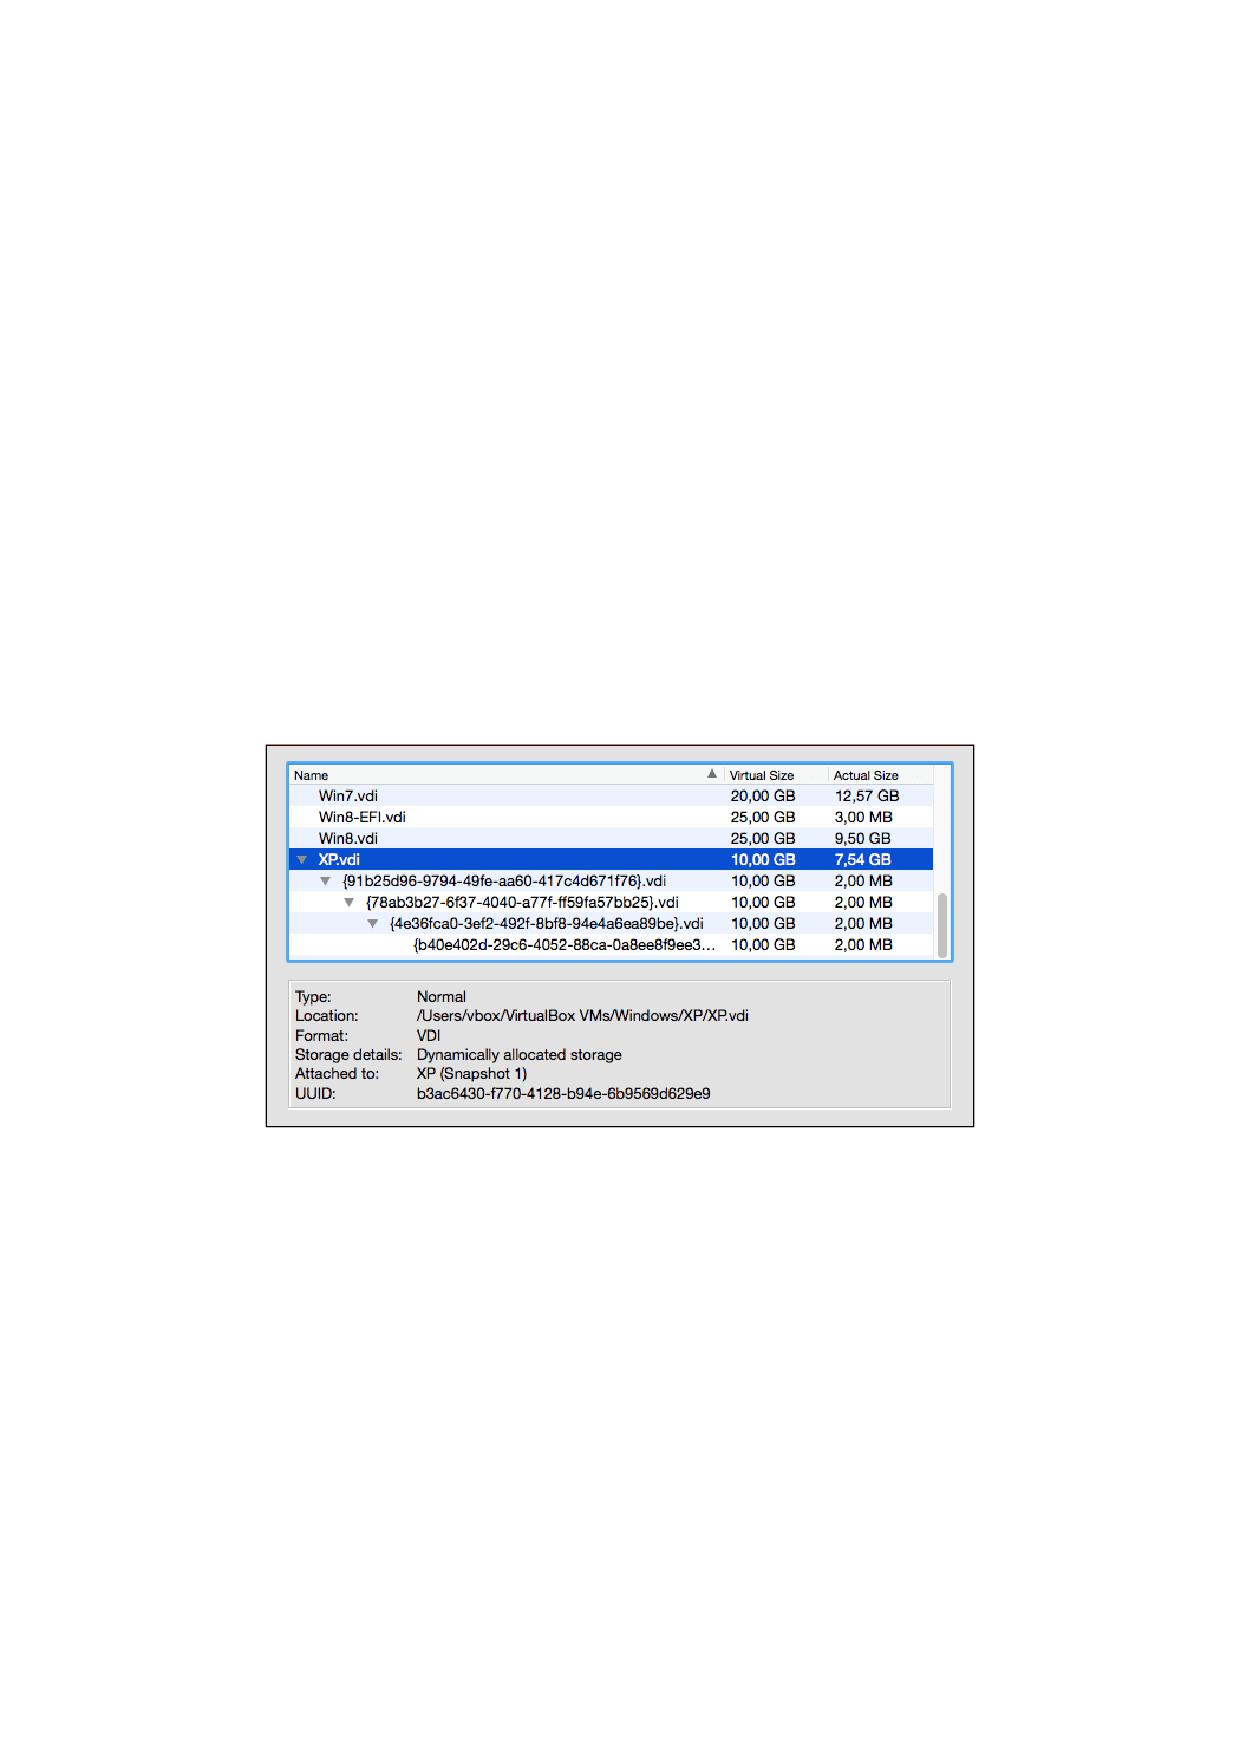
6 Virtual Storage
A differencing image is a special disk image that only holds the differences to another image.
A differencing image by itself is useless, it must always refer to another image. The differencing
image is then typically referred to as a child, which holds the differences to its parent.
When a differencing image is active, it receives all write operations from the virtual machine
instead of its parent. The differencing image only contains the sectors of the virtual hard disk
that have changed since the differencing image was created. When the machine reads a sector
from such a virtual hard disk, it looks into the differencing image first. If the sector is present,
it is returned from there. If not, Oracle VM VirtualBox looks into the parent. In other words,
the parent becomes read-only. It is never written to again, but it is read from if a sector has not
changed.
Differencing images can be chained. If another differencing image is created for a virtual
disk that already has a differencing image, then it becomes a grandchild of the original parent.
The first differencing image then becomes read-only as well, and write operations only go to
the second-level differencing image. When reading from the virtual disk, Oracle VM VirtualBox
needs to look into the second differencing image first, then into the first if the sector was not
found, and then into the original image.
There can be an unlimited number of differencing images, and each image can have more than
one child. As a result, the differencing images can form a complex tree with parents, siblings,
and children, depending on how complex your machine configuration is. Write operations always
go to the one active differencing image that is attached to the machine, and for read operations,
Oracle VM VirtualBox may need to look up all the parents in the chain until the sector in question
is found. You can view such a tree in the Virtual Media Manager.
In all of these situations, from the point of view of the virtual machine, the virtual hard disk
behaves like any other disk. While the virtual machine is running, there is a slight run-time I/O
overhead because Oracle VM VirtualBox might need to look up sectors several times. This is not
noticeable however since the tables with sector information are always kept in memory and can
be looked up quickly.
Differencing images are used in the following situations:
• Snapshots. When you create a snapshot, as explained in the previous section, Oracle
VM VirtualBox freezes the images attached to the virtual machine and creates differencing
images for each image that is not in write-through mode. From the point of view of the
virtual machine, the virtual disks continue to operate before, but all write operations go
into the differencing images. Each time you create another snapshot, for each hard disk
attachment, another differencing image is created and attached, forming a chain or tree.
In the above screenshot, you see that the original disk image is now attached to a snapshot,
representing the state of the disk when the snapshot was taken.
121
6 Virtual Storage
If you restore a snapshot, and want to go back to the exact machine state that was stored
in the snapshot, the following happens:
- Oracle VM VirtualBox copies the virtual machine settings that were copied into the
snapshot back to the virtual machine. As a result, if you have made changes to the
machine configuration since taking the snapshot, they are undone.
- If the snapshot was taken while the machine was running, it contains a saved machine
state, and that state is restored as well. After restoring the snapshot, the machine
will then be in Saved state and resume execution from there when it is next started.
Otherwise the machine will be in Powered Off state and do a full boot.
- For each disk image attached to the machine, the differencing image holding all the
write operations since the current snapshot was taken is thrown away, and the original
parent image is made active again. If you restored the root snapshot, then this will be
the root disk image for each attachment. Otherwise, some other differencing image
descended from it. This effectively restores the old machine state.
If you later delete a snapshot in order to free disk space, for each disk attachment, one of
the differencing images becomes obsolete. In this case, the differencing image of the disk
attachment cannot simply be deleted. Instead, Oracle VM VirtualBox needs to look at each
sector of the differencing image and needs to copy it back into its parent. This is called
“merging” images and can be a potentially lengthy process, depending on how large the
differencing image is. It can also temporarily need a considerable amount of extra disk
space, before the differencing image obsoleted by the merge operation is deleted.
•
Immutable images. When an image is switched to immutable mode, a differencing im-
age is created as well. As with snapshots, the parent image then becomes read-only, and
the differencing image receives all the write operations. Every time the virtual machine is
started, all the immutable images which are attached to it have their respective differenc-
ing image thrown away, effectively resetting the virtual machine’s virtual disk with every
restart.
6.6
Cloning Disk Images
You can duplicate hard disk image files on the same host to quickly produce a second virtual ma-
chine with the same OS setup. However, you should only make copies of virtual disk images us-
ing the utility supplied with Oracle VM VirtualBox. See chapter 9.32, VBoxManage clonemedium,
page 264. This is because Oracle VM VirtualBox assigns a UUID to each disk image, which is also
stored inside the image, and Oracle VM VirtualBox will refuse to work with two images that use
the same number. If you do accidentally try to reimport a disk image which you copied normally,
you can make a second copy using the VBoxManage clonevm command and import that instead.
Note that Linux distributions identify the boot hard disk from the ID of the drive. The ID Oracle
VM VirtualBox reports for a drive is determined from the UUID of the virtual disk image. So if
you clone a disk image and try to boot the copied image the guest might not be able to determine
its own boot disk as the UUID changed. In this case you have to adapt the disk ID in your boot
loader script, for example /boot/grub/menu.lst. The disk ID looks like the following:
scsi-SATA_VBOX_HARDDISK_VB5cfdb1e2-c251e503
The ID for the copied image can be determined as follows:
hdparm -i /dev/sda
122
6 Virtual Storage
6.7 Host Input/Output Caching
Oracle VM VirtualBox can optionally disable the I/O caching that the host OS would otherwise
perform on disk image files.
Traditionally, Oracle VM VirtualBox has opened disk image files as normal files, which results in
them being cached by the host OS like any other file. The main advantage of this is speed: when
the guest OS writes to disk and the host OS cache uses delayed writing, the write operation can
be reported as completed to the guest OS quickly while the host OS can perform the operation
asynchronously. Also, when you start a VM a second time and have enough memory available
for the OS to use for caching, large parts of the virtual disk may be in system memory, and the
VM can access the data much faster.
Note that this applies only to image files. Buffering does not occur for virtual disks residing on
remote iSCSI storage, which is the more common scenario in enterprise-class setups. See chapter
6.10, iSCSI Servers, page 125.
While buffering is a useful default setting for virtualizing a few machines on a desktop com-
puter, there are some disadvantages to this approach:
• Delayed writing through the host OS cache is less secure. When the guest OS writes data,
it considers the data written even though it has not yet arrived on a physical disk. If for
some reason the write does not happen, such as power failure or host crash, the likelihood
of data loss increases.
• Disk image files tend to be very large. Caching them can therefore quickly use up the entire
host OS cache. Depending on the efficiency of the host OS caching, this may slow down
the host immensely, especially if several VMs run at the same time. For example, on Linux
hosts, host caching may result in Linux delaying all writes until the host cache is nearly full
and then writing out all these changes at once, possibly stalling VM execution for minutes.
This can result in I/O errors in the guest as I/O requests time out there.
• Physical memory is often wasted as guest OSes typically have their own I/O caches, which
may result in the data being cached twice, in both the guest and the host caches, for little
effect.
If you decide to disable host I/O caching for the above reasons, Oracle VM VirtualBox uses its
own small cache to buffer writes, but no read caching since this is typically already performed by
the guest OS. In addition, Oracle VM VirtualBox fully supports asynchronous I/O for its virtual
SATA, SCSI, and SAS controllers through multiple I/O threads.
Since asynchronous I/O is not supported by IDE controllers, for performance reasons, you may
want to leave host caching enabled for your VM’s virtual IDE controllers.
For this reason, Oracle VM VirtualBox enables you to configure whether the host I/O cache
is used for each I/O controller separately. Either select the Use Host I/O Cache check box
in the Storage settings for a given virtual storage controller, or use the following VBoxManage
command to disable the host I/O cache for a virtual storage controller:
VBoxManage storagectl "VM name" --name <controllername> --hostiocache off
See chapter 9.27, VBoxManage storagectl, page 256.
For the above reasons, Oracle VM VirtualBox uses SATA controllers by default for new virtual
machines.
6.8 Limiting Bandwidth for Disk Images
Oracle VM VirtualBox supports limiting of the maximum bandwidth used for asynchronous I/O.
Additionally it supports sharing limits through bandwidth groups for several images. It is possible
to have more than one such limit.
123
6 Virtual Storage
Limits are configured using VBoxManage. The example below creates a bandwidth group
named Limit, sets the limit to 20 MB per second, and assigns the group to the attached disks
of the VM:
VBoxManage bandwidthctl "VM name" add Limit --type disk --limit 20M
VBoxManage storageattach "VM name" --storagectl "SATA" --port 0 --device 0 --type hdd
--medium disk1.vdi --bandwidthgroup Limit
VBoxManage storageattach "VM name" --storagectl "SATA" --port 1 --device 0 --type hdd
--medium disk2.vdi --bandwidthgroup Limit
All disks in a group share the bandwidth limit, meaning that in the example above the band-
width of both images combined can never exceed 20 MBps. However, if one disk does not require
bandwidth the other can use the remaining bandwidth of its group.
The limits for each group can be changed while the VM is running, with changes being picked
up immediately. The example below changes the limit for the group created in the example
above to 10 MBps:
VBoxManage bandwidthctl "VM name" set Limit --limit 10M
6.9 CD/DVD Support
Virtual CD/DVD drives by default support only reading. The medium configuration is changeable
at runtime. You can select between the following options to provide the medium data:
• Host Drive defines that the guest can read from the medium in the host drive.
• Image file gives the guest read-only access to the data in the image. This is typically an
ISO file.
• Empty means a drive without an inserted medium.
Changing between the above, or changing a medium in the host drive that is accessed by a
machine, or changing an image file will signal a medium change to the guest OS. The guest OS
can then react to the change, for example by starting an installation program.
Medium changes can be prevented by the guest, and Oracle VM VirtualBox reflects that by
locking the host drive if appropriate. You can force a medium removal in such situations by
using the VirtualBox Manager or the VBoxManage command line tool. Effectively this is the
equivalent of the emergency eject which many CD/DVD drives provide, with all associated side
effects. The guest OS can issue error messages, just like on real hardware, and guest applications
may misbehave. Use this with caution.
Note: The identification string of the drive provided to the guest, displayed by con-
figuration tools such as the Windows Device Manager, is always VBOX CD-ROM, irre-
spective of the current configuration of the virtual drive. This is to prevent hardware
detection from being triggered in the guest OS every time the configuration is changed.
The standard CD/DVD emulation enables reading of standard data CD and DVD formats only.
As an experimental feature, for additional capabilities, it is possible to give the guest direct access
to the CD/DVD host drive by enabling passthrough mode. Depending on the host hardware, this
may potentially enable the following things to work:
• CD/DVD writing from within the guest, if the host DVD drive is a CD/DVD writer
• Playing audio CDs
• Playing encrypted DVDs
124
6 Virtual Storage
To enable host drive passthrough you can use the
--passthrough option of the
VBoxManage storageattach command. See chapter 9.26, VBoxManage storageattach, page
252.
Even if passthrough is enabled, unsafe commands, such as updating the drive firmware, will
be blocked. Video CD formats are never supported, not even in passthrough mode, and cannot
be played from a virtual machine.
On Oracle Solaris hosts, passthrough requires running Oracle VM VirtualBox with real root
permissions due to security measures enforced by the host.
6.10 iSCSI Servers
iSCSI stands for Internet SCSI and is a standard that supports use of the SCSI protocol over
Internet (TCP/IP) connections. Especially with the advent of Gigabit Ethernet, it has become
affordable to attach iSCSI storage servers simply as remote hard disks to a computer network.
In iSCSI terminology, the server providing storage resources is called an iSCSI target, while the
client connecting to the server and accessing its resources is called an iSCSI initiator.
Oracle VM VirtualBox can transparently present iSCSI remote storage to a virtual machine as
a virtual hard disk. The guest OS will not see any difference between a virtual disk image (VDI
file) and an iSCSI target. To achieve this, Oracle VM VirtualBox has an integrated iSCSI initiator.
Oracle VM VirtualBox’s iSCSI support has been developed according to the iSCSI standard and
should work with all standard-conforming iSCSI targets. To use an iSCSI target with Oracle VM
VirtualBox, you must use the command line. See chapter 9.26, VBoxManage storageattach, page
252.
6.11 vboximg-mount: A Utility for FUSE Mounting a Virtual
Disk Image
vboximg-mount is a command line utility for Mac OS and Linux hosts that provides raw access
to an Oracle VM VirtualBox virtual disk image on the host system. Use this utility to mount, view,
and optionally modify the disk image contents.
The utility is based on Filesystem in Userspace (FUSE) technology and uses the VirtualBox
runtime engine. Ensure that Oracle VM VirtualBox is running on the host system.
Note: When using vboximg-mount, ensure that the following conditions apply:
• The disk image is not being used by any other systems, such as by guest VMs.
• No VMs are running on the host system.
Raw access using FUSE is preferred over direct loopback mounting of virtual disk images,
because it is snapshot aware. It can selectively merge disk differencing images in an exposed
virtual hard disk, providing historical or up-to-date representations of the virtual disk contents.
vboximg-mount enables you to view information about registered VMs, their attached disk
media, and any snapshots. Also, you can view partition information for a disk image.
The vboximg-mount command includes experimental read-only access to file systems inside
a VM disk image. This feature enables you to extract some files from the disk image without
starting the VM and without requiring third-party file system drivers on the host system. FAT,
NTFS, ext2, ext3, and ext4 file systems are supported.
Use the --help option to view information about the vboximg-mount command usage. The
complete command reference is described in chapter 9.55, vboximg-mount, page 328.
125
6 Virtual Storage
When vboximg-mount mounts an Oracle VM VirtualBox disk image, it creates a one level deep
file system at a mount point that you specify. The file system includes a device node that repre-
sents the synthesized disk image as a readable or readable-writeable bytestream. This bytestream
can be mounted either by using the host OS or by using other FUSE-based file systems.
6.11.1 Viewing Detailed Information About a Virtual Disk Image
The following examples show how to use the vboximg-mount command to view information
about virtual disk images.
The following command outputs detailed information about all registered VMs and associated
snapshots:
$ vboximg-mount --list --verbose
------------------------------------------------------
VM Name:
"macOS High Sierra 10.13"
UUID:
3887d96d-831c-4187-a55a-567c504ff0e1
Location:
/Volumes/work/vm_guests/macOS High Sierra 10.13/macOS High Sierra 10.13.vbox
-----------------------
HDD base:
"macOS High Sierra 10.13.vdi"
UUID:
f9ea7173-6869-4aa9-b487-68023a655980
Location:
/Volumes/work/vm_guests/macOS High Sierra 10.13/macOS High Sierra 10.13.vdi
Diff 1:
UUID:
98c2bac9-cf37-443d-a935-4e879b70166d
Location:
/Volumes/work/vm_guests/macOS High Sierra 10.13/
Snapshots/{98c2bac9-cf37-443d-a935-4e879b70166d}.vdi
Diff 2:
UUID:
f401f381-7377-40b3-948e-3c61241b1a42
Location:
/Volumes/work/vm_guests/macOS High Sierra 10.13/
Snapshots/{f401f381-7377-40b3-948e-3c61241b1a42}.vdi
-----------------------
HDD base:
"simple_fixed_disk.vdi"
UUID:
ffba4d7e-1277-489d-8173-22ca7660773d
Location:
/Volumes/work/vm_guests/macOS High Sierra 10.13/simple_fixed_disk.vdi
Diff 1:
UUID:
aecab681-0d2d-468b-8682-93f79dc97a48
Location:
/Volumes/work/vm_guests/macOS High Sierra 10.13/
Snapshots/{aecab681-0d2d-468b-8682-93f79dc97a48}.vdi
Diff 2:
UUID:
70d6b34d-8422-47fa-8521-3b6929a1971c
Location:
/Volumes/work/vm_guests/macOS High Sierra 10.13/
Snapshots/{70d6b34d-8422-47fa-8521-3b6929a1971c}.vdi
------------------------------------------------------
VM Name:
"debian"
UUID:
5365ab5f-470d-44c0-9863-dad532ee5905
Location:
/Volumes/work/vm_guests/debian/debian.vbox
-----------------------
HDD base:
"debian.vdi"
UUID:
96d2e92e-0d4e-46ab-a0f1-008fdbf997e7
Location:
/Volumes/work/vm_guests/debian/ol7.vdi
Diff 1:
UUID:
f9cc866a-9166-42e9-a503-bbfe9b7312e8
Location:
/Volumes/work/vm_guests/debian/Snapshots/
{f9cc866a-9166-42e9-a503-bbfe9b7312e8}.vdi
The following command outputs partition information about the specified disk image:
$ vboximg-mount --image=f9ea7173-6869-4aa9-b487-68023a655980 --list
Virtual disk image:
Path: /Volumes/work/vm_guests/macOS High Sierra 10.13/macOS High Sierra 10.13.vdi
126
6 Virtual Storage
UUID: f9ea7173-6869-4aa9-b487-68023a655980
#
Start Sectors
Size
Offset Type
1
40
409599
199.9M
20480
EFI System
2
409640
67453071
32.1G
209735680
Hierarchical File System Plus (HFS+)
3
67862712
1269535
107.8M
34745708544
Apple Boot (Recovery HD)
6.11.2 Mounting a Virtual Disk Image
The following steps show how to use the vboximg-mount command to mount a partition of a
virtual disk image on the host OS.
1. Create a mount point on the host OS. For example:
$ mkdir macos_sysdisk
2. Show partition information about the virtual disk image.
$ vboximg-mount --image=<uuid> --list
where uuid is the UUID of the disk image.
3. Use vboximg-mount to perform a FUSE mount of a partition on the virtual disk image. For
example:
$ vboximg-mount --image=<uuid> -p 2 macos_sysdisk
where uuid is the UUID for the disk image.
In this example, partition 2 is mounted on the macos_sysdisk mount point. The mount
includes all snapshots for the disk image.
4. Use the host OS to mount the vhdd device node. The FUSE-mounted device node represents
the virtual disk image.
$ ls macos_sysdisk
macOS High Sierra 10.13.vdi vhdd
$ sudo mount macos_sysdisk/vhdd /mnt
127
7 Virtual Networking
As mentioned in chapter 4.9, Network Settings, page 81, Oracle VM VirtualBox provides up to
eight virtual PCI Ethernet cards for each virtual machine. For each such card, you can individually
select the following:
• The hardware that will be virtualized.
• The virtualization mode that the virtual card operates in, with respect to your physical
networking hardware on the host.
Four of the network cards can be configured in the Network section of the Settings window
in VirtualBox Manager. You can configure all eight network cards on the command line using
VBoxManage modifyvm. See chapter 9.10, VBoxManage modifyvm, page 180.
This chapter explains the various networking settings in more detail.
7.1 Virtual Networking Hardware
For each card, you can individually select what kind of hardware will be presented to the virtual
machine. Oracle VM VirtualBox can virtualize the following types of networking hardware:
• AMD PCNet PCI II (Am79C970A)
• AMD PCNet FAST III (Am79C973), the default setting
• Intel PRO/1000 MT Desktop (82540EM)
• Intel PRO/1000 T Server (82543GC)
• Intel PRO/1000 MT Server (82545EM)
• Paravirtualized network adapter (virtio-net)
The PCNet FAST III is the default because it is supported by nearly all operating systems, as
well as by the GNU GRUB boot manager. As an exception, the Intel PRO/1000 family adapters
are chosen for some guest operating system types that no longer ship with drivers for the PCNet
card, such as Windows Vista.
The Intel PRO/1000 MT Desktop type works with Windows Vista and later versions. The T
Server variant of the Intel PRO/1000 card is recognized by Windows XP guests without additional
driver installation. The MT Server variant facilitates OVF imports from other platforms.
The Paravirtualized network adapter (virtio-net) is special. If you select this adapter, then
Oracle VM VirtualBox does not virtualize common networking hardware that is supported by
common guest operating systems. Instead, Oracle VM VirtualBox expects a special software
interface for virtualized environments to be provided by the guest, thus avoiding the complexity
of emulating networking hardware and improving network performance. Oracle VM VirtualBox
provides support for the industry-standard virtio networking drivers, which are part of the open
source KVM project.
The virtio networking drivers are available for the following guest operating systems:
• Linux kernels version 2.6.25 or later can be configured to provide virtio support. Some
distributions have also back-ported virtio to older kernels.
128
7 Virtual Networking
• For Windows 2000, XP, and Vista, virtio drivers can be downloaded and installed from the
KVM project web page:
http://www.linux-kvm.org/page/WindowsGuestDrivers.
Oracle VM VirtualBox also has limited support for jumbo frames. These are networking packets
with more than 1500 bytes of data, provided that you use the Intel card virtualization and
bridged networking. Jumbo frames are not supported with the AMD networking devices. In those
cases, jumbo packets will silently be dropped for both the transmit and the receive direction.
Guest operating systems trying to use this feature will observe this as a packet loss, which may
lead to unexpected application behavior in the guest. This does not cause problems with guest
operating systems in their default configuration, as jumbo frames need to be explicitly enabled.
7.2 Introduction to Networking Modes
Each of the networking adapters can be separately configured to operate in one of the following
modes:
•
Not attached. In this mode, Oracle VM VirtualBox reports to the guest that a network
card is present, but that there is no connection. This is as if no Ethernet cable was plugged
into the card. Using this mode, it is possible to pull the virtual Ethernet cable and disrupt
the connection, which can be useful to inform a guest operating system that no network
connection is available and enforce a reconfiguration.
•
Network Address Translation (NAT). If all you want is to browse the Web, download files,
and view email inside the guest, then this default mode should be sufficient for you, and
you can skip the rest of this section. Please note that there are certain limitations when
using Windows file sharing. See chapter 7.3.3, NAT Limitations, page 132.
•
NAT Network. A NAT network is a type of internal network that allows outbound connec-
tions. See chapter 7.4, Network Address Translation Service, page 132.
•
Bridged networking. This is for more advanced networking needs, such as network sim-
ulations and running servers in a guest. When enabled, Oracle VM VirtualBox connects to
one of your installed network cards and exchanges network packets directly, circumventing
your host operating system’s network stack.
•
Internal networking. This can be used to create a different kind of software-based net-
work which is visible to selected virtual machines, but not to applications running on the
host or to the outside world.
•
Host-only networking. This can be used to create a network containing the host and a set
of virtual machines, without the need for the host’s physical network interface. Instead, a
virtual network interface, similar to a loopback interface, is created on the host, providing
connectivity among virtual machines and the host.
•
Cloud networking. This can be used to connect a local VM to a subnet on a remote cloud
service.
•
Generic networking. Rarely used modes which share the same generic network interface,
by allowing the user to select a driver which can be included with Oracle VM VirtualBox or
be distributed in an extension pack.
The following sub-modes are available:
- UDP Tunnel: Used to interconnect virtual machines running on different hosts di-
rectly, easily, and transparently, over an existing network infrastructure.
129
7 Virtual Networking
- VDE (Virtual Distributed Ethernet) networking: Used to connect to a Virtual Dis-
tributed Ethernet switch on a Linux or a FreeBSD host. At the moment this option
requires compilation of Oracle VM VirtualBox from sources, as the Oracle packages
do not include it.
The following table provides an overview of the most important networking modes.
Mode
VM→Host
VM←Host
VM1↔VM2
VM→Net/LAN
VM←Net/LAN
Host-only
+
+
+
âĂS
âĂS
Internal
âĂS
âĂS
+
âĂS
âĂS
Bridged
+
+
+
+
+
NAT
+
Port forward
âĂS
+
Port forward
NATservice
+
Port forward
+
+
Port forward
The following sections describe the available network modes in more detail.
7.3 Network Address Translation (NAT)
Network Address Translation (NAT) is the simplest way of accessing an external network from
a virtual machine. Usually, it does not require any configuration on the host network and guest
system. For this reason, it is the default networking mode in Oracle VM VirtualBox.
A virtual machine with NAT enabled acts much like a real computer that connects to the In-
ternet through a router. The router, in this case, is the Oracle VM VirtualBox networking engine,
which maps traffic from and to the virtual machine transparently. In Oracle VM VirtualBox this
router is placed between each virtual machine and the host. This separation maximizes security
since by default virtual machines cannot talk to each other.
The disadvantage of NAT mode is that, much like a private network behind a router, the virtual
machine is invisible and unreachable from the outside internet. You cannot run a server this way
unless you set up port forwarding. See chapter 7.3.1, Configuring Port Forwarding with NAT,
page 131.
The network frames sent out by the guest operating system are received by Oracle VM
VirtualBox’s NAT engine, which extracts the TCP/IP data and resends it using the host oper-
ating system. To an application on the host, or to another computer on the same network as the
host, it looks like the data was sent by the Oracle VM VirtualBox application on the host, using
an IP address belonging to the host. Oracle VM VirtualBox listens for replies to the packages
sent, and repacks and resends them to the guest machine on its private network.
Note: Even though the NAT engine separates the VM from the host, the VM has ac-
cess to the host’s loopback interface and the network services running on it. The host’s
loopback interface is accessible as IP address 10.0.2.2. This access to the host’s loop-
back interface can be extremely useful in some cases, for example when running a web
application under development in the VM and the database server on the loopback
interface on the host.
The virtual machine receives its network address and configuration on the private network
from a DHCP server integrated into Oracle VM VirtualBox. The IP address thus assigned to the
virtual machine is usually on a completely different network than the host. As more than one
card of a virtual machine can be set up to use NAT, the first card is connected to the private
network 10.0.2.0, the second card to the network 10.0.3.0 and so on. If you need to change
the guest-assigned IP range, see chapter 10.8, Fine Tuning the Oracle VM VirtualBox NAT Engine,
page 345.
130
7 Virtual Networking
7.3.1 Configuring Port Forwarding with NAT
As the virtual machine is connected to a private network internal to Oracle VM VirtualBox and
invisible to the host, network services on the guest are not accessible to the host machine or to
other computers on the same network. However, like a physical router, Oracle VM VirtualBox
can make selected services available to the world outside the guest through port forwarding.
This means that Oracle VM VirtualBox listens to certain ports on the host and resends all packets
which arrive there to the guest, on the same or a different port.
To an application on the host or other physical or virtual machines on the network, it looks as
though the service being proxied is actually running on the host. This also means that you cannot
run the same service on the same ports on the host. However, you still gain the advantages of
running the service in a virtual machine. For example, services on the host machine or on other
virtual machines cannot be compromised or crashed by a vulnerability or a bug in the service,
and the service can run in a different operating system than the host system.
To configure port forwarding you can use the graphical Port Forwarding editor which can be
found in the Network settings dialog for network adaptors configured to use NAT. Here, you can
map host ports to guest ports to allow network traffic to be routed to a specific port in the guest.
Alternatively, the command line tool VBoxManage can be used. See chapter 9.10, VBoxManage
modifyvm, page 180.
You will need to know which ports on the guest the service uses and to decide which ports to
use on the host. You may want to use the same ports on the guest and on the host. You can use
any ports on the host which are not already in use by a service. For example, to set up incoming
NAT connections to an ssh server in the guest, use the following command:
VBoxManage modifyvm "VM name" --nat-pf1 "guestssh,tcp,,2222,,22"
In the above example, all TCP traffic arriving on port 2222 on any host interface will be
forwarded to port 22 in the guest. The protocol name tcp is a mandatory attribute defining
which protocol should be used for forwarding, udp could also be used. The name guestssh is
purely descriptive and will be auto-generated if omitted. The number after --nat-pf denotes
the network card, as with other VBoxManage commands.
To remove this forwarding rule, use the following command:
VBoxManage modifyvm "VM name" --natpf1 delete "guestssh"
If for some reason the guest uses a static assigned IP address not leased from the built-in DHCP
server, it is required to specify the guest IP when registering the forwarding rule, as follows:
VBoxManage modifyvm "VM name" --natpf1 "guestssh,tcp,,2222,10.0.2.19,22"
This example is identical to the previous one, except that the NAT engine is being told that the
guest can be found at the 10.0.2.19 address.
To forward all incoming traffic from a specific host interface to the guest, specify the IP of that
host interface as follows:
VBoxManage modifyvm "VM name" --natpf1 "guestssh,tcp,127.0.0.1,2222,,22"
This example forwards all TCP traffic arriving on the localhost interface at 127.0.0.1 through
port 2222 to port 22 in the guest.
It is possible to configure incoming NAT connections while the VM is running, see chapter
9.20, VBoxManage controlvm, page 226.
7.3.2 PXE Booting with NAT
PXE booting is now supported in NAT mode. The NAT DHCP server provides a boot file
name of the form vmname.pxe if the directory TFTP exists in the directory where the user’s
VirtualBox.xml file is kept. It is the responsibility of the user to provide vmname.pxe.
131
7 Virtual Networking
7.3.3 NAT Limitations
There are some limitations of NAT mode which users should be aware of, as follows:
• ICMP protocol limitations. Some frequently used network debugging tools, such as ping
or traceroute, rely on the ICMP protocol for sending and receiving messages. Oracle VM
VirtualBox ICMP support has some limitations, meaning ping should work but some other
tools may not work reliably.
• Receiving of UDP broadcasts. The guest does not reliably receive UDP broadcasts. In
order to save resources, it only listens for a certain amount of time after the guest has
sent UDP data on a particular port. As a consequence, NetBios name resolution based on
broadcasts does not always work, but WINS always works. As a workaround, you can use
the numeric IP of the desired server in the \\server\share notation.
• Some protocols are not supported. Protocols other than TCP and UDP are not supported.
GRE is not supported. This means some VPN products, such as PPTP from Microsoft, cannot
be used. There are other VPN products which use only TCP and UDP.
• Forwarding host ports below 1024. On UNIX-based hosts, such as Linux, Oracle Solaris,
and macOS, it is not possible to bind to ports below 1024 from applications that are not
run by root. As a result, if you try to configure such a port forwarding, the VM will refuse
to start.
These limitations normally do not affect standard network use. But the presence of NAT has
also subtle effects that may interfere with protocols that are normally working. One example is
NFS, where the server is often configured to refuse connections from non-privileged ports, which
are those ports not below 1024.
7.4 Network Address Translation Service
The Network Address Translation (NAT) service works in a similar way to a home router, group-
ing the systems using it into a network and preventing systems outside of this network from
directly accessing systems inside it, but letting systems inside communicate with each other and
with systems outside using TCP and UDP over IPv4 and IPv6.
A NAT service is attached to an internal network. Virtual machines which are to make use of it
should be attached to that internal network. The name of internal network is chosen when the
NAT service is created and the internal network will be created if it does not already exist. The
following is an example command to create a NAT network:
VBoxManage natnetwork add --netname natnet1 --network "192.168.15.0/24" --enable
Here, natnet1 is the name of the internal network to be used and 192.168.15.0/24 is the
network address and mask of the NAT service interface. By default in this static configuration the
gateway will be assigned the address 192.168.15.1, the address following the interface address,
though this is subject to change. To attach a DHCP server to the internal network, modify the
example command as follows:
VBoxManage natnetwork add --netname natnet1 --network "192.168.15.0/24" --enable --dhcp on
To add a DHCP server to an existing network, use the following command:
VBoxManage natnetwork modify --netname natnet1 --dhcp on
To disable the DHCP server, use the following command:
VBoxManage natnetwork modify --netname natnet1 --dhcp off
132
7 Virtual Networking
A DHCP server provides a list of registered nameservers, but does not map servers from the
127/8 network.
To start the NAT service, use the following command:
VBoxManage natnetwork start --netname natnet1
If the network has a DHCP server attached then it will start together with the NAT network
service.
To stop the NAT network service, together with any DHCP server:
VBoxManage natnetwork stop --netname natnet1
To delete the NAT network service:
VBoxManage natnetwork remove --netname natnet1
This command does not remove the DHCP server if one is enabled on the internal network.
Port-forwarding is supported, using the
--port-forward-4 switch for IPv4 and
--port-forward-6 for IPv6. For example:
VBoxManage natnetwork modify \
--netname natnet1 --port-forward-4 "ssh:tcp:[]:1022:[192.168.15.5]:22"
This adds a port-forwarding rule from the host’s TCP 1022 port to the port 22 on the guest
with IP address 192.168.15.5. Host port, guest port and guest IP are mandatory. To delete the
rule, use the following command:
VBoxManage natnetwork modify --netname natnet1 --port-forward-4 delete ssh
It is possible to bind a NAT service to specified interface. For example:
VBoxManage setextradata global "NAT/win-nat-test-0/SourceIp4" 192.168.1.185
To see the list of registered NAT networks, use the following command:
VBoxManage list natnetworks
NAT networks can also be created, deleted, and configured using the Network Manager tool in
VirtualBox Manager. Click File, Tools, Network Manager. See chapter 7.11, Network Manager,
page 139.
Note: Even though the NAT service separates the VM from the host, the VM has ac-
cess to the host’s loopback interface and the network services running on it. The host’s
loopback interface is accessible as IP address 10.0.2.2 (assuming the default configura-
tion, in other configurations it’s the respective address in the configured IPv4 or IPv6
network range). This access to the host’s loopback interface can be extremely useful
in some cases, for example when running a web application under development in the
VM and the database server on the loopback interface on the host.
133
7 Virtual Networking
7.5 Bridged Networking
With bridged networking, Oracle VM VirtualBox uses a device driver on your host system that
filters data from your physical network adapter. This driver is therefore called a net filter driver.
This enables Oracle VM VirtualBox to intercept data from the physical network and inject data
into it, effectively creating a new network interface in software. When a guest is using such a
new software interface, it looks to the host system as though the guest were physically connected
to the interface using a network cable. The host can send data to the guest through that interface
and receive data from it. This means that you can set up routing or bridging between the guest
and the rest of your network.
Note: Even though TAP interfaces are no longer necessary on Linux for bridged net-
working, you can still use TAP interfaces for certain advanced setups, since you can
connect a VM to any host interface.
To enable bridged networking, open the Settings dialog of a virtual machine, go to the Net-
work page and select Bridged Network in the drop-down list for the Attached To field. Select a
host interface from the list at the bottom of the page, which contains the physical network inter-
faces of your systems. On a typical MacBook, for example, this will allow you to select between
en1: AirPort, which is the wireless interface, and en0: Ethernet, which represents the interface
with a network cable.
Note: Bridging to a wireless interface is done differently from bridging to a wired in-
terface, because most wireless adapters do not support promiscuous mode. All traffic
has to use the MAC address of the host’s wireless adapter, and therefore Oracle VM
VirtualBox needs to replace the source MAC address in the Ethernet header of an out-
going packet to make sure the reply will be sent to the host interface. When Oracle VM
VirtualBox sees an incoming packet with a destination IP address that belongs to one
of the virtual machine adapters it replaces the destination MAC address in the Ether-
net header with the VM adapter’s MAC address and passes it on. Oracle VM VirtualBox
examines ARP and DHCP packets in order to learn the IP addresses of virtual machines.
Depending on your host operating system, the following limitations apply:
• macOS hosts. Functionality is limited when using AirPort, the Mac’s wireless networking
system, for bridged networking. Currently, Oracle VM VirtualBox supports only IPv4 and
IPv6 over AirPort. For other protocols, such as IPX, you must choose a wired interface.
• Linux hosts. Functionality is limited when using wireless interfaces for bridged network-
ing. Currently, Oracle VM VirtualBox supports only IPv4 and IPv6 over wireless. For other
protocols, such as IPX, you must choose a wired interface.
Also, setting the MTU to less than 1500 bytes on wired interfaces provided by the sky2
driver on the Marvell Yukon II EC Ultra Ethernet NIC is known to cause packet losses
under certain conditions.
Some adapters strip VLAN tags in hardware. This does not allow you to use VLAN trunking
between VM and the external network with pre-2.6.27 Linux kernels, or with host operating
systems other than Linux.
• Oracle Solaris hosts. There is no support for using wireless interfaces. Filtering guest
traffic using IPFilter is also not completely supported due to technical restrictions of the
Oracle Solaris networking subsystem. These issues may be addressed in later releases of
Oracle Solaris 11.
134
7 Virtual Networking
On Oracle Solaris 11 hosts build 159 and above, it is possible to use Oracle Solaris Cross-
bow Virtual Network Interfaces (VNICs) directly with Oracle VM VirtualBox without any
additional configuration other than each VNIC must be exclusive for every guest network
interface.
When using VLAN interfaces with Oracle VM VirtualBox, they must be named according to
the PPA-hack naming scheme, such as e1000g513001. Otherwise, the guest may receive
packets in an unexpected format.
7.6 Internal Networking
Internal Networking is similar to bridged networking in that the VM can directly communicate
with the outside world. However, the outside world is limited to other VMs on the same host
which connect to the same internal network.
Even though technically, everything that can be done using internal networking can also be
done using bridged networking, there are security advantages with internal networking. In
bridged networking mode, all traffic goes through a physical interface of the host system. It is
therefore possible to attach a packet sniffer such as Wireshark to the host interface and log all
traffic that goes over it. If, for any reason, you prefer two or more VMs on the same machine
to communicate privately, hiding their data from both the host system and the user, bridged
networking therefore is not an option.
Internal networks are created automatically as needed. There is no central configuration.
Every internal network is identified simply by its name. Once there is more than one active
virtual network card with the same internal network ID, the Oracle VM VirtualBox support driver
will automatically wire the cards and act as a network switch. The Oracle VM VirtualBox support
driver implements a complete Ethernet switch and supports both broadcast/multicast frames and
promiscuous mode.
In order to attach a VM’s network card to an internal network, set its networking mode to
Internal Networking. There are two ways to accomplish this:
• Use the VM’s Settings window in VirtualBox Manager. In the Network category of the
Settings window, select Internal Network from the drop-down list of networking modes.
Select the name of an existing internal network from the drop-down list below, or enter a
new name into the Name field.
• Use the command line, for example:
VBoxManage modifyvm "VM name" --nic<x> intnet
Optionally, you can specify a network name with the command:
VBoxManage modifyvm "VM name" --intnet<x> "network name"
If you do not specify a network name, the network card will be attached to the network
intnet by default.
Unless you configure the virtual network cards in the guest operating systems that are partici-
pating in the internal network to use static IP addresses, you may want to use the DHCP server
that is built into Oracle VM VirtualBox to manage IP addresses for the internal network. See
chapter 9.50, VBoxManage dhcpserver, page 311.
As a security measure, by default, the Linux implementation of internal networking only allows
VMs running under the same user ID to establish an internal network. However, it is possible to
create a shared internal networking interface, accessible by users with different user IDs.
135
7 Virtual Networking
7.7 Host-Only Networking
Host-only networking can be thought of as a hybrid between the bridged and internal networking
modes. As with bridged networking, the virtual machines can talk to each other and the host
as if they were connected through a physical Ethernet switch. As with internal networking, a
physical networking interface need not be present, and the virtual machines cannot talk to the
world outside the host since they are not connected to a physical networking interface.
When host-only networking is used, Oracle VM VirtualBox creates a new software interface on
the host which then appears next to your existing network interfaces. In other words, whereas
with bridged networking an existing physical interface is used to attach virtual machines to, with
host-only networking a new loopback interface is created on the host. And whereas with internal
networking, the traffic between the virtual machines cannot be seen, the traffic on the loopback
interface on the host can be intercepted.
Note: Hosts running recent macOS versions do not support host-only adapters. These
adapters are replaced by host-only networks, which define a network mask and an IP
address range, where the host network interface receives the lowest address in the
range.
The host network interface gets added and removed dynamically by the operating sys-
tem, whenever a host-only network is used by virtual machines.
On macOS hosts, choose the Host-Only Network option when configuring a network
adapter. The Host-Only Adapter option is provided for legacy support.
Host-only networking is particularly useful for preconfigured virtual appliances, where multi-
ple virtual machines are shipped together and designed to cooperate. For example, one virtual
machine may contain a web server and a second one a database, and since they are intended to
talk to each other, the appliance can instruct Oracle VM VirtualBox to set up a host-only network
for the two. A second, bridged, network would then connect the web server to the outside world
to serve data to, but the outside world cannot connect to the database.
To enable a host-only network interface for a virtual machine, do either of the following:
• Go to the Network page in the virtual machine’s Settings dialog and select an Adapter
tab. Ensure that the Enable Network Adapter check box is selected and choose Host-
Only Adapter for the Attached To field.
• On the command line, use VBoxManage modifyvm vmname --nicx hostonly. See chap-
ter 9.10, VBoxManage modifyvm, page 180.
For host-only networking, as with internal networking, you may find the DHCP server useful
that is built into Oracle VM VirtualBox. This is enabled by default and manages the IP addresses
in the host-only network. Without the DHCP server you would need to configure all IP addresses
statically.
• In VirtualBox Manager you can configure the DHCP server by choosing File, Tools, Net-
work Manager. The Network Manager window lists all host-only networks which are
presently in use. Select the network name and then use the DHCP Server tab to configure
DHCP server settings. See chapter 7.11, Network Manager, page 139.
• Alternatively, you can use the VBoxManage dhcpserver command. See chapter 9.50,
VBoxManage dhcpserver, page 311.
Note: On Linux and macOS hosts the number of host-only interfaces is limited to 128.
There is no such limit for Oracle Solaris and Windows hosts.
136
7 Virtual Networking
On Linux, macOS and Solaris Oracle VM VirtualBox will only allow IP addresses in
192.168.56.0/21 range to be assigned to host-only adapters.
For IPv6 only link-local
addresses are allowed.
If other ranges are desired, they can be enabled by creating
/etc/vbox/networks.conf and specifying allowed ranges there. For example, to allow
10.0.0.0/8 and 192.168.0.0/16 IPv4 ranges as well as 2001::/64 range put the following lines
into /etc/vbox/networks.conf:
*
10.0.0.0/8 192.168.0.0/16
* 2001::/64
Lines starting with the hash # are ignored. The following example allows any addresses,
effectively disabling range control:
* 0.0.0.0/0 ::/0
If the file exists, but no ranges are specified in it, no addresses will be assigned to host-only
adapters. The following example effectively disables all ranges:
# No addresses are allowed for host-only adapters
7.8 UDP Tunnel Networking
This networking mode enables you to interconnect virtual machines running on different hosts.
Technically this is done by encapsulating Ethernet frames sent or received by the guest network
card into UDP/IP datagrams, and sending them over any network available to the host.
UDP Tunnel mode has the following parameters:
• Source UDP port: The port on which the host listens. Datagrams arriving on this port
from any source address will be forwarded to the receiving part of the guest network card.
• Destination address: IP address of the target host of the transmitted data.
• Destination UDP port: Port number to which the transmitted data is sent.
When interconnecting two virtual machines on two different hosts, their IP addresses must be
swapped. On a single host, source and destination UDP ports must be swapped.
In the following example, host 1 uses the IP address 10.0.0.1 and host 2 uses IP address
10.0.0.2. To configure using the command-line:
VBoxManage modifyvm "VM 01 on host 1" --nic<x> generic
VBoxManage modifyvm "VM 01 on host 1" --nic-generic-drv<x> UDPTunnel
VBoxManage modifyvm "VM 01 on host 1" --nic-property<x> dest=10.0.0.2
VBoxManage modifyvm "VM 01 on host 1" --nic-property<x> sport=10001
VBoxManage modifyvm "VM 01 on host 1" --nic-property<x> dport=10002
VBoxManage modifyvm "VM 02 on host 2" --nic<y> generic
VBoxManage modifyvm "VM 02 on host 2" --nic-generic-drv<y> UDPTunnel
VBoxManage modifyvm "VM 02 on host 2" --nic-property<y> dest=10.0.0.1
VBoxManage modifyvm "VM 02 on host 2" --nic-property<y> sport=10002
VBoxManage modifyvm "VM 02 on host 2" --nic-property<y> dport=10001
Of course, you can always interconnect two virtual machines on the same host, by setting the
destination address parameter to 127.0.0.1 on both. It will act similarly to an internal network in
this case. However, the host can see the network traffic which it could not in the normal internal
network case.
137
7 Virtual Networking
Note: On UNIX-based hosts, such as Linux, Oracle Solaris, and Mac OS X, it is not
possible to bind to ports below 1024 from applications that are not run by root. As a
result, if you try to configure such a source UDP port, the VM will refuse to start.
7.9 VDE Networking
Virtual Distributed Ethernet (VDE) is a flexible, virtual network infrastructure system, spanning
across multiple hosts in a secure way. It enables L2/L3 switching, including spanning-tree pro-
tocol, VLANs, and WAN emulation. It is an optional part of Oracle VM VirtualBox which is only
included in the source code.
VDE is a project developed by Renzo Davoli, Associate Professor at the University of Bologna,
Italy.
The basic building blocks of the infrastructure are VDE switches, VDE plugs, and VDE wires
which interconnect the switches.
The Oracle VM VirtualBox VDE driver has a single parameter: VDE network. This is the name
of the VDE network switch socket to which the VM will be connected.
The following basic example shows how to connect a virtual machine to a VDE switch.
1. Create a VDE switch:
vde_switch -s /tmp/switch1
2. Configure VMs using the command-line:
VBoxManage modifyvm "VM name" --nic<x> generic
VBoxManage modifyvm "VM name" --nic-generic-drv<x> VDE
To connect to an automatically allocated switch port:
VBoxManage modifyvm "VM name" --nic-property<x> network=/tmp/switch1
To connect to a specific switch port n:
VBoxManage modifyvm "VM name" --nic-property<x> network=/tmp/switch1[<n>]
This command can be useful for VLANs.
3. (Optional) Map between a VDE switch port and a VLAN.
Using the switch command line:
vde$ vlan/create <VLAN>
vde$ port/setvlan <port> <VLAN>
VDE is available on Linux and FreeBSD hosts only. It is only available if the VDE software and
the VDE plugin library from the VirtualSquare project are installed on the host system.
Note: For Linux hosts, the shared library libvdeplug.so must be available in the search
path for shared libraries.
For more information on setting up VDE networks, please see the documentation accompany-
ing the software. See also http://wiki.virtualsquare.org.
138
7 Virtual Networking
7.10 Cloud Networks
Cloud networks can be used for connections from a local VM to a subnet on a remote Oracle
Cloud Infrastructure instance. See chapter 7.11.3, Cloud Networks Tab, page 140 for details of
how to create and configure a cloud network using the Network Manager tool in VirtualBox
Manager.
To enable a cloud network interface for a virtual machine, do either of the following:
• Go to the Network page in the virtual machine’s Settings dialog and select an Adapter
tab. Ensure that the Enable Network Adapter check box is selected and choose Cloud
Network for the Attached To field.
• On the command line, use VBoxManage modifyvm vmname --nicx cloud. See chapter
9.10, VBoxManage modifyvm, page 180.
7.11 Network Manager
The Network Manager tool in VirtualBox Manager enables you to create, delete, and configure
the following types of networks used by Oracle VM VirtualBox:
• Host-only networks. See chapter 7.11.1, Host-Only Networks Tab, page 139.
• NAT networks. See chapter 7.11.2, NAT Networks Tab, page 139.
• Cloud networks. See chapter 7.11.3, Cloud Networks Tab, page 140.
To display the Network Manager, go to the global Tools menu and click Network.
7.11.1 Host-Only Networks Tab
The Host-Only Networks tab in Network Manager lists all host-only networks that are currently
in use.
• Click Create to add a new host-only network to the list.
• Click Remove to remove a host-only network from the list.
• Click Properties to show or hide settings for the selected host-only network.
To configure a host-only network, select the network name in the Name field and do the
following:
• Use the Adapter tab to configure the network adapter for the host-only network.
• Use the DHCP Server tab to configure settings for the DHCP server used by the host-only
network. The DHCP server is built into Oracle VM VirtualBox and manages IP addresses
for the network automatically.
7.11.2 NAT Networks Tab
The NAT Networks tab in Network Manager lists all NAT networks that are currently in use.
• Click Create to add a new NAT network to the list.
• Click Remove to remove a NAT network from the list.
• Click Properties to show or hide settings for the selected NAT network.
139
7 Virtual Networking
To configure a NAT network, select the network name in the Name field and do the following:
• Use the General Options tab to configure the network settings used by the NAT network.
For example, the network address and mask of the NAT service interface.
• Use the Port Forwarding tab to configure port forwarding rules used by the NAT network.
7.11.3 Cloud Networks Tab
The Cloud Networks tab in Network Manager lists all cloud networks that are currently in use.
• Click Create to add a new cloud network to the list.
• Click Remove to remove a cloud network from the list.
• Click Properties to show or hide settings for the selected cloud network.
To configure a cloud network, select the network name in the Name field and specify the
following:
• Name: The name used for the cloud network.
• Provider: The cloud service provider, such as Oracle Cloud Infrastructure.
• Profile: The cloud profile used to connect to the cloud network.
• ID: The OCID for the cloud tunneling network. Click the Network icon to view the subnets
on Oracle Cloud Infrastructure that are available for tunneling traffic.
See chapter 2.16.10, Using a Cloud Network, page 46 for details of how you can use the
VBoxManage cloud command to create and configure a virtual cloud network (VCN) on
Oracle Cloud Infrastructure.
7.12 Limiting Bandwidth for Network Input/Output
Oracle VM VirtualBox supports limiting of the maximum bandwidth used for network transmis-
sion. Several network adapters of one VM may share limits through bandwidth groups. It is
possible to have more than one such limit.
Note: Oracle VM VirtualBox shapes VM traffic only in the transmit direction, delaying
the packets being sent by virtual machines. It does not limit the traffic being received
by virtual machines.
Limits are configured through VBoxManage. The following example creates a bandwidth group
named Limit, sets the limit to 20 Mbps and assigns the group to the first and second adapters of
the VM:
VBoxManage bandwidthctl "VM name" add Limit --type network --limit 20m
VBoxManage modifyvm "VM name" --nicbandwidthgroup1 Limit
VBoxManage modifyvm "VM name" --nicbandwidthgroup2 Limit
All adapters in a group share the bandwidth limit, meaning that in the example above the
bandwidth of both adapters combined can never exceed 20 Mbps. However, if one adapter does
not require bandwidth the other can use the remaining bandwidth of its group.
The limits for each group can be changed while the VM is running, with changes being picked
up immediately. The following example changes the limit for the group created in the previous
example to 100 Kbps:
140
7 Virtual Networking
VBoxManage bandwidthctl "VM name" set Limit --limit 100k
To completely disable shaping for the first adapter of VM use the following command:
VBoxManage modifyvm "VM name" --nicbandwidthgroup1 none
It is also possible to disable shaping for all adapters assigned to a bandwidth group while VM
is running, by specifying the zero limit for the group. For example, for the bandwidth group
named Limit:
VBoxManage bandwidthctl "VM name" set Limit --limit 0
7.13 Improving Network Performance
Oracle VM VirtualBox provides a variety of virtual network adapters that can be attached to the
host’s network in a number of ways. Depending on which types of adapters and attachments are
used the network performance will be different. Performance-wise the virtio network adapter is
preferable over Intel PRO/1000 emulated adapters, which are preferred over the PCNet family
of adapters. Both virtio and Intel PRO/1000 adapters enjoy the benefit of segmentation and
checksum offloading. Segmentation offloading is essential for high performance as it allows
for less context switches, dramatically increasing the sizes of packets that cross the VM/host
boundary.
Note: Neither virtio nor Intel PRO/1000 drivers for Windows XP support segmentation
offloading. Therefore Windows XP guests never reach the same transmission rates as
other guest types. Refer to MS Knowledge base article 842264 for additional informa-
tion.
Three attachment types: Internal, Bridged, and Host-Only, have nearly identical performance.
The Internal type is a little bit faster and uses less CPU cycles as the packets never reach the
host’s network stack. The NAT attachment type is the slowest and most secure of all attachment
types, as it provides network address translation. The generic driver attachment is special and
cannot be considered as an alternative to other attachment types.
The number of CPUs assigned to VM does not improve network performance and in some cases
may hurt it due to increased concurrency in the guest.
Here is a short summary of things to check in order to improve network performance:
• Whenever possible use the virtio network adapter. Otherwise, use one of the Intel
PRO/1000 adapters.
• Use a Bridged attachment instead of NAT.
• Make sure segmentation offloading is enabled in the guest OS. Usually it will be enabled
by default. You can check and modify offloading settings using the ethtool command on
Linux guests.
• Perform a full detailed analysis of network traffic on the VM’s network adaptor using a
third party tool such as Wireshark. To do this, a promiscuous mode policy needs to be used
on the VM’s network adaptor. Use of this mode is only possible on the following network
types: NAT Network, Bridged Adapter, Internal Network, and Host-Only Adapter.
To setup a promiscuous mode policy, either select from the drop down list located in
the Network Settings dialog for the network adaptor or use the command line tool
VBoxManage. See chapter 9.10, VBoxManage modifyvm, page 180.
Promiscuous mode policies are as follows:
141
7 Virtual Networking
- deny, which hides any traffic not intended for the VM’s network adaptor. This is the
default setting.
- allow-vms, which hides all host traffic from the VM’s network adaptor, but allows it
to see traffic from and to other VMs.
- allow-all, which removes all restrictions. The VM’s network adaptor sees all traffic.
142
8 Remote Virtual Machines
8.1 Remote Display (VRDP Support)
Oracle VM VirtualBox can display virtual machines remotely, meaning that a virtual machine can
execute on one computer even though the machine will be displayed on a second computer, and
the machine will be controlled from there as well, as if the virtual machine was running on that
second computer.
For maximum flexibility, Oracle VM VirtualBox implements remote machine display through a
generic extension interface called the VirtualBox Remote Desktop Extension (VRDE). The base
open source Oracle VM VirtualBox package only provides this interface, while implementations
can be supplied by third parties with Oracle VM VirtualBox extension packages, which must be
installed separately from the base package. See chapter 2.5, Installing Oracle VM VirtualBox and
Extension Packs, page 6.
Oracle provides support for the VirtualBox Remote Display Protocol (VRDP) in such an Oracle
VM VirtualBox extension package.
VRDP is a backwards-compatible extension to Microsoft’s Remote Desktop Protocol (RDP). As
a result, you can use any standard RDP client to control the remote VM.
Even when the extension is installed, the VRDP server is disabled by default. It can easily be
enabled on a per-VM basis either from VirtualBox Manager in the Display settings, see chapter
4.6, Display Settings, page 77, or with the VBoxManage command, as follows:
$ VBoxManage modifyvm <VM-name> --vrde on
By default, the VRDP server uses TCP port 3389. You will need to change the default port if
you run more than one VRDP server, since the port can only be used by one server at a time. You
might also need to change it on Windows hosts since the default port might already be used by
the RDP server that is built into Windows itself. Ports 5000 through 5050 are typically not used
and might be a good choice.
The port can be changed either in the Display settings of the graphical user interface or with
the --vrde-port option of the VBoxManage modifyvm command. You can specify a comma-
separated list of ports or ranges of ports. Use a dash between two port numbers to specify a
range. The VRDP server will bind to one of the available ports from the specified list. For example,
VBoxManage modifyvm VM-name --vrde-port 5000,5010-5012 configures the server to bind
to one of the ports 5000, 5010, 5011, or 5012. See chapter 9.10, VBoxManage modifyvm, page
180.
The actual port used by a running VM can be either queried with the VBoxManage showvminfo
command or seen in VirtualBox Manager on the Runtime tab of the Session Information dialog,
which is accessible from the Machine menu of the VM window.
Oracle VM VirtualBox supports IPv6. If the host OS supports IPv6 the VRDP server will auto-
matically listen for IPv6 connections in addition to IPv4.
8.1.1 Common Third-Party RDP Viewers
Since VRDP is backwards-compatible to RDP, you can use any standard RDP viewer to connect
to such a remote virtual machine. For this to work, you must specify the IP address of your host
system, not of the virtual machine, as the server address to connect to. You must also specify the
port number that the VRDP server is using.
The following examples are for the most common RDP viewers:
143
8 Remote Virtual Machines
•
On Windows, you can use the Microsoft Terminal Services Connector, mstsc.exe, that is
included with Windows. Press the Windows key + R, to display the Run dialog. Enter
mstsc to start the program. You can also find the program in Start, All Programs, Acces-
sories, Remote Desktop Connection. If you use the Run dialog, you can enter options
directly. For example:
mstsc 1.2.3.4:3389
Replace 1.2.3.4 with the host IP address, and 3389 with a different port, if necessary.
Note:
- IPv6 addresses must be enclosed in square brackets to specify a port. For example:
mstsc [fe80::1:2:3:4]:3389
- When connecting to localhost in order to test the connection, the addresses
localhost and 127.0.0.1 might not work using mstsc.exe. Instead, the ad-
dress 127.0.0.2[:3389] has to be used.
•
On other systems, you can use the standard open source rdesktop program. This ships
with most Linux distributions.
With rdesktop, use a command line such as the following:
$ rdesktop -a 16 -N 1.2.3.4:3389
Replace 1.2.3.4 with the host IP address, and 3389 with a different port, if necessary. The
-a 16 option requests a color depth of 16 bits per pixel, which we recommend. For best
performance, after installation of the guest operating system, you should set its display
color depth to the same value. The -N option enables use of the NumPad keys.
•
You can use the Remmina remote desktop client with VRDP. This application is included
with some Linux distributions, such as Debian and Ubuntu.
•
If you run the KDE desktop, you can use krdc, the KDE RDP viewer. A typical command
line is as follows:
$ krdc rdp://1.2.3.4:3389
Replace 1.2.3.4 with the host IP address, and 3389 with a different port, if necessary. The
rdp:// prefix is required with krdc to switch it into RDP mode.
•
With Sun Ray thin clients you can use uttsc, which is part of the Sun Ray Windows
Connector package. See the Sun Ray documentation for details.
8.1.2 VBoxHeadless, the Remote Desktop Server
While any VM started from VirtualBox Manager is capable of running virtual machines remotely,
it is not convenient to have to run the full GUI if you never want to have VMs displayed locally
in the first place. In particular, if you are running server hardware whose only purpose is to host
VMs, and all your VMs are supposed to run remotely over VRDP, then it is pointless to have a
graphical user interface on the server at all. This is especially true for Linux or Oracle Solaris
hosts, as the VirtualBox Manager comes with dependencies on the Qt and SDL libraries. This is
inconvenient if you would rather not have the X Window system on your server at all.
Oracle VM VirtualBox therefore comes with a front-end called VBoxHeadless, which produces
no visible output on the host at all, but still can optionally deliver VRDP data. This front-end has
no dependencies on the X Window system on Linux and Oracle Solaris hosts.
144
8 Remote Virtual Machines
Note: In legacy releases of Oracle VM VirtualBox, the headless server was called
VBoxVRDP. For backwards compatibility, the Oracle VM VirtualBox installation still in-
cludes an executable with that name.
To start a virtual machine with VBoxHeadless, you have the following options:
• Use the VBoxManage command, as follows:
$ VBoxManage startvm <VM-name> --type headless
The --type option causes Oracle VM VirtualBox to use VBoxHeadless as the front-end to
the internal virtualization engine, instead of the Qt front-end.
• Use the VBoxHeadless command, as follows:
VBoxHeadless --startvm <uuid>|<vmname>
This way of starting the VM helps troubleshooting problems reported by
VBoxManage startvm, because you can sometimes see more detailed error mes-
sages, especially for early failures before the VM execution is started. In normal situations
VBoxManage startvm is preferred, since it runs the VM directly as a background process
which has to be done explicitly when directly starting with VBoxHeadless. The full
documentation of the command is in chapter 8.3, VBoxHeadless, page 152.
• Start VBoxHeadless from VirtualBox Manager, by pressing the Shift key when starting a
virtual machine or by selecting Headless Start from the Machine menu.
When you use the VBoxHeadless command to start a VM, the VRDP server will be enabled
according to the VM configuration. You can override the VM’s setting using --vrde command
line parameter. To enable the VRDP server, start the VM as follows:
VBoxHeadless --startvm <uuid>|<vmname> --vrde on
To disable the VRDP server:
VBoxHeadless --startvm <uuid>|<vmname> --vrde off
To have the VRDP server enabled depending on the VM configuration, as for other front-ends:
VBoxHeadless --startvm <uuid>|<vmname> --vrde config
This command is the same as the following:
VBoxHeadless --startvm <uuid>|<vmname>
If you start the VM with VBoxManage startvm then the configuration settings of the VM are
always used.
8.1.3 Step by Step: Creating a Virtual Machine on a Headless Server
The following instructions describe how to create a virtual machine on a headless server over
a network connection. This example creates a virtual machine, establishes an RDP connection
and installs a guest operating system. All of these tasks are done without having to touch the
headless server. You need the following prerequisites:
• Oracle VM VirtualBox on a server machine with a supported host operating system. The
Oracle VM VirtualBox Extension Pack for the VRDP server must be installed, see chapter
8.1, Remote Display (VRDP Support), page 143. The procedures assume a Linux server is
used.
145
8 Remote Virtual Machines
• An ISO file accessible from the server, containing the installation data for the guest operat-
ing system to install. Windows XP is used in the example.
• A terminal connection to that host through which you can access a command line, such as
ssh.
• An RDP viewer on the remote client. See chapter 8.1.1, Common Third-Party RDP Viewers,
page 143 for examples.
Note that on the server machine, since we will only use the headless server, Qt and the X
Window system are not required.
1.
On the headless server, create a new virtual machine. For example:
VBoxManage createvm --name "Windows XP" --ostype WindowsXP --register
If you do not specify --register, you will have to manually use the registervm command
later.
You do not need to specify --ostype, but doing so selects some sensible default values for
certain VM parameters. For example, the RAM size and the type of the virtual network
device. To get a complete list of supported operating systems you can use the following
command:
VBoxManage list ostypes
2.
Make sure the settings for the VM are appropriate for the guest operating system that we
will install. For example:
VBoxManage modifyvm "Windows XP" --memory 256 --acpi on --boot1 dvd --nic1 nat
3.
Create a virtual hard disk for the VM. For example, to create a 10 GB virtual hard disk:
VBoxManage createhd --filename "WinXP.vdi" --size 10000
4.
Add an IDE Controller to the new VM. For example:
VBoxManage storagectl "Windows XP" --name "IDE Controller"
--add ide --controller PIIX4
5.
Set the VDI file you created as the first virtual hard disk of the new VM. For example:
VBoxManage storageattach "Windows XP" --storagectl "IDE Controller"
--port 0 --device 0 --type hdd --medium "WinXP.vdi"
6.
Attach the ISO file that contains the operating system installation that you want to install
later to the virtual machine. This is done so that the VM can boot from it.
VBoxManage storageattach "Windows XP" --storagectl "IDE Controller"
--port 0 --device 1 --type dvddrive --medium /full/path/to/iso.iso
7.
Enable the VirtualBox Remote Desktop Extension, the VRDP server, as follows:
VBoxManage modifyvm "Windows XP" --vrde on
8.
Start the virtual machine using the VBoxHeadless command:
146
8 Remote Virtual Machines
VBoxHeadless --startvm "Windows XP"
If the configuration steps worked, you should see a copyright notice. If you are returned to
the command line, then something did not work correctly.
9. On the client machine, start the RDP viewer and connect to the server. See chapter 8.1.1,
Common Third-Party RDP Viewers, page 143 for details of how to use various common RDP
viewers.
The installation routine of your guest operating system should be displayed in the RDP
viewer.
8.1.4 Remote USB
As a special feature additional to the VRDP support, Oracle VM VirtualBox also supports remote
USB devices over the wire. That is, an Oracle VM VirtualBox guest that runs on one computer can
access the USB devices of the remote computer on which the VRDP data is being displayed the
same way as USB devices that are connected to the actual host. This enables running of virtual
machines on an Oracle VM VirtualBox host that acts as a server, where a client can connect from
elsewhere that needs only a network adapter and a display capable of running an RDP viewer.
When USB devices are plugged into the client, the remote Oracle VM VirtualBox server can access
them.
For these remote USB devices, the same filter rules apply as for other USB devices. See chapter
4.11.1, USB Settings, page 83. All you have to do is specify Remote, or Any, when setting up these
rules.
Accessing remote USB devices is only possible if the RDP client supports this extension. Some
versions of uttsc, a client tailored for the use with Sun Ray thin clients, support accessing remote
USB devices. RDP clients for other platforms will be provided in future Oracle VM VirtualBox
versions.
8.1.5 RDP Authentication
For each virtual machine that is remotely accessible using RDP, you can individually determine
if and how client connections are authenticated. For this, use the VBoxManage modifyvm com-
mand with the --vrde-auth-type option. See chapter 9.10, VBoxManage modifyvm, page 180.
The following methods of authentication are available:
• The null method means that there is no authentication at all. Any client can connect
to the VRDP server and thus the virtual machine. This is very insecure and only to be
recommended for private networks.
• The external method provides external authentication through a special authentication
library. Oracle VM VirtualBox ships with two special authentication libraries:
1. The default authentication library, VBoxAuth, authenticates against user credentials
of the hosts. Depending on the host platform, this means the following:
- On Linux hosts, VBoxAuth.so authenticates users against the host’s PAM system.
- On Windows hosts, VBoxAuth.dll authenticates users against the host’s WinLo-
gon system.
- On macOS hosts, VBoxAuth.dylib authenticates users against the host’s direc-
tory service.
In other words, the external method by default performs authentication with the user
accounts that exist on the host system. Any user with valid authentication credentials
is accepted. For example, the username does not have to correspond to the user
running the VM.
147
8 Remote Virtual Machines
2. An additional library called VBoxAuthSimple performs authentication against creden-
tials configured in the extradata section of a virtual machine’s XML settings file. This
is probably the simplest way to get authentication that does not depend on a running
and supported guest. The following steps are required:
a) Enable VBoxAuthSimple with the following command:
VBoxManage setproperty vrdeauthlibrary "VBoxAuthSimple"
b) To enable the library for a particular VM, you must switch authentication to ex-
ternal, as follows:
VBoxManage modifyvm <VM-name> --vrde-auth-type external
Replace VM-name with the VM name or UUID.
c) You then need to configure users and passwords by writing items into the ma-
chine’s extradata. Since the XML machine settings file, into whose extradata
section the password needs to be written, is a plain text file, Oracle VM VirtualBox
uses hashes to encrypt passwords. The following command must be used:
VBoxManage setextradata <VM-name> "VBoxAuthSimple/users/<user>" <hash>
Replace VM-name with the VM name or UUID, user with the user name who
should be allowed to log in and hash with the encrypted password. The following
command example obtains the hash value for the password secret:
$ VBoxManage internalcommands passwordhash "secret"
2bb80d537b1da3e38bd30361aa855686bde0eacd7162fef6a25fe97bf527a25b
You then use VBoxManage setextradata to store this value in the machine’s
extradata section.
As a combined example, to set the password for the user john and the machine
My VM to secret, use this command:
VBoxManage setextradata "My VM" "VBoxAuthSimple/users/john"
2bb80d537b1da3e38bd30361aa855686bde0eacd7162fef6a25fe97bf527a25b
• The guest authentication method performs authentication with a special component that
comes with the Guest Additions. As a result, authentication is not performed on the host,
but with the guest user accounts.
This method is currently still in testing and not yet supported.
In addition to the methods described above, you can replace the default external authenti-
cation module with any other module. For this, Oracle VM VirtualBox provides a well-defined
interface that enables you to write your own authentication module. This is described in detail
in the Oracle VM VirtualBox Software Development Kit (SDK) reference. See chapter 12, Oracle
VM VirtualBox Programming Interfaces, page 398.
8.1.6 RDP Encryption
RDP features data stream encryption, which is based on the RC4 symmetric cipher, with keys up
to 128-bit. The RC4 keys are replaced at regular intervals, every 4096 packets.
RDP provides the following different authentication methods:
• RDP 4 authentication was used historically. With RDP 4, the RDP client does not perform
any checks in order to verify the identity of the server it connects to. Since user credentials
can be obtained using a man in the middle (MITM) attack, RDP4 authentication is insecure
and should generally not be used.
• RDP 5.1 authentication employs a server certificate for which the client possesses the pub-
lic key. This way it is guaranteed that the server possess the corresponding private key.
However, as this hard-coded private key became public some years ago, RDP 5.1 authenti-
cation is also insecure.
148
8 Remote Virtual Machines
•
RDP 5.2 or later authentication uses Enhanced RDP Security, which means that an external
security protocol is used to secure the connection. RDP 4 and RDP 5.1 use Standard RDP
Security. The VRDP server supports Enhanced RDP Security with TLS protocol and, as a
part of the TLS handshake, sends the server certificate to the client.
The Security/Method VRDE property sets the desired security method, which is used for
a connection. Valid values are as follows:
- Negotiate. Both Enhanced (TLS) and Standard RDP Security connections are al-
lowed. The security method is negotiated with the client. This is the default setting.
- RDP. Only Standard RDP Security is accepted.
- TLS. Only Enhanced RDP Security is accepted. The client must support TLS.
The version of OpenSSL used by Oracle VM VirtualBox supports TLS versions 1.0, 1.1,
1.2, and 1.3.
For example, the following command enables a client to use either Standard or Enhanced
RDP Security connection:
vboxmanage modifyvm <VM-name> --vrde-property "Security/Method=negotiate"
If the Security/Method property is set to either Negotiate or TLS, the TLS protocol will
be automatically used by the server, if the client supports TLS. However, in order to use
TLS the server must possess the Server Certificate, the Server Private Key and the Certifi-
cate Authority (CA) Certificate. The following example shows how to generate a server
certificate.
1. Create a CA self signed certificate.
openssl req -new -x509 -days 365 -extensions v3_ca \
-keyout ca_key_private.pem -out ca_cert.pem
2. Generate a server private key and a request for signing.
openssl genrsa -out server_key_private.pem
openssl req -new -key server_key_private.pem -out server_req.pem
3. Generate the server certificate.
openssl x509 -req -days 365 -in server_req.pem \
-CA ca_cert.pem -CAkey ca_key_private.pem -set_serial 01 -out server_cert.pem
The server must be configured to access the required files. For example:
vboxmanage modifyvm <VM-name> \
--vrde-property "Security/CACertificate=path/ca_cert.pem"
vboxmanage modifyvm <VM-name> \
--vrde-property "Security/ServerCertificate=path/server_cert.pem"
vboxmanage modifyvm <VM-name> \
--vrde-property "Security/ServerPrivateKey=path/server_key_private.pem"
As the client that connects to the server determines what type of encryption will be used, with
rdesktop, the Linux RDP viewer, use the -4 or -5 options.
8.1.7 Multiple Connections to the VRDP Server
The VRDP server of Oracle VM VirtualBox supports multiple simultaneous connections to the
same running VM from different clients. All connected clients see the same screen output and
share a mouse pointer and keyboard focus. This is similar to several people using the same
computer at the same time, taking turns at the keyboard.
The following command enables multiple connection mode:
VBoxManage modifyvm <VM-name> --vrde-multi-con on
149
8 Remote Virtual Machines
8.1.8 Multiple Remote Monitors
To access two or more remote VM displays you have to enable the VRDP multiconnection mode.
See chapter 8.1.7, Multiple Connections to the VRDP Server, page 149.
The RDP client can select the virtual monitor number to connect to using the domain login
parameter (-d). If the parameter ends with @ followed by a number, Oracle VM VirtualBox
interprets this number as the screen index. The primary guest screen is selected with @1, the first
secondary screen is @2, and so on.
The Microsoft RDP 6 client does not let you specify a separate domain name. Instead, enter
domain\username in the Username field. For example, @2\name. name must be supplied, and
must be the name used to log in if the VRDP server is set up to require credentials. If it is not,
you may use any text as the username.
8.1.9 VRDP Video Redirection
The VRDP server can redirect video streams from the guest to the RDP client. Video frames are
compressed using the JPEG algorithm allowing a higher compression ratio than standard RDP
bitmap compression methods. It is possible to increase the compression ratio by lowering the
video quality.
The VRDP server automatically detects video streams in a guest as frequently updated rectan-
gular areas. As a result, this method works with any guest operating system without having to
install additional software in the guest. In particular, the Guest Additions are not required.
On the client side, however, currently only the Windows 7 Remote Desktop Connection client
supports this feature. If a client does not support video redirection, the VRDP server falls back to
regular bitmap updates.
The following command enables video redirection:
VBoxManage modifyvm <VM-name> --vrde-video-channel on
The quality of the video is defined as a value from 10 to 100 percent, representing a JPEG com-
pression level, where lower numbers mean lower quality but higher compression. The quality
can be changed using the following command:
VBoxManage modifyvm <VM-name> --vrde-video-channel-quality 75
8.1.10 VRDP Customization
You can disable display output, mouse and keyboard input, audio, remote USB, or clipboard
individually in the VRDP server.
The following commands change the corresponding server settings:
$ VBoxManage modifyvm <VM-name> --vrde-property Client/DisableDisplay=1
$ VBoxManage modifyvm <VM-name> --vrde-property Client/DisableInput=1
$ VBoxManage modifyvm <VM-name> --vrde-property Client/DisableUSB=1
$ VBoxManage modifyvm <VM-name> --vrde-property Client/DisableAudio=1
$ VBoxManage modifyvm <VM-name> --vrde-property Client/DisableClipboard=1
$ VBoxManage modifyvm <VM-name> --vrde-property Client/DisableUpstreamAudio=1
To reenable a feature, use a similar command without the trailing 1. For example:
$ VBoxManage modifyvm <VM-name> --vrde-property Client/DisableDisplay=
150
8 Remote Virtual Machines
8.2 Teleporting
Oracle VM VirtualBox supports teleporting. Teleporting is moving a virtual machine over a net-
work from one Oracle VM VirtualBox host to another, while the virtual machine is running. This
works regardless of the host operating system that is running on the hosts. You can teleport
virtual machines between Oracle Solaris and macOS hosts, for example.
Teleporting requires that a machine be currently running on one host, which is called the
source. The host to which the virtual machine will be teleported is called the target. The machine
on the target is then configured to wait for the source to contact the target. The machine’s
running state will then be transferred from the source to the target with minimal downtime.
Teleporting happens over any TCP/IP network. The source and the target only need to agree
on a TCP/IP port which is specified in the teleporting settings.
At this time, there are a few prerequisites for this to work, as follows:
•
On the target host, you must configure a virtual machine in Oracle VM VirtualBox with
exactly the same hardware settings as the machine on the source that you want to teleport.
This does not apply to settings which are merely descriptive, such as the VM name, but ob-
viously for teleporting to work, the target machine must have the same amount of memory
and other hardware settings. Otherwise teleporting will fail with an error message.
•
The two virtual machines on the source and the target must share the same storage, hard
disks as well as floppy disks and CD/DVD images. This means that they either use the same
iSCSI targets or that the storage resides somewhere on the network and both hosts have
access to it using NFS or SMB/CIFS.
This also means that neither the source nor the target machine can have any snapshots.
To configure teleporting, perform the following steps:
1.
On the target host, configure the virtual machine to wait for a teleport request to arrive
when it is started, instead of actually attempting to start the machine. This is done with
the following VBoxManage command:
VBoxManage modifyvm <targetvmname> --teleporter on --teleporter-port <port>
targetvmname is the name of the virtual machine on the target host and port is a TCP/IP
port number to be used on both the source and the target hosts. For example, use 6000.
See chapter 9.10, VBoxManage modifyvm, page 180.
2.
Start the VM on the target host. Instead of running, the VM shows a progress dialog,
indicating that it is waiting for a teleport request to arrive.
3.
Start the VM on the source host as usual. When it is running and you want it to be tele-
ported, issue the following command on the source host:
VBoxManage controlvm <sourcevmname> teleport --host <targethost> --port <port>
where sourcevmname is the name of the virtual machine on the source host, which is the
machine that is currently running. targethost is the host or IP name of the target host on
which the machine is waiting for the teleport request, and port must be the same number
as specified in the command on the target host. See chapter 9.20, VBoxManage controlvm,
page 226.
For testing, you can also teleport machines on the same host. In that case, use localhost as the
hostname on both the source and the target host.
151
8 Remote Virtual Machines
Note: In rare cases, if the CPUs of the source and the target are very different, teleport-
ing can fail with an error message, or the target may hang. This may happen especially
if the VM is running application software that is highly optimized to run on a particular
CPU without correctly checking that certain CPU features are actually present. Ora-
cle VM VirtualBox filters what CPU capabilities are presented to the guest operating
system. Advanced users can attempt to restrict these virtual CPU capabilities with the
VBoxManage modifyvm --cpuid-portability-level command. See chapter 9.10,
VBoxManage modifyvm, page 180.
8.3 VBoxHeadless
Oracle VM VirtualBox remote desktop server.
Synopsis
VBoxHeadless [--startvm= [uuid | vmname] ] [--vrde= on | off | config ]
[--vrdeproperty=prop-name=[prop-value]] [--settingspw=[password]]
[--settingspwfile=password-file] [--start-paused=vmname] [--capture]
[--width=width] [--height=height] [--bitrate=bit-rate]
[--filename=filename]
Description
The VBoxHeadless command is an alternate front end that enables you to remotely manage
virtual machines (VMs). The front end is a CLI rather than the VirtualBox Manager graphical
user interface (GUI).
For information about using this command, see chapter 8.1.2, VBoxHeadless, the Remote Desk-
top Server, page 144.
Command Options
--startvm=<uuid> | <vmname>
Specifies the Universally Unique Identifier (UUID) or name of the VM to start.
Use the VBoxManage list vms command to obtain VM information.
The short versions of this option are -s and -startvm.
--vrde=on | off | config
Specifies how to use the VRDP server. The default value is config. Valid values are as
follows:
• on enables the VRDP server.
VBoxHeadless --startvm=<vmname> --vrde=on
• off disables the VRDP server.
VBoxHeadless --startvm=<vmname> --vrde=off
• config enables the VRDP server depending on the VM configuration.
VBoxHeadless --startvm=<vmname> --vrde=config
The short version of this option is -v.
--vrdeproperty=<prop-name>=<prop-value>
Specifies a value for one of the following properties:
152
8 Remote Virtual Machines
• The TCP/Ports property value is a comma-separated list of ports to which the VRDE
server can bind. Use a hyphen (-) between two port numbers to specify a range of
ports.
• The TCP/Address property value is the interface IP address to which to bind the VRDE
server.
--settingspw=[<password>]
Specifies a settings password to access encrypted settings. If you do not specify the pass-
word on the command line, VBoxHeadless prompts you for the password.
--settingspwfile=<password-file>
Specifies the file that contains the settings password.
--start-paused=<vmname>
Starts the specified VM in the paused state.
--capture
Records the VM screen output to a file. In addition to this option, you must use the
--filename option to specify the name of the file.
--width=<width>
Specifies the frame width of the recording in pixels. This option is associated with the
--capture option.
--height=<height>
Specifies the frame height of the recording in pixels. This option is associated with the
--capture option.
--bitrate=<bit-rate>
Specifies the bit rate of the recording in kilobits per second. This option is associated with
the --capture option.
--filename=<filename>
Specifies the name of the file in which to store the recording. The codec used is based on
the file extension that you choose. You must specify this option if you use the --capture
option.
Examples
The following command starts the ol7u4 VM:
$ VBoxHeadless --startvm "ol7u4"
The following command starts the ol7u6 VM in the Paused state.
$ VBoxHeadless --startvm "ol7u6" --start-paused
The following command starts the ol7u6 VM and records the session. The recording is saved
to the ol7u6-recording WebM file.
$ VBoxHeadless --startvm "ol7u6" --capture --filename ol7u6-recording.webm
See Also
chapter 9.5, VBoxManage list, page 170, chapter 9.19, VBoxManage startvm, page 225
153
9 VBoxManage
9.1 Introduction
As briefly mentioned in chapter 2.18, Alternative Front-Ends, page 48, VBoxManage is the
command-line interface to Oracle VM VirtualBox. With it, you can completely control Oracle
VM VirtualBox from the command line of your host operating system. VBoxManage supports all
the features that the graphical user interface gives you access to, but it supports a lot more than
that. It exposes all the features of the virtualization engine, even those that cannot be accessed
from the GUI.
You will need to use the command line if you want to do the following:
• Use a different user interface than the main GUI such as the VBoxHeadless server.
• Control some of the more advanced and experimental configuration settings for a VM.
There are two main things to keep in mind when using VBoxManage. First, VBoxManage must
always be used with a specific subcommand, such as list or createvm or startvm. All the
subcommands that VBoxManage supports are described in detail in chapter 9, VBoxManage, page
154.
Second, most of these subcommands require that you specify a particular virtual machine after
the subcommand. There are two ways you can do this:
• You can specify the VM name, as it is shown in the Oracle VM VirtualBox GUI. Note that if
that name contains spaces, then you must enclose the entire name in double quotes. This
is always required with command line arguments that contain spaces. For example:
VBoxManage startvm "Windows XP"
• You can specify the UUID, which is the internal unique identifier that Oracle VM VirtualBox
uses to refer to the virtual machine. Assuming that the VM called “Windows XP” has the
UUID shown below, the following command has the same effect as the previous example:
VBoxManage startvm 670e746d-abea-4ba6-ad02-2a3b043810a5
You can enter VBoxManage list vms to have all currently registered VMs listed with all their
settings, including their respective names and UUIDs.
Some typical examples of how to control Oracle VM VirtualBox from the command line are
listed below:
• To create a new virtual machine from the command line and immediately register it with
Oracle VM VirtualBox, use VBoxManage createvm with the --register option, as follows:
$ VBoxManage createvm --name "SUSE 10.2" --register
VirtualBox Command Line Management Interface Version <version-number>
Virtual machine ’SUSE 10.2’ is created.
UUID: c89fc351-8ec6-4f02-a048-57f4d25288e5
Settings file: ’/home/username/.config/VirtualBox/Machines/SUSE 10.2/SUSE 10.2.xml’
154
9 VBoxManage
As can be seen from the above output, a new virtual machine has been created with a new
UUID and a new XML settings file.
For more details, see chapter 9.9, VBoxManage createvm, page 179.
• To show the configuration of a particular VM, use VBoxManage showvminfo. See chapter
9.6, VBoxManage showvminfo, page 175 for details and an example.
• To change settings while a VM is powered off, use VBoxManage modifyvm. For example:
VBoxManage modifyvm "Windows XP" --memory 512
See also chapter 9.10, VBoxManage modifyvm, page 180.
• To change the storage configuration, such as to add a storage controller and then a virtual
disk, use VBoxManage storagectl and VBoxManage storageattach. See chapter 9.27,
VBoxManage storagectl, page 256 and chapter 9.26, VBoxManage storageattach, page 252.
• To control VM operation, use one of the following:
- To start a VM that is currently powered off, use VBoxManage startvm. See chapter
9.19, VBoxManage startvm, page 225.
- To pause or save a VM that is currently running or change some of its settings, use
VBoxManage controlvm. See chapter 9.20, VBoxManage controlvm, page 226.
9.2 Commands Overview
When running VBoxManage without parameters or when supplying an invalid command line, the
following command syntax list is shown. Note that the output will be slightly different depending
on the host platform. If in doubt, check the output of VBoxManage for the commands available
on your particular host.
VBoxManage [-V | --version] [--dump-build-type] [-q | --nologo]
[--settingspw=password] [--settingspwfile=pw-file] [@response-file]
[[help] subcommand]
VBoxManage list [--long] [--sorted] [bridgedifs | cloudnets | cloudprofiles
| cloudproviders | cpu-profiles | dhcpservers | dvds | extpacks | floppies
| groups | hddbackends | hdds | hostcpuids | hostdrives | hostdvds
| hostfloppies | hostinfo | hostonlyifs | hostonlynets | intnets | natnets
| ostypes | runningvms | screenshotformats | systemproperties | usbfilters
| usbhost | vms | webcams]
VBoxManage showvminfo <uuid | vmname> [--details] [--machinereadable]
[--password-id] [--password]
VBoxManage showvminfo <uuid | vmname> <--log=index> [--password-id id]
[--password file|-]
VBoxManage registervm <filename> --password file
VBoxManage unregistervm <uuid | vmname> [--delete] [--delete-all]
VBoxManage createvm <--name=name> [--basefolder=basefolder] [--default]
[--groups=group-ID,...]
[--ostype=ostype] [--register] [--uuid=uuid]
[--cipher cipher] [--password-id password-id] [--password file]
155
9 VBoxManage
VBoxManage modifyvm <uuid | vmname> [--name=name]
[--groups= group [,group...]
]
[--description=description]
[--os-type=OS-type] [--icon-file=filename] [--memory=size-in-MB]
[--page-fusion= on | off ] [--vram=size-in-MB] [--acpi= on | off ]
[--ioapic= on | off ] [--hardware-uuid=UUID] [--cpus=CPU-count]
[--cpu-hotplug= on | off ] [--plug-cpu=CPU-ID] [--unplug-cpu=CPU-ID]
[--cpu-execution-cap=number] [--pae= on | off ] [--long-mode= on | off ]
[--ibpb-on-vm-exit= on | off ] [--ibpb-on-vm-entry= on | off ]
[--spec-ctrl= on | off ] [--l1d-flush-on-sched= on | off ]
[--l1d-flush-on-vm-entry= on | off ] [--mds-clear-on-sched= on | off ]
[--mds-clear-on-vm-entry= on | off ] [--cpu-profile= host | Intel 8086
| Intel 80286 | Intel 80386 ] [--hpet= on | off ] [--hwvirtex= on | off ]
[--triple-fault-reset= on | off ] [--apic= on | off ] [--x2apic= on | off ]
[--paravirt-provider= none | default | legacy | minimal | hyperv | kvm ]
[--paravirt-debug= key=value [,key=value...]
]
[--nested-paging= on
| off ] [--large-pages= on | off ] [--vtx-vpid= on | off ] [--vtx-ux= on
| off ] [--nested-hw-virt= on | off ] [--virt-vmsave-vmload= on | off ]
[--accelerate-3d= on | off ] [--accelerate-2d-video= on | off ]
[--chipset= ich9 | piix3 ] [--iommu= none | automatic | amd | intel ]
[--tpm-type= none | 1.2 | 2.0 | host | swtpm ] [--tpm-location= location ]
[--bios-logo-fade-in= on | off ] [--bios-logo-fade-out= on | off ]
[--bios-logo-display-time=msec] [--bios-logo-image-path=pathname]
[--bios-boot-menu= disabled | menuonly | messageandmenu ] [--bios-apic=
disabled | apic | x2apic ] [--bios-system-time-offset=msec]
[--bios-pxe-debug= on | off ] [--system-uuid-le= on | off ] [--bootX= none
| floppy | dvd | disk | net ] [--rtc-use-utc= on | off ]
[--graphicscontroller= none | vboxvga | vmsvga | vboxsvga ]
[--snapshot-folder= default | pathname ] [--firmware= bios | efi | efi32
| efi64 ] [--guest-memory-balloon=size-in-MB] [--default-frontend=
default | name ] [--vm-process-priority= default | flat | low | normal | high
]
VBoxManage modifyvm <uuid | vmname> [--nicN= none | null | nat | bridged
| intnet | hostonly | hostonlynet | generic | natnetwork | cloud ]
[--nic-typeN= Am79C970A | Am79C973 | 82540EM | 82543GC | 82545EM | virtio ]
[--cable-connectedN= on | off ] [--nic-traceN= on | off ]
[--nic-trace-fileN=filename] [--nic-propertyN=name= [value] ]
[--nic-speedN=kbps] [--nic-boot-prioN=priority] [--nic-promiscN= deny
| allow-vms | allow-all ] [--nic-bandwidth-groupN= none | name ]
[--bridge-adapterN= none | device-name ] [--cloud-networkN=network-name]
[--host-only-adapterN= none | device-name ]
[--host-only-netN=network-name] [--intnetN=network-name]
[--nat-networkN=network-name] [--nic-generic-drvN=driver-name]
[--mac-addressN= auto | MAC-address ]
VBoxManage modifyvm <uuid | vmname> [--nat-netN= network | default ]
[--nat-pfN= [rule-name],tcp | udp,[host-IP],hostport,[guest-IP],guestport
] [--nat-pfN=delete=rule-name] [--nat-tftp-prefixN=prefix]
[--nat-tftp-fileN=filename] [--nat-tftp-serverN=IP-address]
[--nat-bind-ipN=IP-address] [--nat-dns-pass-domainN= on | off ]
[--nat-dns-proxyN= on | off ] [--nat-dns-host-resolverN= on | off ]
[--nat-localhostreachableN= on | off ]
[--nat-settingsN=[mtu],[socksnd],[sockrcv],[tcpsnd],[tcprcv]]
[--nat-alias-modeN= default | [log],[proxyonly],[sameports] ]
156
9 VBoxManage
VBoxManage modifyvm <uuid | vmname> [--mouse= ps2 | usb | usbtablet
| usbmultitouch | usbmtscreenpluspad ] [--keyboard= ps2 | usb ] [--uartN=
off | IO-baseIRQ ] [--uart-modeN= disconnected | server pipe | client pipe
| tcpserver port | tcpclient hostname:port | file filename | device-name ]
[--uart-typeN= 16450 | 16550A | 16750 ] [--lpt-modeN=device-name] [--lptN=
off | IO-baseIRQ ] [--audio-controller= ac97 | hda | sb16 ] [--audio-codec=
stac9700 | ad1980 | stac9221 | sb16 ] [--audio-driver= none | default | null
| dsound | was | oss | alsa | pulse | coreaudio ] [--audio-enabled= on | off ]
[--audio-in= on | off ] [--audio-out= on | off ] [--clipboard-mode=
disabled | hosttoguest | guesttohost | bidirectional ] [--drag-and-drop=
disabled | hosttoguest | guesttohost | bidirectional ]
[--monitor-count=number] [--usb-ehci= on | off ] [--usb-ohci= on | off ]
[--usb-xhci= on | off ] [--usb-rename=old-namenew-name]
VBoxManage modifyvm <uuid | vmname> [--recording= on | off ]
[--recording-screens= all | none | screen-ID[,screen-ID...]
]
[--recording-file=filename] [--recording-max-size=MB]
[--recording-max-time=msec] [--recording-opts= key=value[,key=value...]
]
[--recording-video-fps=fps] [--recording-video-rate=rate]
[--recording-video-res=widthheight]
VBoxManage modifyvm <uuid | vmname> [--vrde= on | off ]
[--vrde-property=property-name= [property-value] ] [--vrde-extpack=
default | name ] [--vrde-port=port] [--vrde-address=hostip]
[--vrde-auth-type= null | external | guest ] [--vrde-auth-library= default
| name ] [--vrde-multi-con= on | off ] [--vrde-reuse-con= on | off ]
[--vrde-video-channel= on | off ] [--vrde-video-channel-quality=percent]
VBoxManage modifyvm <uuid | vmname> [--teleporter= on | off ]
[--teleporter-port=port] [--teleporter-address= address | empty ]
[--teleporter-password=password] [--teleporter-password-file= filename
| stdin ] [--cpuid-portability-level=level] [--cpuid-set=leaf [:subleaf]
eaxÂăebxÂăecxÂăedx] [--cpuid-remove=leaf [:subleaf] ]
[--cpuid-remove-all]
VBoxManage modifyvm <uuid | vmname> [--tracing-enabled= on | off ]
[--tracing-config=string] [--tracing-allow-vm-access= on | off ]
VBoxManage modifyvm <uuid | vmname> [--usb-card-reader= on | off ]
VBoxManage modifyvm <uuid | vmname> [--autostart-enabled= on | off ]
[--autostart-delay=seconds]
VBoxManage modifyvm <uuid | vmname> [--guest-debug-provider= none | native
| gdb | kd ] [--guest-debug-io-provider= none | tcp | udp | ipc ]
[--guest-debug-address= IP-Address | path ] [--guest-debug-port=port]
VBoxManage modifyvm <uuid | vmname> [--pci-attach=host-PCI-address
[@guest-PCI-bus-address] ] [--pci-detach=host-PCI-address]
VBoxManage modifyvm <uuid | vmname> [--testing-enabled= on | off ]
[--testing-mmio= on | off ] [--testing-cfg-dwordidx=value]
VBoxManage clonevm <vmname|uuid> [--basefolder=basefolder]
[--groups=group,. . . ]
[--mode=machine | --mode=machinechildren
| --mode=all] [--name=name] [--options=option,. . . ]
[--register]
[--snapshot=snapshot-name] [--uuid=uuid]
VBoxManage movevm <uuid | vmname> [--type=basic] [--folder=folder-name]
VBoxManage encryptvm <uuid | vmname> setencryption --old-password file
--cipher cipher-identifier --new-password file
--new-password-id password-identifier --force
157
9 VBoxManage
VBoxManage encryptvm <uuid | vmname> checkpassword <file>
VBoxManage encryptvm <uuid | vmname> addpassword --password file
--password-id password-identifier
VBoxManage encryptvm <uuid | vmname> removepassword <password-identifier>
VBoxManage cloud <--provider=name> <--profile=name>
list instances [--state=string] [--compartment-id=string]
VBoxManage cloud <--provider=name> <--profile=name>
list images <--compartment-id=string> [--state=string]
VBoxManage cloud <--provider=name> <--profile=name>
list vnicattachments <--compartment-id=string> [--filter=string]
VBoxManage cloud <--provider=name> <--profile=name>
instance create <--domain-name=name> <<--image-id=id>
| <--boot-volume-id=id>> <--display-name=name> <--shape=type>
<--subnet=id> [--boot-disk-size=size in GB] [--publicip=true/false]
[--privateip=IP address] [--public-ssh-key=key string. . . ]
[--launch-mode=NATIVE/EMULATED/PARAVIRTUALIZED]
[--cloud-init-script-path=path to a script]
VBoxManage cloud <--provider=name> <--profile=name>
instance info <--id=unique id>
VBoxManage cloud <--provider=name> <--profile=name>
instance terminate <--id=unique id>
VBoxManage cloud <--provider=name> <--profile=name>
instance start <--id=unique id>
VBoxManage cloud <--provider=name> <--profile=name>
instance pause <--id=unique id>
VBoxManage cloud <--provider=name> <--profile=name>
instance reset <--id=unique id>
VBoxManage cloud <--provider=name> <--profile=name>
image create <--display-name=name> [--bucket-name=name]
[--object-name=name] [--instance-id=unique id]
VBoxManage cloud <--provider=name> <--profile=name>
image info <--id=unique id>
VBoxManage cloud <--provider=name> <--profile=name>
image delete <--id=unique id>
VBoxManage cloud <--provider=name> <--profile=name>
image import <--id=unique id> [--bucket-name=name] [--object-name=name]
VBoxManage cloud <--provider=name> <--profile=name>
image export <--id=unique id> <--display-name=name>
[--bucket-name=name] [--object-name=name]
VBoxManage cloud <--provider=name> <--profile=name>
network setup [--gateway-os-name=string] [--gateway-os-version=string]
[--gateway-shape=string] [--tunnel-network-name=string]
[--tunnel-network-range=string] [--proxy=string]
[--compartment-id=string]
VBoxManage cloud <--provider=name> <--profile=name>
network create <--name=string> <--network-id=string> [--enable
| --disable]
VBoxManage cloud network update <--name=string> [--network-id=string]
[--enable | --disable]
VBoxManage cloud network delete <--name=string>
VBoxManage cloud network info <--name=string>
VBoxManage cloudprofile <--provider=name> <--profile=name> add
[--clouduser=unique id] [--fingerprint=MD5 string] [--keyfile=path]
158
9 VBoxManage
[--passphrase=string] [--tenancy=unique id] [--compartment=unique id]
[--region=string]
VBoxManage cloudprofile <--provider=name> <--profile=name> update
[--clouduser=unique id] [--fingerprint=MD5 string] [--keyfile=path]
[--passphrase=string] [--tenancy=unique id] [--compartment=unique id]
[--region=string]
VBoxManage cloudprofile <--provider=name> <--profile=name> delete
VBoxManage cloudprofile <--provider=name> <--profile=name> show
VBoxManage import <ovfname | ovaname> [--dry-run] [--options= keepallmacs
| keepnatmacs | importtovdi ] [--vsys=n] [--ostype=ostype] [--vmname=name]
[--settingsfile=file] [--basefolder=folder] [--group=group] [--memory=MB]
[--cpus=n] [--description=text] [--eula= show | accept ] [--unit=n]
[--ignore] [--scsitype= BusLogic | LsiLogic ] [--disk=path]
[--controller=index] [--port=n]
VBoxManage import OCI:// --cloud [--ostype=ostype] [--vmname=name]
[--basefolder=folder] [--memory=MB] [--cpus=n] [--description=text]
<--cloudprofile=profile> <--cloudinstanceid=id>
[--cloudbucket=bucket]
VBoxManage export <machines> <--output=name> [--legacy09 | --ovf09
| --ovf10 | --ovf20] [--manifest] [--options= manifest | iso | nomacs
| nomacsbutnat . . .
]
[--vsys=virtual-system-number]
[--description=description-info] [--eula=license-text]
[--eulafile=filename] [--product=product-name]
[--producturl=product-URL] [--vendor=vendor-name]
[--vendorurl=vendor-URL] [--version=version-info] [--vmname=vmname]
VBoxManage export <machine> <--output=cloud-service-provider> [--opc10]
[--vmname=vmname] [--cloud=virtual-system-number]
[--cloudprofile=cloud-profile-name] [--cloudshape=cloud-shape-name]
[--clouddomain=cloud-domain] [--clouddisksize=disk-size-in-GB]
[--cloudbucket=bucket-name] [--cloudocivcn=OCI-VCN-ID]
[--cloudocisubnet=OCI-subnet-ID] [--cloudkeepobject= true | false ]
[--cloudlaunchinstance= true | false ] [--cloudlaunchmode= EMULATED
| PARAVIRTUALIZED ] [--cloudpublicip= true | false ]
VBoxManage signova <ova> <--certificate=file> <--private-key=file>
[--private-key-password-file=password-file
| --private-key-password=password] [--digest-type=type] [--pkcs7
| --no-pkcs7] [--intermediate-cert=file] [--force] [--verbose] [--quiet]
[--dry-run]
VBoxManage startvm <uuid | vmname . . . > [--putenv=name[=value]] [--type= [gui
| headless | sdl | separate] ] --password file --password-id password
identifier
VBoxManage controlvm <uuid | vmname> pause
VBoxManage controlvm <uuid | vmname> resume
VBoxManage controlvm <uuid | vmname> reset
VBoxManage controlvm <uuid | vmname> poweroff
VBoxManage controlvm <uuid | vmname> savestate
VBoxManage controlvm <uuid | vmname> acpipowerbutton
VBoxManage controlvm <uuid | vmname> acpisleepbutton
VBoxManage controlvm <uuid | vmname> reboot
VBoxManage controlvm <uuid | vmname> shutdown [--force]
159
9 VBoxManage
VBoxManage controlvm <uuid | vmname> keyboardputscancode <hex> [hex. . . ]
VBoxManage controlvm <uuid | vmname> keyboardputstring <string> [string. . . ]
VBoxManage controlvm <uuid | vmname> keyboardputfile <filename>
VBoxManage controlvm <uuid | vmname> setlinkstateN <on | off>
VBoxManage controlvm <uuid | vmname> nicN <null | nat | bridged | intnet
| hostonly | generic | natnetwork> [device-name]
VBoxManage controlvm <uuid | vmname> nictraceN <on | off>
VBoxManage controlvm <uuid | vmname> nictracefileN <filename>
VBoxManage controlvm <uuid | vmname> nicpropertyN <prop-name=prop-value>
VBoxManage controlvm <uuid | vmname> nicpromiscN <deny | allow-vms
| allow-all>
VBoxManage controlvm <uuid | vmname> natpfN <[rulename] ,tcp | udp,
[host-IP] , hostport, [guest-IP] , guestport >
VBoxManage controlvm <uuid | vmname> natpfN delete <rulename>
VBoxManage controlvm <uuid | vmname> guestmemoryballoon <balloon-size>
VBoxManage controlvm <uuid | vmname> usbattach <uuid | address>
[--capturefile=filename]
VBoxManage controlvm <uuid | vmname> usbdetach <uuid | address>
VBoxManage controlvm <uuid | vmname> audioin <on | off>
VBoxManage controlvm <uuid | vmname> audioout <on | off>
VBoxManage controlvm <uuid | vmname> clipboard mode <disabled | hosttoguest
| guesttohost | bidirectional>
VBoxManage controlvm <uuid | vmname> clipboard filetransfers <on | off>
VBoxManage controlvm <uuid | vmname> draganddrop <disabled | hosttoguest
| guesttohost | bidirectional>
VBoxManage controlvm <uuid | vmname> vrde <on | off>
VBoxManage controlvm <uuid | vmname> vrdeport <port>
VBoxManage controlvm <uuid | vmname> vrdeproperty <prop-name=prop-value>
VBoxManage controlvm <uuid | vmname> vrdevideochannelquality <percentage>
VBoxManage controlvm <uuid | vmname> setvideomodehint <xres> <yres>
<bpp> [[display] [enabled:yes | no | [x-originÂăy-origin]] ]
VBoxManage controlvm <uuid | vmname> setscreenlayout <display> <on
| primary x-originÂăy-originÂăx-resolutionÂăy-resolutionÂăbpp | off>
VBoxManage controlvm <uuid | vmname> screenshotpng <filename> [display]
VBoxManage controlvm <uuid | vmname> recording <on | off>
VBoxManage controlvm <uuid | vmname> recording screens <all | none
| screen-ID[,screen-ID...]>
VBoxManage controlvm <uuid | vmname> recording filename <filename>
VBoxManage controlvm <uuid | vmname> recording videores <widthxheight>
VBoxManage controlvm <uuid | vmname> recording videorate <rate>
VBoxManage controlvm <uuid | vmname> recording videofps <fps>
VBoxManage controlvm <uuid | vmname> recording maxtime <sec>
VBoxManage controlvm <uuid | vmname> recording maxfilesize <MB>
VBoxManage controlvm <uuid | vmname> setcredentials <username>
--passwordfile= <filename | password> <domain-name> --allowlocallogon=
<yes | no>
VBoxManage controlvm <uuid | vmname> teleport <--host=host-name>
<--port=port-name> [--maxdowntime=msec] [--passwordfile=filename
| --password=password]
VBoxManage controlvm <uuid | vmname> plugcpu <ID>
VBoxManage controlvm <uuid | vmname> unplugcpu <ID>
VBoxManage controlvm <uuid | vmname> cpuexecutioncap <num>
160
9 VBoxManage
VBoxManage controlvm <uuid | vmname> vm-process-priority <default | flat
| low | normal | high>
VBoxManage controlvm <uuid | vmname> webcam attach [pathname [settings] ]
VBoxManage controlvm <uuid | vmname> webcam detach [pathname]
VBoxManage controlvm <uuid | vmname> webcam list
VBoxManage controlvm <uuid | vmname> addencpassword <ID> <password-file
| -> [--removeonsuspend= yes | no ]
VBoxManage controlvm <uuid | vmname> removeencpassword <ID>
VBoxManage controlvm <uuid | vmname> removeallencpasswords
VBoxManage controlvm <uuid | vmname> changeuartmodeN disconnected
| server pipe-name | client pipe-name | tcpserver port
| tcpclient hostname:port | file filename | device-name
VBoxManage controlvm <uuid | vmname> autostart-enabledN on | off
VBoxManage controlvm <uuid | vmname> autostart-delayseconds
VBoxManage unattended detect <--iso=install-iso> [--machine-readable]
VBoxManage unattended install <uuid|vmname> <--iso=install-iso>
[--user=login] [--password=password] [--password-file=file]
[--full-user-name=name] [--key=product-key] [--install-additions]
[--no-install-additions] [--additions-iso=add-iso] [--install-txs]
[--no-install-txs] [--validation-kit-iso=testing-iso] [--locale=ll_CC]
[--country=CC] [--time-zone=tz] [--hostname=fqdn]
[--package-selection-adjustment=keyword] [--dry-run]
[--auxiliary-base-path=path] [--image-index=number]
[--script-template=file] [--post-install-template=file]
[--post-install-command=command]
[--extra-install-kernel-parameters=params] [--language=lang]
[--start-vm=session-type]
VBoxManage discardstate <uuid | vmname>
VBoxManage adoptstate <uuid | vmname> <state-filename>
VBoxManage snapshot <uuid|vmname>
VBoxManage snapshot <uuid|vmname> take <snapshot-name>
[--description=description] [--live]
[--uniquename Number,Timestamp,Space,Force]
VBoxManage snapshot <uuid|vmname> delete <snapshot-name>
VBoxManage snapshot <uuid|vmname> restore <snapshot-name>
VBoxManage snapshot <uuid|vmname> restorecurrent
VBoxManage snapshot <uuid|vmname> edit <snapshot-name | --current>
[--description=description] [--name=new-name]
VBoxManage snapshot <uuid|vmname> list [[--details] | [--machinereadable]]
VBoxManage snapshot <uuid|vmname> showvminfo <snapshot-name>
VBoxManage closemedium [disk | dvd | floppy] <uuid | filename> [--delete]
VBoxManage storageattach <uuid | vmname> <--storagectl=name>
[--bandwidthgroup= name | none ] [--comment=text] [--device=number]
[--discard= on | off ] [--encodedlun=lun] [--forceunmount]
[--hotpluggable= on | off ] [--initiator=initiator] [--intnet] [--lun=lun]
[--medium= none | emptydrive | additions | uuid | filename | host:drive
| iscsi ] [--mtype= normal | writethrough | immutable | shareable | readonly
| multiattach ] [--nonrotational= on | off ] [--passthrough= on | off ]
[--passwordfile=file] [--password=password] [--port=number] [--server=
161
9 VBoxManage
name | ip ] [--setparentuuid=uuid] [--setuuid=uuid] [--target=target]
[--tempeject= on | off ] [--tport=port] [--type= dvddrive | fdd | hdd ]
[--username=username]
VBoxManage storagectl <uuid | vmname> <--name=controller-name> [--add=
floppy | ide | pcie | sas | sata | scsi | usb ] [--controller= BusLogic
| I82078 | ICH6 | IntelAhci | LSILogic | LSILogicSAS | NVMe | PIIX3 | PIIX4
| USB | VirtIO ] [--bootable= on | off ] [--hostiocache= on | off ]
[--portcount=count] [--remove] [--rename=new-controller-name]
VBoxManage bandwidthctl <uuid | vmname> add <bandwidth-group-name>
<--limit=bandwidth-limit[k|m|g|K|M|G]> <--type=disk|network>
VBoxManage bandwidthctl <uuid | vmname> list [--machinereadable]
VBoxManage bandwidthctl <uuid | vmname> remove <bandwidth-group-name>
VBoxManage bandwidthctl <uuid | vmname> set <bandwidth-group-name>
<--limit=bandwidth-limit[k|m|g|K|M|G]>
VBoxManage showmediuminfo [disk | dvd | floppy] <uuid | filename>
VBoxManage createmedium [disk | dvd | floppy] <--filename=filename>
[--size=megabytes | --sizebyte=bytes] [--diffparent= UUID | filename ]
[--format= VDI | VMDK | VHD ]
[--variant Standard,Fixed,Split2G,Stream,ESX,Formatted,RawDisk]
--property name=value. . .
--property-file name=/path/to/file/with/value. . .
VBoxManage modifymedium [disk | dvd | floppy] <uuid | filename>
[--autoreset=on | off] [--compact] [--description=description]
[--move=pathname] [--property=name=[value]]
[--resize=megabytes | --resizebyte=bytes] [--setlocation=pathname]
[--type=normal | writethrough | immutable | shareable | readonly | multiattach]
VBoxManage clonemedium <uuid | source-medium> <uuid | target-medium> [disk
| dvd | floppy] [--existing] [--format= VDI | VMDK | VHD | RAW | other ]
[--variant=Standard,Fixed,Split2G,Stream,ESX]
VBoxManage mediumproperty [disk | dvd | floppy] set <uuid | filename>
<property-name> <property-value>
VBoxManage mediumproperty [disk | dvd | floppy] get <uuid | filename>
<property-name>
VBoxManage mediumproperty [disk | dvd | floppy] delete <uuid | filename>
<property-name>
VBoxManage encryptmedium <uuid | filename> [--cipher=cipher-ID]
[--newpassword=password] [--newpasswordid=password-ID]
[--oldpassword=password]
VBoxManage checkmediumpwd <uuid | filename> <password-file>
VBoxManage convertfromraw <inputfile> <outputfile> [--format= VDI | VMDK
| VHD ] [--uuid=uuid] [--variant=Standard,Fixed,Split2G,Stream,ESX]
VBoxManage convertfromraw stdin <outputfile> <bytes> [--format= VDI | VMDK
| VHD ] [--uuid=uuid] [--variant=Standard,Fixed,Split2G,Stream,ESX]
162
9 VBoxManage
VBoxManage mediumio <--disk=uuid|filename | --dvd=uuid|filename
| --floppy=uuid|filename> [--password-file=-|filename] formatfat
[--quick]
VBoxManage mediumio <--disk=uuid|filename | --dvd=uuid|filename
| --floppy=uuid|filename> [--password-file=-|filename] cat [--hex]
[--offset=byte-offset] [--size=bytes] [--output=-|filename]
VBoxManage mediumio <--disk=uuid|filename | --dvd=uuid|filename
| --floppy=uuid|filename> [--password-file=-|filename] stream
[--format=image-format] [--variant=image-variant] [--output=-|filename]
VBoxManage setextradata <global | uuid | vmname> <keyword> [value]
VBoxManage getextradata <global | uuid | vmname> <keyword> | [enumerate]
VBoxManage setproperty <property-name> <property-value>
VBoxManage usbfilter add <index,0-N> <--target= <uuid | vmname | global> >
<--name=string> <--action=ignore | hold> [--active=yes | no]
[--vendorid=XXXX] [--productid=XXXX] [--revision=IIFF]
[--manufacturer=string] [--product=string] [--port=hex]
[--remote=yes | no] [--serialnumber=string]
[--maskedinterfaces=XXXXXXXX]
VBoxManage usbfilter modify <index,0-N> <--target= <uuid | vmname
| global> > [--name=string] [--action=ignore | hold] [--active=yes | no]
[--vendorid=XXXX | ""] [--productid=XXXX | ""] [--revision=IIFF | ""]
[--manufacturer=string | ""] [--product=string | ""] [--port=hex]
[--remote=yes | no] [--serialnumber=string | ""]
[--maskedinterfaces=XXXXXXXX]
VBoxManage usbfilter remove <index,0-N> <--target= <uuid | vmname
| global> >
VBoxManage sharedfolder add <uuid | vmname> <--name=name>
<--hostpath=hostpath> [--readonly] [--transient] [--automount]
[--auto-mount-point=path]
VBoxManage sharedfolder remove <uuid | vmname> <--name=name> [--transient]
VBoxManage guestproperty get <uuid | vmname> <property-name> [--verbose]
VBoxManage guestproperty enumerate <uuid | vmname> [--no-timestamp]
[--no-flags] [--relative] [--old-format] [patterns. . . ]
VBoxManage guestproperty set <uuid | vmname> <property-name>
[property-value [--flags=flags] ]
VBoxManage guestproperty unset <uuid | vmname> <property-name>
VBoxManage guestproperty wait <uuid | vmname> <patterns> [--timeout=msec]
[--fail-on-timeout]
VBoxManage guestcontrol <uuid | vmname> run [--arg0=argument 0]
[--domain=domainname] [--dos2unix] [--exe=filename]
[--ignore-orphaned-processes] [--no-wait-stderr | --wait-stderr]
[--no-wait-stdout | --wait-stdout] [--passwordfile=password-file
| --password=password] [--profile] [--putenv=var-name=[value]] [--quiet]
[--timeout=msec] [--unix2dos] [--unquoted-args] [--username=username]
[--verbose] <-- [argument. . . ]
>
VBoxManage guestcontrol <uuid | vmname> start [--arg0=argument 0]
[--domain=domainname] [--exe=filename] [--ignore-orphaned-processes]
[--passwordfile=password-file | --password=password] [--profile]
163
9 VBoxManage
[--putenv=var-name=[value]] [--quiet] [--timeout=msec] [--unquoted-args]
[--username=username] [--verbose] <-- [argument. . . ]
>
VBoxManage guestcontrol <uuid | vmname> copyfrom [--dereference]
[--domain=domainname] [--passwordfile=password-file
| --password=password] [--quiet] [--no-replace] [--recursive]
[--target-directory=host-destination-dir] [--update]
[--username=username] [--verbose] <guest-source0> guest-source1 [...]
<host-destination>
VBoxManage guestcontrol <uuid | vmname> copyto [--dereference]
[--domain=domainname] [--passwordfile=password-file
| --password=password] [--quiet] [--no-replace] [--recursive]
[--target-directory=guest-destination-dir] [--update]
[--username=username] [--verbose] <host-source0> host-source1 [...]
VBoxManage guestcontrol <uuid | vmname> mkdir [--domain=domainname]
[--mode=mode] [--parents] [--passwordfile=password-file
| --password=password] [--quiet] [--username=username] [--verbose]
<guest-directory. . . >
VBoxManage guestcontrol <uuid | vmname> rmdir [--domain=domainname]
[--passwordfile=password-file | --password=password] [--quiet]
[--recursive] [--username=username] [--verbose] <guest-directory. . . >
VBoxManage guestcontrol <uuid | vmname> rm [--domain=domainname] [--force]
[--passwordfile=password-file | --password=password] [--quiet]
[--username=username] [--verbose] <guest-directory. . . >
VBoxManage guestcontrol <uuid | vmname> mv [--domain=domainname]
[--passwordfile=password-file | --password=password] [--quiet]
[--username=username] [--verbose] <source. . . > <destination-directory>
VBoxManage guestcontrol <uuid | vmname> mktemp [--directory]
[--domain=domainname] [--mode=mode] [--passwordfile=password-file
| --password=password] [--quiet] [--secure] [--tmpdir=directory-name]
[--username=username] [--verbose] <template-name>
VBoxManage guestcontrol <uuid | vmname> stat [--domain=domainname]
[--passwordfile=password-file | --password=password] [--quiet]
[--username=username] [--verbose] <filename>
VBoxManage guestcontrol <uuid | vmname> list <all | files | processes
| sessions> [--quiet] [--verbose]
VBoxManage guestcontrol <uuid | vmname> closeprocess [--session-id=ID
| --session-name=name-or-pattern] [--quiet] [--verbose] <PID. . . >
VBoxManage guestcontrol <uuid | vmname> closesession [--all
| --session-id=ID | --session-name=name-or-pattern] [--quiet] [--verbose]
VBoxManage guestcontrol <uuid | vmname> updatega [--quiet] [--verbose]
[--source=guest-additions.ISO] [--wait-start] [-- [argument. . . ]
]
VBoxManage guestcontrol <uuid | vmname> watch [--quiet] [--verbose]
VBoxManage debugvm <uuid|vmname> dumpvmcore [--filename=name]
VBoxManage debugvm <uuid|vmname> info <item> [args. . . ]
VBoxManage debugvm <uuid|vmname> injectnmi
VBoxManage debugvm <uuid|vmname> log [[--release] | [--debug]]
[group-settings. . . ]
VBoxManage debugvm <uuid|vmname> logdest [[--release] | [--debug]]
[destinations. . . ]
VBoxManage debugvm <uuid|vmname> logflags [[--release] | [--debug]]
[flags. . . ]
VBoxManage debugvm <uuid|vmname> osdetect
VBoxManage debugvm <uuid|vmname> osinfo
164
9 VBoxManage
VBoxManage debugvm <uuid|vmname> osdmesg [--lines=lines]
VBoxManage debugvm <uuid|vmname> getregisters [--cpu=id]
[reg-set.reg-name. . . ]
VBoxManage debugvm <uuid|vmname> setregisters [--cpu=id]
[reg-set.reg-name=value. . . ]
VBoxManage debugvm <uuid|vmname> show [[--human-readable] | [--sh-export]
| [--sh-eval] | [--cmd-set]] [settings-item. . . ]
VBoxManage debugvm <uuid|vmname> stack [--cpu=id]
VBoxManage debugvm <uuid|vmname> statistics [--reset] [--descriptions]
[--pattern=pattern]
VBoxManage debugvm <uuid|vmname> guestsample [--filename=filename]
[--sample-interval-us=interval] [--sample-time-us=time]
VBoxManage metrics collect [--detach] [--list] [--period=seconds]
[--samples=count] [* | host | vmname [metric-list] ]
VBoxManage metrics disable [--list] [* | host | vmname [metric-list] ]
VBoxManage metrics enable [--list] [* | host | vmname [metric-list] ]
VBoxManage metrics list [* | host | vmname [metric-list] ]
VBoxManage metrics query [* | host | vmname [metric-list] ]
VBoxManage metrics setup [--list] [--period seconds] [--samples count] [*
| host | vmname [metric-list] ]
VBoxManage natnetwork add [--disable | --enable] <--netname=name>
<--network=network> [--dhcp=on|off] [--ipv6=on|off] [--loopback-4=rule]
[--loopback-6=rule] [--port-forward-4=rule] [--port-forward-6=rule]
VBoxManage natnetwork list [filter-pattern]
VBoxManage natnetwork modify [--dhcp=on|off] [--disable | --enable]
<--netname=name> <--network=network> [--ipv6=on|off]
[--loopback-4=rule] [--loopback-6=rule] [--port-forward-4=rule]
[--port-forward-6=rule]
VBoxManage natnetwork remove <--netname=name>
VBoxManage natnetwork start <--netname=name>
VBoxManage natnetwork stop <--netname=name>
VBoxManage hostonlyif ipconfig <ifname> [--dhcp | --ip=IPv4-address
[--netmask=IPv4-netmask]
| --ipv6=IPv6-address
[--netmasklengthv6=length] ]
VBoxManage hostonlyif create
VBoxManage hostonlyif remove <ifname>
VBoxManage hostonlynet add <--name=netname> [--id=netid] <--netmask=mask>
<--lower-ip=address> <--upper-ip=address> [--enable | --disable]
VBoxManage hostonlynet modify <--name=netname | --id=netid>
[--lower-ip=address] [--upper-ip=address] [--netmask=mask] [--enable
| --disable]
VBoxManage hostonlynet remove <--name=netname | --id=netid>
VBoxManage dhcpserver add <--network=netname | --interface=ifname>
<--server-ip=address> <--netmask=mask> <--lower-ip=address>
<--upper-ip=address> <--enable | --disable>
[[--global] | [--set-opt=dhcp-opt-no value. . . ] | [--set-opt-hex=dhcp-opt-no
hexstring. . . ] | [--force-opt=dhcp-opt-no. . . ]
| [--supress-opt=dhcp-opt-no. . . ] | [--min-lease-time=seconds]
| [--default-lease-time=seconds] | [--max-lease-time=seconds] . . . ]
[<--group=name> | [--set-opt=dhcp-opt-no value. . . ]
165
9 VBoxManage
| [--set-opt-hex=dhcp-opt-no hexstring. . . ] | [--force-opt=dhcp-opt-no. . . ]
| [--supress-opt=dhcp-opt-no. . . ] | [--incl-mac=address. . . ]
| [--excl-mac=address. . . ] | [--incl-mac-wild=pattern. . . ]
| [--excl-mac-wild=pattern. . . ] | [--incl-vendor=string. . . ]
| [--excl-vendor=string. . . ] | [--incl-vendor-wild=pattern. . . ]
| [--excl-vendor-wild=pattern. . . ] | [--incl-user=string. . . ]
| [--excl-user=string. . . ] | [--incl-user-wild=pattern. . . ]
| [--excl-user-wild=pattern. . . ] | [--min-lease-time=seconds]
| [--default-lease-time=seconds] | [--max-lease-time=seconds] . . . ]
[<--vm=name|uuid> | [--nic=1-N] | [--set-opt=dhcp-opt-no value. . . ]
| [--set-opt-hex=dhcp-opt-no hexstring. . . ] | [--force-opt=dhcp-opt-no. . . ]
| [--supress-opt=dhcp-opt-no. . . ] | [--min-lease-time=seconds]
| [--default-lease-time=seconds] | [--max-lease-time=seconds]
| [--fixed-address=address] . . . ]
[<--mac-address=address> | [--set-opt=dhcp-opt-no value. . . ]
| [--set-opt-hex=dhcp-opt-no hexstring. . . ] | [--force-opt=dhcp-opt-no. . . ]
| [--supress-opt=dhcp-opt-no. . . ] | [--min-lease-time=seconds]
| [--default-lease-time=seconds] | [--max-lease-time=seconds]
| [--fixed-address=address] . . . ]
VBoxManage dhcpserver modify <--network=netname | --interface=ifname>
[--server-ip=address] [--lower-ip=address] [--upper-ip=address]
[--netmask=mask] [--enable | --disable]
[[--global] | [--del-opt=dhcp-opt-no. . . ] | [--set-opt=dhcp-opt-no value. . . ]
| [--set-opt-hex=dhcp-opt-no hexstring. . . ] | [--force-opt=dhcp-opt-no. . . ]
| [--unforce-opt=dhcp-opt-no. . . ] | [--supress-opt=dhcp-opt-no. . . ]
| [--unsupress-opt=dhcp-opt-no. . . ] | [--min-lease-time=seconds]
| [--default-lease-time=seconds] | [--max-lease-time=seconds]
| [--remove-config] . . . ]
[<--group=name> | [--set-opt=dhcp-opt-no value. . . ]
| [--set-opt-hex=dhcp-opt-no hexstring. . . ] | [--force-opt=dhcp-opt-no. . . ]
| [--unforce-opt=dhcp-opt-no. . . ] | [--supress-opt=dhcp-opt-no. . . ]
| [--unsupress-opt=dhcp-opt-no. . . ] | [--del-mac=address. . . ]
| [--incl-mac=address. . . ] | [--excl-mac=address. . . ]
| [--del-mac-wild=pattern. . . ] | [--incl-mac-wild=pattern. . . ]
| [--excl-mac-wild=pattern. . . ] | [--del-vendor=string. . . ]
| [--incl-vendor=string. . . ] | [--excl-vendor=string. . . ]
| [--del-vendor-wild=pattern. . . ] | [--incl-vendor-wild=pattern. . . ]
| [--excl-vendor-wild=pattern. . . ] | [--del-user=string. . . ]
| [--incl-user=string. . . ] | [--excl-user=string. . . ]
| [--del-user-wild=pattern. . . ] | [--incl-user-wild=pattern. . . ]
| [--excl-user-wild=pattern. . . ] | [--zap-conditions]
| [--min-lease-time=seconds] | [--default-lease-time=seconds]
| [--max-lease-time=seconds] | [--remove-config] . . . ]
[<--vm=name|uuid> | [--nic=1-N] | [--del-opt=dhcp-opt-no. . . ]
| [--set-opt=dhcp-opt-no value. . . ] | [--set-opt-hex=dhcp-opt-no
hexstring. . . ] | [--force-opt=dhcp-opt-no. . . ]
| [--unforce-opt=dhcp-opt-no. . . ] | [--supress-opt=dhcp-opt-no. . . ]
| [--unsupress-opt=dhcp-opt-no. . . ] | [--min-lease-time=seconds]
| [--default-lease-time=seconds] | [--max-lease-time=seconds]
| [--fixed-address=address] | [--remove-config] . . . ]
[<--mac-address=address> | [--del-opt=dhcp-opt-no. . . ]
| [--set-opt=dhcp-opt-no value. . . ] | [--set-opt-hex=dhcp-opt-no
hexstring. . . ] | [--force-opt=dhcp-opt-no. . . ]
166
9 VBoxManage
| [--unforce-opt=dhcp-opt-no. . . ] | [--supress-opt=dhcp-opt-no. . . ]
| [--unsupress-opt=dhcp-opt-no. . . ] | [--min-lease-time=seconds]
| [--default-lease-time=seconds] | [--max-lease-time=seconds]
| [--fixed-address=address] | [--remove-config] . . . ]
VBoxManage dhcpserver remove <--network=netname | --interface=ifname>
VBoxManage dhcpserver start <--network=netname | --interface=ifname>
VBoxManage dhcpserver restart <--network=netname | --interface=ifname>
VBoxManage dhcpserver stop <--network=netname | --interface=ifname>
VBoxManage dhcpserver findlease <--network=netname | --interface=ifname>
<--mac-address=mac>
VBoxManage usbdevsource add <source-name> <--backend=backend>
<--address=address>
VBoxManage usbdevsource remove <source-name>
VBoxManage extpack install [--replace] [--accept-license=sha256] <tarball>
VBoxManage extpack uninstall [--force] <name>
VBoxManage extpack cleanup
VBoxManage updatecheck perform [--machine-readable]
VBoxManage updatecheck list [--machine-readable]
VBoxManage updatecheck modify [--disable | --enable] [--channel=stable |
withbetas | all] [--frequency=days]
VBoxManage modifynvram <uuid|vmname> inituefivarstore
VBoxManage modifynvram <uuid|vmname> enrollmssignatures
VBoxManage modifynvram <uuid|vmname> enrollorclpk
VBoxManage modifynvram <uuid|vmname> enrollpk [--platform-key=filename]
[--owner-uuid=uuid]
VBoxManage modifynvram <uuid|vmname> enrollmok [--mok=filename]
[--owner-uuid=uuid]
VBoxManage modifynvram <uuid|vmname> listvars
VBoxManage modifynvram <uuid|vmname> queryvar [--name=name]
[--filename=filename]
VBoxManage modifynvram <uuid|vmname> deletevar [--name=name]
[--owner-uuid=uuid]
VBoxManage modifynvram <uuid|vmname> changevar [--name=name]
[--filename=filename]
Each time VBoxManage is invoked, only one command can be executed. However, a command
might support several subcommands which then can be invoked in one single call. The following
sections provide detailed reference information on the different commands.
9.3 General Options
• -v|--version: Show the version of this tool and exit.
• --nologo: Suppress the output of the logo information. This option is useful for scripts.
• --settingspw: Specifiy a settings password.
• --settingspwfile: Specify a file containing the settings password.
167
9 VBoxManage
The settings password is used for certain settings which need to be stored in encrypted form
for security reasons. At the moment, the only encrypted setting is the iSCSI initiator secret, see
chapter 9.26, VBoxManage storageattach, page 252. As long as no settings password is specified,
this information is stored in plain text. After using the --settingspw|--settingspwfile option
once, it must be always used. Otherwise, the encrypted setting cannot be unencrypted.
9.4 VBoxManage
Oracle VM VirtualBox command-line interface.
Synopsis
VBoxManage [-V | --version] [--dump-build-type] [-q | --nologo]
[--settingspw=password] [--settingspwfile=pw-file] [@response-file]
[[help] subcommand]
Description
The VBoxManage command is the command-line interface (CLI) for the Oracle VM VirtualBox
software. The CLI supports all the features that are available with the Oracle VM VirtualBox
graphical user interface (GUI). In addition, you can use the VBoxManage command to manage
the features of the virtualization engine that cannot be managed by the GUI.
Each time you invoke the VBoxManage command, only one command is executed. Note that
some VBoxManage subcommands invoke several subcommands.
Run the VBoxManage command from the command line of the host operating system (OS) to
control Oracle VM VirtualBox software.
The VBoxManage command is stored in the following locations on the host system:
• Linux: /usr/bin/VBoxManage
• Mac OS X: /Applications/VirtualBox.app/Contents/MacOS/VBoxManage
• Oracle Solaris: /opt/VirtualBox/bin/VBoxManage
• Windows: C:\Program Files\Oracle\VirtualBox\VBoxManage.exe
In addition to managing virtual machines (VMs) with this CLI or the GUI, you can use the
VBoxHeadless CLI to manage VMs remotely.
The VBoxManage command performs particular tasks by using subcommands, such as list,
createvm, and startvm. See the associated information for each VBoxManage subcommand.
If required, specify the VM by its name or by its Universally Unique Identifier (UUID).
Use the VBoxManage list vms command to obtain information about all currently registered
VMs, including the VM names and associated UUIDs.
Note that you must enclose the entire VM name in double quotes if it contains spaces.
General Options
--nologo
Suppresses the output of the logo information, which is useful for scripts.
The short version of this option is -q.
--settingspw=[<password>]
Specifies the settings password. You can optionally specify the password as an argument
168
9 VBoxManage
to this option. If you do not specify the password in this way, the VBoxManage command
prompts you for the password.
The settings password is a security feature that encrypts stored settings, which are stored
as plain text by default.
You cannot unencrypt encrypted settings. So, if the settings are encrypted, you must con-
tinue to specify the --settingspw or --settingspwfile option.
Only the iSCSI secret is encrypted at this time.
--settingspwfile=<pw-filename>
Specifies the file that contains the settings password.
--version
Shows version information about the VBoxManage command.
The short version of this option is -V.
@response-file
Loads arguments from the specified Bourne shell response file.
subcommand
Specifies one of the VBoxManage subcommands, such as controlvm, createvm, list,
modifyvm, showvminfo, startvm, storageattach, and storagectl.
Each subcommand is described in its own command topic, some of which are shown in See
Also sections.
Examples
The following command creates a virtual machine called Win8 and registers it with Oracle VM
VirtualBox by using the --register option.
$ VBoxManage createvm --name "Win8" --register
Virtual machine ’Win8’ is created.
UUID: <UUID-string>
Settings file: ’/home/<username>/VirtualBox VMs/Win8/Win8.vbox’
The command output shows that the Win8 VM is assigned a UUID and an XML machine settings
file.
You can use the VBoxManage showvminfo command to view the configuration information of
a VM.
The following example uses the VBoxManage modifyvm command to change the amount of
memory for the Windows XP VM to be 1024 megabytes:
$ VBoxManage modifyvm "Windows XP" --memory 1024
Note that you can use the VBoxManage modifyvm command even when the VM is powered
off.
You can use the VBoxManage storagectl command or the VBoxManage storageattach
command to modify the storage configuration for a VM. For example, to create a SATA storage
controller called sata01 and add it to the ol7 VM:
$ VBoxManage storagectl ol7 --name "sata01" --add sata
Use the VBoxManage startvm command to start a VM that is currently powered off. For
example, to start the win7 VM:
$ VBoxManage startvm win7
Use the VBoxManage controlvm command to pause or save a VM that is currently running.
You can also use this command to modify settings for the VM. For example, to enable audio input
for the ol6u9 VM.
$ VBoxManage controlvm ol6u9 audioin on
169
9 VBoxManage
See Also
chapter 9.20, VBoxManage controlvm, page 226, chapter 9.9, VBoxManage createvm, page 179,
chapter 9.5, VBoxManage list, page 170, chapter 9.10, VBoxManage modifyvm, page 180, chapter
9.6, VBoxManage showvminfo, page 175, chapter 9.19, VBoxManage startvm, page 225, chapter
9.26, VBoxManage storageattach, page 252, chapter 9.27, VBoxManage storagectl, page 256
9.5 VBoxManage list
View system information and VM configuration details.
Synopsis
VBoxManage list [--long] [--sorted] [bridgedifs | cloudnets | cloudprofiles
| cloudproviders | cpu-profiles | dhcpservers | dvds | extpacks | floppies
| groups | hddbackends | hdds | hostcpuids | hostdrives | hostdvds
| hostfloppies | hostinfo | hostonlyifs | hostonlynets | intnets | natnets
| ostypes | runningvms | screenshotformats | systemproperties | usbfilters
| usbhost | vms | webcams]
Description
The VBoxManage list subcommands enable you to obtain information about the Oracle VM
VirtualBox software, the VMs and associated services that you create.
Common Options
--long
Shows detailed information about each information entry if available. The short form of
this option is -l.
--sorted
Sorts the list of information entries alphabetically. The short form of this option is -s.
List the Bridged Network Interfaces on the Host System
VBoxManage list bridgedifs
The VBoxManage list bridgedifs command lists the bridged network interfaces that are
currently available on the host system. The output shows detailed configuration information
about each interface. See chapter 7, Virtual Networking, page 128.
List the Cloud Network Interfaces
VBoxManage list cloudnets
The VBoxManage list cloudnets command lists the cloud network interfaces that have been
configured. A cloud network interface provides connectivity between local VMs and a cloud
network.
170
9 VBoxManage
List the Cloud Profiles
VBoxManage list cloudprofiles
The VBoxManage list cloudprofiles command lists the cloud profiles that have been con-
figured. A cloud profile contains settings for a cloud service account.
List the Cloud Providers
VBoxManage list cloudproviders
The VBoxManage list cloudproviders command lists the cloud providers that are sup-
ported by Oracle VM VirtualBox. Oracle Cloud Infrastructure is an example of a cloud provider.
List the known CPU Profiles
VBoxManage list cpu-profiles
The VBoxManage list cpu-profiles command lists the CPU profiles that are known by
Oracle VM VirtualBox.
List the DHCP Servers on the Host System
VBoxManage list dhcpservers
The VBoxManage list dhcpservers command lists the DHCP servers that are currently
available on the host system. The output shows detailed configuration information about each
DHCP server. See chapter 7, Virtual Networking, page 128.
List the DVD Virtual Disk Images
VBoxManage list dvds
The VBoxManage list dvds command shows information about the DVD virtual disk images
that are currently in use by the Oracle VM VirtualBox software. For each image, the output
shows all the settings, the UUIDs associated with the image by Oracle VM VirtualBox, and all
files associated with the image.
This command performs the same function as the Virtual Media Manager. See chapter 6.3, The
Virtual Media Manager, page 115.
List the Installed Oracle VM VirtualBox Extension Packs
VBoxManage list extpacks
The VBoxManage list extpacks command shows all Oracle VM VirtualBox extension packs
that are currently installed. See chapter 2.5, Installing Oracle VM VirtualBox and Extension Packs,
page 6 and chapter 9.52, VBoxManage extpack, page 322.
171
9 VBoxManage
List the Floppy Disk Virtual Disk Images
VBoxManage list floppies
The VBoxManage list floppies command shows information about the floppy disk images
that are currently in use by the Oracle VM VirtualBox software. For each image, the output
shows all the settings, the UUIDs associated with the image by Oracle VM VirtualBox, and all
files associated with the image.
This command performs the same function as the Virtual Media Manager. See chapter 6.3, The
Virtual Media Manager, page 115.
List the Virtual Machine Groups
VBoxManage list groups
The VBoxManage list groups command shows all VM groups. See chapter 2.10, Using VM
Groups, page 23.
List the Virtual Disk Backends
VBoxManage list hddbackends
The VBoxManage list hddbackends command lists all known virtual disk backends of the
Oracle VM VirtualBox software. For each such format, such as VDI, VMDK, or RAW, this com-
mand lists the backend’s capabilities and configuration.
List the Hard Disk Virtual Disk Images
VBoxManage list hdds
The VBoxManage list hdds command shows information about the hard disk virtual disk
images that are currently in use by the Oracle VM VirtualBox software. For each image, the
output shows all the settings, the UUIDs associated with the image by Oracle VM VirtualBox,
and all files associated with the image.
This command performs the same function as the Virtual Media Manager. See chapter 6.3, The
Virtual Media Manager, page 115.
List the CPUID Information for the Host System CPUs
VBoxManage list hostcpuids
The VBoxManage list hostcpuids command lists CPUID information for each CPU on the
host system. Use this information to perform a more fine grained analyis of the host system’s
virtualization capabilities.
List the Storage Drives on the Host System
VBoxManage list hostdrives
The VBoxManage list hostdrives command lists the disk drives on the host system poten-
tially useful for creating a VMDK raw disk image. Each entry includes the name used to reference
them from within Oracle VM VirtualBox.
172
9 VBoxManage
List the DVD Drives on the Host System
VBoxManage list hostdvds
The VBoxManage list hostdvds command lists the DVD drives on the host system. Each
DVD entry includes the name used to access them from within Oracle VM VirtualBox.
List the Floppy Disk Drives on the Host System
VBoxManage list hostfloppies
The VBoxManage list hostfloppies command lists the floppy disk drives on the host sys-
tem. Each floppy disk entry includes the name used to access them from within Oracle VM
VirtualBox.
List Information About the Host System
VBoxManage list hostinfo
The VBoxManage list hostinfo command shows information about the host system. The
output includes information about the CPUs, memory, and the OS version.
List the Host-Only Network Interfaces on the Host System
VBoxManage list hostonlyifs
The VBoxManage list hostonlyifs command lists the host-only network interfaces that
are currently available on the host system. The output shows detailed configuration information
about each interface. See chapter 7, Virtual Networking, page 128.
List Host-Only Networks
VBoxManage list hostonlynets
The VBoxManage list hostonlynets command lists the host-only networks that have been
configured. A host-only network provides connectivity between the host and local VMs. See
chapter 7, Virtual Networking, page 128.
List Internal Networks
VBoxManage list intnets
The VBoxManage list intnets command shows information about the internal networks.
See chapter 7, Virtual Networking, page 128.
List the NAT Network Interfaces on the Host System
VBoxManage list natnets
The VBoxManage list natnets command lists the NAT network interfaces that are currently
available on the host system. See chapter 7, Virtual Networking, page 128.
173
9 VBoxManage
List the Guest Operating Systems
VBoxManage list ostypes
The VBoxManage list ostypes command lists all guest operating systems (OSes) that are
known to Oracle VM VirtualBox. Each OS entry includes an identifier, a description, a family
identifier, a family description, and whether the OS has 64-bit support.
You can use these identifiers with the VBoxManage modifyvm command.
List the Running Virtual Machines
VBoxManage list runningvms
The VBoxManage list runningvms command lists all virtual machines (VMs) that are cur-
rently running. By default this displays a compact list that shows the name and UUID of each
VM.
List the Available Screen Shot Formats
VBoxManage list screenshotformats
The VBoxManage list screenshotformats command shows the list of available screen shot
formats.
List System Properties
VBoxManage list systemproperties
The VBoxManage list systemproperties command shows a large collection of global Ora-
cle VM VirtualBox settings and limits, such as minimum and maximum guest RAM, virtual hard
disk size, folder settings, and the current authentication library in use.
List the Registered Global USB Filters
VBoxManage list usbfilters
The VBoxManage list usbfilters command lists all global USB filters registered with Or-
acle VM VirtualBox and displays the filter parameters. Global USB filters are for devices which
are accessible to all virtual machines.
List the USB Devices on the Host System
VBoxManage list usbhost
The VBoxManage list usbhost command shows information about the USB devices that are
attached to the host system. The output includes information that you can use to construct USB
filters and indicates whether the device is currently in use by the host system.
174
9 VBoxManage
List Virtual Machines
VBoxManage list vms
The VBoxManage list vms command lists all virtual machines (VMs) that are currently reg-
istered with Oracle VM VirtualBox. By default this command displays a compact list that shows
the name and UUID of each VM.
List the Webcams Attached to a Running Virtual Machine
VBoxManage list webcams
The VBoxManage list webcams command shows the list of webcams that are attached to the
running VM.
The output is a list of absolute paths or aliases that are used to attach the webcams to the VM
by using the VBoxManage webcam attach command.
Examples
The following command lists the VM groups configured for Oracle VM VirtualBox.
$ VBoxManage list groups
"/Linux-VMs"
"/Windows-VMs"
The following command lists the VMs that are currently running.
$ VBoxManage list runningvms
"ol7" {<ol7-UUID>}
"win8" {<win8-UUID>}
9.6 VBoxManage showvminfo
Show configuration information or log file contents for a virtual machine.
Synopsis
VBoxManage showvminfo <uuid | vmname> [--details] [--machinereadable]
[--password-id] [--password]
VBoxManage showvminfo <uuid | vmname> <--log=index> [--password-id id]
[--password file|-]
Description
The VBoxManage showvminfo command outputs configuration information or log file contents
for a specified virtual machine (VM).
175
9 VBoxManage
Viewing Virtual Machine Information
VBoxManage showvminfo <uuid | vmname> [--details] [--machinereadable]
[--password-id] [--password]
The VBoxManage showvminfo command outputs information about the specified VM in a de-
tailed format or in a machine-readable format.
The VBoxManage showvminfo command shows the same information for the specified VM in
the same format as the VBoxManage list vms --long command.
--details
Includes detailed information about the VM.
--machinereadable
Specifies that the VM information be in a machine-readable format.
--password-id <id>
Specifies password id of the VM if it is encrypted.
--password <file>|-
Specifies password of the VM if it is encrypted. Either specify the absolute pathname of a
password file on the host operating system, or - to prompt you for the password.
Viewing Virtual Machine Log Contents
VBoxManage showvminfo <uuid | vmname> <--log=index> [--password-id id]
[--password file|-]
The VBoxManage showvminfo --log command outputs the contents of one of the specified
VM’s log files.
--log=<index>
Specifies a numerical index that identifies the log file.
The index value starts at 0, which indicates the VBox.log file. An index value of 1 indicates
the VBoxHardening.log file. Index values starting at 2 indicate other log files, such as the
VBox.log.1 file.
--password-id <id>
Specifies password id of the VM if it is encrypted.
--password <file>|-
Specifies password of the VM if it is encrypted. Either specify the absolute pathname of a
password file on the host operating system, or - to prompt you for the password.
Examples
The following example shows typical output for this command:
$ VBoxManage showvminfo "Windows 10"
VirtualBox Command Line Management Interface Version <version-number>
Name:
Windows 10
Groups:
/
Guest OS:
Windows 10 (64-bit)
UUID:
1bf3464d-57c6-4d49-92a9-a5cc3816b7e7
176
9 VBoxManage
Config file:
/home/username/VirtualBox VMs/Windows 10/Windows 10.vbox
Snapshot folder: /home/username/VirtualBox VMs/Windows 10/Snapshots
Log folder:
/home/username/VirtualBox VMs/Windows 10/Logs
Hardware UUID:
1bf3464d-57c6-4d49-92a9-a5cc3816b7e7
Memory size:
2048MB
Page Fusion:
off
VRAM size:
12MB
CPU exec cap:
100%
The following example shows the information output in a machine-readable format, which
shows the entries as a property=value string:
$ VBoxManage showvminfo "Windows 10" --machinereadable
groups="/"
ostype="Windows 10 (64-bit)"
UUID="1bf3464d-57c6-4d49-92a9-a5cc3816b7e7"
The following example shows the contents of the VBox.log log file:
$ VBoxManage showvminfo "Windows 10" --log 0
00:00:02.895106 VirtualBox VM 6.0.0_RC1 r127378 linux.amd64 (Dec 10 2018 17:16:06) release log
00:00:02.895109 Log opened 2018-12-14T14:31:44.088259000Z
00:00:02.895111 Build Type: release
00:00:02.895115 OS Product: Linux
00:00:02.895117 OS Release: 4.1.12-61.1.22.el7uek.x86_64
00:00:02.895119 OS Version: #2 SMP Fri Dec 2 09:28:44 PST 2016
See Also
chapter 9.5, VBoxManage list, page 170
9.7 VBoxManage registervm
Register a virtual machine.
Synopsis
VBoxManage registervm <filename> --password file
Description
The VBoxManage registervm command enables you to create a virtual machine (VM) by im-
porting an XML machine configuration file into Oracle VM VirtualBox. The VM cannot have the
same UUID as a VM that is already registered in Oracle VM VirtualBox. Ensure that the XML
machine configuration file is in the machines folder prior to registration.
Note: When you use the VBoxManage createvm command to create a VM, you can
specify the --register option to register the VM.
filename
Specifies the XML machine configuration file. This file has the .vbox file extension.
--password
Use the --password to supply the encryption password of the VM. Either specify the abso-
lute pathname of a password file on the host operating system, or - to prompt you for the
password on the command line.
177
9 VBoxManage
Examples
The following command registers a VM called vm2. The XML machine configuration file for the
VM is located in the default machines folder.
$ VBoxManage registervm "/home/user/VirtualBox VMs/vm2/vm2.vbox"
See Also
chapter 9.9, VBoxManage createvm, page 179, chapter 9.8, VBoxManage unregistervm, page 178
9.8 VBoxManage unregistervm
Unregister a virtual machine.
Synopsis
VBoxManage unregistervm <uuid | vmname> [--delete] [--delete-all]
Description
The VBoxManage unregistervm command unregisters a virtual machine (VM).
uuid|vmname
Specifies the name or Universally Unique Identifier (UUID) of the VM.
--delete
Deletes the following files related to the VM automatically:
• All hard disk image files, including differencing files.
• All saved state files that the machine created, including one for each snapshot.
• XML VM machine definition file and its backups.
• VM log files.
• The empty directory associated with the unregistered VM.
--delete-all
Deletes the files described in the --delete option, as well as all DVDs and Floppy disks
located in the VM folder and attached only to this VM.
Examples
The following command unregisters a VM called vm2.
$ VBoxManage unregistervm vm2
The following command unregisters a VM called vm3. All files associated with the VM are
deleted.
$ VBoxManage unregistervm vm3 --delete
%...10%...20%...30%...40%...50%...60%...70%...80%...90%...100%
See Also
chapter 9.7, VBoxManage registervm, page 177
178
9 VBoxManage
9.9 VBoxManage createvm
Create a new virtual machine.
Synopsis
VBoxManage createvm <--name=name> [--basefolder=basefolder] [--default]
[--groups=group-ID,...]
[--ostype=ostype] [--register] [--uuid=uuid]
[--cipher cipher] [--password-id password-id] [--password file]
Description
The VBoxManage createvm command creates a new XML virtual machine (VM) definition file.
You must specify the name of the VM by using --name <name>. This name is used by default
as the name of the settings file that has the .vbox extension and the machine folder, which is a
subfolder of the $HOME/VirtualBox VMs directory.
The actual file name may not correspond directly to the VM name if it violates the host OS file
name requirements (such as using the path separator or other reserved characters, they will be
substituted with a placeholder). If you later rename the VM, the file and folder names will be
updated to match the new name automatically.
Command Options
In addition to specifying the name or UUID of the VM, which is required, you can specify any of
the following options:
--basefolder=<basefolder>
Specifies the name of the folder in which to save the machine configuration file for the new
VM.
Note that the names of the file and the folder do not change if you rename the VM.
--default
Applies a default hardware configuration for the specified guest OS. By default, the VM is
created with minimal hardware.
--groups=<group-ID>[,...]
Assigns the VM to the specified groups. If you specify more than one group, separate each
group name with a comma.
Note that each group is identified by a group ID that starts with a slash character (/) so
that groups can be nested. By default, a VM is always assigned membership to the / group.
--ostype=<ostype>
Specifies the guest OS to run in the VM. Run the VBoxManage list ostypes command to
see the available OS types.
--register
Registers the VM with your Oracle VM VirtualBox installation.
By default, the
VBoxManage createvm command creates only the XML configuration for the VM but
does not register the VM. If you do not register the VM at creation, you can run the
VBoxManage registervm command after you create the VM.
--uuid=<uuid>
Specifies the Universally Unique Identifier (UUID) of the VM. Ensure that this UUID is
unique within the Oracle VM VirtualBox namespace of the host or of its VM group mem-
berships if you decide to register the VM. By default, Oracle VM VirtualBox provides the
UUID.
179
9 VBoxManage
--cipher <cipher>
Specifies the cipher to use for encryption. Valid values are AES-128 or AES-256.
This option enables you to set up encryption on VM.
--password-id <password-id>
Specifies a new password identifier that is used for correct identification when supplying
multiple passwords for the VM.
This option enables you to set up encryption on VM.
--password <file>
Use the --password to supply the encryption password of the VM. Either specify the abso-
lute pathname of a password file on the host operating system, or - to prompt you for the
password on the command line.
This option enables you to set up encryption on VM.
Examples
The following command creates a VM called vm2 where you plan to run a 64-bit version of Oracle
Linux.
$ VBoxManage createvm --name "vm2" --ostype "Oracle_64"
The following command creates and registers a VM called vm3.
$ VBoxManage createvm --name "vm3" --register
See Also
chapter 9.5, VBoxManage list, page 170, chapter 9.7, VBoxManage registervm, page 177
9.10 VBoxManage modifyvm
Change settings for a virtual machine that is stopped.
Synopsis
VBoxManage modifyvm <uuid | vmname> [--name=name]
[--groups= group [,group...]
]
[--description=description]
[--os-type=OS-type] [--icon-file=filename] [--memory=size-in-MB]
[--page-fusion= on | off ] [--vram=size-in-MB] [--acpi= on | off ]
[--ioapic= on | off ] [--hardware-uuid=UUID] [--cpus=CPU-count]
[--cpu-hotplug= on | off ] [--plug-cpu=CPU-ID] [--unplug-cpu=CPU-ID]
[--cpu-execution-cap=number] [--pae= on | off ] [--long-mode= on | off ]
[--ibpb-on-vm-exit= on | off ] [--ibpb-on-vm-entry= on | off ]
[--spec-ctrl= on | off ] [--l1d-flush-on-sched= on | off ]
[--l1d-flush-on-vm-entry= on | off ] [--mds-clear-on-sched= on | off ]
[--mds-clear-on-vm-entry= on | off ] [--cpu-profile= host | Intel 8086
| Intel 80286 | Intel 80386 ] [--hpet= on | off ] [--hwvirtex= on | off ]
[--triple-fault-reset= on | off ] [--apic= on | off ] [--x2apic= on | off ]
[--paravirt-provider= none | default | legacy | minimal | hyperv | kvm ]
[--paravirt-debug= key=value [,key=value...]
]
[--nested-paging= on
| off ] [--large-pages= on | off ] [--vtx-vpid= on | off ] [--vtx-ux= on
| off ] [--nested-hw-virt= on | off ] [--virt-vmsave-vmload= on | off ]
180
9 VBoxManage
[--accelerate-3d= on | off ] [--accelerate-2d-video= on | off ]
[--chipset= ich9 | piix3 ] [--iommu= none | automatic | amd | intel ]
[--tpm-type= none | 1.2 | 2.0 | host | swtpm ] [--tpm-location= location ]
[--bios-logo-fade-in= on | off ] [--bios-logo-fade-out= on | off ]
[--bios-logo-display-time=msec] [--bios-logo-image-path=pathname]
[--bios-boot-menu= disabled | menuonly | messageandmenu ] [--bios-apic=
disabled | apic | x2apic ] [--bios-system-time-offset=msec]
[--bios-pxe-debug= on | off ] [--system-uuid-le= on | off ] [--bootX= none
| floppy | dvd | disk | net ] [--rtc-use-utc= on | off ]
[--graphicscontroller= none | vboxvga | vmsvga | vboxsvga ]
[--snapshot-folder= default | pathname ] [--firmware= bios | efi | efi32
| efi64 ] [--guest-memory-balloon=size-in-MB] [--default-frontend=
default | name ] [--vm-process-priority= default | flat | low | normal | high
]
VBoxManage modifyvm <uuid | vmname> [--nicN= none | null | nat | bridged
| intnet | hostonly | hostonlynet | generic | natnetwork | cloud ]
[--nic-typeN= Am79C970A | Am79C973 | 82540EM | 82543GC | 82545EM | virtio ]
[--cable-connectedN= on | off ] [--nic-traceN= on | off ]
[--nic-trace-fileN=filename] [--nic-propertyN=name= [value] ]
[--nic-speedN=kbps] [--nic-boot-prioN=priority] [--nic-promiscN= deny
| allow-vms | allow-all ] [--nic-bandwidth-groupN= none | name ]
[--bridge-adapterN= none | device-name ] [--cloud-networkN=network-name]
[--host-only-adapterN= none | device-name ]
[--host-only-netN=network-name] [--intnetN=network-name]
[--nat-networkN=network-name] [--nic-generic-drvN=driver-name]
[--mac-addressN= auto | MAC-address ]
VBoxManage modifyvm <uuid | vmname> [--nat-netN= network | default ]
[--nat-pfN= [rule-name],tcp | udp,[host-IP],hostport,[guest-IP],guestport
] [--nat-pfN=delete=rule-name] [--nat-tftp-prefixN=prefix]
[--nat-tftp-fileN=filename] [--nat-tftp-serverN=IP-address]
[--nat-bind-ipN=IP-address] [--nat-dns-pass-domainN= on | off ]
[--nat-dns-proxyN= on | off ] [--nat-dns-host-resolverN= on | off ]
[--nat-localhostreachableN= on | off ]
[--nat-settingsN=[mtu],[socksnd],[sockrcv],[tcpsnd],[tcprcv]]
[--nat-alias-modeN= default | [log],[proxyonly],[sameports] ]
VBoxManage modifyvm <uuid | vmname> [--mouse= ps2 | usb | usbtablet
| usbmultitouch | usbmtscreenpluspad ] [--keyboard= ps2 | usb ] [--uartN=
off | IO-baseIRQ ] [--uart-modeN= disconnected | server pipe | client pipe
| tcpserver port | tcpclient hostname:port | file filename | device-name ]
[--uart-typeN= 16450 | 16550A | 16750 ] [--lpt-modeN=device-name] [--lptN=
off | IO-baseIRQ ] [--audio-controller= ac97 | hda | sb16 ] [--audio-codec=
stac9700 | ad1980 | stac9221 | sb16 ] [--audio-driver= none | default | null
| dsound | was | oss | alsa | pulse | coreaudio ] [--audio-enabled= on | off ]
[--audio-in= on | off ] [--audio-out= on | off ] [--clipboard-mode=
disabled | hosttoguest | guesttohost | bidirectional ] [--drag-and-drop=
disabled | hosttoguest | guesttohost | bidirectional ]
[--monitor-count=number] [--usb-ehci= on | off ] [--usb-ohci= on | off ]
[--usb-xhci= on | off ] [--usb-rename=old-namenew-name]
VBoxManage modifyvm <uuid | vmname> [--recording= on | off ]
[--recording-screens= all | none | screen-ID[,screen-ID...]
]
[--recording-file=filename] [--recording-max-size=MB]
181
9 VBoxManage
[--recording-max-time=msec] [--recording-opts= key=value[,key=value...]
]
[--recording-video-fps=fps] [--recording-video-rate=rate]
[--recording-video-res=widthheight]
VBoxManage modifyvm <uuid | vmname> [--vrde= on | off ]
[--vrde-property=property-name= [property-value] ] [--vrde-extpack=
default | name ] [--vrde-port=port] [--vrde-address=hostip]
[--vrde-auth-type= null | external | guest ] [--vrde-auth-library= default
| name ] [--vrde-multi-con= on | off ] [--vrde-reuse-con= on | off ]
[--vrde-video-channel= on | off ] [--vrde-video-channel-quality=percent]
VBoxManage modifyvm <uuid | vmname> [--teleporter= on | off ]
[--teleporter-port=port] [--teleporter-address= address | empty ]
[--teleporter-password=password] [--teleporter-password-file= filename
| stdin ] [--cpuid-portability-level=level] [--cpuid-set=leaf [:subleaf]
eaxÂăebxÂăecxÂăedx] [--cpuid-remove=leaf [:subleaf] ]
[--cpuid-remove-all]
VBoxManage modifyvm <uuid | vmname> [--tracing-enabled= on | off ]
[--tracing-config=string] [--tracing-allow-vm-access= on | off ]
VBoxManage modifyvm <uuid | vmname> [--usb-card-reader= on | off ]
VBoxManage modifyvm <uuid | vmname> [--autostart-enabled= on | off ]
[--autostart-delay=seconds]
VBoxManage modifyvm <uuid | vmname> [--guest-debug-provider= none | native
| gdb | kd ] [--guest-debug-io-provider= none | tcp | udp | ipc ]
[--guest-debug-address= IP-Address | path ] [--guest-debug-port=port]
VBoxManage modifyvm <uuid | vmname> [--pci-attach=host-PCI-address
[@guest-PCI-bus-address] ] [--pci-detach=host-PCI-address]
VBoxManage modifyvm <uuid | vmname> [--testing-enabled= on | off ]
[--testing-mmio= on | off ] [--testing-cfg-dwordidx=value]
Description
The VBoxManage modifyvm command enables you to change the properties of a registered vir-
tual machine (VM) that is not running.
Most of these properties correspond to the VM settings that are shown in each VM’s Settings
dialog in the VirtualBox Manager. See chapter 4, Configuring Virtual Machines, page 68. How-
ever, some settings can only be viewed and managed with the VBoxManage command.
You can use the VBoxManage modifyvm command to change VM settings only when the VM is
powered off. The VM cannot be running or in saved state when you use this command.
You can use the VBoxManage controlvm command to dynamically change some VM machine
settings while the VM is running. See chapter 9.20, VBoxManage controlvm, page 226.
General Settings
VBoxManage modifyvm <uuid | vmname> [--name=name]
[--groups= group [,group...]
]
[--description=description]
[--os-type=OS-type] [--icon-file=filename] [--memory=size-in-MB]
[--page-fusion= on | off ] [--vram=size-in-MB] [--acpi= on | off ]
[--ioapic= on | off ] [--hardware-uuid=UUID] [--cpus=CPU-count]
182
9 VBoxManage
[--cpu-hotplug= on | off ] [--plug-cpu=CPU-ID] [--unplug-cpu=CPU-ID]
[--cpu-execution-cap=number] [--pae= on | off ] [--long-mode= on | off ]
[--ibpb-on-vm-exit= on | off ] [--ibpb-on-vm-entry= on | off ]
[--spec-ctrl= on | off ] [--l1d-flush-on-sched= on | off ]
[--l1d-flush-on-vm-entry= on | off ] [--mds-clear-on-sched= on | off ]
[--mds-clear-on-vm-entry= on | off ] [--cpu-profile= host | Intel 8086
| Intel 80286 | Intel 80386 ] [--hpet= on | off ] [--hwvirtex= on | off ]
[--triple-fault-reset= on | off ] [--apic= on | off ] [--x2apic= on | off ]
[--paravirt-provider= none | default | legacy | minimal | hyperv | kvm ]
[--paravirt-debug= key=value [,key=value...]
]
[--nested-paging= on
| off ] [--large-pages= on | off ] [--vtx-vpid= on | off ] [--vtx-ux= on
| off ] [--nested-hw-virt= on | off ] [--virt-vmsave-vmload= on | off ]
[--accelerate-3d= on | off ] [--accelerate-2d-video= on | off ]
[--chipset= ich9 | piix3 ] [--iommu= none | automatic | amd | intel ]
[--tpm-type= none | 1.2 | 2.0 | host | swtpm ] [--tpm-location= location ]
[--bios-logo-fade-in= on | off ] [--bios-logo-fade-out= on | off ]
[--bios-logo-display-time=msec] [--bios-logo-image-path=pathname]
[--bios-boot-menu= disabled | menuonly | messageandmenu ] [--bios-apic=
disabled | apic | x2apic ] [--bios-system-time-offset=msec]
[--bios-pxe-debug= on | off ] [--system-uuid-le= on | off ] [--bootX= none
| floppy | dvd | disk | net ] [--rtc-use-utc= on | off ]
[--graphicscontroller= none | vboxvga | vmsvga | vboxsvga ]
[--snapshot-folder= default | pathname ] [--firmware= bios | efi | efi32
| efi64 ] [--guest-memory-balloon=size-in-MB] [--default-frontend=
default | name ] [--vm-process-priority= default | flat | low | normal | high
]
The following options enable you to modify general information about your VM.
The VBoxManage modifyvm command supports the following options:
--name=<vmname>
Changes the name of the VM and its related internal VM files. See chapter 9.9, VBoxManage
createvm, page 179.
--groups=<group>
Changes the group membership of a VM. Group names always begin with a slash character
(/) and can be nested. By default, VMs are members of the / group. A VM can be member
of multiple groups, but its primary group determines the directory structure where the
internal VM files are placed by default.
--description=<desc>
Changes the optional VM description. Use a description to record details about the VM
in a meaningful way. The GUI interprets HTML markup while the VBoxManage modifyvm
command enables you include arbitrary strings that can contain multiple lines.
--os-type=<OS-type>
Specifies the guest operating system (OS) information for the VM. Use the
VBoxManage list ostypes command to view the OS type identifiers.
--icon-file=<filename>
Specifies the path to the VM icon file in PNG format on the host system. The icon is shown
in the VM manager UI and when running the VM with UI.
--memory=<size>
Specifies the amount of host system RAM to allocate to the VM. The size is in MB. See
chapter 2.8, Creating Your First Virtual Machine, page 13.
183
9 VBoxManage
--page-fusion=on | off
Enables or disables the Page Fusion feature, which is disabled by default. Use the Page
Fusion feature to minimize the memory duplication between VMs that have similar con-
figurations and that run on the same host system. See chapter 5.10.2, Page Fusion, page
109.
--vram=<size>
Specifies the amount of RAM to allocate to the virtual graphics card. See chapter 4.6,
Display Settings, page 77.
--acpi=on | off
Determines whether the VM has ACPI support. See chapter 4.5.1, Motherboard Tab, page
74.
--ioapic=on | off
Determines whether the VM has I/O APIC support. See chapter 4.5.1, Motherboard Tab,
page 74.
--hardware-uuid=<uuid>
Specifies the Universally Unique Identifier (UUID) to present to the guest VM in memory
tables (DMI/SMBIOS), hardware, and VM properties. By default this hardware UUID is the
same as the VM UUID. Cloning a VM and the teleporting feature automatically preserve the
hardware UUID value. Likewise for Virtual Appliance export and import, but only if both
operations are done by Oracle VM VirtualBox.
--cpus=<CPU-count>
Specifies the number of virtual CPUs to assign to the VM. See chapter 4.5.2, Processor Tab,
page 76.
If CPU hot-plugging is enabled, this option specifies the maximum number of virtual CPUs
that can be plugged into the VMs.
--cpu-hotplug=on | off
Enables or disables CPU hot-plugging. When enabled, you can dynamically add virtual
CPUs to a VM or remove virtual CPUs from a VM. See chapter 10.4, CPU Hot-Plugging,
page 338.
--plug-cpu=<CPU-ID>
Adds a virtual CPU to the VM. CPU-ID is the index of the virtual CPU to add. A valid index
value is a number from 0 to the maximum number of CPUs that you configured by using
the --cpus option.
Only use this option if CPU hot-plugging is enabled.
--unplug-cpu=<CPU-ID>
Removes a virtual CPU from the VM. CPU-ID is the index of the virtual CPU to remove. A
valid index value is a number from 1 to the maximum number of CPUs that you configured
by using the --cpus option.
Only use this option if CPU hot-plugging is enabled.
Note that you cannot remove CPU 0.
--cpuexectioncap=<percentage>
Specifies how much CPU time a virtual CPU can use. A valid value is from 1 to 100. A
value of 50 indicates that a single virtual CPU can use up to 50% of a single host CPU.
Use this feature with caution, it can have unexpected results including timekeeping prob-
lems and lower performance than specified. If you want to limit the resource usage of a
VM it is more reliable to pick an appropriate number of VCPUs.
184
9 VBoxManage
--pae=on | off
Enables or disables physical address extension (PAE). See chapter 4.5.2, Processor Tab, page
76.
--long-mode=on | off
Enables or disables long mode. See chapter 4.5.2, Processor Tab, page 76.
--ibpb-on-vm-exit=on | off
Enables use of Indirect Branch Prediction Barrier (IBPB) on every VM exit.
--ibpb-on-vm-entry=on | off
Enables use of Indirect Branch Prediction Barrier (IBPB) on every VM entry.
--spec-ctrl=on | off
Enables or disables the exposure of speculation control interfaces to the guest VM. These
interfaces must be available on the host system.
Depending on the host CPU and the workload, enabling speculation control might signifi-
cantly reduce performance.
--l1d-flush-on-sched=on | off
Enables or disables level 1 data cache flushing when a thread is scheduled to execute guest
code. See chapter 14.4.1, CVE-2018-3646, page 419.
--l1d-flush-on-vm-entry=on | off
Enables or disables level 1 data cache flushing on every VM entry. See chapter 14.4.1,
CVE-2018-3646, page 419.
--mds-clear-on-sched=on | off
Enables CPU buffer clearing when a thread is scheduled to execute guest code. See chapter
14.4.2, CVE-2018-12126, CVE-2018-12127, CVE-2018-12130, CVE-2019-11091, page 420.
--mds-clear-on-vm-entry=on | off
Enables CPU buffer clearing on every VM entry. See chapter 14.4.2, CVE-2018-12126,
CVE-2018-12127, CVE-2018-12130, CVE-2019-11091, page 420.
--cpu-profile=host | Intel 8086 | Intel 80286 | Intel 80386
Specifies the profile to use for guest CPU emulation. Specify a value that is based on the
host system CPU (host) or one of the following older Intel micro-architectures:
8086,
80286, or 80386.
--hpet=on | off
Enables or disables a High Precision Event Timer (HPET) that can replace a legacy system
timer. This feature is disabled by default. Note HPET is supported on Windows versions
starting with Vista.
--hwvirtex=on | off
Enables or disables the use of hardware virtualization extensions in the processor of the
host system. Such extensions are Intel VT-x or AMD-V. See chapter 11.3, Hardware Virtual-
ization, page 395.
--triple-fault-reset=on | off
Enables or disables the resetting of the guest VM instead of triggering a Guru Meditation.
Some guest VMs raise a triple fault to reset the CPU, so sometimes resetting the guest
VM is the best outcome. This option only applies to guests that do not use symmetric
multiprocessing (SMP).
185