Scion Q EV. Service Manual - part 13
 

  Index      Manuals     Scion Q EV. Service Manual


Search            copyright infringement  


Content      ..     11      12      13      14     ..


Scion Q EV. Service Manual - part 13


206

5-4. How to charge

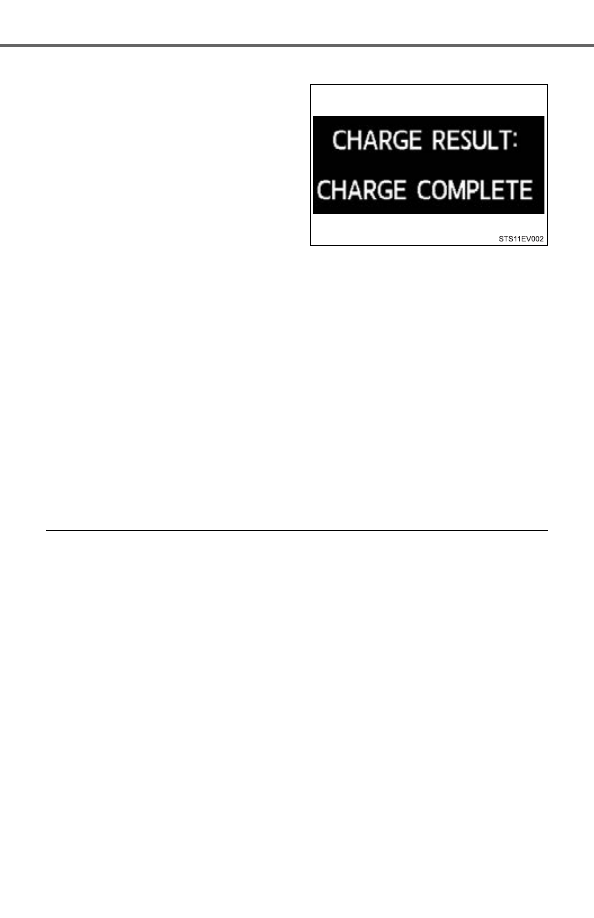
Charging messages

The first time the power switch
is turned to ON mode after
charging is completed

*

, a mes-

sage detailing the results of the
charging will be displayed.
Also, if an operation which can-
not be carried out is attempted
during charging, a warning
message will be displayed.

If a message appears, perform
the operation required by the
message. (

P. 355)

If charging fails to finish suc-
cessfully, a message will remain
on the multi-information display.
To change the display, turn the
“DISP” knob.

*

: The message may not be dis-

played if the Remote Climate
Control (

P. 228) has been

used.

Safety functions
P. 188

If the traction battery becomes low
P. 75

Amount of time required for charging in normal charge
P. 188

Remaining charging time
P. 188

During normal charging
P. 188

If two charging connectors are used at the same time
P. 189

-------------------------------------------------------------------------------------------------------------------------------------------------------------

207

5-4. How to charge

5

Dr
ivi
n

g

Timer charging function

While the Remote Climate Control is in operation, the timer charging func-
tion cannot be used.

While charging with the quick charger, the timer charging function cannot be
used.

Either start or finish time can be scheduled (both cannot be scheduled).
For the timer charging operation, refer to the diagram shown below.

Timer charging finishes when the traction battery is fully charged.

Charging starts at some time so that the battery will be fully charged at
the scheduled finish time.

• The finish time setting mode should only be used as a reference for the

time at which charging will finish.

• If charging does not finish on time, charging will start immediately.
• Due to the traction battery’s remaining charge, outside temperature and

other charging conditions, the battery may be fully charged earlier than
the scheduled finish time or may not be fully charged even at the finish
time.

• For information about the charging time, refer to P. 188.

For correct operation of the charging timer function

Check the following points.

Check that the time is correct.

Check that the power switch is off.

Do not use a connector which has an electricity interruption function (includ-
ing timer functions). 
(Use a connector which supplies electricity normally.)

STS12EV033

Start time setting 
mode

Finish time setting 
mode

1

2

-------------------------------------------------------------------------------------------------------------------------------------------------------------

208

5-4. How to charge

Automatic cancelation of the charging timer function

If the Remote Climate Control is operated while the charging cable is con-
nected, the charging timer function will be canceled. Charging will com-
mence after the Remote Climate Control has been turned off.

When quick charging is started, the timer charging function will be canceled
so that quick charging will commence.

Charging will not commence if the power switch is not off, even at the set
time.

When the 12-volt battery is disconnected

Disconnecting the 12-volt battery terminal will reset the set time of scheduled
timer charging. The timer charging function will also be canceled. In addition
to setting a charging start or finish time, a charging schedule will need to be
set.

Charging indicator
P. 189

When the outside temperature is low or high
P. 189

Charging time may increase
P. 190

Capacity reduction of the traction battery
P. 190

Handling the traction battery
P. 83

When not using the vehicle for an extended period of time 
P. 191

If the recharge inlet door cannot be opened
P. 191

Charging cable
P. 191

-------------------------------------------------------------------------------------------------------------------------------------------------------------

209

5-4. How to charge

5

Dr
ivi
n

g

CAUTION

When charging
P. 192

Warning while charging
P. 193

Warning after normal charging
P. 193

Battery charger
P. 193

If the error warning indicator on the CCID (Charging Circuit Interrupt-
ing Device) stays on during charging
P. 193

When the charging cable is connected to the vehicle
P. 194

NOTICE

After charging
P. 194

Using private power generators
P. 194

Usable temperature range
P. 194

-------------------------------------------------------------------------------------------------------------------------------------------------------------

210

5-5. Using the driving support systems

Driving assist systems

ABS (Anti-lock Brake System)

Helps to prevent wheel lock when the brakes are applied suddenly,
or if the brakes are applied while driving on a slippery road surface

Brake assist

Generates an increased level of braking force after the brake pedal
is depressed when the system detects a panic stop situation

VSC (Vehicle Stability Control)

Helps the driver to control skidding when swerving suddenly or
turning on slippery road surfaces

Enhanced VSC (Enhanced Vehicle Stability Control)

Provides cooperative control of the ABS, TRAC, VSC and EPS. 
Helps to maintain directional stability when swerving on slippery
road surfaces by controlling steering performance.

TRAC (Traction Control)

Helps to maintain drive power and prevent the drive wheels from
spinning when starting the vehicle or accelerating on slippery roads

Hill-start assist control

P. 213

EPS (Electric Power Steering) 

Employs an electric motor to reduce the amount of effort needed to
turn the steering wheel 

To help enhance driving safety and performance, the following
systems operate automatically in response to various driving
situations. Be aware, however, that these systems are supple-
mentary and should not be relied upon too heavily when operat-
ing the vehicle. 

-------------------------------------------------------------------------------------------------------------------------------------------------------------

211

5-5. Using the driving support systems

5

Dr
ivi
n

g

The slip indicator will flash while
the TRAC/VSC/ABS systems are
operating.

Sounds and vibrations caused by the ABS, brake assist, TRAC and VSC
systems

A sound may be heard from the motor compartment when the brake pedal is
depressed repeatedly, when the EV system is started or just after the vehi-
cle begins to move. This sound does not indicate that a malfunction has
occurred in any of these systems.

Any of the following conditions may occur when the above systems are
operating. None of these indicates that a malfunction has occurred.

• Vibrations may be felt through the vehicle body and steering.
• A motor sound may be heard after the vehicle comes to a stop.
• The brake pedal may pulsate slightly after the ABS is activated.
• The brake pedal may move down slightly after the ABS is activated.

EPS operation sound

When the steering wheel is operated, a motor sound (whirring sound) may be
heard. This does not indicate a malfunction.

Reduced effectiveness of the EPS system

The effectiveness of the EPS system is reduced to prevent the system from
overheating when there is frequent steering input over an extended period of
time. The steering wheel may feel heavy as a result. Should this occur, refrain
from excessive steering input or stop the vehicle and turn the EV system off.
The EPS system should return to normal within 10 minutes.

When the TRAC/VSC/ABS systems are operating

-------------------------------------------------------------------------------------------------------------------------------------------------------------

212

5-5. Using the driving support systems

CAUTION

The ABS does not operate effectively when

The limits of tire gripping performance have been exceeded.

The vehicle hydroplanes while driving at high speed on wet or slick roads.

Stopping distance when the ABS is operating may exceed that of nor-
mal conditions

The ABS is not designed to shorten the vehicle’s stopping distance. Always
maintain a safe distance from the vehicle in front of you, especially in the
following situations:

When driving on dirt, gravel or snow-covered roads

When driving with tire chains

When driving over bumps in the road

When driving over roads with potholes or uneven surfaces

TRAC may not operate effectively when

Directional control and power may not be achievable while driving on slip-
pery road surfaces, even if the TRAC system is operating. 
Do not drive the vehicle in conditions where stability and power may be lost.

When the VSC is activated

The slip indicator flashes. Always drive carefully. Reckless driving may
cause an accident. Exercise particular care when the indicator flashes.

Replacing tires

Make sure that all tires are of the specified size, brand, tread pattern and
total load capacity. In addition, make sure that the tires are inflated to the
recommended tire inflation pressure level.

The ABS, TRAC and VSC systems will not function correctly if different tires
are installed on the vehicle.
Contact your Scion dealer for further information when replacing tires or
wheels.

Handling of tires and the suspension

Using tires with any kind of problem or modifying the suspension will affect
the driving assist systems, and may cause a system to malfunction.

-------------------------------------------------------------------------------------------------------------------------------------------------------------

213

5-5. Using the driving support systems

5

Dr
ivi
n

g

Hill-start assist control

To engage hill-start assist control,
further depress the brake pedal
when the vehicle is stopped com-
pletely.

A buzzer will sound once to indi-
cate the system is activated. The
slip indicator will also start flashing.

Hill-start assist control operating conditions

The system operates in the following situations:

• The shift lever is in a position other than P.
• The parking brake is not applied.
• The accelerator pedal is not depressed.

Hill-start assist control cannot be operated while the slip indicator is illumi-
nated.

Hill-start assist control

While hill-start assist control is operating, the brakes remain automatically
applied after the driver releases the brake pedal. The stop lights and the
high mounted stoplight turn on.

Hill-start assist control operates for about 2 seconds after the brake pedal is
released.

If the slip indicator does not flash and the buzzer does not sound when the
brake pedal is further depressed, slightly reduce the pressure on the brake
pedal (do not allow the vehicle to roll backward) and then firmly depress it
again. If the system still does not operate, check that the operating condi-
tions explained above have been met.

Assists with starting off and temporarily maintains braking
power even if the foot is removed from the brake pedal when
starting off on an incline or a slippery slope.

-------------------------------------------------------------------------------------------------------------------------------------------------------------

214

5-5. Using the driving support systems

Hill-start assist control buzzer

When hill-start assist control is activated, the buzzer will sound once.

In the following situations, hill-start assist control will be canceled and the
buzzer will sound twice.

• No attempt is made to drive the vehicle within approximately 2 seconds of

releasing the brake pedal.

• The shift lever is moved to P.
• The parking brake is applied.
• The brake pedal is depressed again.
• The brake pedal has been depressed for more than approximately 3 min-

utes.

If a buzzer other than the hill-start assist control buzzer is sounding, the hill-
start assist control buzzer may not sound.

If the slip indicator comes on

It may indicate a malfunction in the system. Contact your Scion dealer.

CAUTION

Hill-start assist control

Do not overly rely on hill-start assist control. Hill-start assist control may
not operate effectively on steep inclines and roads covered with ice.

Unlike the parking brake, hill-start assist control is not intended to hold the
vehicle stationary for an extended period of time. Do not attempt to use
hill-start assist control to hold the vehicle on an incline, as doing so may
lead to an accident.

-------------------------------------------------------------------------------------------------------------------------------------------------------------

215

5-6. Driving tips

5

Dr
ivi
n

g

Winter driving tips

● Use fluids that are appropriate to the prevailing outside tempera-

tures. 

• Inverter coolant
• Washer fluid

● Have a service technician inspect the condition of the 12-volt bat-

tery.

● Have the vehicle fitted with four snow tires or purchase a set of tire

chains for the front tires.

Ensure that all tires are the same size and brand, and that chains match
the size of the tires.

Perform the following according to the driving conditions: 
● Do not try to forcibly open a window or move a wiper that is frozen.

Pour warm water over the frozen area to melt the ice. Wipe away
the water immediately to prevent it from freezing. 

● To ensure proper operation of the climate control system fan,

remove any snow that has accumulated on the air inlet vents in
front of the windshield. 

● Check for and remove any excess ice or snow that may have accu-

mulated on the exterior lights, vehicle’s roof, chassis, around the
tires or on the brakes.

● Remove any snow or mud from the bottom of your shoes before

getting in the vehicle.

Carry out the necessary preparations and inspections before
driving the vehicle in winter. Always drive the vehicle in a man-
ner appropriate to the prevailing weather conditions. 

Preparation for winter

Before driving the vehicle

-------------------------------------------------------------------------------------------------------------------------------------------------------------

216

5-6. Driving tips

Accelerate the vehicle slowly, keep a safe distance between you and
the vehicle ahead, and drive at a reduced speed suitable to road con-
ditions.

Park the vehicle and move the shift lever to P without setting the park-
ing brake. The parking brake may freeze up, preventing it from being
released. If necessary, block the wheels to prevent inadvertent sliding
or creeping.

Use the correct tire chain size when mounting the tire chains. 
Chain size is regulated for each tire size.

Regulations regarding the use of tire chains vary depending on loca-
tion and type of road. Always check local regulations before installing
chains.

When driving the vehicle

When parking the vehicle

Selecting tire chains

Side chain

0.12 in. (3 mm) in diameter

0.39 in. (10 mm) in width

1.18 in. (30 mm) in length

Cross chain

0.16 in. (4 mm) in diameter

0.55 in. (14 mm) in width

0.98 in. (25 mm) in length

Regulations on the use of tire chains

1
2
3

4
5
6

-------------------------------------------------------------------------------------------------------------------------------------------------------------

217

5-6. Driving tips

5

Dr
ivi
n

g

Tire chain installation

Observe the following precautions when installing and removing chains:

Install and remove tire chains in a safe location.

Install tire chains on the front tires only. Do not install tire chains on the rear
tires.

Install tire chains on front tires as tightly as possible. Retighten chains after
driving 1/4 

 1/2 mile (0.5  1.0 km).

Install tire chains following the instructions provided with the tire chains.

If wheel ornaments are used, they will be scratched by the chain band, so
remove the ornaments before putting on the chains. (

P. 271)

Cooling fan

Snow may enter from the opening of the front bumper and so forth, and may

adhere to the cooling fan. Press 

 and check whether the cooling fan is

operating. If the cooling fan does not operate, it is possible that the cooling
fan is frozen. (However, when outside temperature is below 14°F [-10°C], the
cooling fan may not operate) 
If the cooling fan is frozen, remove any snow and ice from the cooling fan
area.

CAUTION

Driving with snow tires

Observe the following precautions to reduce the risk of accidents. 
Failure to do so may result in a loss of vehicle control and cause death or
serious injury.

Use tires of the specified size.

Maintain the recommended level of air pressure.

Do not drive in excess of 75 mph (120 km/h), regardless of the type of
snow tires being used.

Use snow tires on all, not just some wheels.

Do not mix tires of different marks, models, tread patterns or treadwear.

-------------------------------------------------------------------------------------------------------------------------------------------------------------

218

5-6. Driving tips

CAUTION

Driving with tire chains 

Observe the following precautions to reduce the risk of accidents. 
Failure to do so may result in the vehicle being unable to be driven safely,
and may cause death or serious injury.

Do not drive in excess of the speed limit specified for the tire chains being
used, or 30 mph (50 km/h), whichever is lower.

Avoid driving on bumpy road surfaces or over potholes.

Avoid sudden acceleration, abrupt steering, sudden braking and shifting
operations that cause sudden regenerative braking.

Slow down sufficiently before entering a curve to ensure that vehicle con-
trol is maintained.

When removing snow and ice from cooling fan

Please turn the power switch off. Also, if you are in the middle of charging
the vehicle, please stop charging. With the power switch in ACCESSORY or
ON mode, or charging, there is a possibility of the cooling fan suddenly
beginning to turn and the danger of hands, clothes, etc. being caught in the
fan, resulting in serious injury.

NOTICE

Repairing or replacing snow tires

Request repairs or replacement of snow tires from Scion dealers or legiti-
mate tire retailers.
This is because the removal and attachment of snow tires affects the opera-
tion of the tire pressure warning valves and transmitters.

Fitting tire chains 

The tire pressure warning valves and transmitters may not function correctly
when tire chains are fitted.

When the cooling fan freezes

Do not run the cooling for a long time in the frozen state. 
The heating effect not only becomes weak, but there is a possibility of dam-
aging the cooling fan.

-------------------------------------------------------------------------------------------------------------------------------------------------------------

219

6

Interior features

6-1. Using the air conditioning 

system and defogger

Air conditioning system ..... 220

Remote Climate Control 

System for EV ................. 228

Rear window defogger ...... 232

HWD (Heated 

Windshield Defroster) ..... 233

6-2. Using the interior lights

Interior lights list ................ 234

• Interior light ................... 234

6-3. Using the storage features

List of storage features ..... 236

• Cup holders .................. 237
• Bottle holders................ 237

Luggage compartment 

features ........................... 239

6-4. Other interior features

Sun visors 

and vanity mirrors ........... 241

Outside temperature 

display............................. 242

Power outlet ...................... 243

Seat heaters...................... 244

Assist grips........................ 246

-------------------------------------------------------------------------------------------------------------------------------------------------------------

220

6-1. Using the air conditioning system and defogger

Air conditioning system

Temperature display

Air outlet display

Fan speed display

Outside/recirculated air mode
button

Cooling and dehumidification
function on/off button

Windshield defogger button

“MAX” mode button (

P. 225)

Air outlet button

Control dial

Fan speed button

Temperature button

“OFF” button

Automatic mode button

1
2
3
4

5

6

7
8
9

10

11

12
13

-------------------------------------------------------------------------------------------------------------------------------------------------------------

221

6-1. Using the air conditioning system and defogger

6

Interio

r features

Press .

Air outlets and fan speed are automatically adjusted according to the tem-
perature setting.

To adjust the temperature settings, press 

 and turn the control

dial clockwise (warm) or counterclockwise (cool).

The button lights up.

Press .

The cooling function switches between on and off each time the button is
pressed.

To adjust the fan speed, press 

 and turn the control dial clock-

wise (increase) or counterclockwise (decrease).

The button lights up.

Press 

 to turn the fan off.

To adjust the temperature settings, press 

 and turn the control

dial clockwise (warm) or counterclockwise (cool).

The button lights up.

To change the air outlets, press 

 and turn the control dial.

The button lights up.

The air outlets switch each time either side of control dial is turned.

Using the automatic air conditioning system

Adjusting the settings manually

1

2

3

1

2

3

-------------------------------------------------------------------------------------------------------------------------------------------------------------


Content      ..     11      12      13      14     ..