Lancia FLAVIA. Service Manual - part 4
POWER CONVERTIBLE
There are two Top Down
2. Press and hold the
switch positions. Press and
POWER TOP button until
TOP CONTROLS
hold the switch to the first
the Power Top and All Win-
The power top switch is located on the
detent, which is indicated by
dows Down feature is com-
front of the center console.
the EVIC displaying
“CONVERT-
plete.
There is also a power top button on
IBLE TOP IN OPERATION” message.
3. Press and release the POWER TOP
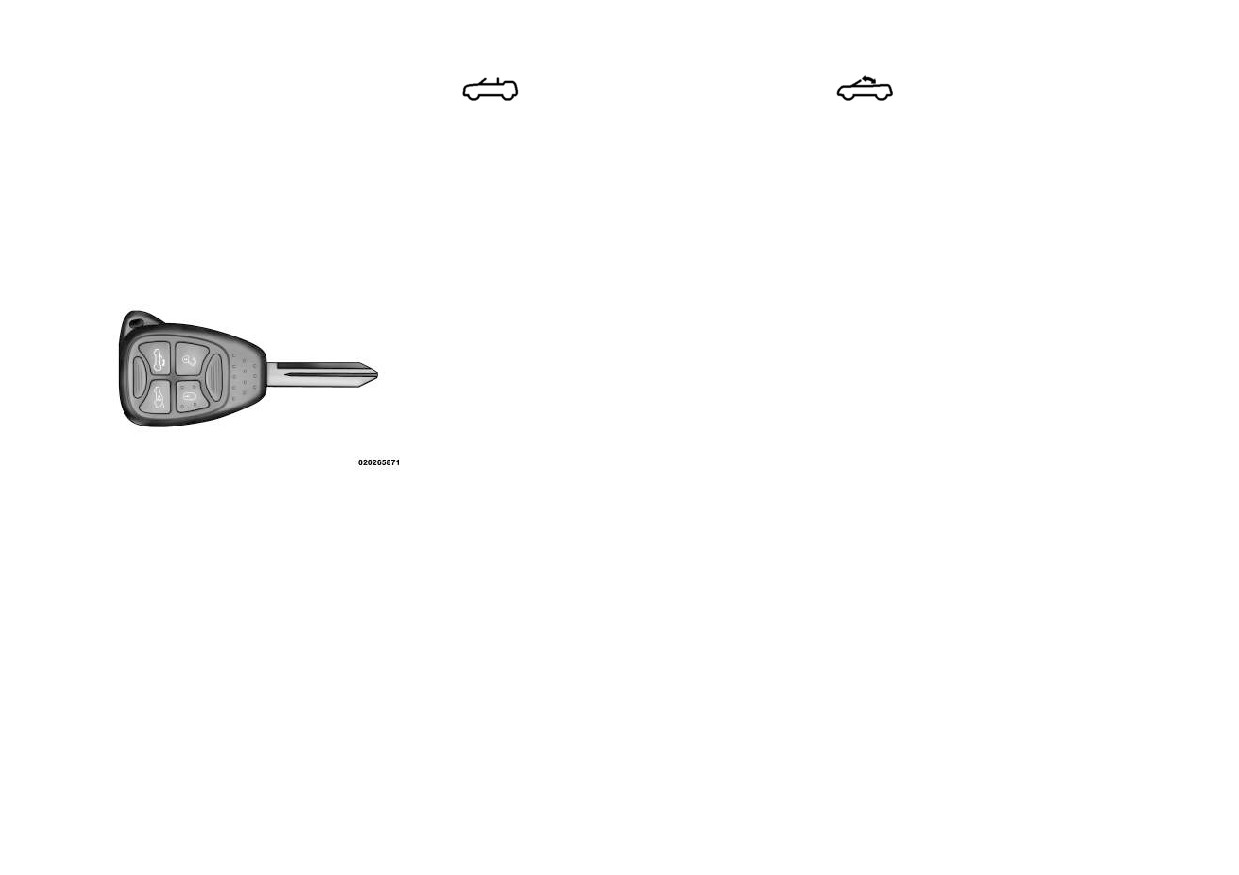
the Remote Keyless Entry
(RKE)
The system will lower all fully raised
button on the RKE transmitter.
transmitter for remotely lowering the
windows approximately 10 mm, lower
power convertible top.
the top to its fully retracted position,
NOTE: If the RKE transmitter
and then raise the windows. Press and
button is released before the power
hold the switch to the second detent.
top is completely down steps 1-3
The system will lower all four windows
must be performed again.
and the top to their fully retracted
RAISING THE POWER
positions.
CONVERTIBLE TOP
The driver has to press and hold the
convertible top switch during the en-
Using The Power Top Switch
tire opening cycle, if there is an ob-
NOTE: The power top switch will
Power Top Button
struction and the driver is alerted, the
operate when the ignition switch is
LOWERING THE POWER
convertible top operation can be
turned to the ON or ACC position
stopped by releasing the switch.
CONVERTIBLE TOP
and when in the power accessory
Using The Remote Keyless Entry
delay.
Using The Power Top Switch
Transmitter
NOTE: The power top switch will
NOTE: Steps 1 - 3 must be per-
operate when the ignition switch is
formed within five seconds.
turned to the ON or ACC position
and when in the power accessory
1. Press and release the UNLOCK
delay.
button on the RKE transmitter.
59
Press and hold the switch in
2. Check for Operation and Warning
Installing The Wind Stop
the Top Up position, “CON-
Messages as described under “Power
1. Remove the Wind Stop from the
VERTIBLE TOP IN OP-
Convertible Top Operation and Warn-
trunk.
ERATION” message is dis-
ing Messages.” If applicable, perform
played in the EVIC at this time. Keep
the related action to correct the condi-
2. Unfold the Wind Stop framework.
holding the switch until the operation
tion present.
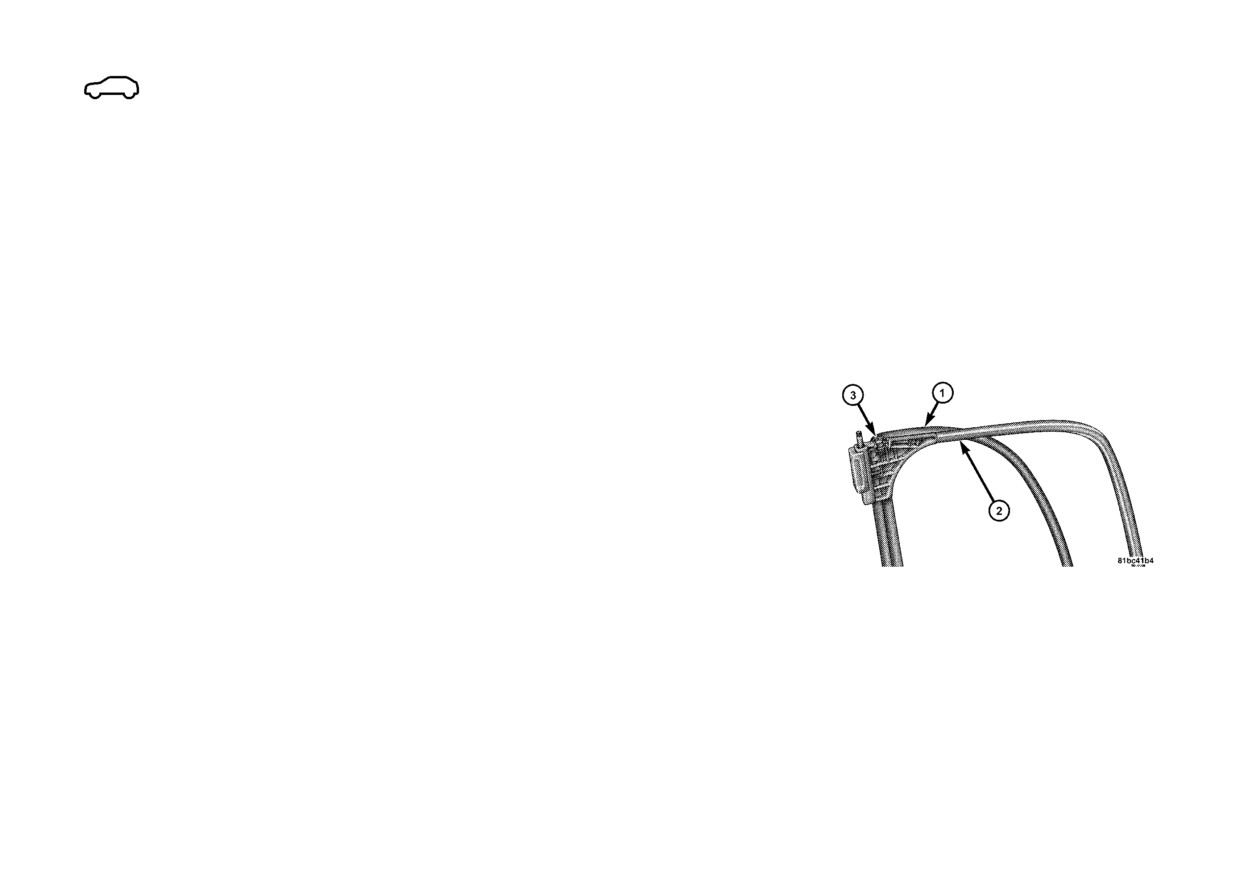
3. Lay the small frame (1) flat on top
of raising the top and latching it is
3. If Steps 1 and 2 do not resolve the
of the large frame (2) and snap the
complete, which is indicated by the
problem, refer to “Emergency Bypass
two frames together by engaging the
system also raising the windows and
Mode”.
frame lock (3).
displaying
“CONVERTIBLE TOP
COMPLETE” message in the EVIC.
WIND STOP
NOTE: The frames must lie flat
on each other
in
order
to
snap
Using The Remote Keyless Entry
The Wind Stop installs in the backseat
them together.
Transmitter
area of the vehicle. The Wind Stop
will not interfere with power top op-
You cannot use the power top button
eration. Therefore, it can remain in-
on the RKE transmitter to raise the
stalled when the top is up. However,
power convertible top. You must use
when not in use, the Wind Stop folds
the power top switch inside the ve-
to allow for convenient storage under-
hicle to perform this operation.
neath the cargo shield in the trunk.
Manually Raising
NOTE: It is recommended that
Raising the power convertible top
you lower the convertible top be-
manually should only be performed by
fore installing or removing the
an authorized dealer. In the event that
Wind Stop.
you experience a malfunction when
operating the power convertible top:
1. Read all of the Notes, Cautions, and
Warning found under “Power Convert-
ible Top Usage Precautions” to verify
all operating conditions are met.
60
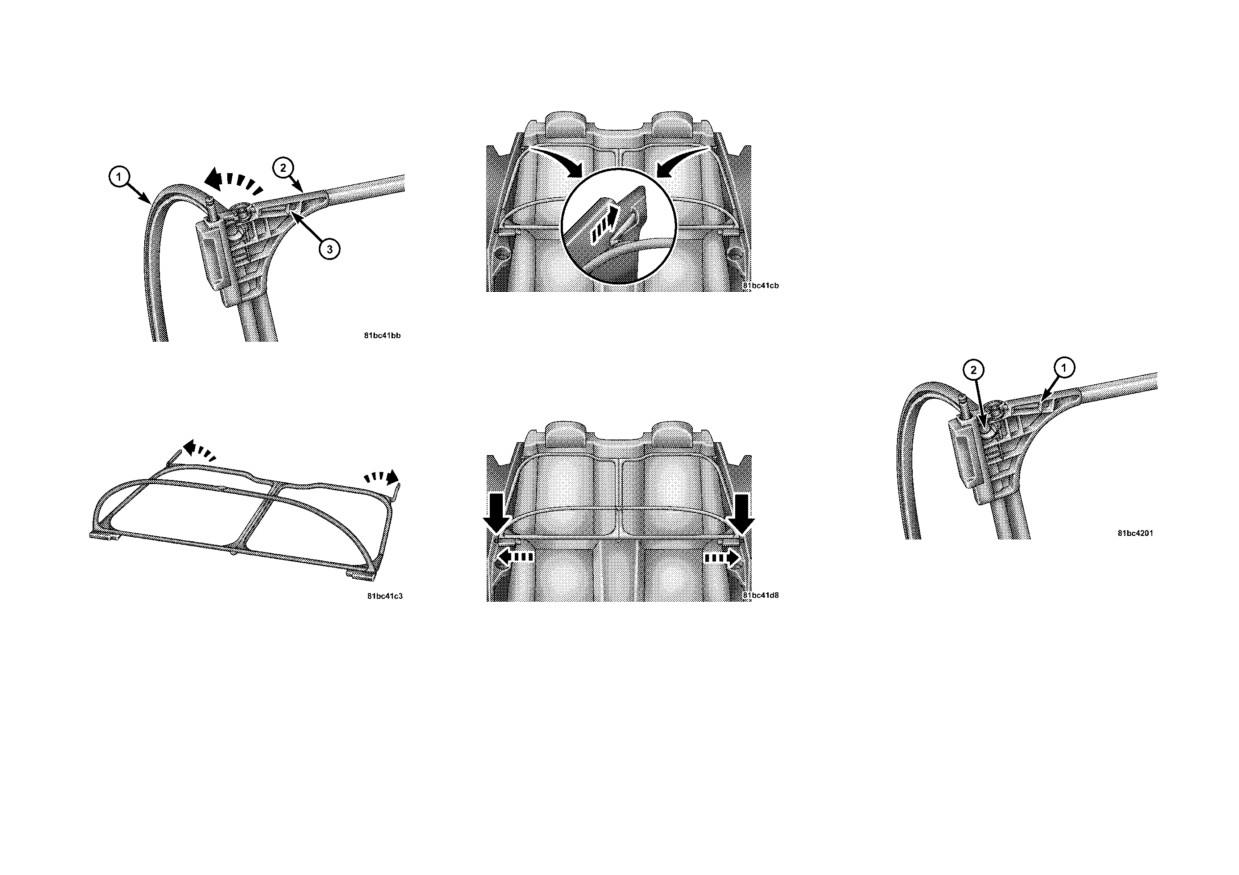
4. Pivot the small frame (1) away
6. Align and insert the stems into the
Removing And Storing The Wind
from the large frame (2) until the
slot in each trim panel.
Stop
pivot lock (3) engages to lock the two
Reverse the installation procedure to
frames in an L shape.
remove, fold, and store the Wind Stop.
However, note the following before
doing so:
Disengage the pivot lock (1) to fold
the small frame flat onto the large
frame. Disengage the frame lock (2)
to disconnect the small frame from
7. Align the pins at the front of the
the large frame.
large frame with the hole in each trim
5. Unfold both stems at the rear of
panel. Slide the pins outward until fully
the large frame.
extended into each hole.
61

POWER CONVERTIBLE TOP OPERATION AND WARNING MESSAGES
When the appropriate conditions exist, the PTCM displays various power convertible top operation and warning messages in
the Electronic Vehicle Information Center (EVIC), or in the Odometer for vehicles not equipped with the EVIC. Refer to the
following chart for message related information:
EVIC
EVIC
Odometer
Odometer
Odometer
Odometer
Chime
Condition
Operator
Message♦
Message
Message
Message
Message
Message
Action
Display
(< 8 km/h)♦♦
Display
(> 8
km/h)♦♦
Display
Required
Time♦
Time♦♦
Time♦♦
CONVERT-
Until Op-
TOP nOT
Until Op-
—
—
—
The Sys-
—
IBLE TOP
eration is
SECUrE
eration is
tem is
NOT SE-
Complete
Complete
Lowering
CURED
or Raising
the Top
CONVERT-
9 sec.
TOP
Display
—
—
Single
The Sys-
—
IBLE TOP
DONE
Scrolls for
Chime
tem Com-
COM-
6 sec.
pletes Op-
PLETE
eration of
Lowering
or Raising
the Top
SECURE
9 sec.
SET
Display
—
—
Single
The Top
Position
CARGO
CARGO
Scrolls for
Chime
Fails to
the Cargo
SHIELD
SHIELD
9 sec.
Move
Shield in
When Op-
the Trunk
erating the
to Allow
Power Top
Top Op-
Control
eration
62

EVIC
EVIC
Odometer
Odometer
Odometer
Odometer
Chime
Condition
Operator
Message♦
Message
Message
Message
Message
Message
Action
Display
(< 8 km/h)♦♦
Display
(> 8 km/h)♦♦
Display
Required
Time♦
Time♦♦
Time♦♦
CONVERT-
Until Op-
TOP nOT
Until Op-
TOP nOT
Until Op-
Single
The Sys-
Cycle
IBLE TOP
eration is
SECUrE
eration is
SECUrE
eration is
Chime
tem Fails
Power Top
NOT
Complete
Complete
Complete
to Com-
Control
SECURED
plete Op-
eration of
Lowering
or Raising
the Top
SPEED
9 sec.
SPEED
Display
TOP
6 sec.
Single
You Are
The Top
TOO HIGH
TOO
Scrolls for
Chime
Operating
Will Not
HIGH
9 sec.
the Power
Operate
Top at a
Unless the
Vehicle
Vehicle is
Speed
Stationary.
Greater
Than
0 km/h
TRUNK
Continu-
DECK
Continu-
DECK
Continu-
Single
The Trunk
The Top
AJAR
ous
ous
ous
Chime
Lid is Un-
Will Not
latched or
Operate
Open
Unless the
Trunk Lid
is Closed
63

EVIC
EVIC
Odometer
Odometer
Odometer
Odometer
Chime
Condition
Operator
Message♦
Message
Message
Message
Message
Message
Action
Display
(< 8 km/h)♦♦
Display
(> 8 km/h)♦♦
Display
Required
Time♦
Time♦♦
Time♦♦
CONVERT-
6 sec.
TOP FAIL
Display
TOP
6 sec.
Single
The PTCM
Refer to
IBLE TOP
Scrolls for
Chime
Activated
Foot Note
MAL-
6 Seconds
the System
♦♦♦
FUNC-
LOCK-
TION
OUT
Feature
CONVERT-
Until
TOP FAIL
Display
TOP
Display
Single
The PTCM
See your
IBLE TOP
Fault is
Scrolls
Flashes
Chime
Activated
authorized
MAL-
No Lon-
until
until
the System
dealer for
FUNC-
ger De-
Fault is
Fault is
LOCK-
service
TION
tected or
No Lon-
No Lon-
OUT
Repaired
ger De-
ger De-
Feature
tected or
tected or
Repaired
Repaired
♦ If so equipped.
♦♦ For vehicles not equipped with the EVIC.
♦♦♦ The PTCM will lockout the power convertible top system if the vehicle charging system is malfunctioning, or the
battery is run down, or the hydraulic pump is overheating.
• If the vehicle charging system is malfunctioning, see your authorized dealer for service.
• If the battery is run down, have it recharged and tested at your authorized dealer.
• Hydraulic pump overheating can occur if you lower and raise the top consecutively (usually more than six or seven
times depending upon the ambient temperature). Wait at least five minutes before operating the power top again.
NOTE: If lockout occurs due to hydraulic pump overheating, the system will allow you to raise the top without waiting
five minutes. However, do so only if necessary.
64
EMERGENCY BYPASS MODE
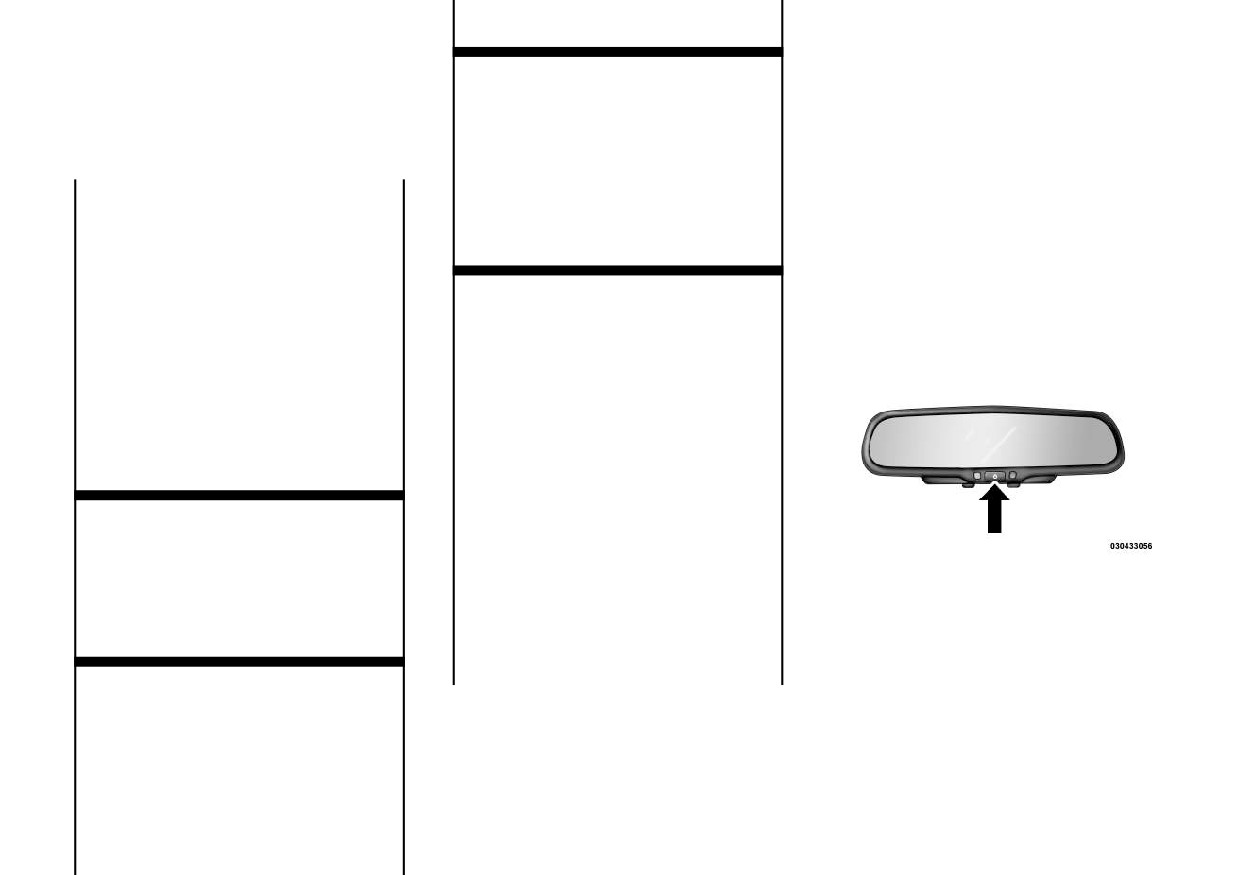
This mirror automatically adjusts for
CAUTION! (Continued)
headlight glare from vehicles behind
(TO RAISE THE TOP ONLY)
• Using the Emergency Bypass
you. You can turn the feature on or off
This procedure is only to be used to
Mode could potentially damage
by pressing the button at the base of
raise the top when the top cannot be
the convertible top and should
the mirror. A light to the left of the
returned to the UP (raised) position by
only be used to raise the power
button will illuminate to indicate
pressing the POWER TOP switch or is
top to the UP (raised) position
when the dimming feature is acti-
in a position in which the vehicle can-
when the normal top operation is
vated. The sensor to the right of the
not be driven. Please follow these
not functioning.
button does not illuminate.
emergency bypass instructions to re-
If damage starts to occur while in the
NOTE: This feature is disabled
turn the top to the UP (raised) posi-
Emergency Bypass Mode, immedi-
when the vehicle is moving in re-
tion.
ately release the power top switch and
verse.
Press the POWER TOP switch in the
see your authorized dealer.
Top Up direction five times within two
NOTE: This procedure may take
seconds and hold the switch in the
more time to fully raise and close
Top Up position for a minimum of two
the power top. It is not uncommon
minutes.
to see delays of up to 30 seconds
before operation begins.
CAUTION!
• Once this procedure has been
MIRRORS
completed and the top is in the
Auto Dimming Mirror
UP (raised) position, see your au-
AUTOMATIC DIMMING
thorized dealer.
MIRROR
• DO NOT exceed 64 km/h.
A two-point pivot system allows for
(Continued)
horizontal and vertical adjustment of
the mirror. Adjust the mirror to center
on the view through the rear window.
65
After selecting a mirror, move the
CAUTION!
WARNING!
knob in the same direction you want
To avoid damage to the mirror dur-
Vehicles and other objects seen in
the mirror to move. When finished,
ing cleaning, never spray any clean-
the passenger side convex mirror
return the knob to the center “O”
ing solution directly onto the mirror.
will look smaller and farther away
(Off) position to guard against acci-
Apply the solution onto a clean cloth
than they really are. Relying too
dentally moving a mirror position.
and wipe the mirror clean.
much on your passenger side con-
vex mirror could cause you to col-
OUTSIDE MIRRORS
lide with another vehicle or other
object. Use your inside mirror when
To receive maximum benefit, adjust
judging the size or distance of a
the outside mirrors to center on the
vehicle seen in the passenger side
adjacent lane of traffic and a slight
convex mirror.
overlap of the view obtained from the
inside mirror.
POWER MIRRORS
Mirror Directions
NOTE: The passenger side con-
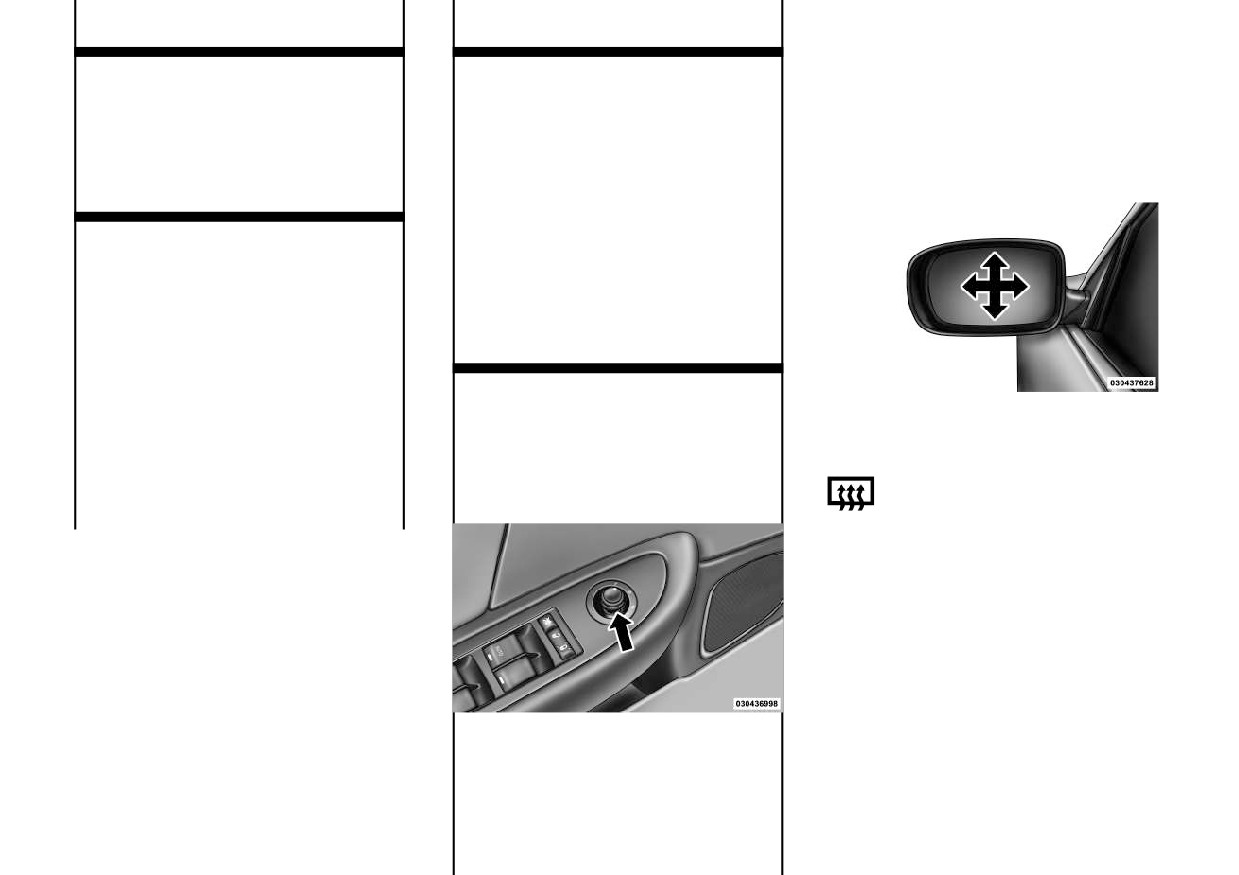
The power mirror switch is located on
vex outside mirror will give a
HEATED MIRRORS
the driver's door trim. A rotary knob
much wider view to the rear, and
selects the left mirror, right mirror or
These mirrors are heated to
especially of the lane next to your
off position.
melt frost or ice. This feature is
vehicle.
activated whenever you turn
on the rear window defroster. Refer to
“Rear Window Features” in “Under-
standing The Features Of Your Ve-
hicle” for further information.
Power Mirror Switch
66
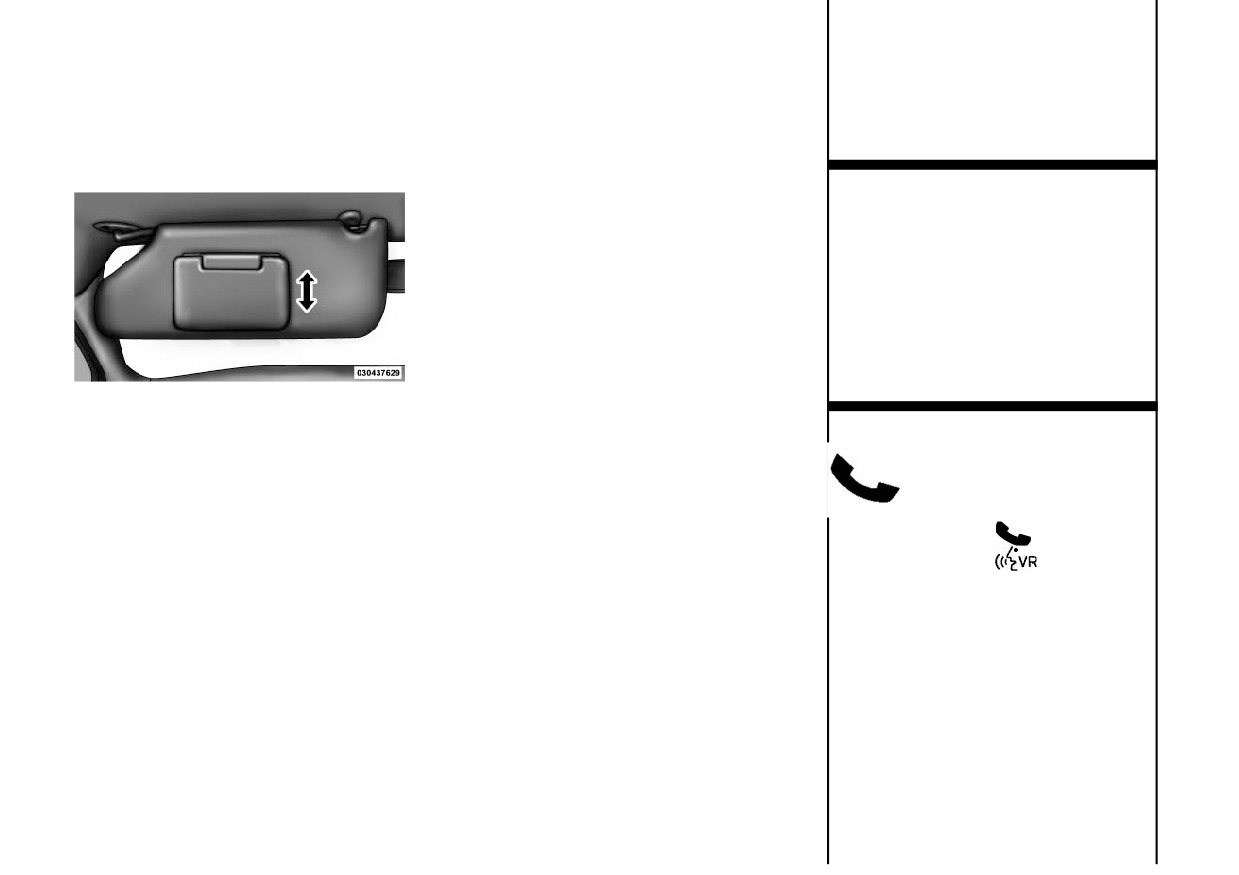
VANITY MIRROR
or “Dial”…“151-1234 -5555”). Your
Phone at a time. The Uconnect™ Phone
mobile phone's audio is transmitted
is available in English, Dutch, French,
A vanity mirror is attached to the
through your vehicle's audio system;
German, Italian or Spanish languages
inside face of the sun visor. To use the
the system will automatically mute your
(as equipped).
mirror, rotate the sun visor downward
radio when using the Uconnect™
and flip the mirror cover upward.
Phone.
WARNING!
Any voice commanded system
Uconnect™ Phone allows you to
should be used only in safe driving
transfer calls between the Uconnect™
conditions following all applicable
Phone and your mobile phone as you
laws, including laws regarding
enter or exit your vehicle and enables
phone use. All attention should be
you to mute the Uconnect™ Phone's
kept on the roadway ahead. Failure
microphone for private conversation.
to do so may result in a collision
The Uconnect™ Phone is driven
causing serious injury or death.
Vanity Mirror
through your Bluetooth® “Hands-Free
Uconnect™ Phone Button
UCONNECT™ PHONE
profile” mobile phone. Uconnect™
Phone features Bluetooth® technology -
The radio or steering wheel
NOTE: For Uconnect™ Phone
the global standard that enables differ-
controls will contain the two
with Navigation or Multimedia ra-
ent electronic devices to connect to each
control buttons (Uconnect™
dio, refer to the Navigation or Mul-
other without wires or a docking sta-
Phone
button and
timedia radio's User's Manual
tion, so Uconnect™ Phone works no
Voice Command
button) that
(separate booklet) Uconnect™
matter where you stow your mobile
will enable you to access the system.
Phone section.
phone (be it your purse, pocket, or
When you press the button you will
briefcase), as long as your phone is
Uconnect™ Phone is a voice-activated,
hear the word Uconnect™ followed
turned on and has been paired to the
hands-free, in-vehicle communications
by a BEEP. The beep is your signal to
vehicle's Uconnect™ Phone. The
system. Uconnect™ Phone allows you
give a command.
Uconnect™ Phone allows up to seven
to dial a phone number with your mo-
mobile phones to be linked to the sys-
bile phone* using simple voice com-
tem. Only one linked (or paired) mobile
mands (e.g., “Call”…“Jim”… “Work”
phone can be used with the Uconnect™
67

Voice Command Button
COMPATIBLE PHONES
•
For certain operations, compound
commands can be used. For ex-
Actual button location may
* The Uconnect™ Phone requires
ample, instead of saying “Setup”
vary with radio. The indi-
a mobile phone equipped with the
and then “Phone Pairing”, the fol-
vidual buttons are described
Bluetooth® “Hands-Free Profile”,
lowing compound command can be
in the “Operation” section.
version 1.0 or higher.
said: “Setup Phone Pairing”.
The Uconnect™ Phone can be used
To find the list of compatible phones
•
For each feature explanation in this
with Hands-Free Profile certified
navigate through the following
section, only the compound form of
Bluetooth® mobile phones. Some
menus:
the voice command is given. You can
phones may not support all the
• Select model year for the vehicle
also break the commands into parts
Uconnect™ Phone features. Refer to
and say each part of the command
your mobile service provider or the
• Select type of the vehicle
when you are asked for it. For ex-
phone manufacturer for details.
• In the getting started tab, select
ample, you can use the compound
The Uconnect™ Phone is fully inte-
compatible phones
form voice command “Phonebook
grated with the vehicle's audio sys-
New Entry”, or you can break the
OPERATION
tem. The volume of the Uconnect™
compound form command into two
Phone can be adjusted either from the
Voice commands can be used to oper-
voice commands: “Phonebook” and
radio volume control knob or from the
ate the Uconnect™ Phone and to navi-
“New Entry”. Please remember, the
steering wheel radio control, if so
gate through the Uconnect™ Phone
Uconnect™ Phone works best when
equipped.
menu structure. Voice commands are
you talk in a normal conversational
required after most Uconnect™ Phone
tone, as if speaking to someone sit-
The radio display will be used for
prompts. You will be prompted for a
ting a few meters away from you.
visual prompts from the Uconnect™
specific command and then guided
Phone such as CELL or caller ID on
Voice Command Tree
through the available options.
certain radios.
Refer to “Voice Tree” in this section.
• Prior to giving a voice command,
one must wait for the beep, which
follows the “Ready” prompt or an-
other prompt.
68

Help Command
To complete the pairing process, you
•
For identification purposes, you
will need to reference your mobile
will be prompted to give the
If you need assistance at any prompt,
phone
owner's
manual.
The
Uconnect™ Phone a name for your
or if you want to know your options at
Uconnect™ website may also provide
mobile phone. Each mobile phone
any prompt, say “Help” following the
detailed instructions for pairing.
that is paired should be given a
beep. The Uconnect™ Phone will
unique phone name.
play all the options at any prompt if
The following are general phone to
you ask for help.
Uconnect™ Phone pairing instruc-
•
You will then be asked to give your
tions:
mobile phone a priority level be-
To activate the Uconnect™ Phone
tween 1 and 7, with 1 being the
from idle, simply press the
button
•
Press the
button to begin.
highest priority. You can pair up to
and follow the audible prompts for
•
After the “Ready” prompt and the
seven mobile phones to your
directions. All Uconnect™ Phone ses-
following beep, say “Setup Phone
Uconnect™ Phone. However, at
sions begin with a press of the
Pairing”.
any given time, only one mobile
button on the radio control head.
phone can be in use, connected to
•
When prompted, after the beep, say
Cancel Command
your Uconnect™ System. The pri-
“Pair a Phone” and follow the au-
ority allows the Uconnect™ Phone
At any prompt, after the beep, you
dible prompts.
to know which mobile phone to use
can say “Cancel” and you will be re-
•
You will be asked to say a four-digit
if multiple mobile phones are in the
turned to the main menu. However, in
Personal Identification Number
vehicle at the same time. For ex-
a few instances the system will take
(PIN), which you will later need to
ample, if priority 3 and priority 5
you back to the previous menu.
enter into your mobile phone. You
phones are present in the vehicle,
Pair (Link) Uconnect™ Phone To
can enter any four-digit PIN. You
the Uconnect™ Phone will use the
A Mobile Phone
will not need to remember this PIN
priority 3 mobile phone when you
after the initial pairing process.
make a call. You can select to use a
To begin using your Uconnect™
lower priority mobile phone at any
Phone, you must pair your compatible
time
(refer to
“Advanced Phone
Bluetooth® enabled mobile phone (re-
Connectivity”).
fer to “Compatible Phones” section to
learn about the phone type).
69

Dial By Saying A Number
Phonebook or downloaded phone-
• When prompted, enter the number
book. To learn how to store a name
designation (e.g., “Home”, “Work”,
• Press the
button to begin.
in the phonebook , refer to “Add
“Mobile”, or “Other”). This will al-
• After the “Ready” prompt and the
Names to Your Uconnect™
low you to store multiple numbers
following beep, say “Dial.”
Phonebook”.
for each phonebook entry, if desired.
• The system will prompt you to say
• The Uconnect™ Phone will con-
• When prompted, recite the phone
the number you want to call.
firm the name and then dial the
number for the phonebook entry
corresponding phone number,
that you are adding.
• For example, you can say
which may appear in the display of
“151-1234-5555.”
After you are finished adding an entry
certain radios.
into the phonebook, you will be given
• The Uconnect™ Phone will con-
Add Names To Your Uconnect™
the opportunity to add more phone
firm the phone number and then
Phonebook
numbers to the current entry or to
dial. The number will appear in the
return to the main menu.
display of certain radios.
NOTE: Adding names to the
Uconnect™ Phonebook is recom-
The Uconnect™ Phone will allow you
Call By Saying A Name
mended when the vehicle is not in
to enter up to 32 names in the phone-
•
Press the
button to begin.
motion.
book with each name having up to
four associated phone numbers and
•
After the “Ready” prompt and the
• Press the
button to begin.
designations. Each language has a
following beep, say “Call.”
• After the “Ready” prompt and the
separate 32-name phonebook acces-
•
The system will prompt you to say the
following beep, say
“Phonebook
sible only in that language. In addi-
name of the person you want to call.
New Entry”.
tion, for versions/markets, where pro-
vided, and supported by your phone,
•
After the “Ready” prompt and the
• When prompted, say the name of
Uconnect™ Phone automatically
following beep, say the name of the
the new entry. Use of long names
downloads your mobile phone’s
person you want to call. For ex-
helps the Voice Command and it is
phonebook.
ample, you can say “John Doe”,
recommended. For example, say
where John Doe is a previously
“Robert Smith” or
“Robert” in-
stored name entry in the Uconnect™
stead of “Bob”.
70

Phonebook Download —
•
Maximum of
1000
entries per
Edit Uconnect™ Phonebook
Automatic Phonebook Transfer
phone will be downloaded and up-
Entries
From Mobile Phone
dated every time a phone is con-
Editing names in the phonebook is
nected to the Uconnect™ Phone.
For versions/markets, where pro-
recommended when the vehicle is not
vided and specifically supported by
•
Depending on the maximum num-
in motion.
your phone, Uconnect™ Phone auto-
ber of entries downloaded, there
Automatic downloaded phonebook
matically downloads names
(text
may be a short delay before the
entries cannot be deleted or edited.
names) and number entries from your
latest downloaded names can be
mobile phone’s phonebook. Specific
used. Until then, if available, the
•
Press the
button to begin.
Bluetooth® Phones with Phone Book
previously downloaded phonebook
•
After the “Ready” prompt and the
Access Profile may support this fea-
is available for use.
following beep, say
“Phonebook
ture. See Uconnect™ website for sup-
•
Only the phonebook of the cur-
Edit”.
ported phones.
rently connected mobile phone is
•
You will then be asked for the name
•
To call a name from downloaded
accessible.
of the phonebook entry that you
(or Uconnect™) Phonebook, follow
•
Only the mobile phone’s phone-
wish to edit.
the procedure in “Call by Saying a
book is downloaded. SIM card
Name” section.
•
Next, choose the number designa-
phonebook is not part of the mobile
tion (home, work, mobile, or other)
•
Automatic download and update, if
phonebook.
that you wish to edit.
supported, begins as soon as the
•
This downloaded phonebook can-
phone Bluetooth® wireless connec-
•
When prompted, recite the new
not be edited or deleted on the
tion is made to the Uconnect™
phone number for the phonebook
Uconnect™ Phone. These can only
Phone. For example, after you start
entry that you are editing.
be edited on the mobile phone. The
the vehicle.
changes are transferred and up-
After you are finished editing an entry
dated to Uconnect™ Phone on the
in the phonebook, you will be given the
next phone connection.
opportunity to edit another entry in the
phonebook, call the number you just
edited, or return to the main menu.
71

“Phonebook Edit” can be used to add
button while the Uconnect™
• Note that only the phonebook in the
another phone number to a name en-
Phone is playing the desired entry
current language is deleted.
try that already exists in the phone-
and say “Delete”.
• Automatic downloaded phonebook
book. For example, the entry John
•
After you enter the name, the
entries cannot be deleted or edited.
Doe may have a mobile and a home
Uconnect™ Phone will ask you
number, but you can add
“John
List All Uconnect™ Phonebook
which designation you wish to de-
Doe's” work number later using the
Names
lete; home, work, mobile, other, or
“Phonebook Edit” feature.
all. Say the designation you wish to
•
Press the
button to begin.
NOTE: Editing phonebook en-
delete.
•
After the “Ready” prompt and the
tries is recommended when the ve-
•
Note that only the phonebook entry
following beep, say
“Phonebook
hicle is not in motion.
in the current language is deleted.
List Names”.
Delete Uconnect™ Phonebook
•
Automatic downloaded phonebook
•
The Uconnect™ Phone will play
Entry
entries cannot be deleted or edited.
the names of all the phonebook en-
•
Press the
button to begin.
tries, including the downloaded
Delete/Erase “All” Uconnect™
phonebook entries, if available.
•
After the “Ready” prompt and the
Phonebook Entries
following beep, say
“Phonebook
•
To call one of the names in the list,
• Press the
button to begin.
Delete”.
press the
button during the
• After the “Ready” prompt and the
playing of the desired name, and
•
After you enter the Phonebook De-
following beep, say
“Phonebook
say “Call”.
lete menu, you will then be asked
Erase All”.
for the name of the entry that you
NOTE: The user can also exer-
wish to delete. You can either say
• The Uconnect™ Phone will ask you
cise “Edit” or “Delete” operations
the name of a phonebook entry that
to verify that you wish to delete all
at this point.
you wish to delete or you can say
the entries from the phonebook.
• The Uconnect™ Phone will then
“List Names” to hear a list of the
• After confirmation, the phonebook
prompt you as to the number des-
entries in the phonebook from
entries will be deleted.
ignation you wish to call.
which you choose. To select one of
the entries from the list, press the
• The selected number will be dialed.
72

PHONE CALL FEATURES
Answer Or Reject An Incoming
Place/Retrieve A Call From Hold
Call — Call Currently In Progress
The following features can be accessed
To put a call on hold, press the
through the Uconnect™ Phone if the
If a call is currently in progress and you
button until you hear a single
feature(s) are available on your mobile
have another incoming call, you will
beep. This indicates that the call is on
service plan. For example, if your mo-
hear the same network tones for call
hold. To bring the call back from
bile service plan provides three-way
waiting that you normally hear when
hold, press and hold the
button
calling, this feature can be accessed
using your mobile phone. Press the
until you hear a single beep.
through the Uconnect™ Phone. Check
button to place the current call
Toggling Between Calls
with your mobile service provider for
on hold and answer the incoming call.
If two calls are in progress (one active
the features that you have.
NOTE: The Uconnect™ Phone
and one on hold), press the
button
Answer Or Reject An Incoming
compatible phones in the market
until you hear a single beep, indicat-
Call — No Call Currently In
today do not support rejecting an
ing that the active and hold status of
Progress
incoming call when another call is
the two calls have switched. Only one
in progress. Therefore, the user
When you receive a call on your mo-
call can be placed on hold at one time.
can only answer an incoming call
bile phone, the Uconnect™ Phone
or ignore it.
Conference Call
will interrupt the vehicle audio sys-
tem, if on, and will ask if you would
Making A Second Call While
When two calls are in progress (one
like to answer the call. Press the
Current Call In Progress
active and one on hold), press and
hold the
button until you hear a
button to accept the call. To re-
To make a second call while you are
double beep indicating that the two
ject the call, press and hold the
currently on a call, press the
but-
calls have been joined into one confer-
button until you hear a single
ton and say “Dial” or “Call” followed
ence call.
beep, indicating that the incoming
by the phone number or phonebook
call was rejected.
entry you wish to call. The first call
will be on hold while the second call is
in progress. To go back to the first
call, refer to
“Toggling Between
Calls”. To combine two calls, refer to
“Conference Call”.
73

Three-Way Calling
Redial
• After the ignition key is cycled to
OFF, a call can continue on the
To initiate three-way calling, press the
• Press the
button to begin.
Uconnect™ Phone for a certain du-
button while a call is in progress,
• After the “Ready” prompt and the
ration, after which the call is auto-
and make a second phone call, as
following beep, say “Redial”.
matically transferred from the
described under “Making a Second
Uconnect™ Phone to the mobile
Call While Current Call in Progress”.
• The Uconnect™ Phone will call the
phone.
After the second call has established,
last number that was dialed from
press and hold the
button until
your mobile phone.
• An active call is automatically trans-
you hear a double beep, indicating
ferred to the mobile phone after the
NOTE: This may not be the last
that the two calls have been joined
ignition key is cycled to OFF.
number dialed from the Uconnect™
into one conference call.
Phone.
UCONNECT™ PHONE
Call Termination
FEATURES
Call Continuation
To end a call in progress, momentarily
Call continuation is the progression of
Language Selection
press the
button. Only the active
a phone call on the Uconnect™ Phone
call(s) will be terminated and if there
To change the language that the
after the vehicle ignition key has been
is a call on hold, it will become the
Uconnect™ Phone is using:
switched to OFF. Call continuation
new active call. If the active call is
functionality available on the vehicle
• Press the
button to begin.
terminated by the phone far end, a
can be any one of three types:
call on hold may not become active
• After the “Ready” prompt and the
automatically. This is cell phone-
• After the ignition key is switched to
following beep, say the name of the
dependent. To bring the call back
OFF, a call can continue on the
language you wish to switch to
from hold, press and hold the
Uconnect™ Phone either until the
(English, Dutch, French, German,
button until you hear a single
call ends, or until the vehicle bat-
Italian, or Spanish, if so equipped).
beep.
tery condition dictates cessation of
• Continue to follow the system
the call on the Uconnect™ Phone
prompts to complete language se-
and transfer of the call to the mo-
lection.
bile phone.
74