Buick LaCrosse (2009 year). Manual - part 7
 

  Index      Buick     Buick LaCrosse (2009 year) - manual in english


Search            copyright infringement  


Content      ..     5      6      7      8     ..


Buick LaCrosse (2009 year). Manual - part 7


Automatic Transmission Operation

The vehicle’s automatic
transmission may have a
shift lever on the steering
column or on the console
between the seats.

There is also a display
located on the instrument
panel cluster that
indicates the vehicle’s
gear position.

{

CAUTION:

It is dangerous to get out of the vehicle if the shift
lever is not fully in P (Park) with the parking brake
firmly set. The vehicle can roll.

Do not leave the vehicle when the engine is
running unless you have to. If you have left the
engine running, the vehicle can move suddenly.
You or others could be injured. To be sure the
vehicle will not move, even when you are on fairly
level ground, always set the parking brake and
move the shift lever to P (Park). See Shifting Into
Park 
on page 2-29. If you are pulling a trailer, see
Towing a Trailer on page 4-28.

Console Shift Lever

2-26

-------------------------------------------------------------------------------------------------------------------------------------------------------------

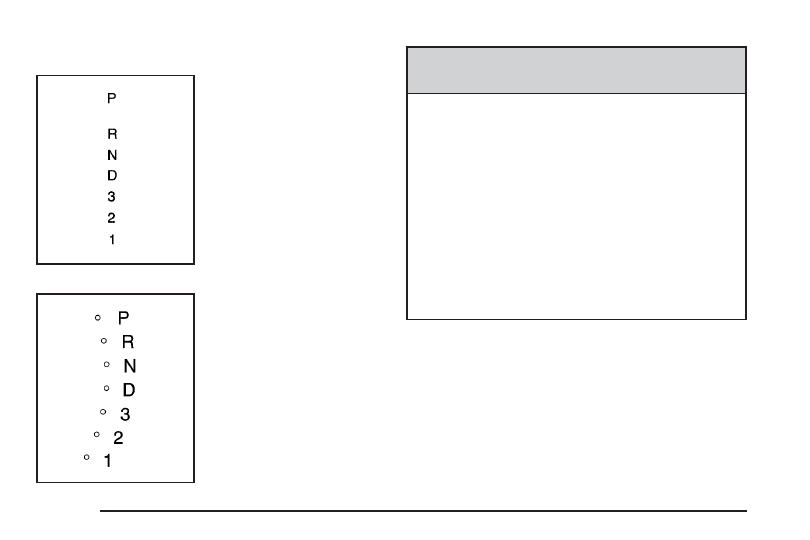
The positions for the shift lever are:

P (Park): This position locks the vehicle’s front wheels.
It is the best position to use when the engine is
started because the vehicle cannot move easily.

Make sure the shift lever is fully in P (Park) before
starting the engine. The vehicle has an electronic shift
lock release system. You must fully apply the brakes
before shifting from P (Park) when the ignition is
in ON/RUN. If you cannot shift out of P (Park), ease
pressure on the shift lever by pushing it all the way into
P (Park) as you maintain brake application. Then
move the shift lever into another gear. See Shifting Out
of Park 
on page 2-32.

Notice: Shifting to R (Reverse) while the vehicle is
moving forward could damage the transmission.
The repairs would not be covered by the vehicle
warranty. Shift to R (Reverse) only after the vehicle
is stopped.

R (Reverse): Use this gear to back up.

To rock the vehicle back and forth in order to get it out
of snow, ice, or sand without damaging the transmission,
see If Your Vehicle is Stuck in Sand, Mud, Ice, or
Snow 
on page 4-19.

N (Neutral): In this position, the engine does not
connect with the wheels. To restart the engine when the
vehicle is moving, use N (Neutral) only. Also, use
N (Neutral) when the vehicle is being towed.

{

CAUTION:

Shifting into a drive gear while the engine is
running at high speed is dangerous. Unless your
foot is firmly on the brake pedal, the vehicle could
move very rapidly. You could lose control and hit
people or objects. Do not shift into a drive gear
while the engine is running at high speed.

Notice: Shifting out of P (Park) or N (Neutral) with
the engine running at high speed may damage
the transmission. The repairs would not be covered
by the vehicle warranty. Be sure the engine is
not running at high speed when shifting the vehicle.

2-27

-------------------------------------------------------------------------------------------------------------------------------------------------------------

Notice: Driving the vehicle if you notice that it is
moving slowly or not shifting gears as you increase
speed may damage the transmission. Have the
vehicle serviced right away. You can drive in
2 (Second) when you are driving less than 35 mph
(55 km/h) and D (Drive) for higher speeds until then.

D (Drive): This position is for normal driving. It
provides the best fuel economy. If more power is needed
for passing, and the vehicle is:

Going less than 35 mph (55 km/h), push the
accelerator pedal about halfway down.

Going about 35 mph (55 km/h) or more, push the
accelerator pedal all the way down.

By doing this, the vehicle will automatically shift
down to the next gear and have more power.

Downshifting the transmission in slippery road conditions
could result in skidding. See Skidding under Loss of
Control 
on page 4-12.

3 (Third): This position is also used for normal driving.
However it reduces vehicle speed more than D (Drive)
without using the brakes. You might choose 3 (Third)
instead of D (Drive) when driving on hilly, winding roads,
when towing a trailer, so there is less shifting between
gears and when going down a steep hill.

Notice: Driving in 2 (Second) for more than 25 miles
(40 km) or at speeds over 55 mph (90 km/h) may
damage the transmission. Also, shifting into
2 (Second) at speeds above 65 mph (105 km/h) can
cause damage. Drive in 3 (Third) or D (Drive)
instead of 2 (Second).

2 (Second): This position reduces vehicle speed even
more than 3 (Third) without using the brakes. You
can use 2 (Second) on hills. It can help control vehicle
speed as you go down steep mountain roads, while
using the brakes off and on.

1 (First): This position reduces vehicle speed even
more than 2 (Second) without using the brakes. You can
use it on very steep hills, or in deep snow or mud. If
the shift lever is put in 1 (First) while the vehicle
is moving forward, the transmission will not shift into
first gear until the vehicle is going slowly enough.

Notice: Spinning the tires or holding the vehicle in
one place on a hill using only the accelerator
pedal may damage the transmission. The repair will
not be covered by the vehicle warranty. If you
are stuck, do not spin the tires. When stopping on a
hill, use the brakes to hold the vehicle in place.

2-28

-------------------------------------------------------------------------------------------------------------------------------------------------------------

Parking Brake

To set the parking brake,
hold the regular brake
pedal down, then
push down the parking
brake pedal.

To release the parking brake, hold the regular brake
pedal down, and push the parking brake pedal.
While you lift your foot off the parking brake, the parking
brake pedal will follow it to the released position.

A warning chime will sound and PARKING BRAKE ON
will display in the DIC if the parking brake is set, the
ignition is on, and the vehicle speed is greater than
5 mph (8 km/h). For more information see Brake System
Warning Light 
on page 3-35 and DIC Warnings and
Messages 
on page 3-56.

Notice: Driving with the parking brake on can
overheat the brake system and cause premature
wear or damage to brake system parts. Make sure
that the parking brake is fully released and the brake
warning light is off before driving.

If you are towing a trailer and parking on any hill, see
Towing a Trailer on page 4-28.

Shifting Into Park

{

CAUTION:

It can be dangerous to get out of the vehicle if the
shift lever is not fully in P (Park) with the parking
brake firmly set. The vehicle can roll. If you have
left the engine running, the vehicle can move
suddenly. You or others could be injured. To be
sure the vehicle will not move, even when you are
on fairly level ground, use the steps that follow. If
you are pulling a trailer, see Towing a Trailer on
page 4-28
.

2-29

-------------------------------------------------------------------------------------------------------------------------------------------------------------

Steering Column Shift Lever

If the vehicle has a steering column shift lever, use this
procedure to shift the vehicle into P (Park):

1. Hold the brake pedal down.

2. Move the shift lever into P (Park) by pulling the

shift lever toward you and moving it up as far as
it will go.

3. With your foot still holding the brake pedal down,

set the parking brake. See Parking Brake on
page 2-29 
for more information.

4. Turn the ignition key to LOCK/OFF.

5. Remove the key and take it with you. If you can

leave the vehicle with the ignition key in your
hand, the vehicle is in P (Park).

Console Shift Lever

If the vehicle is equipped with a console shift lever, use
this procedure to shift the vehicle into P (Park):

1. Hold the brake pedal down.

2. Move the shift lever into P (Park) by pushing the

lever all the way toward the front of the vehicle
and then to the left.

3. While keeping the brake pedal applied, set the

parking brake. See Parking Brake on page 2-29
for more information.

4. Turn the ignition key to LOCK/OFF.

5. Remove the key and take it with you. If you can

leave the vehicle with the ignition key in your
hand, the vehicle is in P (Park).

2-30

-------------------------------------------------------------------------------------------------------------------------------------------------------------

Leaving the Vehicle With the Engine
Running

{

CAUTION:

It can be dangerous to leave the vehicle with the
engine running. The vehicle could move suddenly
if the shift lever is not fully in P (Park) with the
parking brake firmly set. And, if you leave the
vehicle with the engine running, it could overheat
and even catch fire. You or others could be
injured. Do not leave the vehicle with the engine
running.

If you have to leave the vehicle with the engine running,
be sure your vehicle is in P (Park) and the parking
brake is firmly set before you leave it. See Parking Brake
on page 2-29 for more information.

Torque Lock

Torque lock is when the weight of the vehicle puts too
much force on the parking pawl in the transmission. This
happens when parking on a hill and shifting the
transmission into P (Park) is not done properly and then
it is difficult to shift out of P (Park). To prevent torque
lock, set the parking brake and then shift into P (Park).
To find out how, see “Shifting Into Park” in this
section.

If torque lock does occur, your vehicle may need to be
pushed uphill by another vehicle to relieve the parking
pawl pressure, so you can shift out of P (Park).

2-31

-------------------------------------------------------------------------------------------------------------------------------------------------------------

Shifting Out of Park

Automatic Transmission Shift Lock

The vehicle has an electronic shift lock release system.
The shift lock release is designed to:

Prevent ignition key removal unless the shift lever is
in P (Park)

Prevent movement of the shift lever out of P (Park),
unless the ignition is in ON/RUN and the regular
brake pedal is applied.

The shift lock is always functional except in the case of a
an uncharged or low voltage (less than 9 volt) battery.

If the vehicle has an uncharged battery or a battery with
low voltage, try charging or jump starting the battery.
See Jump Starting on page 5-41.

Console Shift

If the console shift lever cannot be moved out of P (Park):

1. Apply and maintain the regular brakes.

2. Turn the ignition to ON/RUN position. See Ignition

Positions on page 2-21 for more information.

3. Let up on the shift lever and make sure the shift

lever is pushed all the way into P (Park).

4. Press the shift lever button

5. Then, move the shift into the desired gear.

If you still cannot move the shift lever from P (Park),
consult your dealer/retailer or a professional towing
service.

Column Shift

If the column shift lever cannot be moved out of
P (Park):

1. Apply and maintain the regular brakes.

2. Turn the ignition key to the ON/RUN position. See

Ignition Positions on page 2-21 for more information.

3. Shift out of the P (Park) position to the N (Neutral)

position.

4. Move the vehicle to a safe location.

If you still cannot move the shift lever from P (Park),
consult your dealer/retailer or a professional towing
service.

2-32

-------------------------------------------------------------------------------------------------------------------------------------------------------------

Parking Over Things That Burn

{

CAUTION:

Things that can burn could touch hot exhaust
parts under the vehicle and ignite. Do not park
over papers, leaves, dry grass, or other things that
can burn.

Engine Exhaust

{

CAUTION:

Engine exhaust contains Carbon Monoxide (CO)
which cannot be seen or smelled. Exposure to CO
can cause unconsciousness and even death.

CAUTION:

(Continued)

CAUTION:

(Continued)

Exhaust may enter the vehicle if:

The vehicle idles in areas with poor ventilation
(parking garages, tunnels, deep snow that
may block underbody airflow or tail pipes).

The exhaust smells or sounds strange or
different.

The exhaust system leaks due to corrosion or
damage.

The vehicle’s exhaust system has been
modified, damaged or improperly repaired.

There are holes or openings in the vehicle
body from damage or after-market
modifications that are not completely sealed.

If unusual fumes are detected or if it is suspected
that exhaust is coming into the vehicle:

Drive it only with the windows
completely down.

Have the vehicle repaired immediately.

Never park the vehicle with the engine running in
an enclosed area such as a garage or a building
that has no fresh air ventilation.

2-33

-------------------------------------------------------------------------------------------------------------------------------------------------------------

Running the Vehicle While Parked

It is better not to park with the engine running. But if you
ever have to, here are some things to know.

{

CAUTION:

Idling a vehicle in an enclosed area with poor
ventilation is dangerous. Engine exhaust may
enter the vehicle. Engine exhaust contains Carbon
Monoxide (CO) which cannot be seen or smelled.
It can cause unconsciousness and even death.
Never run the engine in an enclosed area that has
no fresh air ventilation. For more information, see
Engine Exhaust on page 2-33.

{

CAUTION:

It can be dangerous to get out of the vehicle if the
automatic transmission shift lever is not fully in
P (Park) with the parking brake firmly set. The
vehicle can roll. Do not leave the vehicle when the
engine is running unless you have to. If you have
left the engine running, the vehicle can move
suddenly. You or others could be injured. To be
sure the vehicle will not move, even when you are
on fairly level ground, always set the parking
brake and move the shift lever to P (Park).

Follow the proper steps to be sure the vehicle will not
move. See Shifting Into Park on page 2-29.

If parking on a hill and pulling a trailer, see Towing a
Trailer 
on page 4-28.

2-34

-------------------------------------------------------------------------------------------------------------------------------------------------------------

Mirrors

Manual Rearview Mirror

Hold the mirror in the center to move it for a clearer
view behind the vehicle.

Adjust the mirror to avoid glare from the headlamps
behind you. Push the tab forward for daytime use and
pull it for nighttime use.

If the vehicle has OnStar

®

, the mirror has a day/night

control located at the bottom. Turn the control to
the right for the night position. Turn the control to the
front for the day position.

Vehicles with OnStar have three control buttons located
at the bottom of the mirror. See your dealer/retailer
for more information on the system and how to
subscribe to OnStar

®

. See OnStar

®

System on

page 2-39 for more information about the services
OnStar

®

provides.

Automatic Dimming Rearview Mirror

Adjust the mirror to see clearly behind your vehicle.
Hold the mirror in the center to move it up or down and
side to side.

The vehicle may have an automatic dimming rearview
mirror that reduces the glare of lights from behind
the vehicle. Press the AUTO button located in the lower
center of the mirror to turn automatic dimming on and
the

(

(off) button located next to the AUTO button

to turn automatic dimming off.

It the vehicle has the OnStar

®

System. The automatic

dimming feature is turned on or off by pressing

O

for about three seconds. This button is located on the
lower part of the mirror.

Vehicles with OnStar

®

have three control buttons

located at the bottom of the mirror. See your
dealer/retailer for more information on the system and
how to subscribe to OnStar

®

. See OnStar

®

System

on page 2-39 for more information about the services
OnStar

®

provides.

Cleaning the Mirror

Do not spray glass cleaner directly on the mirror. Use a
soft towel dampened with water.

2-35

-------------------------------------------------------------------------------------------------------------------------------------------------------------

Outside Power Mirrors

Controls for the outside
power mirrors are located
on the driver’s door
armrest.

To adjust the mirrors:

1. Move the selector switch located below the four-way

control pad to the left or right to choose either the
driver or passenger side mirror.

2. Press one of the four arrows located on the control

pad to move the mirror to the desired direction.

3. Adjust each outside mirror so that a little of the

vehicle and the area behind it can be seen.

Keep the selector switch in the center position when not
adjusting either outside mirror.

Outside Convex Mirror

{

CAUTION:

A convex mirror can make things (like other
vehicles) look farther away than they really are. If
you cut too sharply into the right lane, you could hit
a vehicle on the right. Check the inside mirror or
glance over your shoulder before changing lanes.

The passenger side mirror is convex shaped. A convex
mirror’s surface is curved so more can be seen from
the driver seat.

Outside Heated Mirrors

<

or

=

(Rear Window Defogger): Depending on the

vehicle, press to heat the mirrors. See Dual Automatic
Climate Control System 
on page 3-25 or Climate Control
System 
on page 3-21 for more information.

2-36

-------------------------------------------------------------------------------------------------------------------------------------------------------------

Object Detection Systems

Ultrasonic Rear Parking
Assist (URPA)

For vehicles with the Ultrasonic Rear Parking Assist
(URPA) system, it operates at speeds less than 3 mph
(5 km/h), and assists the driver with parking and
avoiding objects while in R (Reverse). The sensors on
the rear bumper are used to detect the distance to
an object up to 5 feet (1.5 m) behind the vehicle, and at
least 10 inches (25.4 cm) off the ground.

{

CAUTION:

The Ultrasonic Rear Parking Assist (URPA)
system does not replace driver vision. It cannot
detect:

objects that are below the bumper,
underneath the vehicle, or if they are too
close or far from the vehicle

children, pedestrians, bicyclists, or pets.

If you do not use proper care before and while
backing; vehicle damage, injury, or death could
occur. Even with URPA, always check behind the
vehicle before backing up. While backing, be sure
to look for objects and check the vehicle’s mirrors.

2-37

-------------------------------------------------------------------------------------------------------------------------------------------------------------

The display is located
above the rear window and
can be seen by looking
over your right shoulder.

URPA uses three color-coded lights to provide distance
and system information.

How the System Works

URPA comes on automatically when the shift lever is
moved into R (Reverse). The rear display will then briefly
illuminate to let you know the system is working.

URPA operates only at speeds less than 3 mph (5 km/h).
If the vehicle is above this speed, the red light on the rear
display will flash.

To be detected, objects must be at least 10 inches
(25.4 cm) off the ground and below trunk level. Objects
must also be within 5 feet (1.5 m) from the rear
bumper. This distance may be less during warmer or
humid weather.

A single beep will sound the first time an object is
detected between 20 inches (0.5 m) and 5 feet (1.5 m)
away. Repeated beeping will occur when you are
closer than 20 inches (0.5 m) from the object.

The following describes what will occur with the URPA
display as the vehicle gets closer to a detected
object:

Description

English

Metric

amber light

5 ft

1.5 m

amber/amber lights

40 in

1.0 m

amber/amber/red

lights/continuous beep

20 in

0.5 m

amber/amber/red

lights flashing and

continuous beep

1 ft

0.3 m

2-38

-------------------------------------------------------------------------------------------------------------------------------------------------------------

When the System Does Not Seem to
Work Properly

The ultrasonic sensors are not clean, a red URPA
display light may illuminate when the vehicle is in
R (Reverse). Keep the rear bumper free of
mud, dirt, snow, ice and slush. For cleaning
instructions, see Washing Your Vehicle on
page 5-93
.

A trailer was attached to the vehicle, or a bicycle or
an object was hanging out of the trunk during the
last drive cycle, the red light may illuminate.
Once the attached object is removed, URPA will
return to normal operation.

A tow bar is attached to the vehicle.

The vehicle’s bumper is damaged. Take the vehicle
to your dealer/retailer to repair the system.

Other conditions may affect system performance,
such as vibrations from a jackhammer or the
compression of air brakes on a very large truck.

If the system is still disabled, after driving forward at
least 15 mph (25 km/h), take the vehicle to your
dealer/retailer.

OnStar

®

System

OnStar uses several innovative technologies and live
advisors to provide a wide range of safety, security,
information, and convenience services. If the airbags
deploy, the system is designed to make an automatic
call to OnStar Emergency advisors who can request
emergency services be sent to your location. If
the keys are locked in the vehicle, call OnStar at
1-888-4-ONSTAR to have a signal sent to unlock
the doors. OnStar Hands-Free Calling, including
30 trial minutes good for 60 days, is available on most
vehicles. OnStar Turn-by-Turn Navigation service,
with one trial route, is available on most vehicles. Press
the OnStar button to have an OnStar advisor contact
Roadside Service.

OnStar service is provided subject to the OnStar Terms
and Conditions included in the OnStar Subscriber
glove box literature.

2-39

-------------------------------------------------------------------------------------------------------------------------------------------------------------

Some services such as Remote Door Unlock or Stolen
Vehicle Location Assistance may not be available
until the owner of the vehicle registers with OnStar. After
the first prepaid year, contact OnStar to select a
monthly or annual subscription payment plan. If a
payment plan is not selected, the OnStar system and all
services, including airbag notification and emergency
services, may be deactivated and no longer available.
For more information visit onstar.com (U.S.) or onstar.ca
(Canada), or press the OnStar button to speak with
an advisor.

Not all OnStar services are available on all vehicles. To
check if this vehicle is able to provide the services
described below, or for a full description of OnStar
services and system limitations, see the OnStar Owner’s
Guide in the glove box or visit onstar.com (U.S.) or
onstar.ca (Canada), contact OnStar at 1-888-4-ONSTAR
(1-888-466-7827) or TTY 1-877-248-2080, or press the
OnStar button to speak with an OnStar advisor 24 hours
a day, 7 days a week.

OnStar Services Available with the
Safe & Sound Plan

Automatic Notification of Airbag Deployment

Advanced Automatic Crash Notification (AACN)
(If equipped)

Link to Emergency Services

Roadside Assistance

Stolen Vehicle Location Assistance

Remote Door Unlock/Vehicle Alert

OnStar Vehicle Diagnostic Email

GM Goodwrench On Demand Diagnostics

OnStar Hands-Free Calling with 30 trial minutes

OnStar Virtual Advisor (U.S. Only)

OnStar Services Included with
Directions & Connections Plan

All Safe and Sound Plan Services

OnStar Turn-by-Turn Navigation (If equipped) or
Driving Directions - Advisor delivered

RideAssist

Information and Convenience Services

2-40

-------------------------------------------------------------------------------------------------------------------------------------------------------------

OnStar Hands-Free Calling

OnStar Hands-Free Calling allows eligible OnStar
subscribers to make and receive calls using voice
commands. Hands-Free Calling is fully integrated into
the vehicle, and can be used with OnStar Pre-Paid
Minute Packages. Most vehicles include 30 trial minutes
good for 60 days. Hands-Free Calling can also be
linked to a Verizon Wireless service plan in the U.S. or
a Bell Mobility service plan in Canada, depending
on eligibility. To find out more, refer to the OnStar
Owner’s Guide in the vehicle’s glove box, visit
onstar.com or onstar.ca, or speak with an OnStar
advisor by pressing the OnStar button or calling
1-888-4-ONSTAR (1-888-466-7827).

OnStar Turn-by-Turn Navigation

Vehicles with the OnStar Turn-by-Turn Navigation
system can provide voice-guided driving directions.
Press the OnStar button to have an OnStar advisor
locate a business or address and download driving
directions to the vehicle. Voice-guided directions to the
desired destination will play through the audio system
speakers. See the OnStar Owner’s Guide for more
information.

OnStar Virtual Advisor

OnStar Virtual Advisor is a feature of OnStar
Hands-Free Calling that uses minutes to access
location-based weather, local traffic reports, and stock
quotes. Press the phone button and give a few
simple voice commands to browse through the various
topics. See the OnStar Owner’s Guide for more
information. This feature is only available in the
continental U.S.

OnStar Steering Wheel Controls

This vehicle may have a Talk/Mute button that can be
used to interact with OnStar Hands-Free Calling.
See Audio Steering Wheel Controls on page 3-110 for
more information.

On some vehicles, the mute button can be used to dial
numbers into voice mail systems, or to dial phone
extensions. See the OnStar Owner’s Guide for more
information.

2-41

-------------------------------------------------------------------------------------------------------------------------------------------------------------


Content      ..     5      6      7      8     ..