Vauxhall Zafira (2016 year). Manual - part 2


  Index      Vauxhall     Vauxhall Zafira (2016 year) - manual in english


Search            copyright infringement  


Content      ..      1      2      3      ..


Vauxhall Zafira (2016 year). Manual - part 2


-------------------------------------------------------------------------------------------------------------------------------------------------------------
22
Keys, doors and windows
Unlocking
The setting can be saved for the key
Unlocking and opening the
being used. Memorised settings
tailgate
3 23.
Locking
Close doors, load compartment and
fuel filler flap.
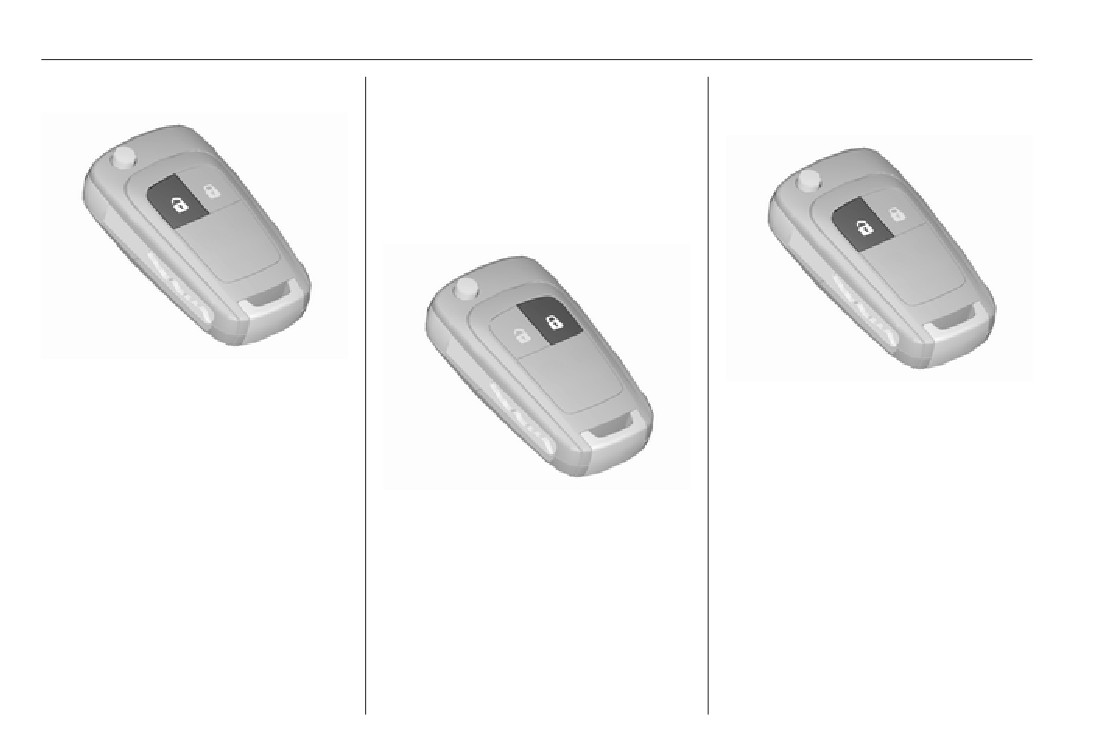
Press c.
Two settings are selectable:
Press c when the ignition is off. The
tailgate is released to be unlocked
● To unlock only the driver's door,
and opened by pushing the touchpad
load compartment and fuel filler
switch below the handle.
flap, press c once. To unlock all
doors, press c twice.
Central locking buttons
Press e.
● Press c once to unlock all doors,
If the driver's door is not closed
Locks or unlocks all doors, the load
load compartment and fuel filler
properly, the central locking system
compartment and fuel filler flap from
flap.
will not work.
the passenger compartment.
The setting can be changed in the
Settings menu in the Info-Display.
Vehicle personalisation 3 129.

-------------------------------------------------------------------------------------------------------------------------------------------------------------

Keys, doors and windows
23
Fault in radio remote control
Fault in central locking system
system
Unlocking
Unlocking
Manually unlock the driver's door by
turning the key in the lock. The other
doors can be opened by pulling the
interior handle twice. The load
compartment and fuel filler flap
cannot be opened. To deactivate the
anti-theft locking system, switch on
the ignition 3 26.
Locking
Press e to lock.
Push inside locking knob of all doors
Press c to unlock.
except driver's door. Then close the
driver's door and lock it from the
outside with the key. The fuel filler flap
Manually unlock the driver's door by
and tailgate cannot be locked.
turning the key in the lock. Switch on
the ignition and press c to unlock all
Memorised settings
doors, load compartment and fuel
Whenever the key is removed from
filler flap. By switching on the ignition,
the ignition switch, the following
the anti-theft locking system is
settings are automatically memorised
deactivated.
by the key:
Locking
● lighting
Manually lock the driver's door by
● Infotainment system
turning the key in the lock.
● central locking system

-------------------------------------------------------------------------------------------------------------------------------------------------------------

24
Keys, doors and windows
● Sport mode settings
transmission) or the selector lever is
Using a key or suitable screwdriver,
moved to position P (automatic
turn the child lock in the rear door to
● comfort settings
transmission).
the horizontal position. The door
The saved settings are automatically
cannot be opened from the inside. For
Settings can be changed in the
used the next time the memorised key
deactivation turn the child lock to the
Settings menu in the Info-Display.
is inserted into the ignition switch and
vertical position.
Vehicle personalisation 3 129.
turned to position 1 3 160.
The settings can be saved for the key
A precondition is that Personalization
being used 3 23.
by driver is activated in the personal
settings of the Graphic-Info-Display.
This must be set for each key used.
Child locks
On vehicles equipped with
Colour-Info-Display, the
personalisation is permanently
activated.
Vehicle personalisation 3 129.
Automatic locking
This security feature can be
configured to automatically lock all
doors, load compartment and fuel
filler flap as soon as a certain speed
is exceeded.
Additionally, it is configurable to
9 Warning
unlock the driver's door or all doors
after the ignition is switched off and
Use the child locks whenever
the ignition key is removed (manual
children are occupying the rear
seats.

-------------------------------------------------------------------------------------------------------------------------------------------------------------

Keys, doors and windows
25
Closing
General hints for operating
Doors
tailgate
Load compartment
9 Danger
Tailgate
Do not drive with the tailgate open
Opening
or ajar, e.g. when transporting
bulky objects, since toxic exhaust
gases, which cannot be seen or
smelled, could enter the vehicle.
This can cause unconsciousness
and even death.
Use the interior handle.
Caution
Do not push the touchpad switch
Before opening the tailgate, check
under the tailgate moulding whilst
overhead obstructions, e.g. a
closing as this will unlock the tailgate
garage door, to avoid damage to
again.
the tailgate. Always check the
Central locking system 3 21.
After unlocking, push the touchpad
moving area above and behind the
switch under the tailgate moulding
tailgate.
and open the tailgate.
Notice
Central locking system 3 21.
The installation of certain heavy
accessories onto the tailgate may
affect its ability to remain open.

-------------------------------------------------------------------------------------------------------------------------------------------------------------

26
Keys, doors and windows
Activating
● vehicle inclination, e.g. if it is
Vehicle security
raised
Anti-theft locking system
● ignition
Activation
9 Warning
● Self-activated 30 seconds after
Do not use the system if there are
locking the vehicle (initialisation
people in the vehicle! The doors
of the system).
cannot be unlocked from the
inside.
The system deadlocks all the doors.
All doors must be closed otherwise
the system cannot be activated.
Press e on the radio remote control
If the ignition was on, the driver's door
twice within 15 seconds.
must be opened and closed once so
that the vehicle can be secured.
Anti-theft alarm system
Unlocking the vehicle disables the
mechanical anti-theft locking system.
The anti-theft alarm system is
This is not possible with the central
combined with the central locking
locking button.
system.
Directly by pressing e on the
It monitors:
radio remote control once more
after locking.
● doors, tailgate, bonnet
● passenger compartment
including adjoining load
compartment

-------------------------------------------------------------------------------------------------------------------------------------------------------------

Keys, doors and windows
27
Notice
movements triggering the alarm. Also
Status LED is integrated into the
Changes to the vehicle interior such
switch off when the vehicle is on a
sensor on top of the instrument panel.
as the use of seat covers, and open
ferry or train.
Status during the first 30 seconds of
windows or sunroof, could impair the
1. Close tailgate, bonnet and
anti-theft alarm system activation:
function of passenger compartment
windows.
LED illuminates : test, arming delay
monitoring.
2. Press
o. LED in the button
LED flashes
: doors, tailgate or
Activation without monitoring of
illuminates for a maximum of ten
quickly
bonnet not
passenger compartment and
minutes.
completely closed,
vehicle inclination
or system fault
3. Close doors.
4. Activate the anti-theft alarm
Status after system is armed:
system.
LED flashes
: system is armed
Status message is displayed in the
slowly
Driver Information Centre.
Seek the assistance of a workshop in
Status LED
the event of faults.
Deactivation
Unlocking the vehicle deactivates the
anti-theft alarm system.
Alarm
Switch off the monitoring of
When triggered, the alarm horn
passenger compartment and vehicle
sounds and the hazard warning lights
inclination when animals are being
flash simultaneously. The number
left in the vehicle, because of high
and duration of alarm signals are
volume ultrasonic signals or
stipulated by legislation.

-------------------------------------------------------------------------------------------------------------------------------------------------------------

28
Keys, doors and windows
The alarm can be silenced by
Immobiliser
Exterior mirrors
pressing any button on the radio
The system is part of the ignition
remote control or by switching on the
switch and checks whether the
Convex shape
ignition.
vehicle is allowed to be started with
The convex exterior mirror contains
The anti-theft alarm system can be
the key being used.
an aspherical area and reduces blind
deactivated only by pressing c or by
The immobiliser is activated
spots. The shape of the mirror makes
switching on the ignition.
automatically after the key has been
objects appear smaller, which will
A triggered alarm, which has not been
removed from the ignition switch.
affect the ability to estimate
interrupted by the driver, will be
distances.
If the control indicator d flashes when
indicated by the hazard warning
the ignition is on, there is a fault in the
Side blind spot alert 3 201.
lights. They will flash quickly three
system; the engine cannot be started.
times when the vehicle is next
Switch off the ignition and repeat the
unlocked with the radio remote
Electric adjustment
start attempt.
control. Additionally, a warning
message or a warning code is
If the control indicator continues
displayed in the Driver Information
flashing, attempt to start the engine
Centre after switching on the ignition.
using the spare key and seek the
assistance of a workshop.
Vehicle messages 3 122.
If the vehicle's battery is to be
Notice
disconnected (e.g. for maintenance
The immobiliser does not lock the
work), the alarm siren must be
doors. You should always lock the
deactivated as follows: switch the
vehicle after leaving it and switch on
ignition on then off, then disconnect
the anti-theft alarm system 3 21,
the vehicle's battery within
3 26.
15 seconds.
Control indicator d 3 115.

-------------------------------------------------------------------------------------------------------------------------------------------------------------

Keys, doors and windows
29
Select the relevant exterior mirror by
Electric folding
Heated mirrors
turning the control to left (L) or right
(R). Then swivel the control to adjust
the mirror.
In position 0 no mirror is selected.
Folding mirrors
Operated by pressing Ü.
Turn control to 0, then push the
Heating works with the engine
control down. Both exterior mirrors
running and is switched off
will fold.
automatically after a short time.
Push the control down again - both
exterior mirrors return to their original
position.
For pedestrian safety, the exterior
mirrors will swing out of their normal
If an electrically folded mirror is
mounting position if they are struck
manually extended, pressing down
with sufficient force. Reposition the
the control will only electrically extend
mirror by applying slight pressure to
the other mirror.
the mirror housing.

-------------------------------------------------------------------------------------------------------------------------------------------------------------

30
Keys, doors and windows
Interior mirrors
Automatic anti-dazzle
Windows
Manual anti-dazzle
Windscreen
Heat-reflecting windscreen
The heat-reflecting windscreen has a
coating which reflects solar radiation.
Also data signals, e.g. from toll
stations, might be reflected.
Dazzle from following vehicles at
night is automatically reduced.
To reduce dazzle, adjust the lever on
the underside of the mirror housing.
The marked areas on the windscreen
are not covered with the coating.
Devices for electronic data recording
and fee payment must be attached in
these areas. Otherwise data
recording malfunctions may occur.

-------------------------------------------------------------------------------------------------------------------------------------------------------------

Keys, doors and windows
31
Windscreen stickers
Power windows
Do not attach stickers such as toll
9 Warning
road stickers or similar on the
windscreen in the area of the interior
Take care when operating the
mirror. Otherwise the detection zone
power windows. Risk of injury,
of the sensor and the view area of the
particularly to children.
camera in the mirror housing could be
restricted.
If there are children on the rear
seats, switch on the child safety
Windscreen replacement
system for the power windows.
Keep a close watch on the
Caution
windows when closing them.
Operate the switch for the respective
Ensure that nothing becomes
If the vehicle has a front-looking
window by pushing to open or pulling
trapped in them as they move.
camera sensor for the driver
to close.
assistance systems, it is very
Switch on ignition to operate power
Pushing or pulling gently to the first
important that any windscreen
windows. Retained power off 3 160.
detent: window moves up or down as
replacement is performed
long as the switch is operated.
accurately according to Vauxhall
Pushing or pulling firmly to the second
specifications. Otherwise, these
detent and then releasing: window
systems may not work properly
moves up or down automatically with
and there is a risk of unexpected
safety function enabled. To stop
behaviour and/or messages from
movement, operate the switch once
these systems.
more in the same direction.
Manual windows
The door windows can be opened or
closed with the window cranks.

-------------------------------------------------------------------------------------------------------------------------------------------------------------

32
Keys, doors and windows
Safety function
Child safety system for rear
windows
If the window glass encounters
resistance above the middle of the
window during automatic closing, it is
immediately stopped and opened
again.
Override safety function
In the event of closing difficulties due
to frost or the like, switch on the
ignition, then pull the switch to the first
detent and hold. The window moves
Press and hold c to open windows.
up without safety function enabled.
To stop movement, release the
Press and hold e to close windows.
switch.
Release button to stop window
Press z to deactivate rear door
power windows, the LED illuminates.
movement.
To activate, press z again.
If the windows are fully opened or
closed, the hazard warning lights will
Operating windows from outside
flash twice.
The windows can be operated
Overload
remotely from outside the vehicle.
If the windows are repeatedly
operated within short intervals, the
window operation is disabled for
some time.

-------------------------------------------------------------------------------------------------------------------------------------------------------------

Keys, doors and windows
33
Initialising the power windows
If the sun visors have integral mirrors,
Heated rear window
the mirror covers should be closed
If the windows cannot be closed
when driving.
automatically (e.g. after
A ticket holder is located on the
disconnecting the vehicle battery), a
backside of the sun visor.
warning message or a warning code
is displayed in the Driver Information
Centre.
Roller blinds
Vehicle messages 3 122.
Activate the window electronics as
follows:
1. Close doors.
2. Switch on ignition.
3. Pull switch until the window is
Operated by pressing Ü.
closed and keep pulling for
Heating works with the engine
additional two seconds.
running and is switched off
4. Repeat for each window.
automatically after a short time.
Depending on the engine type, the
heated rear window comes on
automatically when the diesel particle
To reduce sunlight at the second row
filter is being cleaned.
seats, pull the blind upwards using
the grip and engage it at the top of the
door frame.
Sun visors
The sun visors can be folded down or
swivelled to the side to prevent
dazzling.

-------------------------------------------------------------------------------------------------------------------------------------------------------------

34
Keys, doors and windows
Safety function
Roof
If the sunblind encounters resistance
Glass panel
during automatic closing, it is
immediately stopped and opened
Panorama roof
again.
Function standby
In ignition switch position 1 the
sunblind is operational 3 160.
Initialising after a power failure
G : open
After a power failure, it may only be
H : close
possible to operate the sunblind to a
limited extent. Initialise the system as
Press G or H gently to the first
follows:
detent: the sunblind is opened or
1. Turn key in ignition switch to
closed as long as the switch is
position 1.
Pull the slider to open the cover of the
operated.
2. Press G (open) twice gently to the
panorama roof.
Press G or H firmly to the second
first detent, the sunblind opens
Push the slider to cover the panorama
detent and then release: the sunblind
slightly.
roof.
is opened or closed automatically. To
stop movement, operate the switch
3. Immediately press H (close)
Sunblind
once more.
twice gently to the first detent, the
sunblind closes slightly.
The sunblind above the rear seats is
After step 3 the sunblind is in
electrically operated.
initialising mode without safety
function.

-------------------------------------------------------------------------------------------------------------------------------------------------------------

Keys, doors and windows
35
4. Press G (open) gently to the first
detent until the sunblind is
completely opened.
5. Press H (close) gently to the first
detent until the sunblind is
completely closed.
After this procedure, the sunblind is
initialised with safety function
activated.
When G or H is pressed firmly to the
second detent during initialising, the
procedure is cancelled.

-------------------------------------------------------------------------------------------------------------------------------------------------------------

36
Seats, restraints
Adjustment
Seats, restraints
Head restraints
Head restraints on front seats
Position
Head restraints
36
Active head restraints
37
9 Warning
Front seats
38
Only drive with the head restraint
Seat position
38
set to the proper position.
Manual seat adjustment
39
Power seat adjustment
41
Armrest
42
Heating
43
Rear seats
44
Second row seats
44
Third row seats
48
Seat belts
50
Height adjustment
Three-point seat belt
51
Press release button, adjust height,
Airbag system
54
engage.
Front airbag system
57
Side airbag system
57
Curtain airbag system
58
Airbag deactivation
58
The upper edge of the head restraint
Child restraints
60
should be at upper head level. If this
Child restraint systems
60
is not possible for extremely tall
Child restraint installation
people, set to highest position, and
locations
62
set to lowest position for small people.
ISOFIX child restraint systems . . 65
Top-tether fastening eyes
65

-------------------------------------------------------------------------------------------------------------------------------------------------------------

Seats, restraints
37
Horizontal adjustment
Head restraints on rear seats
forwards. Thus the head is supported
so that the risk of whiplash injury is
reduced.
Notice
Approved accessories may only be
attached if the seat is not in use.
To adjust horizontally, pull the head
Height adjustment
restraint forwards. It engages in
Pull the head restraint upwards or
several positions.
press the catch to release and push
To return to its rearmost position, pull
the head restraint downwards.
fully forwards and release.
Removal
Press both catches, pull the head
restraint upwards and remove.
Active head restraints
In the event of a rear-end impact, the
front parts of the active head
restraints are moved slightly

-------------------------------------------------------------------------------------------------------------------------------------------------------------

38
Seats, restraints
Sit with shoulders as far back
Front seats
against the backrest as possible.
Set the backrest rake so that it is
Seat position
possible to easily reach the
steering wheel with arms slightly
9 Warning
bent. Maintain contact between
shoulders and the backrest when
Only drive with the seat correctly
turning the steering wheel. Do
adjusted.
not angle the backrest too far
back. We recommend a
maximum rake of approx. 25°.
9 Warning
Adjust seat and steering wheel in
Never adjust seats while driving as
a way that the wrist rests on top
Sit with buttocks as far back
they could move uncontrollably.
of the steering wheel while the
against the backrest as possible.
arm is fully extended and
Adjust the distance between the
shoulders are on the backrest.
seat and the pedals so that legs
9 Danger
are slightly angled when pressing
Adjust the steering wheel 3 97.
the pedals. Slide the front
Do not sit nearer than 25 cm from
Adjust the head restraint 3 36.
passenger seat as far back as
the steering wheel, to permit safe
Adjust the height of the seat belt
possible.
airbag deployment.
3 51.
Set seat height high enough to
Adjust the thigh support so that
have a clear field of vision on all
9 Warning
there is a space approx. two
sides and of all display
fingers wide between the edge of
instruments. There should be at
Never store any objects under the
the seat and the hollow of the
least one hand of clearance
seats.
knee.
between head and the roof
frame. Your thighs should rest
Adjust the lumbar support so that
lightly on the seat without
it supports the natural shape of
pressing into it.
the spine.


Content      ..      1      2      3      ..