Oldsmobile Intrigue (2002 year). Manual - part 19


  Index      Oldsmobile     Oldsmobile Intrigue (2002 year) - manual in english


Search            copyright infringement  


Content      ..     17      18      19      20     ..


Oldsmobile Intrigue (2002 year). Manual - part 19


-------------------------------------------------------------------------------------------------------------------------------------------------------------
6-37

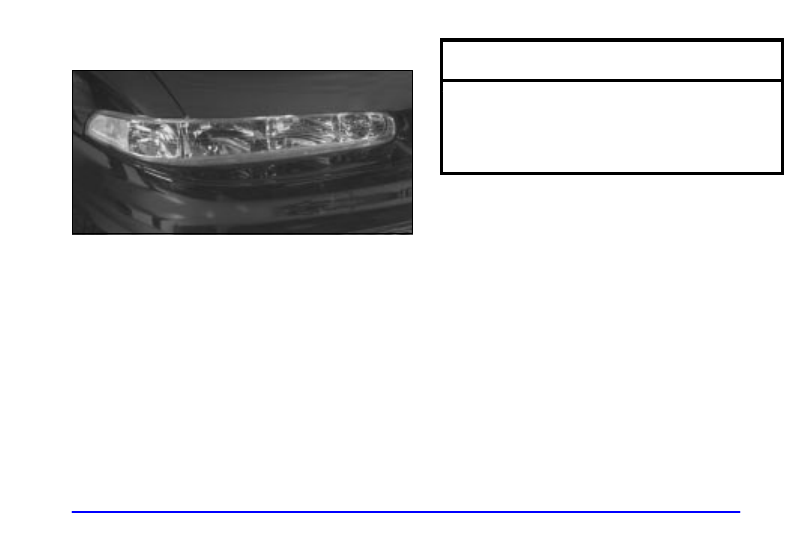
Headlamp Aiming

Your vehicle has a headlamp system equipped with
horizontal and vertical aim indicators. The aim has been
pre

-

set at the factory and should need no further

adjustment. This is true even though your vertical 
and horizontal aim indicators may not fall exactly on the
“0” (zero) marks on their scales.

If your vehicle is damaged in an accident, the headlamp
aim may be affected. Aim adjustment may be necessary
if it is difficult to see lane markers (for horizontal aim),
or if oncoming drivers flash their high beams at you (for
vertical aim). If you believe your headlamps need to be
re

-

aimed, we recommend that you take it to your dealer

for service; however, it is possible for you to re

-

aim

your headlamps as described in the following procedure.

NOTICE:

To make sure your headlamps are aimed
properly, read all the instructions before
beginning. Failure to follow these instructions
could cause damage to headlamp parts.

To check the aim, the vehicle should be properly
prepared as follows:
D The vehicle must have all four tires on a perfectly

level surface.

D If necessary, pads may be used on an uneven surface.
D The vehicle should not have any snow, ice or mud

attached to it.

D The vehicle should be fully assembled and all other

work stopped while headlamp aiming is being done.

D There should not be any cargo or loading of the

vehicle, except it should have a full tank of fuel and
one person or 160 lbs. (75 kg) on the driver’s seat.

D Close all doors.
D Tires should be properly inflated.
D Rock the vehicle to stabilize the suspension.

-------------------------------------------------------------------------------------------------------------------------------------------------------------

-------------------------------------------------------------------------------------------------------------------------------------------------------------

6-38

A. Horizontal Aim Adjustment Screw

B. Vertical Aim Adjustment Screw

Start with the horizontal aim. The adjustment screws can
be turned with an E8 Torx

R

 socket.

Once the horizontal aim is adjusted, then adjust the
vertical aim.

A. Horizontal Aim Adjustment Screw (shown in

previous photo)

B. Vertical Aim Adjustment Screw

C. Horizontal Block Index Plate

D. Vertical Aiming Level

1. Turn the horizontal aiming screw until the indicator

is lined up with zero.

2. Turn the vertical aiming screw until the level bubble

is lined up with zero.

-------------------------------------------------------------------------------------------------------------------------------------------------------------

-------------------------------------------------------------------------------------------------------------------------------------------------------------

6-39

Front Parking, Sidemarker and Turn Signal
Cornering Lamps

1. Remove the headlamp assembly. Refer to the

removal procedure listed under “Headlamps” earlier
in this section.

2. Remove the rubber access cover.

3. Twist and pull the bulb socket from the 

headlamp assembly.

4. Holding the base of the bulb, pull the old bulb from

the socket.

5. Push the new bulb into the socket.

6. Put the bulb socket back into the headlamp assembly

and turn it clockwise until it is secure.

7. Reinstall the rubber access cover.

Center High-Mounted Stoplamp (CHMSL)
(Window Mounted)

1. Open the trunk.

2. Reach through the access opening in the trunk.

-------------------------------------------------------------------------------------------------------------------------------------------------------------

-------------------------------------------------------------------------------------------------------------------------------------------------------------

6-40

3. Remove the old bulb from the socket by turning it

one quarter turn counterclockwise.

4. Place the new bulb into the socket.

5. Turn the bulb one quarter turn clockwise to install.

6. Close the trunk.

Center High-Mounted Stoplamp (CHMSL)
(Spoiler Mounted)

It is recommended that this component be replaced as a
unit. See your dealer.

Tail/Stop/Turn Signal Lamps

-------------------------------------------------------------------------------------------------------------------------------------------------------------

-------------------------------------------------------------------------------------------------------------------------------------------------------------

6-41

1. Unscrew the wing nut inside of the trunk (B) behind

the taillamp to be changed. If equipped with a
convenience net, unhook the net.

2. Pull back the carpeting.

3. Remove the other two plastic wing nuts (A).

4. Pull the taillamp housing away from the body of 

the vehicle (C).

5. Squeeze the tab on the bulb socket and turn the

socket counterclockwise.

6. Pull out the bulb socket.

7. Pull the old bulb out of the socket. (There are four

bulbs on each taillamp.)

8. Push in a new bulb.

9. Reinstall the bulb socket into the housing and 

turn it clockwise.

10. Reinstall the taillamp housing to the body of 

the vehicle.

11. Reinstall all three wing nuts.

12. Tighten the plastic wing nuts.

-------------------------------------------------------------------------------------------------------------------------------------------------------------

-------------------------------------------------------------------------------------------------------------------------------------------------------------

6-42

Windshield Wiper Blade
Replacement

Windshield wiper blades should be inspected at 
least twice a year for wear or cracking. 
See “Windshield Wipers, Blade Check” in the 
Index for more information.

Replacement blades come in different types and are
removed in different ways. For the proper type and
length, see “Normal Maintenance Replacement Parts” 
in the Index.

Here’s how to remove the wiper blades:

1. Pull the windshield wiper arm away from 

the windshield.

2. Push the release lever and slide the wiper assembly

toward the driver’s side of the vehicle.

3. Install a new blade by reversing Steps 1 and 2.

-------------------------------------------------------------------------------------------------------------------------------------------------------------

-------------------------------------------------------------------------------------------------------------------------------------------------------------

6-43

Tires

Your new vehicle comes with high

-

quality tires made by

a leading tire manufacturer. If you ever have questions
about your tire warranty and where to obtain service, see
your Oldsmobile Warranty booklet for details.

CAUTION:

Poorly maintained and improperly used tires 
are dangerous.
Overloading your tires can cause

overheating as a result of too much friction.
You could have an air

-

out and a serious

accident. See “Loading Your Vehicle” in 
the Index.

CAUTION: (Continued)

CAUTION: (Continued)

Underinflated tires pose the same danger as

overloaded tires. The resulting accident
could cause serious injury. Check all tires
frequently to maintain the recommended
pressure. Tire pressure should be checked
when your tires are cold.

Overinflated tires are more likely to be 

cut, punctured or broken by a sudden
impact 

--

 such as when you hit a pothole.

Keep tires at the recommended pressure.

Worn, old tires can cause accidents. If your

tread is badly worn, or if your tires have
been damaged, replace them.

-------------------------------------------------------------------------------------------------------------------------------------------------------------

-------------------------------------------------------------------------------------------------------------------------------------------------------------

6-44

Inflation -- Tire Pressure

The Tire

-

Loading Information label, which is located on

the inside of the trunk lid, shows the correct inflation
pressures for your tires when they’re cold. “Cold”
means your vehicle has been sitting for at least three
hours or driven no more than 1 mile (1.6 km).

NOTICE:

Don’t let anyone tell you that underinflation or
overinflation is all right. It’s not. If your tires
don’t have enough air (underinflation), you can
get the following:
Too much flexing

Too much heat

Tire overloading

Bad wear

Bad handling

Bad fuel economy

NOTICE: (Continued)

NOTICE: (Continued)

If your tires have too much air (overinflation),
you can get the following:
Unusual wear

Bad handling

Rough ride

Needless damage from road hazards

When to Check

Check your tires once a month or more.

Don’t forget your compact spare tire. It should be 
at 60 psi (420 kPa).

How to Check

Use a good quality pocket

-

type gage to check tire

pressure. You can’t tell if your tires are properly inflated
simply by looking at them. Radial tires may look
properly inflated even when they’re underinflated.

Be sure to put the valve caps back on the valve 
stems. They help prevent leaks by keeping out dirt 
and moisture.

-------------------------------------------------------------------------------------------------------------------------------------------------------------

-------------------------------------------------------------------------------------------------------------------------------------------------------------

6-45

Tire Inspection and Rotation

Tires should be rotated every 6,000 to 8,000 miles 
(10 000 to 13 000 km). Any time you notice unusual
wear, rotate your tires as soon as possible and check
wheel alignment. Also check for damaged tires or
wheels. See “When It’s Time for New Tires” and
“Wheel Replacement” later in this section for 
more information.

The purpose of regular rotation is to achieve more
uniform wear for all tires on the vehicle. The first
rotation is the most important. See “Scheduled
Maintenance Services” in the Index for scheduled
rotation intervals.

When rotating your tires, always use the correct rotation
pattern shown here.

Don’t include the compact spare tire in your 
tire rotation.

After the tires have been rotated, adjust the front and
rear inflation pressures as shown on the Tire

-

Loading

Information label. Make certain that all wheel nuts 
are properly tightened. See “Wheel Nut Torque” in 
the Index.

CAUTION:

Rust or dirt on a wheel, or on the parts to which
it is fastened, can make wheel nuts become loose
after a time. The wheel could come off and cause
an accident. When you change a wheel, remove
any rust or dirt from places where the wheel
attaches to the vehicle. In an emergency, you can
use a cloth or a paper towel to do this; but be
sure to use a scraper or wire brush later, if you
need to, to get all the rust or dirt off. See
“Changing a Flat Tire” in the Index.

-------------------------------------------------------------------------------------------------------------------------------------------------------------

-------------------------------------------------------------------------------------------------------------------------------------------------------------

6-46

When It’s Time for New Tires

One way to tell when it’s
time for new tires is to
check the treadwear
indicators, which will
appear when your tires have
only 1/16 inch (1.6 mm) or
less of tread remaining.

You need a new tire if any of the following statements
are true:
D You can see the indicators at three or more places

around the tire.

D You can see cord or fabric showing through the 

tire’s rubber.

D The tread or sidewall is cracked, cut or snagged deep

enough to show cord or fabric.

D The tire has a bump, bulge or split.
D The tire has a puncture, cut or other damage that

can’t be repaired well because of the size or location
of the damage.

Buying New Tires

To find out what kind and size of tires you need, look at
the Tire

-

Loading Information label.

The tires installed on your vehicle when it was new had
a Tire Performance Criteria Specification (TPC Spec)
number on each tire’s sidewall. When you get new tires,
get ones with that same TPC Spec number. That way
your vehicle will continue to have tires that are designed
to give proper endurance, handling, speed rating,
traction, ride and other things during normal service on
your vehicle. If your tires have an all

-

season tread

design, the TPC number will be followed by an “MS”
(for mud and snow).

If you ever replace your tires with those not having 
a TPC Spec number, make sure they are the same 
size, load range, speed rating and construction type
(bias, bias

-

belted or radial) as your original tires.

-------------------------------------------------------------------------------------------------------------------------------------------------------------

-------------------------------------------------------------------------------------------------------------------------------------------------------------

6-47

CAUTION:

Mixing tires could cause you to lose control while
driving. If you mix tires of different sizes or types
(radial and bias

-

belted tires), the vehicle may not

handle properly, and you could have a crash.
Using tires of different sizes may also cause
damage to your vehicle. Be sure to use the same
size and type tires on all wheels.

It’s all right to drive with your compact spare,
though. It was developed for use on your vehicle.

CAUTION:

If you use bias

-

ply tires on your vehicle, the

wheel rim flanges could develop cracks after
many miles of driving. A tire and/or wheel could
fail suddenly, causing a crash. Use only radial

-

ply

tires with the wheels on your vehicle.

Uniform Tire Quality Grading

Quality grades can be found where applicable on the tire
sidewall between tread shoulder and maximum section
width. For example:

Treadwear 200 Traction AA Temperature A

The following information relates to the system
developed by the United States National Highway
Traffic Safety Administration, which grades tires by
treadwear, traction and temperature performance. 
(This applies only to vehicles sold in the United States.)
The grades are molded on the sidewalls of most
passenger car tires. The Uniform Tire Quality Grading
system does not apply to deep tread, winter

-

type snow

tires, space

-

saver or temporary use spare tires, tires with

nominal rim diameters of 10 to 12 inches (25 to 30 cm),
or to some limited

-

production tires.

While the tires available on General Motors passenger
cars and light trucks may vary with respect to these
grades, they must also conform to federal safety
requirements and additional General Motors Tire
Performance Criteria (TPC) standards.

-------------------------------------------------------------------------------------------------------------------------------------------------------------

-------------------------------------------------------------------------------------------------------------------------------------------------------------

6-48

Treadwear

The treadwear grade is a comparative rating based on
the wear rate of the tire when tested under controlled
conditions on a specified government test course. 
For example, a tire graded 150 would wear one and a
half (1 1/2) times as well on the government course 
as a tire graded 100. The relative performance of tires
depends upon the actual conditions of their use,
however, and may depart significantly from the norm
due to variations in driving habits, service practices and
differences in road characteristics and climate.

Traction 

--

 AA, A, B, C

The traction grades, from highest to lowest, are AA, A,
B, and C. Those grades represent the tire’s ability to 
stop on wet pavement as measured under controlled
conditions on specified government test surfaces of
asphalt and concrete. A tire marked C may have poor
traction performance. Warning: The traction grade
assigned to this tire is based on straight

-

ahead braking

traction tests, and does not include acceleration,
cornering, hydroplaning, or peak traction characteristics.

Temperature 

--

 A, B, C

The temperature grades are A (the highest), B, and C,
representing the tire’s resistance to the generation of
heat and its ability to dissipate heat when tested under
controlled conditions on a specified indoor laboratory
test wheel. Sustained high temperature can cause the
material of the tire to degenerate and reduce tire life, and
excessive temperature can lead to sudden tire failure.
The grade C corresponds to a level of performance
which all passenger car tires must meet under the
Federal Motor Vehicle Safety Standard No. 109. Grades
B and A represent higher levels of performance on the
laboratory test wheel than the minimum required by law.

Warning: The temperature grade for this tire is
established for a tire that is properly inflated and 
not overloaded. Excessive speed, underinflation, or
excessive loading, either separately or in combination,
can cause heat buildup and possible tire failure.

-------------------------------------------------------------------------------------------------------------------------------------------------------------

-------------------------------------------------------------------------------------------------------------------------------------------------------------

6-49

Wheel Alignment and Tire Balance

The wheels on your vehicle were aligned and balanced
carefully at the factory to give you the longest tire life
and best overall performance.

Scheduled wheel alignment and wheel balancing are not
needed. However, if you notice unusual tire wear or
your vehicle pulling one way or the other, the alignment
may need to be reset. If you notice your vehicle
vibrating when driving on a smooth road, your wheels
may need to be rebalanced.

Wheel Replacement

Replace any wheel that is bent, cracked, or badly rusted
or corroded. If wheel nuts keep coming loose, the wheel,
wheel bolts and wheel nuts should be replaced. If the
wheel leaks air, replace it (except some aluminum
wheels, which can sometimes be repaired). See your
dealer if any of these conditions exist.

Your dealer will know the kind of wheel you need.

Each new wheel should have the same load

-

carrying

capacity, diameter, width, offset and be mounted the
same way as the one it replaces.

If you need to replace any of your wheels, wheel bolts
or wheel nuts, replace them only with new GM original
equipment parts. This way, you will be sure to have the
right wheel, wheel bolts and wheel nuts for your vehicle.

CAUTION:

Using the wrong replacement wheels, wheel bolts
or wheel nuts on your vehicle can be dangerous.
It could affect the braking and handling of your
vehicle, make your tires lose air and make you
lose control. You could have a collision in which
you or others could be injured. Always use the
correct wheel, wheel bolts and wheel nuts 
for replacement.

NOTICE:

The wrong wheel can also cause problems with
bearing life, brake cooling, speedometer or
odometer calibration, headlamp aim, bumper
height, vehicle ground clearance and tire or tire
chain clearance to the body and chassis.

See “Changing a Flat Tire” in the Index for 
more information.

-------------------------------------------------------------------------------------------------------------------------------------------------------------

-------------------------------------------------------------------------------------------------------------------------------------------------------------

6-50

Used Replacement Wheels

CAUTION:

Putting a used wheel on your vehicle is
dangerous. You can’t know how it’s been used or
how far it’s been driven. It could fail suddenly
and cause an accident. If you have to replace a
wheel, use a new GM original equipment wheel.

Tire Chains

NOTICE:

Use tire chains only where legal and only when
you must. Use only SAE Class “S” type chains
that are the proper size for your tires. Install
them on the front tires and tighten them as
tightly as possible with the ends securely
fastened. Drive slowly and follow the chain
manufacturer’s instructions. If you can hear the
chains contacting your vehicle, stop and retighten
them. If the contact continues, slow down until it
stops. Driving too fast or spinning the wheels
with chains on will damage your vehicle.

-------------------------------------------------------------------------------------------------------------------------------------------------------------

-------------------------------------------------------------------------------------------------------------------------------------------------------------

6-51

Appearance Care

Remember, cleaning products can be hazardous. Some
are toxic. Others can burst into flame if you strike a
match or get them on a hot part of the vehicle. Some are
dangerous if you breathe their fumes in a closed space.
When you use anything from a container to clean your
vehicle, be sure to follow the manufacturer’s warnings
and instructions. And always open your doors or
windows when you’re cleaning the inside.

Never use these to clean your vehicle:
D Gasoline
D Benzene
D Naphtha
D Carbon Tetrachloride
D Acetone
D Paint Thinner
D Turpentine
D Lacquer Thinner
D Nail Polish Remover
They can all be hazardous 

--

 some more than 

others 

--

 and they can all damage your vehicle, too.

Don’t use any of these unless this manual says you can.
In many uses, these will damage your vehicle:
D Alcohol
D Laundry Soap
D Bleach
D Reducing Agents

Cleaning the Inside of Your Vehicle

Use a vacuum cleaner often to get rid of dust and loose
dirt. Wipe vinyl, leather, plastic and painted surfaces
with a clean, damp cloth.

Cleaning of Fabric/Carpet

Your dealer has cleaners for the cleaning of fabric and
carpet. They will clean normal spots and stains very
well. You can get GM

-

approved cleaning products 

from your dealer. See “Appearance Care and Materials”
in the Index.

-------------------------------------------------------------------------------------------------------------------------------------------------------------

-------------------------------------------------------------------------------------------------------------------------------------------------------------

6-52

Here are some cleaning tips:
D Always read the instructions on the cleaner label.
D Clean up stains as soon as you can 

--

 before they set.

D Carefully scrape off any excess stain.
D Use a clean cloth or sponge, and change to a 

clean area often. A soft brush may be used if stains
are stubborn.

D If a ring forms on fabric after spot cleaning, clean the

entire area immediately or it will set.

Using Cleaner on Fabric

1. Vacuum and brush the area to remove any loose dirt.

2. Always clean a whole trim panel or section. 

Mask surrounding trim along stitch or welt lines.

3. Follow the directions on the container label.

4. Apply cleaner with a clean sponge. Don’t saturate

the material and don’t rub it roughly.

5. As soon as you’ve cleaned the section, use a sponge

to remove any excess cleaner.

6. Wipe cleaned area with a clean, water

-

dampened

towel or cloth.

7. Wipe with a clean cloth and let dry.

Special Fabric Cleaning Problems

Stains caused by such things as catsup, coffee (black),
egg, fruit, fruit juice, milk, soft drinks, vomit, urine and
blood can be removed as follows:

1. Carefully scrape off excess stain, then sponge the

soiled area with cool water.

2. If a stain remains, follow the cleaner instructions

described earlier.

3. If an odor lingers after cleaning vomit or urine, 

treat the area with a water/baking soda solution: 
1 teaspoon (5 ml) of baking soda to 1 cup (250 ml)
of lukewarm water.

4. Let dry.

Stains caused by candy, ice cream, mayonnaise, chili
sauce and unknown stains can be removed as follows:

1. Carefully scrape off excess stain.

2. First, clean with cool water and allow to dry

completely.

3. If a stain remains, follow the cleaner instructions

described earlier.

-------------------------------------------------------------------------------------------------------------------------------------------------------------


Content      ..     17      18      19      20     ..