Oldsmobile Intrigue (2002 year). Manual - part 16


  Index      Oldsmobile     Oldsmobile Intrigue (2002 year) - manual in english


Search            copyright infringement  


Content      ..     14      15      16      17     ..


Oldsmobile Intrigue (2002 year). Manual - part 16


-------------------------------------------------------------------------------------------------------------------------------------------------------------
5-20

Changing a Flat Tire

If a tire goes flat, avoid further tire and wheel damage
by driving slowly to a level place. Turn on your hazard
warning flashers.

CAUTION:

Changing a tire can cause an injury. The vehicle
can slip off the jack and roll over you or other
people. You and they could be badly injured.
Find a level place to change your tire. To help
prevent the vehicle from moving:

1. Set the parking brake firmly.
2. Put the shift lever in PARK (P).
3. Turn off the engine.

To be even more certain the vehicle won’t move,
you can put blocks at the front and rear of the
tire farthest away from the one being changed.
That would be the tire on the other side of the
vehicle, at the opposite end.

The following steps will tell you how to use the jack and
change a tire.

-------------------------------------------------------------------------------------------------------------------------------------------------------------

-------------------------------------------------------------------------------------------------------------------------------------------------------------

5-21

Removing the Spare Tire and Tools

The equipment you need is in the trunk.

1. Turn the center 

nut on the compact
spare tire cover
counterclockwise
to remove it. 
Then lift and
remove the cover.

2. Remove the compact spare tire. See “Compact Spare

Tire” in the Index for more information about the
compact spare.

-------------------------------------------------------------------------------------------------------------------------------------------------------------

-------------------------------------------------------------------------------------------------------------------------------------------------------------

5-22

3. Turn the nut holding the jack counterclockwise and

remove it. Then remove the jack and wrench.

The tools you’ll be using include the jack (A), extension
and protector/guide (B) and wheel wrench (C).

-------------------------------------------------------------------------------------------------------------------------------------------------------------

-------------------------------------------------------------------------------------------------------------------------------------------------------------

5-23

Removing the Flat Tire and Installing the
Spare Tire

1. Using the wheel wrench, remove the plastic caps and

loosen all of the wheel nuts. Don’t remove them yet.

CAUTION:

Getting under a vehicle when it is jacked up is
dangerous. If the vehicle slips off the jack, you
could be badly injured or killed. Never get under
a vehicle when it is supported only by a jack.

CAUTION:

Raising your vehicle with the jack improperly
positioned can damage the vehicle and even 
make the vehicle fall. To help avoid personal
injury and vehicle damage, be sure to fit the jack
lift head into the proper location before raising
the vehicle.

-------------------------------------------------------------------------------------------------------------------------------------------------------------

-------------------------------------------------------------------------------------------------------------------------------------------------------------

5-24

2. Turn the jack handle clockwise to raise the jack lift

head a few inches.

For jacking at the vehicle’s front location, put the
jack lift head (C) about 8 inches (20 cm) from the
rear edge of the front wheel opening (B) or just
behind the two bolts (A) as shown.

Put the compact spare near you.

For jacking at the vehicle’s rear location, put the jack
lift head (B) about 6 inches (15 cm) from the front
edge of the rear wheel opening (C) or just behind the
off

-

set (A) as shown.

Put the compact spare tire near you.

-------------------------------------------------------------------------------------------------------------------------------------------------------------

-------------------------------------------------------------------------------------------------------------------------------------------------------------

5-25

3. Raise the vehicle by turning the jack handle

clockwise. Raise the vehicle far enough off the
ground for the compact spare tire to fit underneath
the wheel well.

4. Remove all wheel nuts and take off the flat tire.

-------------------------------------------------------------------------------------------------------------------------------------------------------------

-------------------------------------------------------------------------------------------------------------------------------------------------------------

5-26

5. Remove any rust or dirt

from the wheel bolts,
mounting surfaces and
spare wheel.

CAUTION:

Rust or dirt on the wheel, or on the parts to
which it is fastened, can make the wheel nuts
become loose after a time. The wheel could come
off and cause an accident. When you change a
wheel, remove any rust or dirt from the places
where the wheel attaches to the vehicle. In an
emergency, you can use a cloth or a paper towel
to do this; but be sure to use a scraper or wire
brush later, if you need to, to get all the rust or
dirt off.

CAUTION:

Never use oil or grease on studs or nuts. If you
do, the nuts might come loose. Your wheel could
fall off, causing a serious accident.

6. Install the compact spare tire.

7. Reinstall the wheel nuts

with the rounded end of
the nuts toward the
wheel. Tighten each nut
by hand until the wheel
is held against the hub.

-------------------------------------------------------------------------------------------------------------------------------------------------------------

-------------------------------------------------------------------------------------------------------------------------------------------------------------

5-27

8. Lower the vehicle by turning the jack handle

counterclockwise. Lower the jack completely.

9. Tighten the wheel

nuts firmly in a
crisscross sequence
as shown.

CAUTION:

Incorrect wheel nuts or improperly tightened
wheel nuts can cause the wheel to become loose
and even come off. This could lead to an accident.
Be sure to use the correct wheel nuts. If you have
to replace them, be sure to get new GM original
equipment wheel nuts.

Stop somewhere as soon as you can and have 
the nuts tightened with a torque wrench to 
100 lb

-

ft (140 N·m).

-------------------------------------------------------------------------------------------------------------------------------------------------------------

-------------------------------------------------------------------------------------------------------------------------------------------------------------

5-28

NOTICE:

Improperly tightened wheel nuts can lead to
brake pulsation and rotor damage. To avoid
expensive brake repairs, evenly tighten the wheel
nuts in the proper sequence and to the proper
torque specification.

10. Reinstall the plastic nut caps tightly by hand. Using

the wheel wrench, tighten the caps an additional
one quarter turn.

Storing the Flat Tire and Tools

CAUTION:

Storing a jack, a tire or other equipment in the
passenger compartment of the vehicle could
cause injury. In a sudden stop or collision, loose
equipment could strike someone. Store all these
in the proper place.

After you’ve put the compact spare tire on your vehicle,
you’ll need to store the flat tire in your trunk. Use the
following procedure to secure the flat tire in the trunk.

When storing a full

-

size tire, use the extension and

protector/guide located in the foam holder to help avoid
wheel surface damage. To store a full

-

size tire, place the

tire in the trunk with the valve stem facing down and the
protector/guide through a wheel bolt hole. Remove the
protector and attach the retainer securely.

When returning the compact spare tire to the trunk, put
the protector/guide back in the foam holder. Store the
cover as far forward as possible.

-------------------------------------------------------------------------------------------------------------------------------------------------------------

-------------------------------------------------------------------------------------------------------------------------------------------------------------

5-29

Storing the Spare Tire and Tools

CAUTION:

Storing a jack, a tire or other equipment in the
passenger compartment of the vehicle could
cause injury. In a sudden stop or collision, loose
equipment could strike someone. Store all these
in the proper place.

The compact spare tire is for temporary use only.
Replace the compact spare tire with a full

-

size tire as

soon as you can. See “Compact Spare Tire” in the Index.
See the storage instructions label to replace your
compact spare into your trunk properly.

A. Retainer

B. Cover

C. Compact Spare Tire

D. Nut

E. Jack

F. Wrench

G. Lock Nut Tool

H. Foam Holder

I. Extension and 

Protective Guide

J. Bolt Screw

-------------------------------------------------------------------------------------------------------------------------------------------------------------

-------------------------------------------------------------------------------------------------------------------------------------------------------------

5-30

Compact Spare Tire

Although the compact spare tire was fully inflated 
when your vehicle was new, it can lose air after a time.
Check the inflation pressure regularly. It should be 
60 psi (420 kPa).

After installing the compact spare on your vehicle, 
you should stop as soon as possible and make sure 
your spare tire is correctly inflated. The compact spare
is made to perform well at speeds up to 65 mph 
(105 km/h) for distances up to 3,000 miles (5 000 km),
so you can finish your trip and have your full

-

size tire

repaired or replaced where you want. Of course, it’s best
to replace your spare with a full

-

size tire as soon as you

can. Your spare will last longer and be in good shape in
case you need it again.

NOTICE:

When the compact spare is installed, don’t take
your vehicle through an automatic car wash with
guide rails. The compact spare can get caught on
the rails. That can damage the tire and wheel,
and maybe other parts of your vehicle.

Don’t use your compact spare on other vehicles.

And don’t mix your compact spare tire or wheel with
other wheels or tires. They won’t fit. Keep your spare
tire and its wheel together.

NOTICE:

Tire chains won’t fit your compact spare. Using
them can damage your vehicle and can damage
the chains too. Don’t use tire chains on your
compact spare.

-------------------------------------------------------------------------------------------------------------------------------------------------------------

-------------------------------------------------------------------------------------------------------------------------------------------------------------

5-31

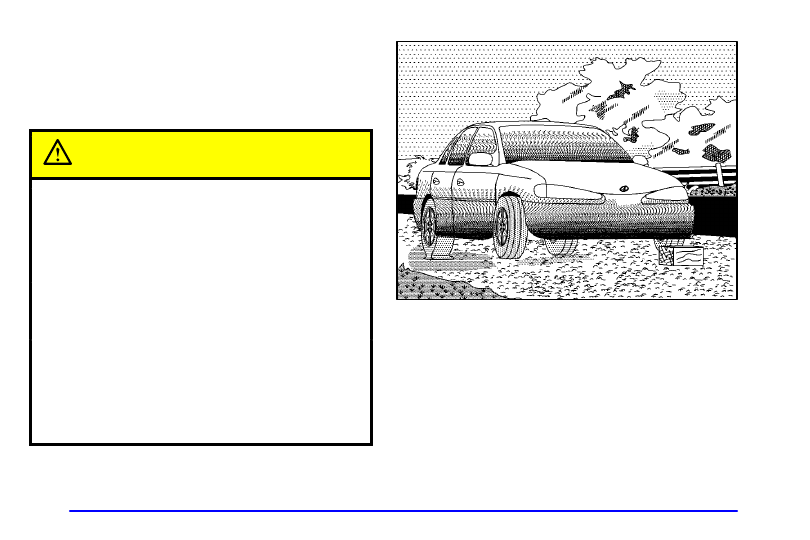
If You’re Stuck: In Sand, Mud, Ice or
Snow

In order to free your vehicle when it is stuck, you will
need to spin the wheels, but you don’t want to spin 
your wheels too fast. The method known as “rocking”
can help you get out when you’re stuck, but you must
use caution.

CAUTION:

If you let your tires spin at high speed, they 
can explode, and you or others could be injured.
And, the transaxle or other parts of the vehicle
can overheat. That could cause an engine
compartment fire or other damage. When you’re
stuck, spin the wheels as little as possible. Don’t
spin the wheels above 35 mph (55 km/h) as shown
on the speedometer.

NOTICE:

Spinning your wheels can destroy parts of your
vehicle as well as the tires. If you spin the wheels
too fast while shifting your transaxle back and
forth, you can destroy your transaxle.

For information about using tire chains on your vehicle,
see “Tire Chains” in the Index.

Rocking Your Vehicle To Get It Out

First, turn your steering wheel left and right. That will
clear the area around your front wheels. If your vehicle
has traction control, you should turn the system off. See
“Traction Control System” in the Index. Then shift back
and forth between REVERSE (R) and a forward gear,
spinning the wheels as little as possible. Release the
accelerator pedal while you shift, and press lightly on
the accelerator pedal when the transaxle is in gear. By
slowly spinning your wheels in the forward and reverse
directions, you will cause a rocking motion that may
free your vehicle. If that doesn’t get you out after a few
tries, you may need to be towed out. If you do need to
be towed out, see “Towing Your Vehicle” in the Index.

-------------------------------------------------------------------------------------------------------------------------------------------------------------

-------------------------------------------------------------------------------------------------------------------------------------------------------------

6-

6-1

Section 6

Service and Appearance Care

Here you will find information about the care of your vehicle. This section begins with service and fuel information,
and then it shows how to check important fluid and lubricant levels. There is also technical information about your
vehicle, and a part devoted to its appearance care.

6

-

2

Service

6

-

3

Fuel

6

-

5

Fuels in Foreign Countries

6

-

6

Filling Your Tank

6

-

8

Filling a Portable Fuel Container

6

-

8

Checking Things Under the Hood

6

-

11

Engine Oil

6

-

16

Engine Air Cleaner/Filter

6

-

19

Passenger Compartment Air Filter

6

-

20

Automatic Transaxle Fluid

6

-

24

Engine Coolant

6

-

27

Cooling System Pressure Cap

6

-

28

Power Steering Fluid

6

-

29

Windshield Washer Fluid

6

-

30

Brakes

6

-

33

Battery

6

-

34

Bulb Replacement

6

-

42

Windshield Wiper Blade Replacement

6

-

43

Tires

6

-

51

Appearance Care

6

-

51

Cleaning the Inside of Your Vehicle

6

-

53

Care of Safety Belts

6

-

55

Cleaning the Outside of Your Vehicle

6

-

56

Cleaning Aluminum or Chrome

-

Plated

Wheels (If Equipped)

6

-

57

Finish Damage

6

-

58

GM Vehicle Care/Appearance Materials

6

-

59

Vehicle Identification Number (VIN)

6

-

59

Service Parts Identification Label

6

-

60

Electrical System

6

-

67

Replacement Bulbs

6

-

67

Capacities and Specifications

6

-

68

Normal Maintenance Replacement Parts

-------------------------------------------------------------------------------------------------------------------------------------------------------------

-------------------------------------------------------------------------------------------------------------------------------------------------------------

6-2

Service

Your dealer knows your vehicle best and wants you to
be happy with it. We hope you’ll go to your dealer for
all your service needs. You’ll get genuine GM parts and
GM

-

trained and supported service people.

We hope you’ll want to keep your GM vehicle all GM.
Genuine GM parts have one of these marks:

Doing Your Own Service Work

If you want to do some of your own service work, you’ll
want to use the proper service manual. It tells you much
more about how to service your vehicle than this manual
can. To order the proper service manual, see “Service
and Owner Publications” in the Index.

Your vehicle has an air bag system. Before attempting to
do your own service work, see “Servicing Your Air
Bag

-

Equipped Vehicle” in the Index.

You should keep a record with all parts receipts and list
the mileage and the date of any service work you
perform. See “Maintenance Record” in the Index.

-------------------------------------------------------------------------------------------------------------------------------------------------------------

-------------------------------------------------------------------------------------------------------------------------------------------------------------

6-3

CAUTION:

You can be injured and your vehicle could be
damaged if you try to do service work on a
vehicle without knowing enough about it.
Be sure you have sufficient knowledge,

experience, the proper replacement parts
and tools before you attempt any vehicle
maintenance task.

Be sure to use the proper nuts, bolts and

other fasteners. “English” and “metric”
fasteners can be easily confused. If you use
the wrong fasteners, parts can later break
or fall off. You could be hurt.

Adding Equipment to the Outside of 
Your Vehicle

Things you might add to the outside of your vehicle can
affect the airflow around it. This may cause wind noise
and affect windshield washer performance. Check with
your dealer before adding equipment to the outside of
your vehicle.

Fuel

Gasoline Octane

Use regular unleaded gasoline with a posted octane of
87 or higher. If the octane is less than 87, you may get a
heavy knocking noise when you drive. If it is bad
enough, it can damage your engine. A little pinging
noise when you accelerate or drive uphill is considered
normal. This does not indicate a problem exists or that a
higher

-

octane fuel is necessary.

-------------------------------------------------------------------------------------------------------------------------------------------------------------

-------------------------------------------------------------------------------------------------------------------------------------------------------------

6-4

Gasoline Specifications

It is recommended that gasoline meet specifications
which were developed by the American Automobile
Manufacturers Association and endorsed by the
Canadian Vehicle Manufacturers’ Association for better
vehicle performance and engine protection. Gasolines
meeting these specifications could provide improved
driveability and emission control system performance
compared to other gasolines.

In Canada, look for 
the “Auto Makers’
Choice” label on 
the pump.

Canada Only

California Fuel

If your vehicle is certified to meet California Emission
Standards (see the underhood emission control label), it
is designed to operate on fuels that meet California
specifications. If this fuel is not available in states
adopting California emissions standards, your vehicle
will operate satisfactorily on fuels meeting federal
specifications, but emission control system performance
may be affected. The malfunction indicator lamp may
turn on (see “Malfunction Indicator Lamp” in the Index)
and your vehicle may fail a smog

-

check test. If this

occurs, return to your authorized GM dealer for
diagnosis. If it is determined that the condition is caused
by the type of fuel used, repairs may not be covered by
your warranty.

-------------------------------------------------------------------------------------------------------------------------------------------------------------


Content      ..     14      15      16      17     ..