Snowmobile Arctic Cat (2009 year). Manual - part 19
MAINTENANCE
69
743-439A
4. Position the console onto the air-
intake silencer; then secure with the
single torx-head screw beneath the
console (located between the head-
lights).
5. Install the two torx-head screws
located to the outside of the head-
light adjustment knobs; then
tighten securely.
6. Check headlight aim (see Adjust-
ing Headlight Aim in this sub-sec-
tion).
Adjusting Headlight
Aim
The headlight can be adjusted for verti-
cal aim of the HIGH/LOW beam. The
geometric center of HIGH beam zone
is to be used for vertical aiming.
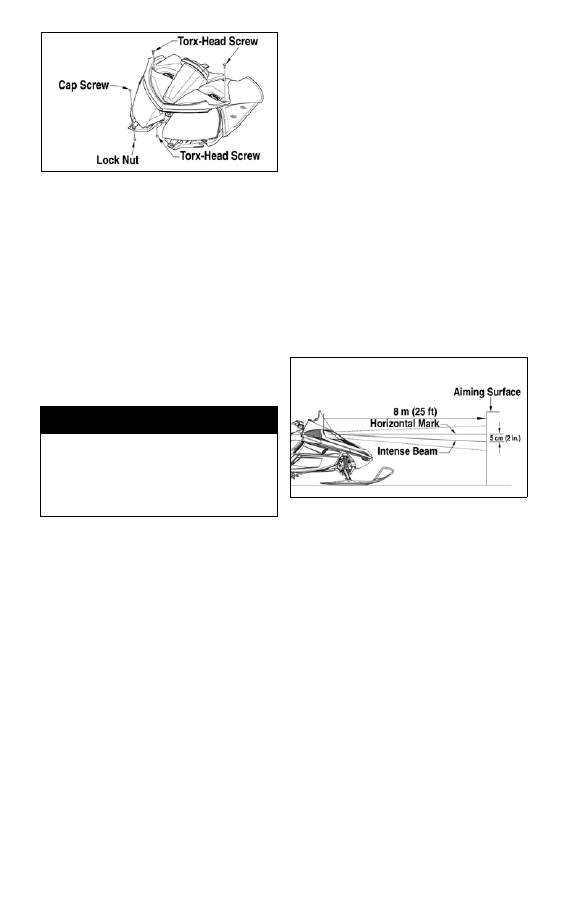
1. Position the snowmobile on a level
floor so the headlight is approxi-
mately 8 m (25 ft) from an aiming
surface (wall or similar surface).
NOTE: There should be an “aver-
age” operating load on the snow-
mobile when adjusting headlight
aim.
2. Measure the distance from the
floor to midpoint of the headlight.
3. Using the measurement obtained
in step 2, make a horizontal mark
on the aiming surface.
4. Make a vertical mark which inter-
sects the horizontal mark on the
aiming surface directly in front of
the headlight.
5. Engage the brake lever lock and
start the engine. Move the head-
light dimmer switch to the HIGH
beam position. DO NOT USE
LOW BEAM.
6. Observe the headlight beam aim.
Proper aim is when the most
intense beam is centered on the
vertical mark 5 cm (2 in.) below
the horizontal mark on the aiming
surface.
0741-448
7. Adjust the headlight using the
adjustment knobs until correct aim
is obtained. Shut the engine off;
then disengage the brake lever
lock.
! WARNING
Do not operate the snowmobile
unless headlight beam is adjusted
properly. An incorrectly adjusted
beam will not provide the operator
the optimum amount of light.