Snowmobile Arctic Cat (2007 year). Manual - part 20
2-65
2
GM124D
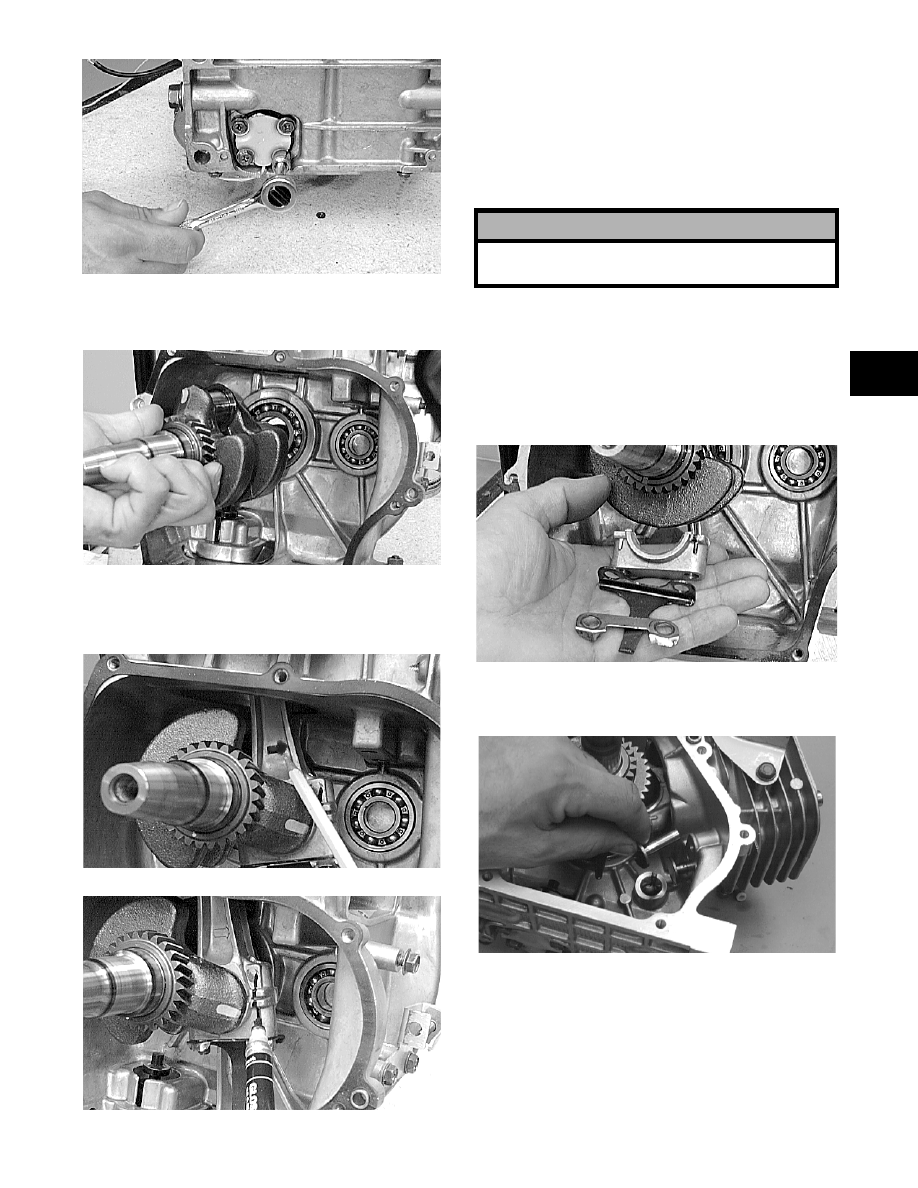
2. Install the crankshaft with the connecting rod
journal facing down.
GM124D
3. Note the direction of the arrow on the connect-
ing rod and the marks on the connecting rod and
end cap made during disassembly.
GM121D
GM120D
NOTE: Coat the cylinder wall, connecting rod
bearing surface, and the crankshaft with light-
weight oil.
4. Compress the piston rings and install the piston
and connecting rod assembly taking care not to
damage the crankshaft with the connecting rod
studs.
NOTE: When installing the piston, rotate the
crankshaft until the piston is at the bottom of the
stroke.
5. Install the connecting rod end cap with the
splasher plate, lock tab, and nuts. Tighten the
nuts to specifications.
GM123D
6. Apply lightweight oil to the tappets and cam-
shaft; then install the tappets and camshaft.
GM217D
! CAUTION
The arrow on the connecting rod must be directed
towards the camshaft.