Snowmobile Arctic Cat (2004 year). Manual - part 97
7-52
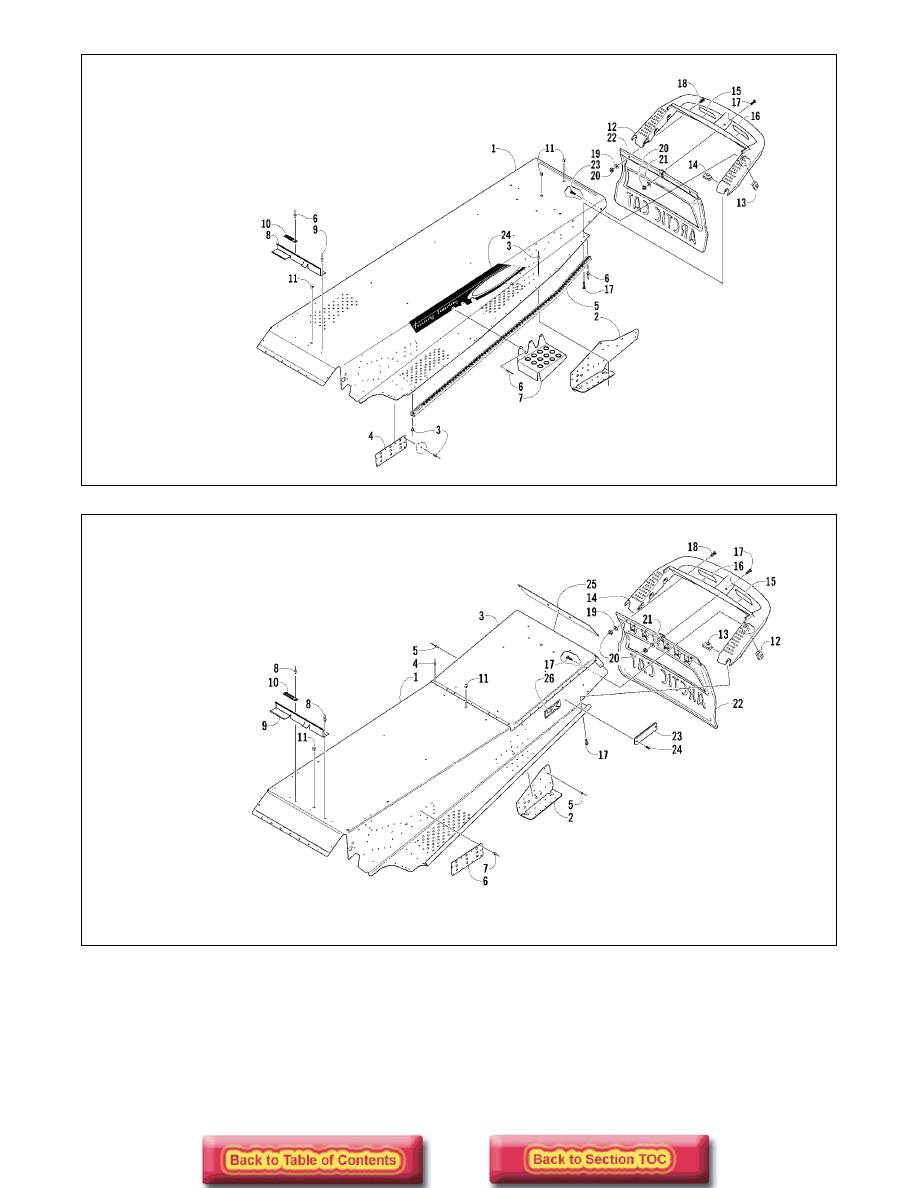
0738-526
0738-399
KEY
1. Tunnel Assy
2. Bracket
3. Rivet
4. Plate - Front
5. Tunnel Roll
6. Rivet
7. Footrest
8. Bracket
9. Rivet
10. Clamp
11. Hole Plug
12. Bumper
13. U-Nut
14. U-Nut
15. Decal
16. Decal
17. Machine Screw
18. Machine Screw
19. Washer
20. Lock Nut
21. Washer
22. Snowflap
23. Machine Screw
24. Decal
KEY
1. Tunnel Assy
2. Bracket
3. Tunnel Plate - Rear
4. Rivet
5. Rivet
6. Mounting Plate -
Front
7. Rivet
8. Rivet
9. Bracket
10. Clamp
11. Plug
12. U-Nut
13. U-Nut
14. Rear Bumper
15. Decal
16. Decal
17. Machine Screw
18. Machine Screw
19. Washer
20. Lock Nut
21. Washer
22. Snowflap
23. Reflector
24. Retaining Clip
25. Decal
26. Decal