Snowmobile Polaris FS IQ Widetrak (2013 year). Manual - part 21
 

  Index      Snowmobiles / ATV     Snowmobile Polaris FS IQ Widetrak - service manual 2013 year


Search            


Content   ..  19  20  21  22   ..


Snowmobile Polaris FS IQ Widetrak (2013 year). Manual - part 21


86

MAINTENANCE

Engine Oil

Oil Level Check

8. Maintain the oil level in 

the safe operating range, 
between the upper and 
lower marks on the dip-
stick. If the level is low, 
add the recommended oil 
in small increments, about 2 ounces (60 ml), and recheck the level.

Tip: If the level is low, or when changing the oil, add only enough oil to bring the 

level to the bottom of the safe operating range on the dipstick.

9. If the level is high, remove 2 ounces (60 ml) and recheck the level.

NOTICE: Do not overfill the oil tank. Engine damage may occur. Always add oil 

in small increments and recheck the level to avoid overfilling.

10. Recheck the oil level if oil was added or removed, making sure the 

coolant temperature is within the specified range. If necessary, con-
tinue adding or removing oil until the level is in the safe operating 
range.

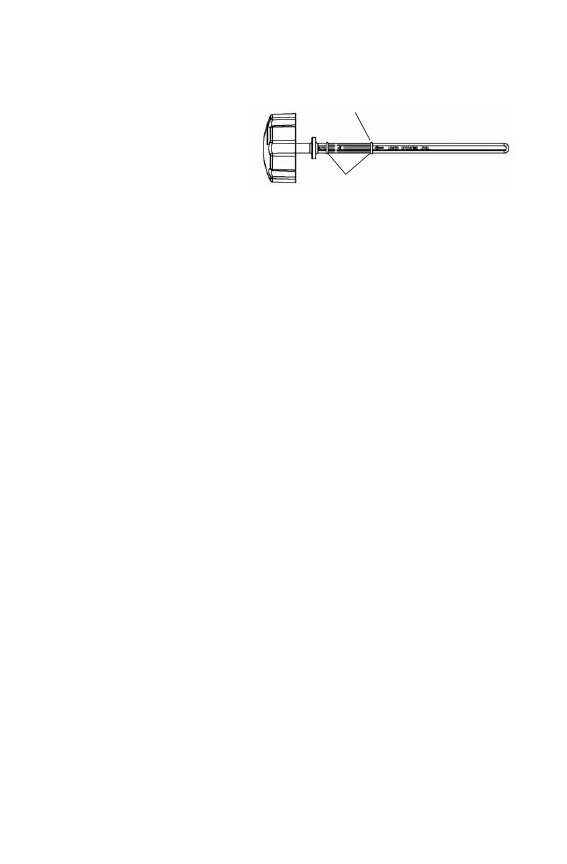
Fill mark for oil changes
(at specified coolant temperature)

Safe operating range

87

MAINTENANCE

Engine Oil

Oil in System Check

1. Position the vehicle on a level surface. Start the engine and allow it 

to idle 3-5 seconds (no more than 5 seconds). Turn the engine off. 

2. Remove the dipstick. Clean the dipstick with a clean shop towel and 

reinstall it, screwing it in completely. Remove the dipstick and ver-
ify that oil is present anywhere on the dipstick. 

3. If oil is present, continue with the oil level check procedure begin-

ning on page 84.

4. If oil is not present, add 1/2 quart (.47 l) of the recommended oil. 

Reinstall the dipstick, start the engine for no more than 5 seconds, 
stop the engine, and recheck for the presence of oil.

5. If oil is present, continue with the oil level check procedure begin-

ning on page 84.

6. If oil is not present, add another 1/2 quart (.47 l) of oil. Reinstall the 

dipstick, start the engine for no more than 5 seconds, stop the 
engine, and recheck for the presence of oil.

7. If no oil is present on the dipstick, check the oil system for leaks and 

proper operation or see your POLARIS dealer.

88

MAINTENANCE

Engine Oil

Oil Change

Always change the oil at the intervals outlined in the Periodic Mainte-
nance Table beginning on page 80. Clean the foam oil breather element 
with each engine oil change. See page 92.

Always use the recommended oil. See page 84, or see your POLARIS 
dealer about oil change kits, which contain a new filter and the recom-
mended oil.

Tip: A special jumper harness is required for changing the oil on this vehicle. 

Please see your POLARIS dealer to purchase the harness, which will allow 
you to use the ignition key to turn over the engine without starting it. You 
may also need an assistant to help with the oil change.

1. Position the vehicle on a level surface. 

2. Make sure the engine coolant temperature is between 145 and 160 

degrees F. (63-71 degrees C). If necessary, start the engine and 
allow it to idle until the coolant temperature is within the specified 
range.

3. Turn the engine off.

CAUTION! Hot oil and a hot exhaust system and engine can cause burns. Do 
not allow hot oil or hot components to contact skin.

4. Open the hood and remove the right side panel.

Tip: Clamp orientation is critical to the proper operation of the system. Be aware 

of clamp placement and orientation when removing hose clamps. Always 
reinstall hose clamps in the same location and position.

89

MAINTENANCE

Engine Oil

Oil Change

5. Remove the oil return hose from the oil tank. Have an assistant 

place the end of the hose into a drain pan.

6. Disconnect the 2-pin WHITE/RED and GREEN/WHITE starter 

motor solenoid control switch harness connector located near the 
battery.

7. Rotate the plug 90 degrees and reinstall it with the WHITE/RED 

wire connected.

8. Insert the male pin of the jumper harness into the starter solenoid's 

female port.

9. Open the handlebar cover. Locate the 3-pin connector with the 

BROWN and RED/WHITE wires. Plug this connector into the 3-
pin connector of the jumper harness.

10. Open the fuse box and remove the 20A EFI fuse from the fuse 

block.

11. Reinstall the right side panel.

12. Have an assistant use the ignition key to turn over the engine. Crank 

the engine for 15 seconds.

13. Wait 30 seconds to allow the starter motor to cool down.

14. Repeat steps 12 and 13 four more times for a total of five cycles.

15. Reconnect the oil return line to the oil tank. Make sure the hose and 

clamp are properly seated. Make sure the clamp is in the correct ori-
entation. Refer to the NOTE following step 4.

16. To prevent oil spillage, wait 3 to 5 minutes to allow any oil in the oil 

filter cap to drain out before removing it. While waiting, remove the 
foam oil breather element from the airbox. See page 92.

17. Inspect the foam element. Clean it with soap and water and let it dry. 

Reinstall it, or install a new element if the existing element is dam-
aged or degraded and unable to absorb liquid.


Content   ..  19  20  21  22   ..