Snowmobile Polaris 600 RMK / 600 PRO RMK / 800 RMK / 800 PRO RMK / 800 RMK Assault. Manual - part 6
26
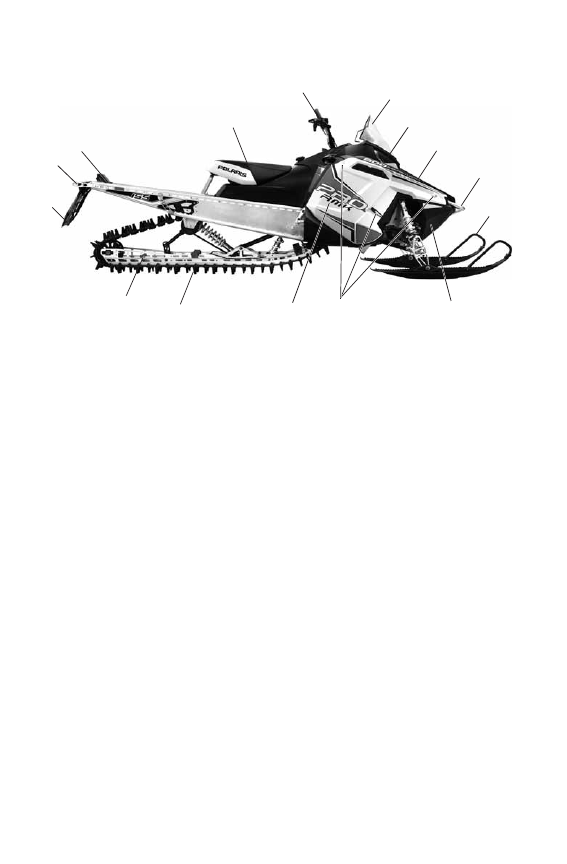
FEATURES
8
13
5
6
7
12
11
2
1
3
4
10
9
1.
Nosepan
2.
Skis
3.
Front Bumper
4.
Hood
5.
Headlight
6.
Windshield (accessory)
7.
Handlebar
8.
Operator Seat
9.
Taillight
10. Rear Bumper
11. Snow Flap
12. Suspension
13. Track
14. Side Panel
15. Side Panel Fasteners
15
14