CFMoto motorcycle CF150-A. Service Manual - part 4
 

  Index      Manuals     CFMoto motorcycle CF150-A. Service Manual


Search            copyright infringement  


Content      ..     2      3      4      5     ..


CFMoto motorcycle CF150-A. Service Manual - part 4


z

Pull out the filler gauge and recheck  the

valve clearance as prescribed limit.otherwise,

readjust the valve clearance conformance to

requirement.

Valve adjustalbe bolt fastening torque

:

10-12N.m

Attention:fasten bolt after fully adjust it.

z


Assemble the valve cover 3,bolt cover 2

and oilet bolt 1.

Tool:  screwdriver,filter guage.

Engine Idle

First inspection after 20 hours opeation.then,

check one time after every 40 hours or every

1000km.

z

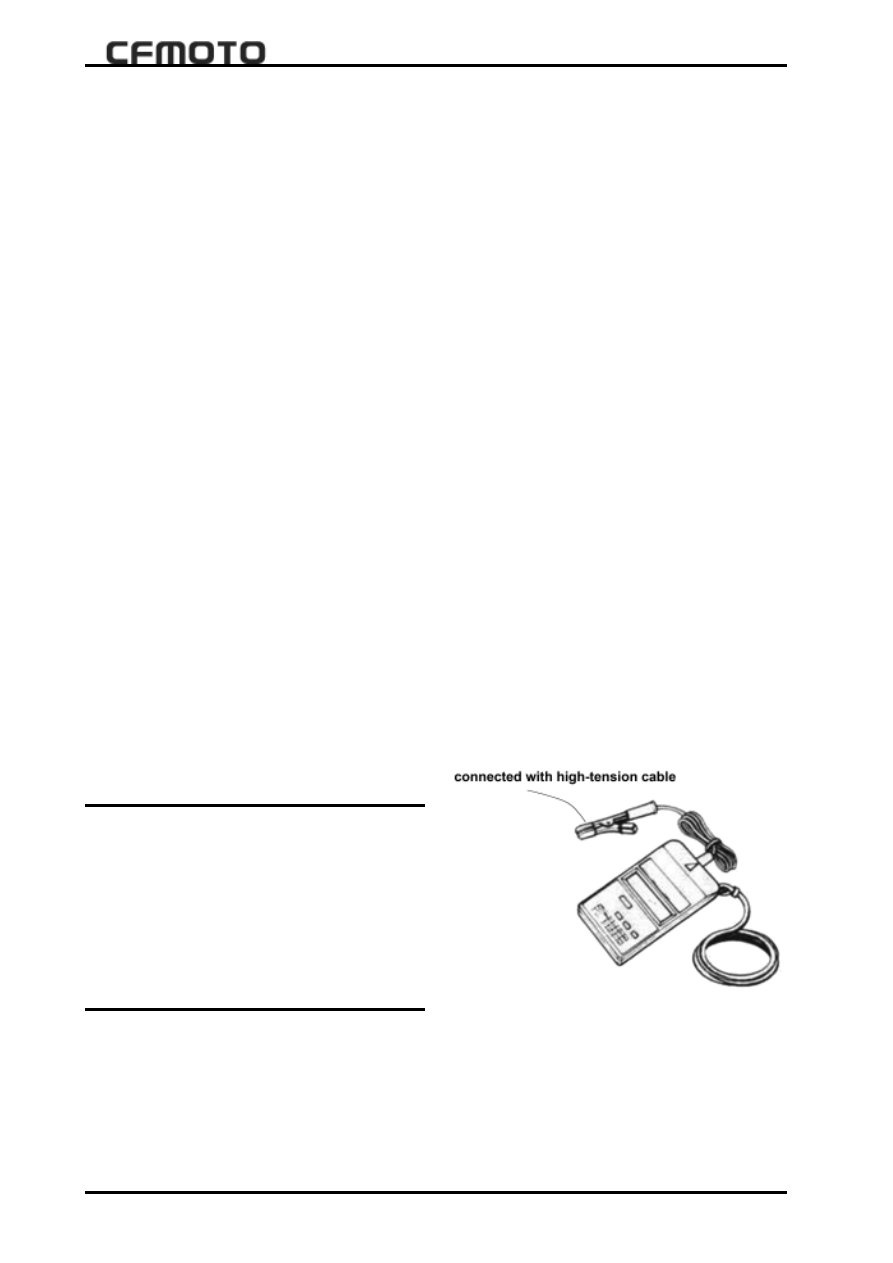
Starting engine to fully warming.then,check

the engine idling during in  1350r/min-1650r/

min by tachometer

.

Engine idling:1350r/min-1650r/min

Note:Adjust engine idling after engine

warming.

   Tool:Tachometer

Spark plug

First inspection after 20 hours operated.then,

Check one time for every 80 hours or 2000km.

change it for every 6000km.

z

Remove spark plug by special tools.

Spark plug Spec:CR9EP

z

Spark plug inspection:if electrode excessive

damage.Insulator breakage or thread

damage.change spark plug as new one.

 3-10

 3-10

 3-10

 3-10

 3-10

-------------------------------------------------------------------------------------------------------------------------------------------------------------


   3 Engine Inspection and Adjustment

 3

3

3

3

3

Check carbon deposition of spark plug.if

necessay,clear it by proper tools.

Spark plug clearance:check clearance by filler

gauge,if exceed limit,adjust it.

Spark plug clearance:0.8-0.9mm

Note

Check thread and extend distance of spark

plug after assembled if replace the spark plug.

if short.carbon deposition will be faced,even

damage the engine.

z

Spark plug installation

Note

Tighten the spark plug by hand avoid to dam-

age the thread of cylinder head.then,tighten

the spark plug by special tools.

Spark plug tighten torque:17-19N¡¤m

Tool:

Spark plug wrench,fitler gauge

Air filter

Check it every 2000km, clean and change it

if necessary.

if air filter jamed,less air into,power decrease

for engine,high fuel consumption. inspection

and clean air filler as follows:

z

Loosen bolt 1.remove air inflow seat of air

filter 2.

z

Take the filter element 3 from 2 .

    Clean the filter.


Compress filter to wiping enough water by

hand

.

Soakage the filter 3 by engine oil.proper crush

out enough engine oil and keep filter 3 as

slight oiling.

Note

:Don’t warp and damage the filter

  3-11

  3-11

  3-11

  3-11

  3-11

-------------------------------------------------------------------------------------------------------------------------------------------------------------

Change the engine oil and oil filter after

1000km.Check oil volume for every 1000km,

Change engine oil and oil filter for every

3000km.

Lubrication system inspection.

Engine oil volume inspection.

z

Horizontal position for engine

(Main stand to support the vehicle.)

z

Oil height should keep same level with F  line

by oil level window.

Warning:Don’t clean filter by gasoline and low

flash point of solvent cleaning

z

Check filter of air filter whether it is

damaged,if damaged,change the filter.

N o t e : K e e p   c l e a n   f o r   f i l t e r   d u r i n g

operation

.

Quicken damage if without filter,dirty filter or

damanged for working.Frequently clean the

filter if working in the dirty situation.

z

Check the air inlet,if dust in it,clean it by

cleanout fluid.

z

Check the oil storage pipe 4,if with oil.clear

the oil after take off strap and oil pipe.

l

Install the air filter as contrary process.to be

sure it is reliably for seal and filter element

fixed.

Accessories:cleanout fluid,SAE30 or

SAE10W/40 engine oil.

Tool:cross screwdriver,cleaning utensil.


1.oil level window    2.

plug screw of oil

filler

 3-12

 3-12

 3-12

 3-12

 3-12

-------------------------------------------------------------------------------------------------------------------------------------------------------------


   3 Engine Inspection and Adjustment

 3

3

3

3

3


Change engine oil and filter

z

Put up vehicle by main stand;

z

Engine prewarming by starting.

z

Remove oil drain bolt;

z

Quickly release all oil before engine cooled;

z

Remove three nuts 1 of filter cover 2,remove

“O “seal ring 3,filter pressure spring 4,paper

filter 5,,from the right side cover 6.

z

Change the paper filter 5.put peristome to

engine and install it on the right side cover.6.

z

Check “O “seal ring before install filter cover

2,whether it is damaged for  “O “seal ring 3,

filter pressure spring 4 whether it is short

shipped,

z

Install filter cover and tighten nut,but don’t

more tighten.

z

Tighten up the oil outlet bolt,screw out plug

screw of oil filler.

z

Fill 1000ml engine oil by oil filler

.

z

Tighten up plug screw of oil filler.running

several seconds while engine starting.

z

Check oil level after engine stopped one

minute,keep oil level 

in 

“F”if its low”F”,fill little

to “F”.Oil volume total 1250ml.

Note: 

Lay engine at horizontal position.

z

If without engine oil,loosen the bolt 2,add en-

gine oil.keep oil as same level with F  line.

Engine Oil:SAE10W/40 SF or SG

3-13

3-13

3-13

3-13

3-13

-------------------------------------------------------------------------------------------------------------------------------------------------------------

Warning:

z

Don’t open the radiator cover if engine is not cooled,otherwise,you will damaged by water

vapor and scalding cooling liquid.

z

Cooling liquid is poisonous,don’t drink it,don’t adhere to skin and eyes.just in case,wash it

by water at once,even,go to hospital to treat in time

.

z

Take care of cooling liquid.Must keep it in the safe place that child couldn’t take it.

Note

:Engine oil should change while heat engine.change oil filter,meanwhile change engine

oil.

Engine oil change volume

Only engine oil change: 1.2L

Meanwhile,change oil filter: 1.25L

Engine overhaul: 1.45L

Cooling system inspection

z

Check radiator,subsidiary water tank.,clamp situation,leaking situation of cooling liquid,if

damaged,change it as new parts.

¡ñcheck cooling liquid by observe the height of cooling liquid and up&down scribed line. if

below it,fill cooling liquid untill the top level.meanwhile,open the radiator cover,fill cooling liquied

into radiator.


1.

Engine assembly

2.

Water pump

3.

Water pump,outlet.

4.

Outlet,Radiator

5.

Radiator assembly

6.

Fan motor element.

7.

Inlet,radiator.

8.

Reservoir tank

 3-14

 3-14

 3-14

 3-14

 3-14

-------------------------------------------------------------------------------------------------------------------------------------------------------------


   3 Engine Inspection and Adjustment

 3

3

3

3

3

Cylinder pressure inspection

It is important indicator for cylinder pressure

in cylinder that reflect the stand or fall of

engine.must to be checked the cylinder

pressure.

Cylinder pressure:1200kPa

Some reasons as follows if lower cylinder

pressure

.

z

Cylinder overworn

z

Piston or piston ring scuffing.

z

Piston ring block in the piston ring slot.

z

Not strictly closed for valve seat.

z

Cylinder head gasket damaged or other

defects.

Note

:check above situations if lower cylinder

pressure.

Note:Cylinder cover bolt whether it is tighten

base on special torque,Valve clearance

whether it is proper adjusted before check the

cylinder pressure..

z

Warm up engine before inspection

z

Confirm that it is fully-powered battery.

z

Remove spark plug 1

    Install cylinder pressure meter 2 below

spark plug hole and tighten nut.

z

Keep open full for damper.

z

Turning several seconds after engine started,

record the full-scale reading of cylinder

pressure.

Tool:cylinder pressure meter,

connector seat.


3-15

3-15

3-15

3-15

3-15

-------------------------------------------------------------------------------------------------------------------------------------------------------------

z

Too Lower engine oil pressure.

z

Oil pipe leakage

z

Oil pump defects.

z

Above-mentioned combination.

z

High engine oil pressure.

z

Engine oile viscosity too high.

z

Blocking of vitta.

z

Blocking of oil filter

z

Above-mentioned combination.

Engine oil pressure inspection process:

z

Remove main vitta bolt.

contect tachometer


and ignition coil

z

Install fuel pressure gauge


and contacter

seat into main vitta hole.

z

Warm up engine as follows

Summer: 10 minutes as 2000r/min

Winter: 20 minutes as 2000r/min

Increase engine speed to 3000r/min after

engine warmed,then record the oil pressure

reading.

z

Apply tighten glue on the bolt of main oil

pipe,then tighten the bolt into the screw hole

base on special torque.

Tighten torque:23N.m

Tool: Oil gauge, tachometer

Engine oil pressure inspection

Engine oil pressure is important indicator to

show stand of fall for engine working

.

Engine oil pressure:9.8

~

~

~

~

~

29.4kPa in 3000r/min

Abnormal situation will be caused dut to Higher

or lower engine oil pressure

3-16

3-16

3-16

3-16

3-16

-------------------------------------------------------------------------------------------------------------------------------------------------------------

4-1


4  Cooling and Lubricating System

 4

4

4

4

4


Cooling and Lubrication System

Cooling system drawing

.............................4-2

Engine coolant

.....................................4-3

Inspection of coolant density

.........................4-3

Inspection and cleaning of Radiator and hose

...........4-4

Inspection of Fan COMP

.............................4-5

Insepction of Water Temp. Alarm Swith

 ................4-6

Insepction of Thermostat

.............................4-6

Water Pump

.........................................4-7

Remove and Disassemble Water Pump

..................4-7

Inspection of Water Pump

..............................4-9

Assemble and Install Water Pump

.......................4-10

Lubrication system drawing

............................4-11

Inspection of Lubrication system

........................4-12

Inspection of Oil Pump

.................................4-12

-------------------------------------------------------------------------------------------------------------------------------------------------------------

4-2


 157MJ-2A engine cooling system


1.

Engine COMP.

          2

.

Water Pump COMP.

          3

.

Outlet hose of Water pump

          4

.

Outlet hose of Radiator

          5

.

Radiator Assy

          6

.

Fan Comp.

          7

.

Inlet hose of Radiator

          8

.

Reservoir COMP

.


-------------------------------------------------------------------------------------------------------------------------------------------------------------

4-3


4  Cooling and Lubricating System

 4

4

4

4

4

Engine Coolant

z

Coolant used in cooling system is mixture of 50%

distilled water and 50% ethylene glycol antifreeze. This

mixture ratio provides optimized corrosion resistance

and fine heat production.Coolant will protect t cooling

system from freezing at temperature above -30

degrees,celsius.Mixing ratio of coolant should be in-

creased to 55% or 60% according to the figure on the

right.

Warning!

z

Use high quality ethylene glycol base antifreeze

mixed with distilled water.Never mix alcohol base an-

tifreeze or other different brands of antifreeze

z

The ratio of mixture should not be more than 60% or

less than 50%

z

Do not use anti-leak additive

Warning!

z

NEVER open radiator cap when engine is still hot.

Or you may be injured by scalding fluid or steam;

z

Coolant is harmful.DO NOT swallow or stain your

skin or eyes with coolant.In case of the above,flush

with plenty of water and consult a doctor if necessary;

z

Keep coolant away from reach of children


Inspection of Cooling Cycle

z

Remove radiator cap

and connect tester

2

NEVER open radiator cap when engine is still hot to

avoid hurt by scalding fluid or steam;

z

Apply pressure 105kPa and hold  for 10 seconds.

z

If pressure drops in 10 seconds,which indicates leak-

age in cooling cycle.In this case,check the complete

system and replace parts when leakage found.

Warning!

z

When removing tester,put a rag on radiator filler to

prevent splash of coolant

z

DO NOT allow testing pressure to exceed radiator

cap response pressure.

-------------------------------------------------------------------------------------------------------------------------------------------------------------

4-4

Inspection and Clean of Radiator and

Water Hoses

Inspection  of Radiator

z

Remove radiator cap

1

z

Connect radiator cap to barometer

2

z

Slowly apply pressure to 93.3~122.7kPa and

check if the cap can hold the pressure for at least

10 seconds

z

If the cap can not meet the pressure

requirement,repalce with new one.

Inspection and Clean of Radiator

z

Remove dirt or trash from radiator with com-

pressed air

z

Repair radiator fins with a small screwdriver

Inspection of Waterhoses

z

Check radiator hoses for leakage or damage.If

any,replace with new one.

z

Check water hose clamps.Replace with new

one if any looseness found.

z

After inspection and clean of radiator and hoses,

check coolant level.Fill coolant if necessary

Radiator Cap Opening Pressure:

Standard:93.3~122.9kPa

Tool:Barometer

-------------------------------------------------------------------------------------------------------------------------------------------------------------

4-5


4  Cooling and Lubricating System

 4

4

4

4

4

Inspection of Fan Motor

z

Check fan motor as the right chart: battery :12 volts

,motor runs at full speed with ampere not more then

3A indicating in ammeter.If the motor does not work of

the ampere exceeds the limit, replace the motor.

z

Installation:Apply a little thread locker to the bolts

and tighten to the specified  torque .

Fan Motor  Blot Tightening Torque:10N.m


z

Release 2 bolts from Fan Motor with  socket span-

ner 1.remove Fan motor from   radiator 3 and

Thermoswitch 2

z

Turn the vanes to check if they can turn smoothly


Inspection of Thermoswitch

z

Remove thermoswitch

z

Test thermoswit opening and closing temperature

as illustrated on the right ,place thermoswitch “1” in a

vessel with engine oil above and alcohol burner.

z

Heat engine oil to raise temperature slowly and take

the reading from thermometer  “2” when opening and

closing thermoswithch

Tool

:

Ammeter

Thermoswitch operating Temperature:

(OFF-ON):Approx

.88degrees(C)

(ON-OFF):Approx

.82degrees(C)

Note:

Note:

Note:

Note:

Note:

z

Avoid sharp impact on thermoswitch.

z

Avoid contact of the thermoswitch with thermom-

eter or vessel.

z

Installation: Change a new O-ring and tighten

thermoswitch to the specified torque:

Thermoswitch Tightening Torque:17N.m

z

Check coolant level after installation of thermoswitch,

Fill coolant if necessary.

-------------------------------------------------------------------------------------------------------------------------------------------------------------

4-6

z

Installation:Apply a little thread locker before assem-

bling it to the cylinder head by tightening to the speci-

fied torque.

Torque :10N. m

Note

Note

Note

Note

Note

z

Avoid sharp impact on water temp. Switch

z

Avoid contact of water temp. Switch with thermom-

eter or vessel

z

After installation ,check the coolant level, fill coolant

if necessary.

Inspection of Thermostat

z

remove 2bolts”1” from Thermostat cover Assy.

z

Remove thermostat cover”2”

z

Remove thermostat


opening and closing table

Tool:ohmmeter ,thermometer.

z

Heat engine oil to raise temperature slowly and take

the reading from thermometer when it’s opening and

closing.

z

Check the resistance of 

Water Temp.Alarm switch

as illustrated on the right,Place 

Water Temp.Alarm

switch

  “2”in a vessel with engine oil above an alcohol

burner.

z

Remove 

Water Temp.Alarm switch

Inspection of Water Temp.Alarm switch

-------------------------------------------------------------------------------------------------------------------------------------------------------------

4-7


4  Cooling and Lubricating System

 4

4

4

4

4

5.

If eigher of thermotat opening temperature or ther-

mostat valve lift does not reach the standards, replace

it .

z

Installation:Reverse the removal procedures for in-

stallation


Apply coolant to the rubber seal of thermostat before

assembling to the mounting hole.

Tighten to the specified torque to install thermostat

cover.

Tightening Torques:10N/m

Water Pump

z

Release hose clamp 1remove hose 2 to drain coolant.

Removal and Disassembly

Note

Before draining coolant,check water pump for oil or

coolant leakage.In case of oil leakage, check water

pump oil seal, O-ring, In case of coolant leakage ,

check water seal .


z

check the thermostat pellet “3”if any broken ,re-

place it.


z

test thermostat as the following steps:

1.Pass a string through thermostat flange as illustrated

on the right

2.

Immerse thermostat in a beaker with water. Make

sure thermostat is in the suspensed position without

contact to the beaker.

Heat water with an alcohol burner and observe the

temp. rise on the thermometer.


-------------------------------------------------------------------------------------------------------------------------------------------------------------

4-8


z

Release clamp”1”remove water hose “2”


z

Remove bolts”3”of water pump


z

Remove Water Pump”4”

z

Release water pump cover screws”6”


z

Remove O-Ring”5” and checking,replace a

new one if broken.


z

Remove water pump gasket”8” and cover”9”

from water pump body”7”,check the gasket ,re-

place a new one if broken.

z

Release shaft clip “10” which on the water

pump shaft with Circlip pliers.

z

Note

It should be clean up the contact surface of wa-

ter pump body and cover ,in order to affect  the

sealing of gasket.

-------------------------------------------------------------------------------------------------------------------------------------------------------------

4-9


4  Cooling and Lubricating System

 4

4

4

4

4

Note

Oil seal  does not need  to be removed if

no abnormal condition


Note:

shaft clipmust replaced with new one

after disassemble.

z

Remove Water Pump Impeller Assy.11;

z

Remove moving ring seal “12” from impeller.


z

Remove stationary ring “13” with special tool.

Note

stationary ring does not need  to be re-

moved if no abnormal condition

z

Remove oil seal with special tool “14”

z

Inspect bearing of water pump if it can work

well. In case any problems like blocked, replace

it. When do replacement, use bearing puller tool

to remove bearing

Note

shaft must be replaced with a new one

after disassembly.

Inspection of Water Pump


Bearing

:

z

Check bearing clearance by hand while it is

still in the water pump body.

z

Turn inner race of bearing to check for abnor-

mal noise and smooth rotation.

z

Repalce bearing if any abnormal condition

-------------------------------------------------------------------------------------------------------------------------------------------------------------


Content      ..     2      3      4      5     ..