Maserati Ghibli (2018 year). Manual in english - page 1
Dear Customer,
Thank you for choosing a Maserati.
This vehicle represents the result of Maserati's great experience in the design and production of sports, touring and
racing vehicles.
With this manual you will acquaint yourself with the equipment and options of your Maserati in order to take advantage
of its full potential.
Before driving your vehicle for the first time, we suggest reading the printed Quick Guide carefully in order to quickly
acquaint with commands and functions of your vehicle. You can consult this Owner's Manual and the Maserati Touch
Control Plus guide directly from the dashboard touchscreen display of your vehicle.
The updated version of the onboard documentation can be consulted by accessing the section “SERVICES” on the website
www.maserati.com or by using the specific apps developed for the more common Tablet and Smartphone.
In a dedicated section of this manual you will also find instructions for basic maintenance procedures, in order to ensure
steady levels of performance, quality and safe driving.
Keep in mind that proper maintenance is an essential factor to help preserve the value of the vehicle over time and
protect the environment.
For “Scheduled Maintenance” or any other operation, contact your Authorized Maserati Dealer: you can trust our
trained technical staff, who is constantly updated and provided with the required equipment in order to ensure that all
service operations are performed properly and reliably.
The Quick guide and other documents contained in onboard documentation kit are integral part of the vehicle and
should always be kept on board.
You can purchase a printed copy of the documents visible on dashboard touchscreen display at your dealer of your
Authorized Maserati Dealer.
2
WARNING!
CALIFORNIA proposition 65.
Operating, servicing and maintaining a passenger vehicle or off-road vehicle can expose you to chemicals including such
as, engine exhaust, carbon monoxide, phthalates and lead, that which are know to the State of California to cause
cancer and birth defects or other reproductive harm. To minimize exposure, avoid breathing exhaust, do not idle the
engine except as necessary, service your vehicle in a well-ventilated area and wear gloves or wash your hands
frequently when servicing your vehicle. For more information go to: www.P65Warnings.ca.gov/passenger-
vehicle
3
Introduction
1
Before Starting
2
Understanding the Vehicle
3
Dashboard Instruments and Controls
4
Driving
5
In an Emergency
6
Maintenance and Care
7
Features and Specifications
8
Index
9
5
1 - Introduction
Consulting the Manual
8
Abbreviations
8
Updating
9
Service and Warranty
10
Suggestions for Obtaining Service for Your Vehicle
10
If You Need Assistance
11
Warranty Information
12
Reporting Safety Defects
12
Parts Service
13
Aftermarket Parts & Accessories Statement
13
Symbols
14
Warnings when Driving
15
Maserati Roadside Assistance Program
(available for USA and Canada only)
16
Vehicle Identification Data
18
7
Introduction
Consulting the Manual
Abbreviations
1
WARNING!
For an easy identification of the topics,
Some descriptions and terms with
this Manual is divided into sections
Failure to comply with the instructions
particular meanings are found in this
and chapters: each chapter can have
could cause HAZARDOUS SITUATIONS
manual in abbreviated form.
more paragraphs.
involving personal and vehicle safety.
A/C
Air-Conditioning system.
Within the text, important warnings
ABA
Advanced Brake Assist.
and notes are also easily identifiable
through icons.
ABS
Anti-Lock Braking System.
ENVIRONMENTAL!
This note indicates the correct
ABSA
Active Blind Spot Assist.
behavior when using the vehicle to
ACC
Adaptive Cruise Control.
WARNING!
protect the environment.
ADAS
Advanced Driver Assistance
California Proposition 65
Systems.
Operating, servicing and maintaining
ALR
Automatic Locking Retractor.
a passenger vehicle or off-road vehicle
CAUTION!
can expose you to chemicals including
AQS
Air Quality Sensor.
Aimed at preventing any damage to
such as, engine exhaust, carbon
the vehicle and thus hazards involving
ATC
Automatic Temperature
monoxide, phthalates and lead, that
the safety of persons.
Control.
which are know to the State of
AWD
All-Wheel Drive.
California to cause cancer and birth
NOTE:
BAS
Brake Assist System.
defects or other reproductive harm. To
Additional information regarding the
minimize exposure, avoid breathing
BSA
Blind Spot Assist.
subject and/or the operation
exhaust, do not idle the engine except
BTO
Brake Throttle Override.
described.
as necessary, service your vehicle in a
CAN
Controller Area Network.
well-ventilated area and wear gloves
• “Left” and “right” in this manual,
or wash your hands frequently when
CC
Cruise Control.
always refer to the driving direction.
servicing your vehicle. For more
CRS
Child Restraint System.
• All indications and images in this
information go to:
DRL
Daytime Running Lights.
Manual refer to a vehicle with
left-hand drive. On right-hand drive
EBD
Electronic Brake-force
vehicle
vehicles, some controls are ordered
Distribution.
differently than shown in the
ECU
Electronic Control Unit.
illustrations.
8
Introduction
Updating
EDR
Event Data Recorder.
SABIC
Supplemental Side Air Bag
Inflatable Curtains.
1
EPB
Electric Parking Brake.
Constant improvements are being
SBR
Seat Belt Reminder.
performed to maintain this vehicle's
ESC
Electronic Stability Control.
SRS
Supplemental Restraint
high level of quality. Therefore, there
ETC
Electronic Throttle Control.
System.
may be differences between this
FCW
Forward Collision Warning.
manual and your vehicle.
TCS
Traction Control System.
HAS
Highway Assist.
Maserati reserves the right to carry
TFT
Thin Film Transistor.
out design and functional changes
HSA
Hill Start Assist.
TPMS
Tire Pressure Monitoring
and to provide updates or
HBA
Hydraulic Brake Assistance.
System.
improvements.
I.C.E.
Increased Control and
This Owner's Manual illustrates and
TSA
Traffic Sign Assist.
Efficiency.
describes all versions of the current
VIN
Vehicle Identification
LATCH
Lower Anchors and Tether
vehicle model. Therefore, some of the
Number.
for Children.
equipment and accessories in this
publication may not appear on your
LDW
Lane Departure Warning
vehicle; please only consider the
(LaneSense).
information related to your vehicle.
LKA
Lane Keeping Assist.
All specifications and illustrations
MIL
Malfunction Indicator Light.
contained in this manual are as of the
MTC+
Maserati Touch Control Plus.
Manual publishing date.
OBD
On Board Diagnostics.
NOTE:
ORC
Occupant Restraint
The updated version of the on-board
Controller.
documentation can be consulted by
PDC
Park Distance Control.
accessing the section “SERVICES” on
RAB
Ready Alert Braking.
using the specific apps developed for
RCP
Rear Cross Path.
the more common Tablet and
RKE
Remote Keyless Entry.
Smartphone.
SAB
Side Air Bag.
9
Introduction
that do not comply with Maserati’s
Service and Warranty
Suggestions for Obtaining
specifications.
1
Service for Your Vehicle
The information provided in this
An Authorized Maserati Dealer is at
manual is limited to instructions and
your complete disposal for any
Prepare for the Appointment
indications that are strictly required
information and questions you may
for vehicle use and proper
have.
If warranty work is required, be sure to
maintenance.
have the right papers with you and
By following these instructions
take your warranty folder. Not all work
carefully, the vehicle will meet the
being performed may be covered by
owner's satisfaction and best results.
the warranty: therefore discuss
We advise to have all service and
additional charges with the service
inspections completed only by an
manager. It is advisable to keep a
Authorized Maserati Dealer, where
maintenance log of your vehicle’s
you will find a specially trained staff
service history, as this can often
and the proper equipment to repair
provide a clue to the current problem.
your vehicle.
Prepare a List
Please visit the www.maserati.com to
find the nearest Authorized Maserati
Make a written list of your vehicle’s
Dealer.
problems or the specific work you wish
All features and accessories installed
to be performed. If the vehicle has had
on the vehicle have been designed by
an accident or work done that is not
Maserati engineers and have
indicated on the maintenance log,
successfully passed rigorous tests,
please communicate this to the service
submitted in all conditions of use.
advisor.
Installing aftermarket components or
Optimize the Requests
accessories not approved by Maserati
may interfere with the vehicle
If there are a number of items needing
electronics and compromise driving
attention, it is advisable to discuss this
safety and possibly voiding the
with your service advisor to agree on
warranty coverage.
the order of priorities.
Nor do the warranties cover the costs
At many Authorized Dealers/Service
of repairing damage or conditions
Centers, it is possible to obtain a
caused by any changes to your vehicle
loaner vehicle or a rental vehicle at a
10
Introduction
minimal daily charge. If you need a
Contact:
If You Need Assistance
rental vehicle, it is advisable to make
MASERATI North America, Inc.
1
these arrangements prior to the visit,
The manufacturer/Maserati and its
250 Sylvan Avenue
for example when you call to set the
Authorized Dealers/Service Network
Englewood Cliffs
appointment.
set highest priority to the client’s
NJ 07632
satisfaction with the products and
Phone:
services.
Maserati Customer Care
Warranty service must be performed
1-877-MY-MASERATI (877-696-2737) or
by an Authorized Maserati
1-201-510-2369
Dealer/Service Center.
Should there be any issues, please
keep in mind that most matters can be
resolved with the following process.
• If for some reason you are still not
satisfied, please contact the general
manager or owner of the Service
Center, it is their responsibility to
assist you.
• If a Service Center is unable to
resolve the issue, you may contact
Maserati Customer Center.
Any communication to the Maserati
Consumer Affairs should include the
following information:
• Owner’s name and address.
• Owner’s telephone number (home
and office).
• Maserati Service Center name.
• Vehicle Identification Number (VIN).
• Vehicle delivery date and mileage.
11
Introduction
in addition to notifying Maserati North
Warranty Information
Reporting Safety Defects
America, Inc.
1
Please refer to the Warranty booklet,
NHTSA’s Toll-free Auto Safety
Transport Canada can be contacted at:
included in the Owner’s
Hotline
1-800-333-0510
documentation kit, for the terms and
Teletypewriter (TTY): 613 990-4500
If you believe that your vehicle has a
provisions of Maserati warranties
Fax: 1-819-994-3372
defect which could cause a crash,
applicable to this vehicle and market.
Mailing Address: Transport Canada -
injury or death, immediately inform
Road Safety, 80 rue Noël, Gatineau,
the National Highway Traffic Safety
(Quebec) J8Z 0A1.
Administration (NHTSA) in addition to
notifying Maserati North America, Inc.
In Canada
If NHTSA receives similar complaints, it
If you believe that your vehicle has a
may open an investigation, and if it
safety defect, contact the Customer
finds that a safety defect exists in a
Service Department immediately.
group of vehicles, it may order a recall
Canadian customers who wish to
and remedy campaign. However,
report a safety defect to the Canadian
NHTSA cannot become involved in
government should contact Transport
individual problems between you, your
Canada, Motor Vehicle Defect
dealer, or Maserati North America, Inc.
Investigations and Recalls at
To contact NHTSA, you may call the
1-800-333-0510 or go to
Vehicle Safety Hotline toll-free at
1-888-327-4236 (TTY: 1-800-424-9153),
go to http://www.safercar.gov; or write
to: Administrator, NHTSA, Washington,
D.C. 20590. You can also obtain other
information about motor vehicle
safety from http://www.safercar.gov.
Reporting safety defects in Canada
If you believe your vehicle has a defect
that could cause a crash or could cause
injury or death, you should
immediately inform Transport Canada
12
Introduction
distributed by Maserati North
Parts Service
Aftermarket Parts &
America, Inc.
Accessories Statement
1
Genuine parts keep the reliability,
comfort and performance of your new
Modification of the vehicle or
car unchanged throughout its life.
installation of any accessory or
For service and scheduled
components attached to the vehicle
maintenance Maserati suggests you to
which alters the original engineering
ask for genuine parts since they are
and/or vehicle operating
the result of constant research and
specifications, or which result in
development, reliability test and new
damage to the other original
technologies, as well as they are
components, electrical interference,
specifically designed for this vehicle.
electrical short(s), radio static, water
leaks and wind noise may result in
damage to genuine components,
compromise the safety of the vehicle
and affect the validity of the new car
warranty on the vehicle.
Non-genuine Maserati Parts
Non-genuine Maserati Parts (while
you may elect to use non-genuine
Maserati parts for maintenance or
repair services), Maserati North
America, Inc. is not obligated to pay
for repairs that include non-genuine
Maserati parts or for any damage
resulting from the use of non-genuine
parts.
Maserati will not accept any liability
for any parts and accessories not
approved by Maserati, including
Dealer-installed accessories not
13

Introduction
Symbols
Coolant expansion
Battery - jack
1
reservoir
Refer to the owner manual.
There are specific colored plates on or
Do not open cap with
near some of the components on your
engine warm.
Maserati designed to attract user’s
attention. Important warnings
Coil - headlights
concerning all specific devices that the
High voltage.
WARNING!
user must consider, are reported on
California Proposition 65
the internal hood cover central label
Belts and pulleys
Operating, servicing and maintaining
(see “Vehicle Identification Data” in
Moving parts, keep body
a passenger vehicle or off-road vehicle
this section).
and clothing clear.
can expose you to chemicals including
All symbols reported on the plate and
Air-conditioning lines
such as, engine exhaust, carbon
inside the vehicle, as well as the
High pressure gas, do not
monoxide, phthalates and lead, that
component for which the symbols
open.
which are know to the State of
stand, are summarized in the
California to cause cancer and birth
following list. These symbols are
Symbols of Prohibitions and
defects or other reproductive harm. To
divided into categories according to
Compulsory Measures
minimize exposure, avoid breathing
their meaning.
exhaust, do not idle the engine except
Battery
as necessary, service your vehicle in a
Danger Symbols
Keep away from flames.
well-ventilated area and wear gloves
Battery
or wash your hands frequently when
Corrosive liquid.
Battery
servicing your vehicle. For more
Keep out of children’s
information go to:
Battery
reach.
Explosion.
Heat guards - belts -
vehicle
pulleys - fans
Blower
Do not touch.
May start automatically
Battery
even with engine off.
Wear eye protection.
14

Introduction
Warning Symbols
Warnings when Driving
Windshield washer fluid
Engine - Engine Oil Filler
reservoir
1
Always comply with local traffic
Cap
Windshield washer. We
regulations wherever you drive.
Engine oil. We recommend
recommend using a liquid
Failure to operate this vehicle correctly
using an oil with the
with the characteristics
may result in loss of control or a
characteristics indicated in
indicated in chapter
collision.
chapter “Refillings” in
“Refillings” in section
Operating this vehicle at excessive
section “Features and
“Features and
speed or in an altered state or while
Specifications”.
Specifications”.
intoxicated may result in loss of
Brake fluid reservoir
control, going off the road, or
Brake fluid type DOT 4. Do
overturning. In all these situations a
not exceed max. level. We
collision with other vehicles or objects
WARNING!
recommend using a fluid
is more likely to happen with the risk
California Proposition 65
with the characteristics
to cause an accident that may lead to
Operating, servicing and maintaining
indicated in chapter
serious injury.
“Refillings” in section
a passenger vehicle or off-road vehicle
In case of an accident, failure to use
can expose you to chemicals including
“Features and
seat belts causes the driver and
such as, engine exhaust, carbon
Specifications”.
passengers a greater risk of injury or
monoxide, phthalates and lead, that
death. Use your seat belt at all times.
Radiator coolant expansion
which are know to the State of
This Owner's Manual contains
reservoir
California to cause cancer and birth
warnings against operating
Use antifreeze liquid for
defects or other reproductive harm. To
procedures that could result in a
radiators. We recommend
minimize exposure, avoid breathing
collision or injury or damage to the
using a liquid with the
exhaust, do not idle the engine except
environment. It also contains cautions
characteristics indicated in
as necessary, service your vehicle in a
against procedures that could damage
chapter “Refillings” in
well-ventilated area and wear gloves
the vehicle.
section “Features and
or wash your hands frequently when
If you do not read this manual in its
Specifications”.
servicing your vehicle. For more
entirety, you may miss important
information go to:
information. Consider carefully all
warnings and cautions.
vehicle
15
Introduction
is necessary to recharge the battery in
Maserati Roadside
order to allow all vehicle’s components
1
WARNING!
Assistance Program
and systems to function correctly.
• It is the driver’s responsibility to
(available for USA and
operate the vehicle in a safe way: if
Canada only)
you are distracted while driving you
can lose control and cause serious
Welcome to Maserati and the benefits
accidents.
and security of the Maserati Roadside
• Maserati strongly recommends you
Assistance Program. Please take a
use particular care when operating
moment to review the benefits listed
the features and tools that may
below and available to you through
distract you.
the Maserati Roadside Assistance
Program.
• Mobile phones, PC, portable audio
device or other features operated
Emergency Roadside Services
while the vehicle is moving can be
In the event you require Roadside
very dangerous and can cause
Assistance, please call 1-888-371-1802,
serious accidents, and in some states
24 hours a day, 365 days a year. You
is against the law.
will be connected with a Roadside
• It is very dangerous to send text
Assistance representative who will
messages while driving; do so only
dispatch a local towing vendor.
when the vehicle is not moving.
• In some Countries/States the use of
Information needed for when
mobile phones when driving is
you call
forbidden: it is the driver’s sole
When you call, please be prepared to
responsibility to respect local
provide the following information:
regulations.
• Your Name.
• Vehicle Identification Number (VIN).
• Location of your vehicle.
CAUTION!
• Nature of your call (for example; you
If battery charge is too low, proper
require a tow, vehicle will not start,
function of some electric/electronic
out of gas, tire service, etc.).
components may not be guaranteed. It
16
Introduction
Summary of Program Benefits
days of the rental car transaction to
NOTE:
and Services
the address listed below; the original
Membership is intended to cover
1
pre-printed rental car receipt, which
emergencies and is not intended to be
• Towing of a disabled registered
must include your name, address,
a substitute for proper vehicle
Maserati vehicle. In the event a
telephone number, VIN, rental dates
maintenance or repair. Repeated calls
registered vehicle becomes disabled
and the corresponding warranty
which are considered by Maserati
in connection to a warranty related
repair order.
North America, Inc. Signature Motor
concern it will be transported to the
Maserati Roadside Assistance ATTN:
Club, Inc. or Signature Motor Club of
nearest Authorized Maserati
Maserati Rental Car Claims Dept.
California, Inc. to be excessive may, at
Dealership. You may request that
P.O. Box 8140 Ft.
our discretion, result in cancellation of
the vehicle be taken to a different
Washington, PA 19034
the membership.
Authorized Maserati Dealer, as long
as it is no more than 50 miles further
NOTE:
Emergency road service providers are
away from the nearest authorized
independent contractors and are not
An authorized licensed driver must be
dealer (one tow per disablement).
employees, agents or representatives
driving at the time of the disablement.
• Battery jump start.
of Maserati North America, Inc.
• Flat tire change providing the
Items excluded from coverage:
Signature Motor Club, Inc. or
vehicle is equipped with a spare tire.
Signature Motor Club of California,
• Parts, labor, tire repair, rental of
Inc.
• Fuel delivery (up to 2 gallons).
towing equipment, storage fees, or
• Lockout Services.
any labor performed at the service
Under this Agreement
facility.
• Service Loaner Vehicle: For warranty
• You will not be required to pay any
repairs, your dealer may provide you
• Any form of impound towing, or
sum for services up to the mileage
with a Maserati Service Loaner
towing by someone other than a
limit on towing.
Vehicle (if available) or provide you
licensed service station or garage.
• Your registered Maserati vehicle is
with Rental Car allowance: in the
• Assistance from a private citizen.
the vehicle covered. The Vehicle
event your vehicle is disabled due to
Identification Number (VIN) that
a warranty related concern, we will
appears on the vehicle represents
reimburse you up to $50 per day. A
your identification number with
five (5) day or $250 maximum
Signature Motor Club, Inc. or
applies. In order to receive
Signature Motor Club of California,
reimbursement, you must supply the
Inc.
following information within 20
17
Introduction
• NEW VEHICLES: Your membership
Maserati Rental Car Claims Dept.
Vehicle Identification Data
begins on the date the Registered
P.O. Box 8140
1
Vehicle was originally sold (in service
Ft. Washington, PA 19034
Vehicle Identification Number
date) and continues until the
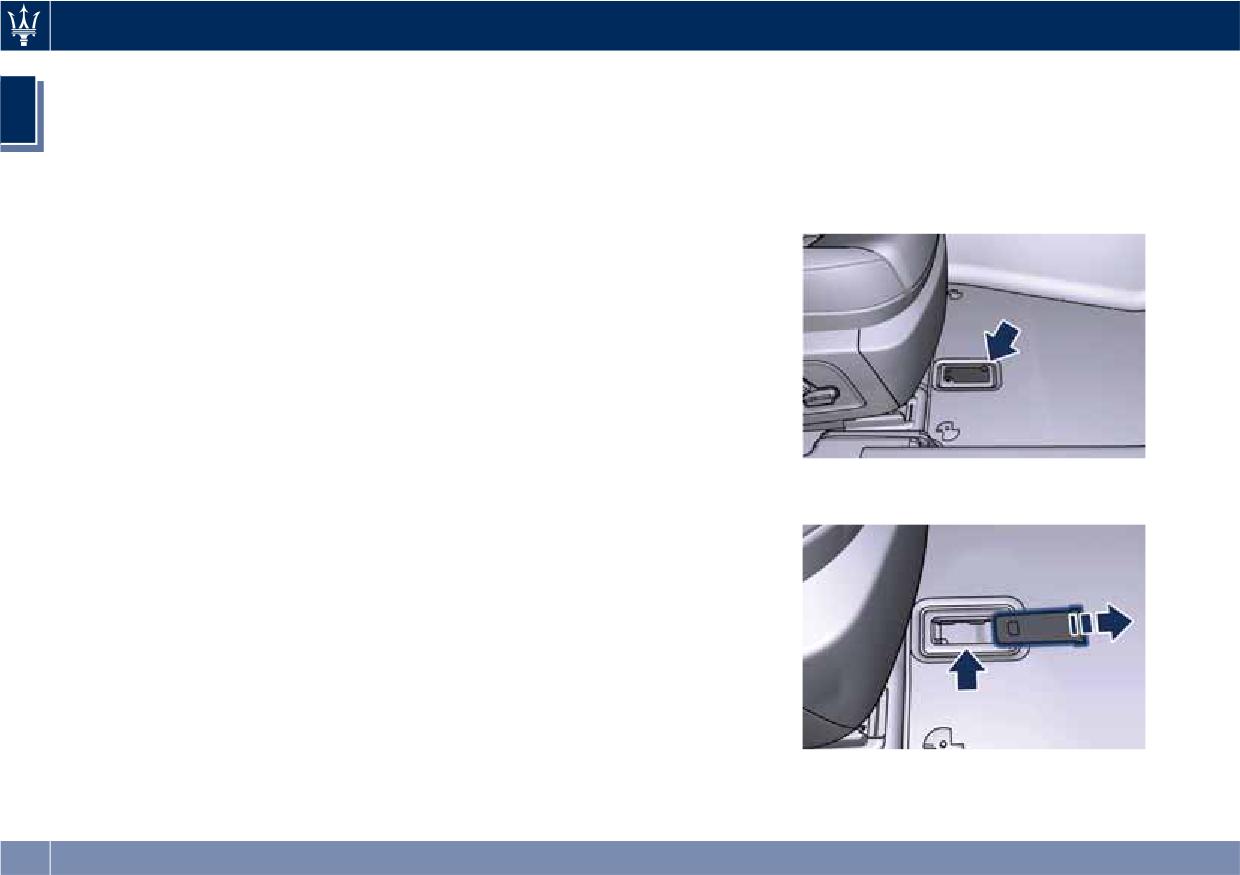
The vehicle's identification number
expiration date of the New Car
(VIN) is punched on the foot platform,
Limited Warranty or unless
in front of the right-hand front seat.
terminated by Maserati North
America, Inc. for cause.
• PRE OWNED VEHICLES: Your
membership begins on the date the
registered vehicle was sold (in service
date) and continues until the
expiration date of the Maserati
Certified Pre-Owned Limited
Warranty or unless terminated by
Maserati North America, Inc for
cause.
Address Inquiries to
To read the number, lift the mat and
rotate the guard.
General Inquiries:
Maserati Roadside Assistance
P.O. Box 968008
Schaumburg, IL 60173
Rental Car Reimbursements:
Within 20 days of your rental car
transaction, the original pre-printed
rental car receipt, which must include
your name, address, telephone
number, VIN, rental dates and the
corresponding warranty repair order
should be submitted to:
The VIN Number is also visible from
the outside through the windshield on
Maserati Roadside Assistance ATTN:
the front left corner of the dashboard.
18
Introduction
1
NOTE:
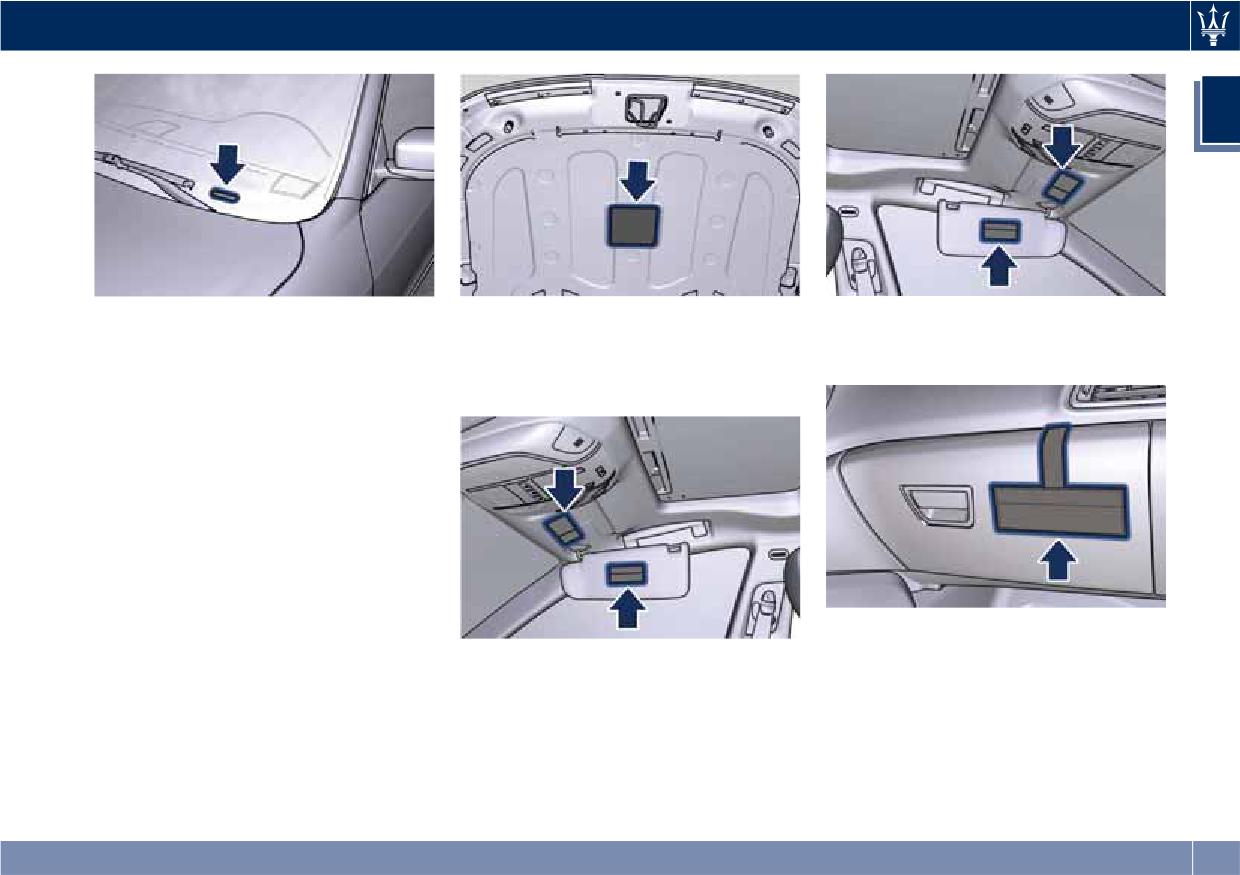
Passenger Air bag Labels
Another label is applied on the
dashboard to indicate that air bag
When ordering spare parts or making
The labels are applied on the external
system is installed.
inquiries, always quote the vehicle
side of sun visors and behind it, on the
identification number.
dome.
Warning and Identification
Labels
Overview label with cautions and
warning notes
The centrally attached label placed
inside the engine hood cover displays
cautions, warnings, and symbols.
For further information refer to
“Symbols” in this section.
19
Introduction
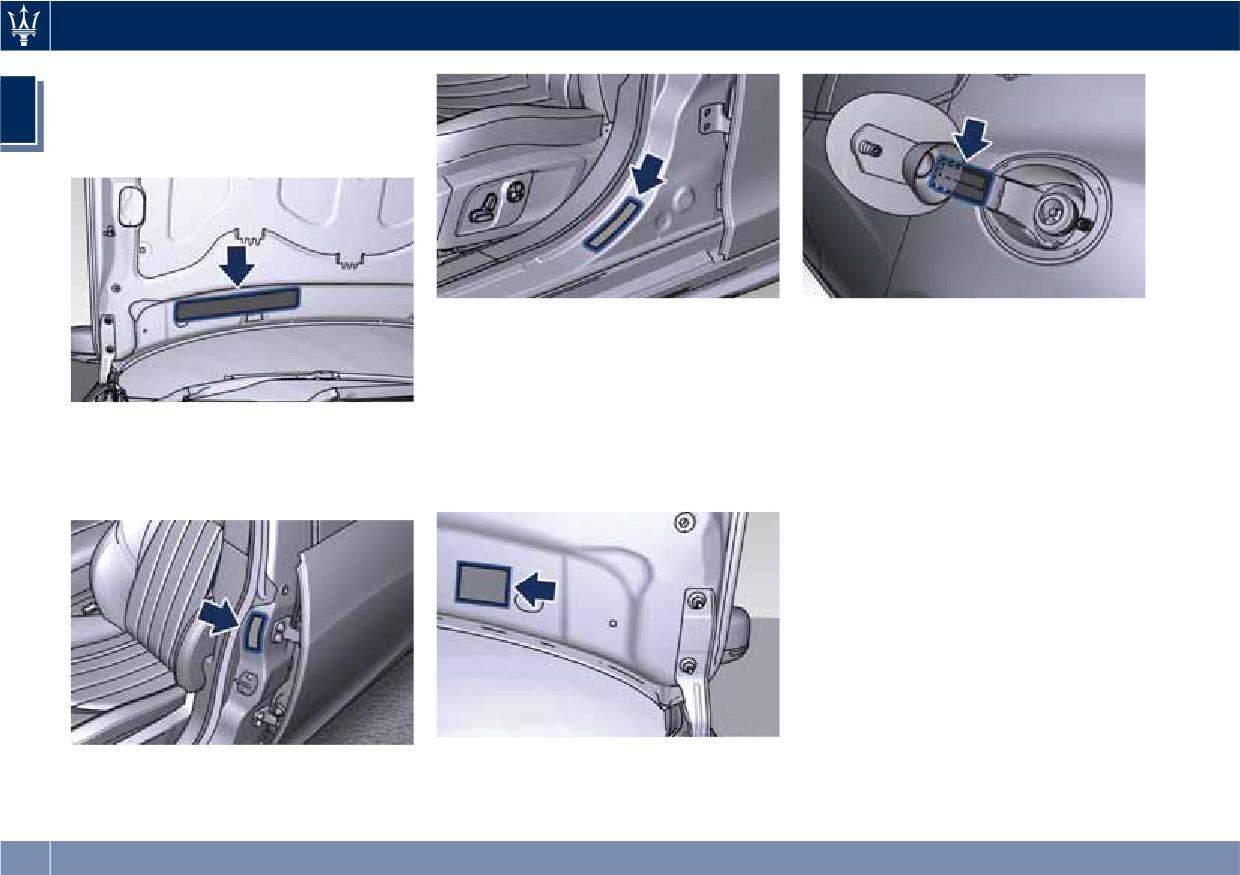
Danger Restart Engine with Hood
Open Label
1
The label is applied on the lower right
side of the hood.
NOTE:
NOTE:
For further informations see “Tire
To ensure optimum performance and
Safety Information” in section
fuel economy, please ensure to refill
"Driving".
your vehicle using Premium Unleaded
Fuel ONLY, with a minimum of 91 AKI.
Loading Information Label
Paint Identification Label
This label applied on the driver's side
The label is applied on the lower left
rear door pillar attests the compliance
side of the hood.
with safety standards.
Fuel Warning Label
Tire Information Label
The label is applied inside the fuel
This paper label is applied on the
filler door.
driver's side rear door pillar.
20
2 - Before Starting
Keys
22
Sentry Key Immobilizer System
24
Vehicle Security Alarm
26
Illuminated Entry/Exit
28
Unlock the Vehicle with Key fob
31
Requiring and Setting Additional Key fobs
33
Remote Start System
35
Doors Locking
38
Passive Entry System
40
Power Windows
45
Rear Window
47
Trunk Lid Operation
48
Trunk Safety
53
Hood Operation
54
Occupants Restraint Systems
55
Supplemental Restraint System (SRS) - Air Bags
63
Child Restraint Systems
71
Transporting Pets
76
Rear Parking Camera
76
Surround View Camera System (optional)
78
Safety Tips
81
Park Assist (if equipped)
84
21
Before Starting
Keys
Keyless Ignition Device
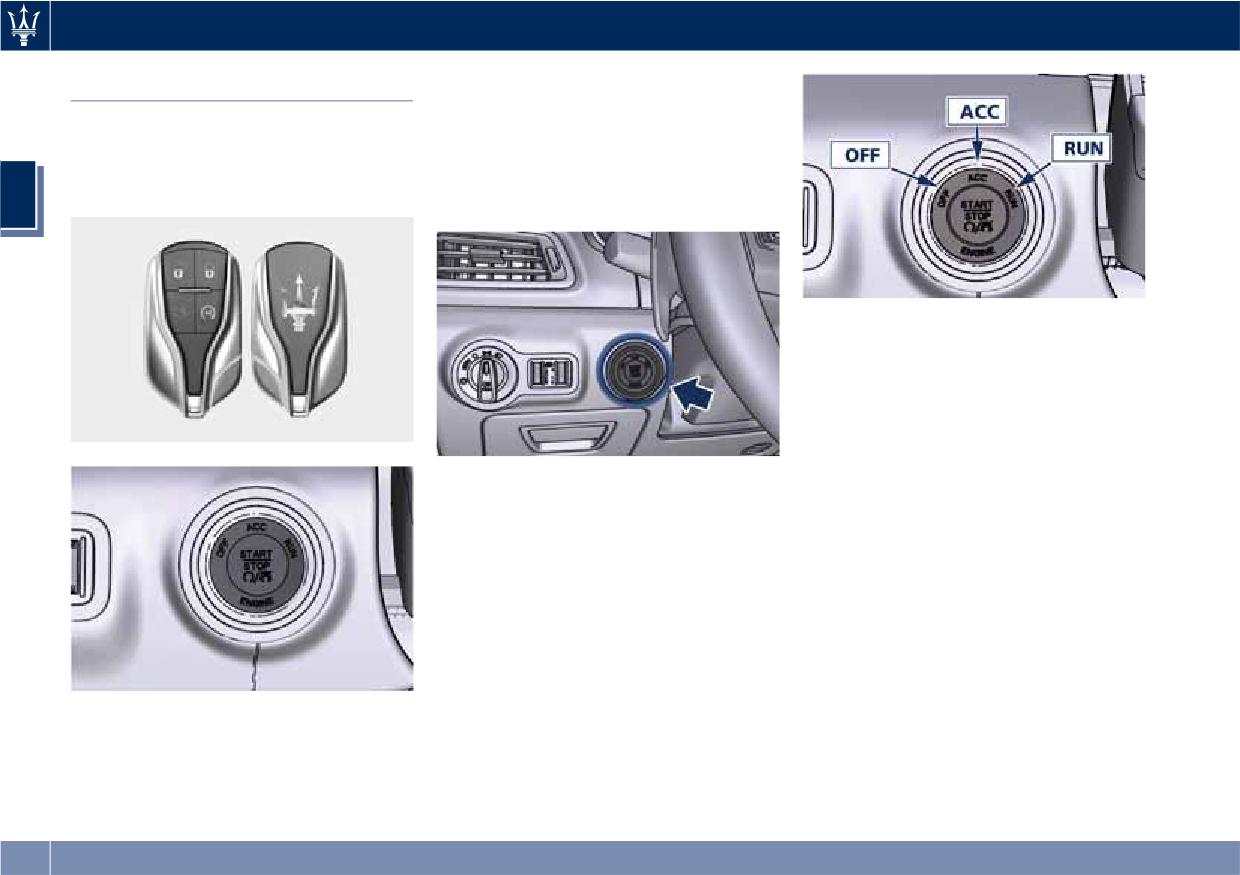
This device allows the driver to
The vehicle is equipped with a Remote
operate the ignition switch with the
Keyless Entry transmitter and a Keyless
push of a button, as long as the
Ignition Node, to enter, start and
Remote Keyless Entry (RKE) transmitter
protect the vehicle.
2
is inside the vehicle.
In case the ignition switch does not
change by pushing a button, the RKE
transmitter (key fob) may have a low
or discharged battery. If this occurs it is
necessary to replace the battery in
order to operate the ignition switch
(see “Requiring and Setting Additional
The Keyless Ignition Node (KIN) has
Key fobs” in this section).
three operating setups indicated on
It is still possible to operate the
the outer ring. Pressing and releasing
ignition device using the key fob RKE
the middle button, you can switch
transmitter with discharged battery by
from one setup to the next without
pressing the nose side (side opposite of
starting the engine, the switched on
the emergency key) of the key fob on
indication will turn amber.
the START/STOP button.
The engine will start by pushing the
center button START/STOP with the
brake pedal pressed and the device set
in any of the three operating setups.
22
Before Starting
NOTE:
You can insert either side of the
emergency key into the lock cylinder.
Shift Ignition Device to OFF
2
Alert
Opening the driver's door to exit the
vehicle when the ignition device is set
in ACC or RUN (engine not running), a
beep will remind you to cycle the
Key fob
You can keep the emergency key with
ignition to OFF.
you when using valet parking.
This vehicle is provided with two
In addition to the acoustic signal a
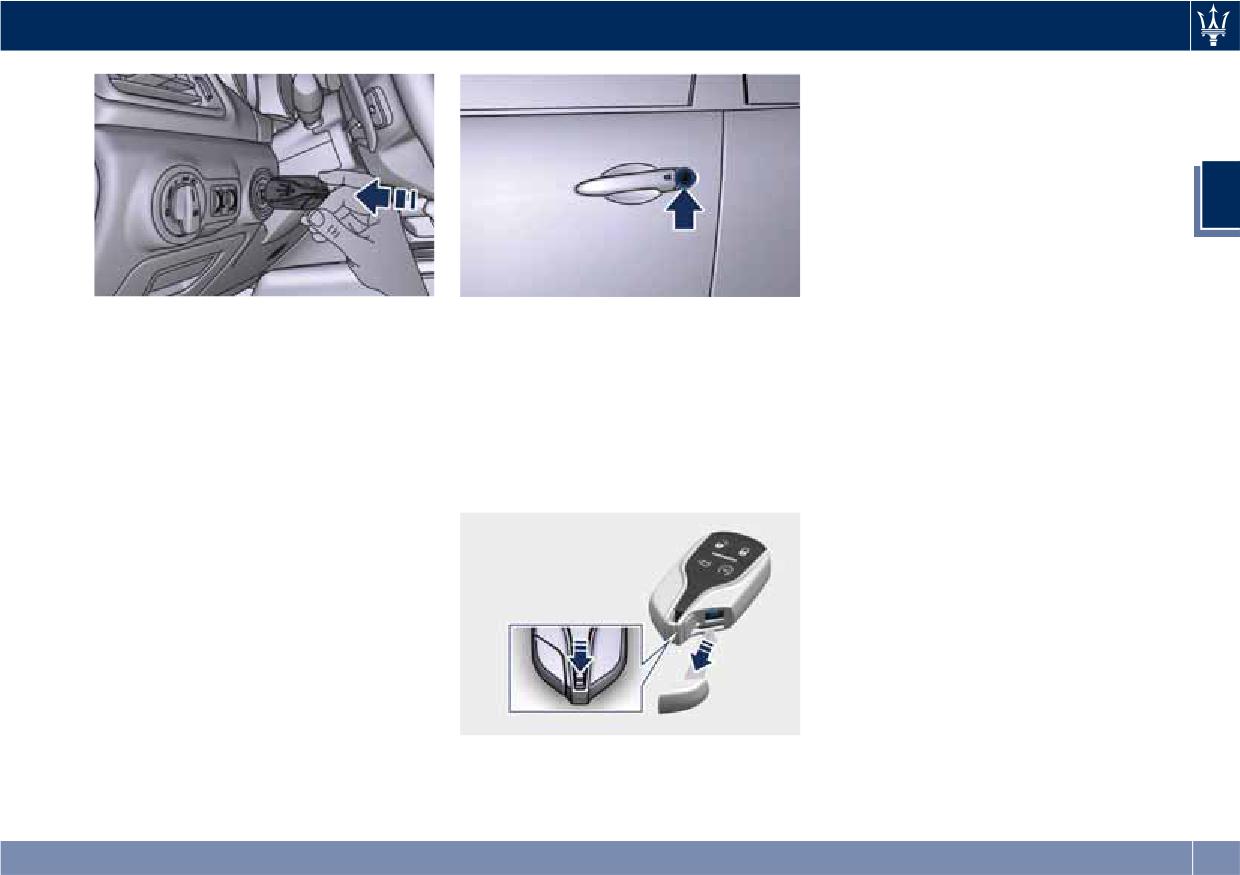
To remove the emergency key:
programmed key fobs.
dedicated message is displayed on the
The key fob contains a Remote Keyless
• hold the mechanical latch on the
instrument cluster.
Entry (RKE) transmitter and an
back of the key fob sideways;
If the ignition device is left in the ACC
emergency key that is inserted in to
• simultaneously remove the
or RUN position, when vehicle is
the remote.
emergency key by sliding laterally
locked the system will turn off the
The emergency key allows you to
towards the end of the key fob.
instrument cluster and automatically
open the vehicle by inserting into the
set ignition device to OFF.
lock of the opening handle on the
With the MTC+ System, the power
driver's door, in case the battery of the
window switches, radio, power
vehicle or the key fob go dead.
sunroof (optional), and power outlets
will remain active for up to 10 minutes
after the ignition switch is cycled to
the OFF position. Opening either front
door will cancel this feature, it is
possible to set the timing of this
feature.
23
Before Starting
NOTE:
switch to OFF and lock all doors
Sentry Key® Immobilizer
when leaving the vehicle
Refer to “MTC+ Settings” in Section
System
unattended.
“Dashboard Instruments and Controls”
for further information.
The Sentry Key® Immobilizer System
prevents unauthorized vehicle
2
operation by disabling the engine. The
system does not need to be armed or
WARNING!
activated. Operation is automatic,
• When leaving the vehicle, always
regardless of whether the vehicle is
remove the key fob and lock your
locked or unlocked.
vehicle.
The system uses a key fob with Remote
• Do not allow children to be in a
Keyless Entry (RKE) transmitter, an
vehicle unattended or with access to
ignition switch and a RF (Radio
an unlocked vehicle. A child or
Frequency) receiver to prevent
others could be seriously or fatally
unauthorized vehicle operation.
injured. Children should be warned
Therefore, only key fobs expressly
not to touch the parking brake
programmed can be used to start and
trigger, brake pedal or the shift
operate the vehicle.
lever.
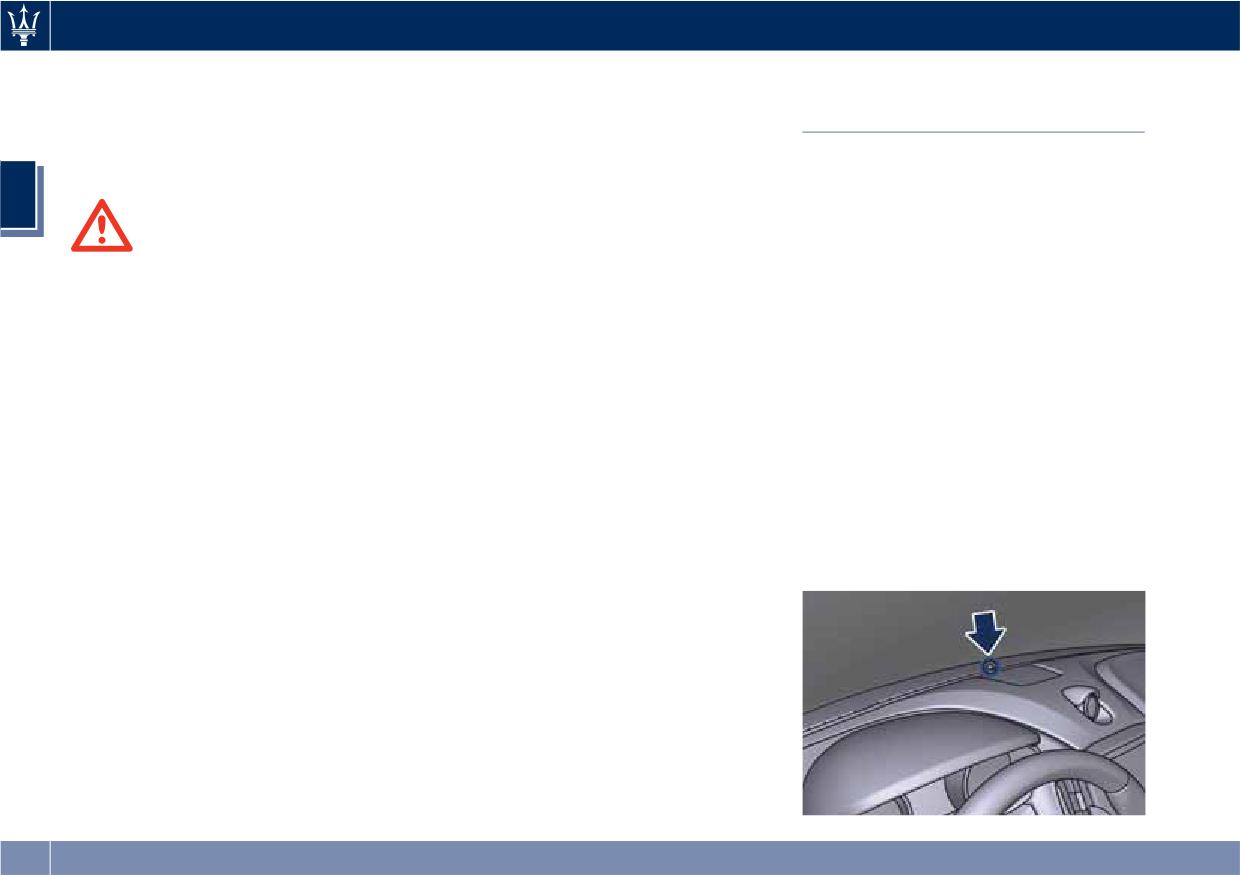
After placing the ignition in the RUN
position, the Vehicle Security Light (see
• Do not leave the key fob in or near
picture) will light up for a three
the vehicle, and do not leave the
seconds bulb check.
ignition switch in the ACC or RUN
mode. A child could operate power
windows, other controls, or move
the vehicle.
• Do not leave children or animals
inside parked vehicles in hot
weather. Interior heat build-up may
cause serious injury or death.
• An unlocked car is an invitation to
thieves. Always remove the key fob
from vehicle, cycle the ignition
24
Before Starting
If the light remains on after the bulb
Operation is subject to the following
NOTE:
check, it indicates that there is a
conditions:
• When having the Sentry Key®
problem with the electronics: this
• This device may not cause harmful
Immobilizer System serviced, bring
condition will result in the engine
interference.
all key fobs provided with the
being shut off after two seconds.
vehicle with you to the Authorized
• This device must accept any
If the Vehicle Security Light turns on
Maserati Dealer.
2
interference that may be received,
during normal vehicle operation
including interference that may
• When selling the vehicle, it is
(engine running for longer than 10
cause undesired operation.
necessary to provide the new owner
seconds), an electronic fault is
with all key fobs.
detected. Should this occur, contact
Replacement Key fobs
the Authorized Maserati Dealer as
soon as possible for assistance.
NOTE:
Only key fobs that are updated with
the vehicle electronics can be used to
CAUTION!
start and operate the vehicle.
The Sentry Key® Immobilizer system is
not compatible with some remote
starting systems that can be installed
in after-market.
WARNING!
Use of these systems may result in
• Always remove the key fobs from
vehicle starting problems and loss of
the vehicle and lock all doors when
security protection.
leaving the vehicle unattended.
• Always remember to cycle the
All key fobs provided with the new
ignition switch to OFF.
vehicle have been updated with the
vehicle electronics and are therefore
Duplication of key fobs may be
able to guarantee correct functioning
performed by an Authorized Maserati
and protection.
Dealer only.
General Information
This procedure consists of
programming a key fob that has never
This device complies with Part 15 of
been programmed to the vehicle’s
the FCC rules and RSS 210 of Industry
electronics.
Canada.
25
Before Starting
and will then flash slowly until the
located on the driver door trim
Vehicle Security Alarm
vehicle is disarmed.
panel with the driver and/or
The vehicle security alarm monitors the
passenger door open.
vehicle doors and trunk for
unauthorized entry and the
START/STOP button for unauthorized
2
operations.
The system includes a dual function
anti-intrusion sensor and vehicle
anti-lift sensor. The anti-intrusion
sensor monitors the vehicle interior for
motion.
The vehicle anti-lift sensor monitors
the vehicle for any lifting or tilting
Rearming the System
actions (tow away, tire removal, ferry
If something triggers the security
transport, etc). A siren with battery
alarm, and no quick action is taken to
backup which senses interruptions of
disarm it, the vehicle security alarm
power and communications is also
will turn off the beeper after 29
included.
seconds, and turn off all of the visual
While the vehicle security alarm is
signals after 31 more seconds; the
enabled, interior door locks switches,
vehicle security alarm will then rearm
trunk lid and fuel filler door release
itself.
are disabled. If something triggers the
alarm, the vehicle security alarm will
Arming the System
provide the following audible and
Follow these steps to arm the vehicle
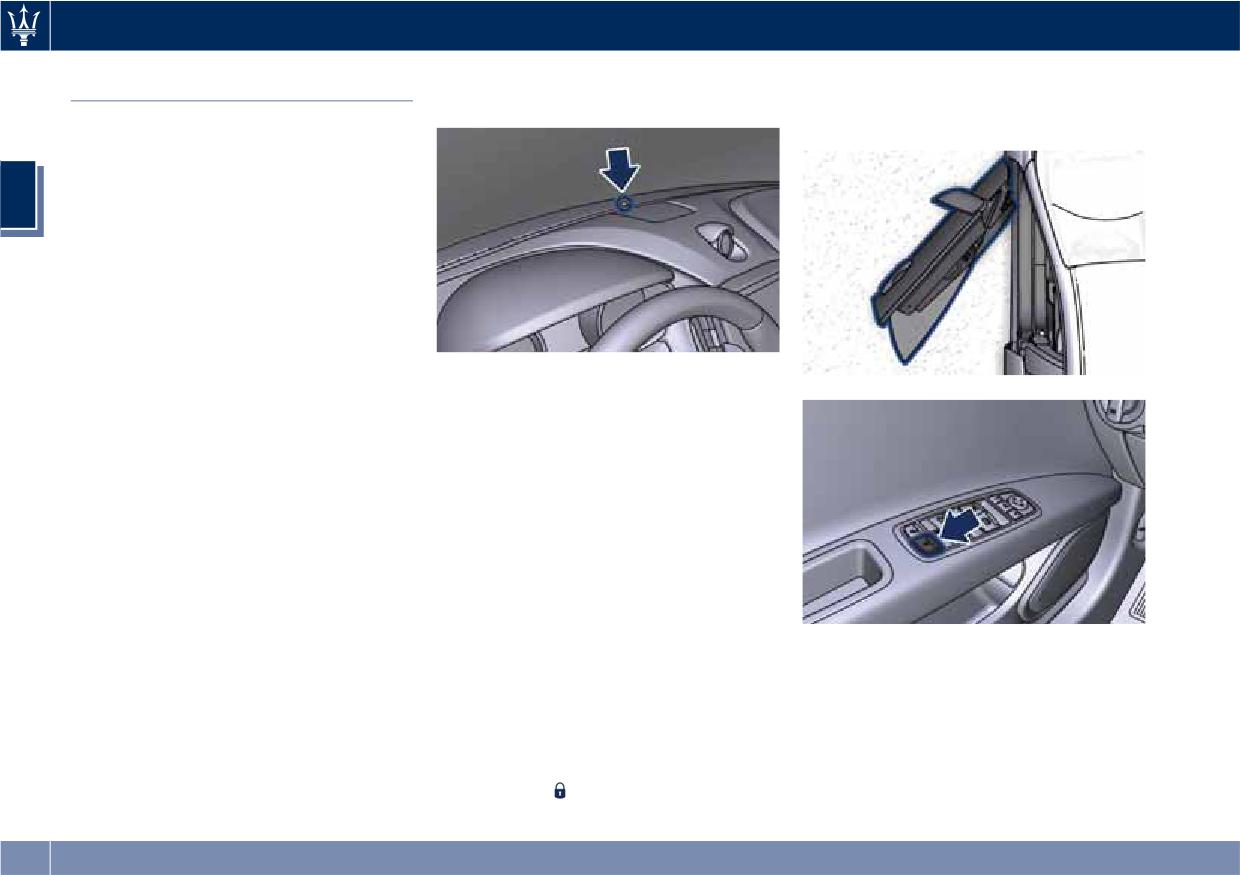
• Press the button on the exterior
visible signals: intermittent buzzer,
security alarm.
“Passive Entry” door handle having
position lights and/or turn signals and
• Make sure the vehicle ignition switch
a valid key fob RKE transmitter in
the vehicle security light on the
is OFF.
the same exterior zone (see
dashboard will flash.
• Perform one of the following
“Passive Entry System” in this
This light will fast flash for
methods to lock the vehicle:
section for further information).
approximately 15 seconds, when the
vehicle security alarm is being armed,
• Press the
lock button on the
interior power door lock switch
26
Before Starting
will remain open if it was left open. In
possible to disable these sensors by
this condition, it will be necessary to
pressing the
button on the key fob
first close the trunk lid as described
three times within 5 seconds from the
under "Trunk Lid Operation" in this
moment the system has been armed
section, and repeat the arming
(meanwhile the security alarm light
operation, to be able to arm the alarm
flashes rapidly).
2
system.
To disarm the System
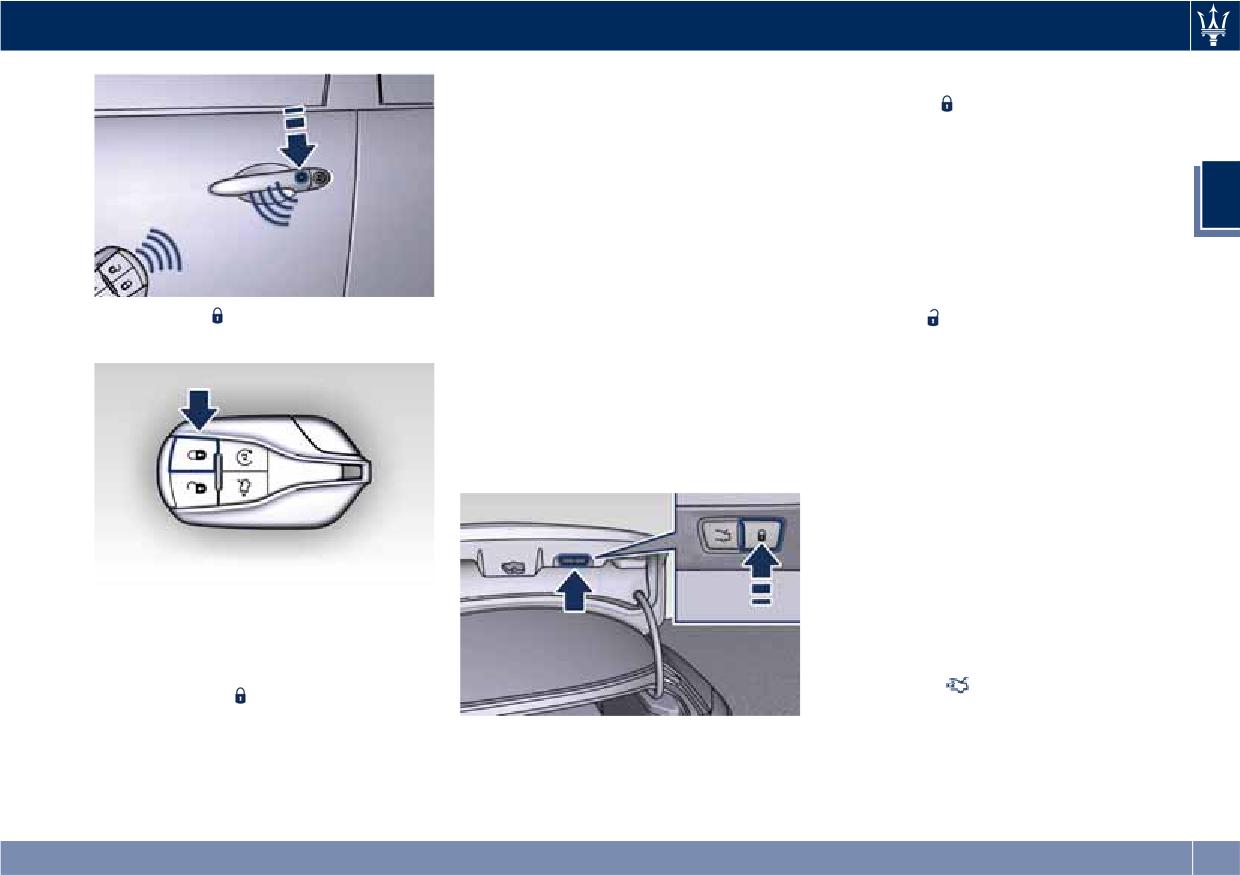
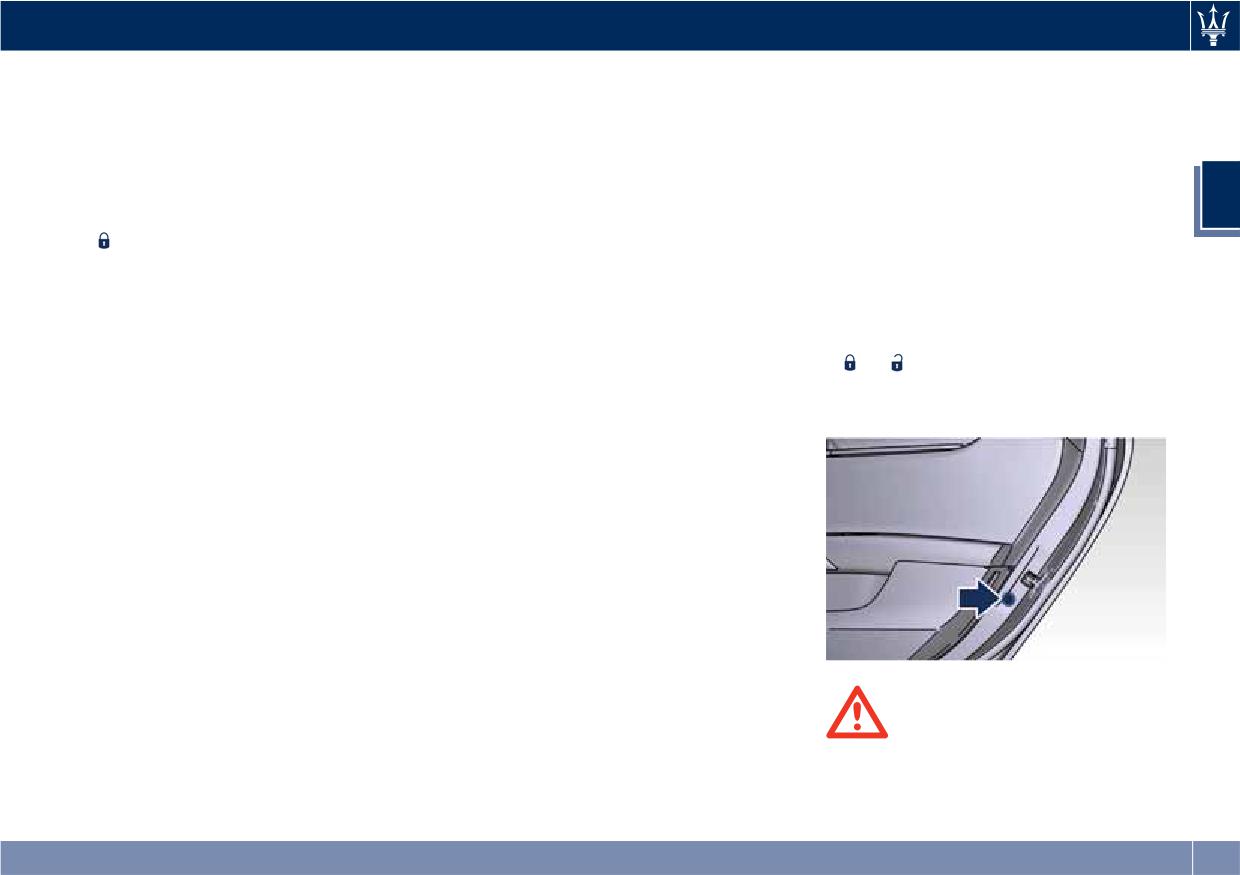
Vehicles equipped with Power Trunk
Lid/Hands Free option a button -
Use any of the following steps to
located at the bottom of the trunk lid
disarm the vehicle security alarm.
and indicated in the figure - that can
• Press the
lock button on the key
• Press the
button on key fob RKE
be used to completely close and lock
fob RKE transmitter.
transmitter.
the trunk lid, lock all the doors and
• Grasp the “Passive Entry” unlock
arm the alarm system if all the
door handle (see “Passive Entry
passengers and driver doors and trunk
System” in this section for further
lid are closed.
information).
See chapter “ Trunk Lid Operation” in
• Press the START/STOP button so as
this section for further information.
to release the OFF position.
NOTE:
• When the vehicle security alarm is
armed, the interior power door lock
switch will not allow unlocking of
• If any door is open, close it.
the doors.
In any of these situations, if one or
• The use of the emergency key into
more windows are open, they will
the driver door lock and the use of
remain open. To close the windows
the button
on the key fob
press again the
lock button and
cannot arm or disarm the security
hold it until their closure.
Each time the vehicle security alarm is
alarm of the vehicle.
If vehicle is equipped with Power
armed, the anti-intrusion and anti-lift
• The vehicle security alarm remains
Trunk Lid/Hands Free, when arming
sensors actively monitor the vehicle.
engaged while accessing the power
the alarm system in any of the
When arming the security alarm, it is
described ways, the power trunk lid
(Continued)
27
Before Starting
(Continued)
disarm the vehicle security alarm.
Illuminated Entry/Exit
trunk lid. Pressing the button
Check the vehicle for tampering.
between the license plate lights will
Lights will turn on and off when you
not disarm the vehicle security alarm.
enter/exit the vehicle and operate the
If anyone enters the vehicle through
buttons on the key fob RKE
the trunk lid and opens a door, the
transmitter and/or on the “Passive
2
alarm will trigger.
Entry” system as follows:
The vehicle security alarm is designed
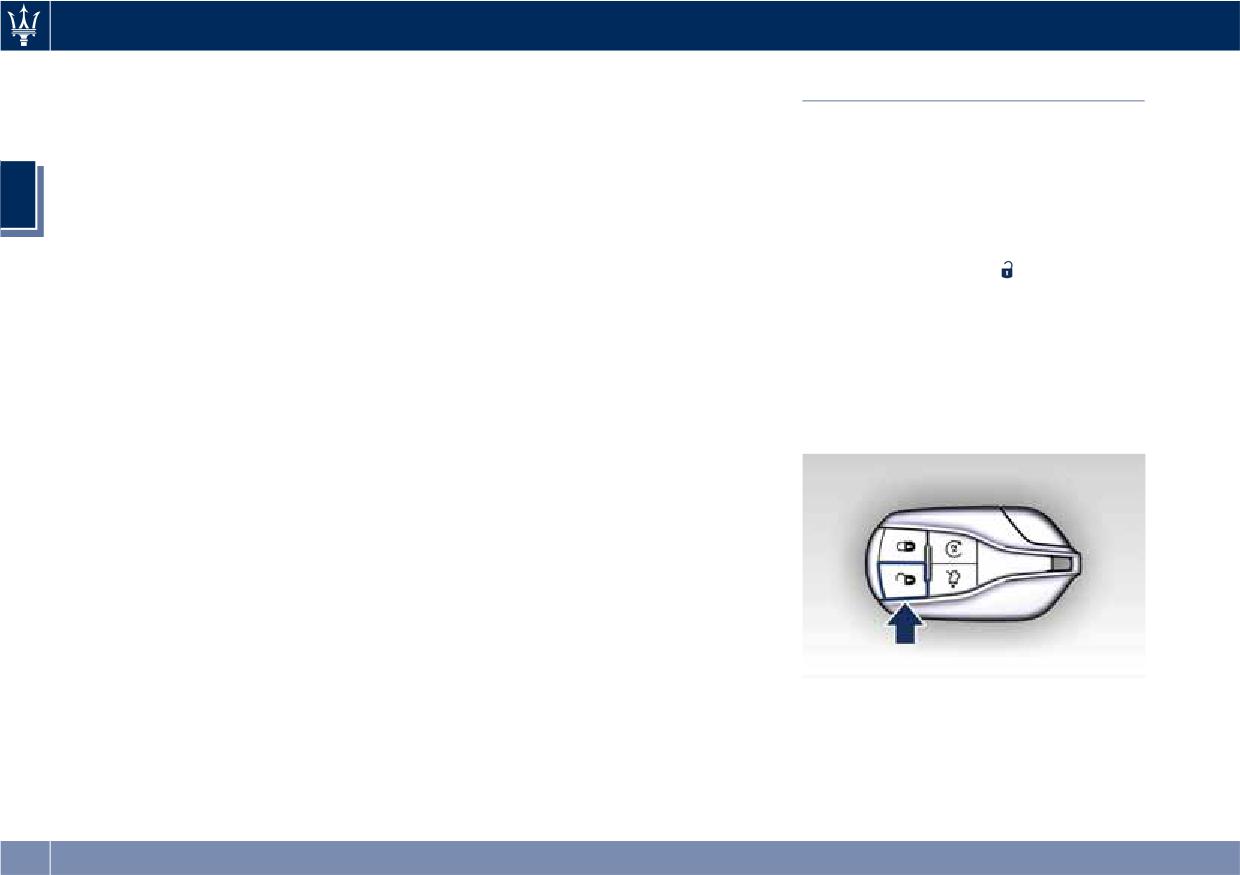
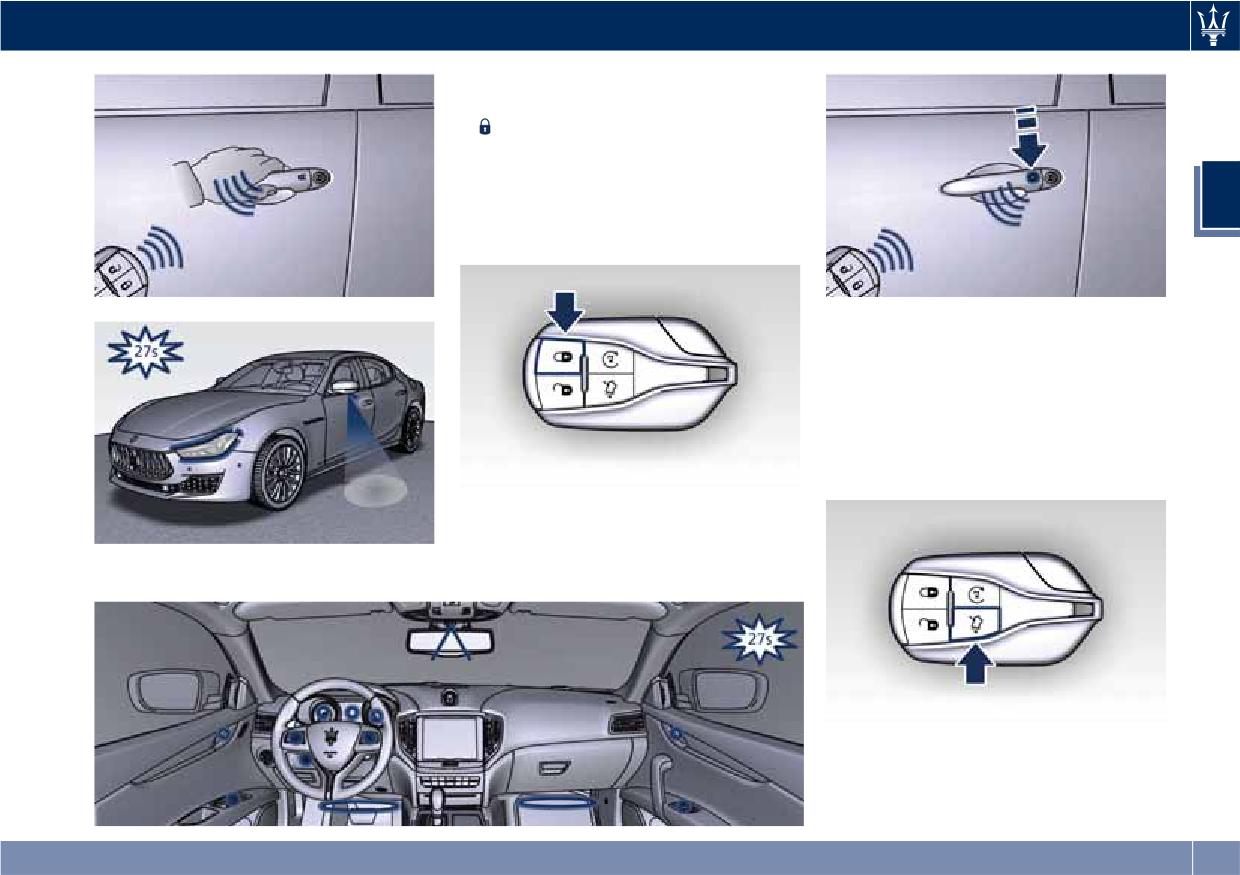
• If the unlock command is enabled by
to protect your vehicle; however, you
pressing the specific
button on the
can create conditions where the
key fob RKE transmitter or by the
system will give you a false alarm. If
“Passive Entry” system, the
one of the previously described arming
“illuminated entry” mode will
sequences has occurred, the vehicle
activate. Courtesy & dimmable
security alarm will arm regardless of
internal lighting, night front seats
whether you are in the vehicle or not.
lighting, and approach lighting will
If you remain in the vehicle and open a
stay on for 27 seconds.
door, the alarm will activate. If this
occurs, disarm the vehicle security
alarm.
If the vehicle security alarm is armed
and the battery becomes disconnected,
the vehicle security alarm will remain
armed when the battery is
reconnected; the exterior lights will
flash, the buzzer will activate. If this
occurs, disarm the vehicle security
alarm.
Tamper Alert
If something has triggered the vehicle
security alarm in your absence, the
horn will sound three times when you
28
Before Starting
• If the lock command of the car is
enabled by pressing the specific
button on the key fob RKE
transmitter or by the “Passive Entry”
system, when the key fob RKE
transmitter is moved out of range,
2
all the lights will turn off within 3
seconds, if they were previously on.
• After activating the trunk lid
opening command in the possible
modes (see “Trunk Lid Operation” in
this section), the inner trunk light
will turn on and will stay on for 10
minutes before turning off. The light
will immediately turn off if you lock
the trunk lid before 10 minutes.
29
Before Starting
Vehicle Lighting with
Use of Light Switch for Vehicle
Open/Closed Doors
Lighting
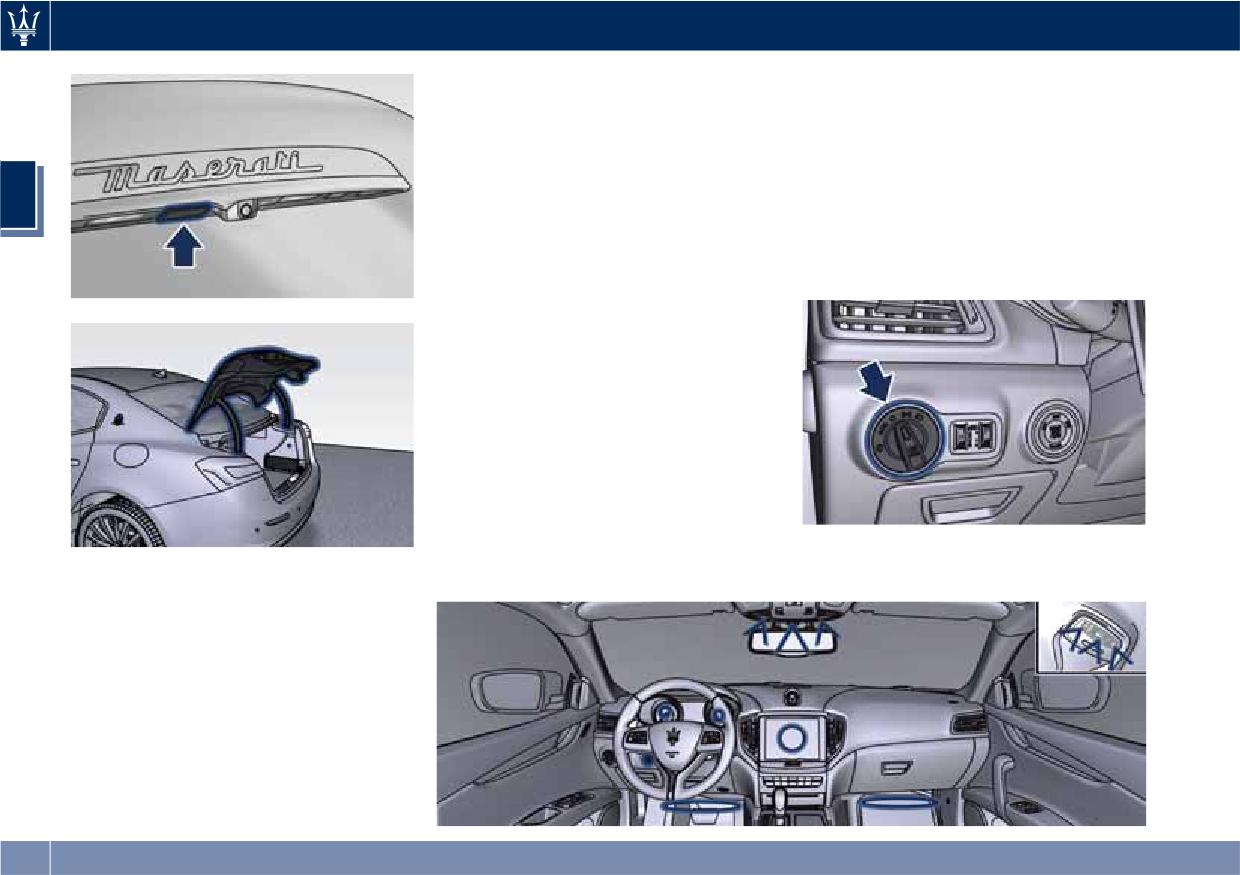
• If one or more doors are open, the
Vehicle lighting can be operated from
central light, front/rear domelights
the key fob RKE transmitter, the
(main and spot light), the instrument
“Passive Entry” system and from the
2
cluster, the MTC+ display, the night
light switch on the left side of the
front seats lighting and the ignition
dashboard (refer to “Lights” in section
switch backlight will turn on and will
“Understanding the Vehicle” for
light up for 27 seconds.
further information).
• If the doors are closed, all lights will
turn off (within 3 seconds) with the
exception of the console display and
the ignition switch backlight, which
will turn off after 27 seconds.
30
Before Starting
• If the light switch is in the “0” (OFF)
“DAY” or “NIGHT” mode according
Unlock the Vehicle with
mode all switch backlights and the
to the twilight sensor. In “DAY”
Key fob
front seats lighting will turn off.
mode the switches backlighting will
• If the light switch is in the
be at 100% intensity, in “NIGHT”
The RKE system allows you to unlock
position and the ignition switch
mode they will be as set by the left
the doors and the fuel filler door,
is in OFF position, the front low
dimmer control switch.
open the trunk and turn the approach
2
intensity LEDs of the external light
and courtesy lights on from a distance
NOTE:
and rear position light guide LED
up to approximately 33 ft (10 m). The
In “DAY” mode, the switches are not
will turn on and will turn off
key fob RKE transmitter does not need
backlit, except the windows and
automatically after 8 minutes to
to be pointed at the vehicle to
steering switches.
preserve the battery charge.
activate the system. See “Illuminated
• If the light switch is in
position
Entry/Exit” in this section for further
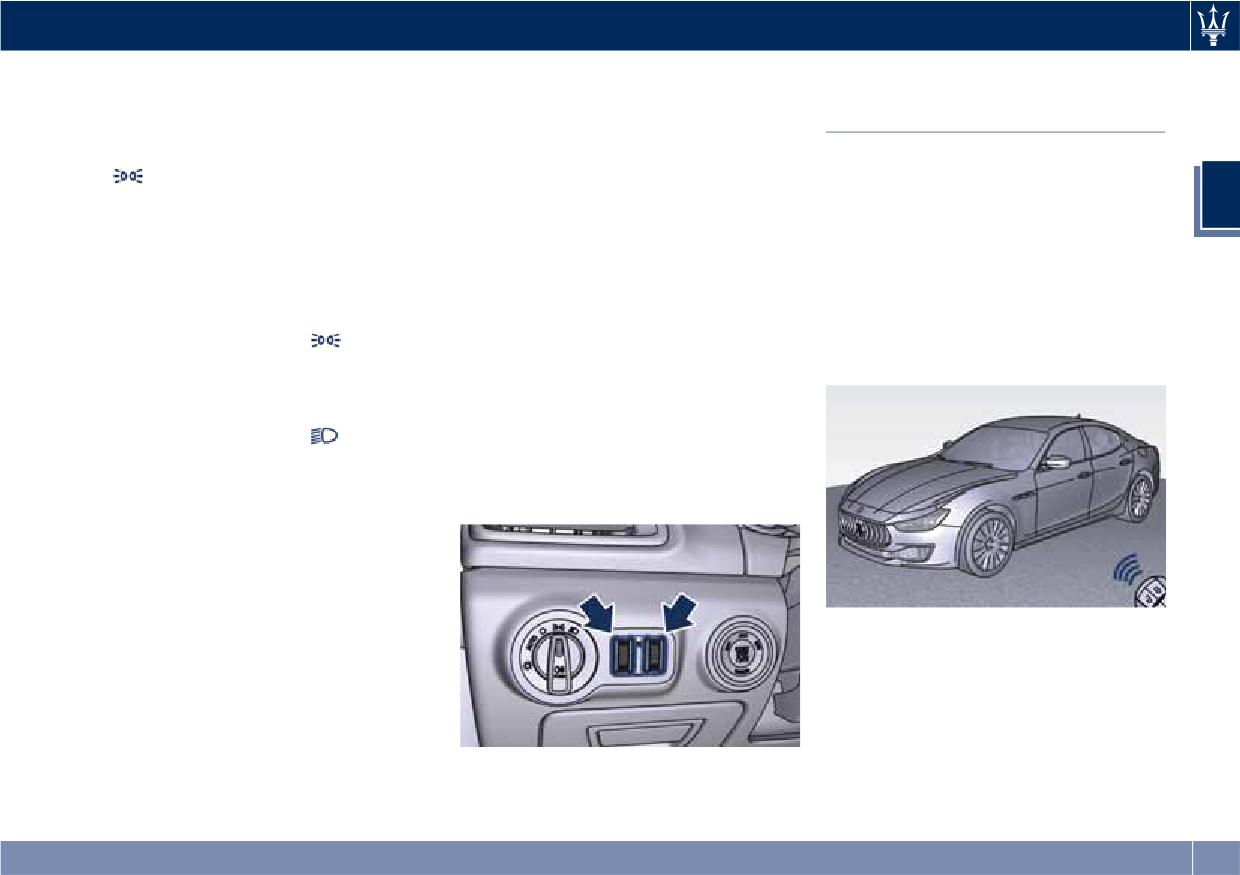
Light Dimmer Controls
and the ignition switch is in RUN
information.
position, no lighting feature will be
The light dimmer controls are part of
available.
the headlight switch and are
• If the light switch is in
position
positioned beside the switcher itself
(Low beam mode) the front
(see “Lights” in section
domelight LED (if enabled), the
"Understanding the Vehicle" for
switches backlighting, the
further information).
instrument cluster’s display, the night
front seats lighting will turn on. The
front domelight LED and the night
lighting of the front seats will light
up with the intensity set by the
NOTE:
right-hand regulator. If the regulator
Driving at speeds of 5 mph (8 km/h)
is in "0" (OFF) position, the night
and above disables the system from
lighting will turn off.
responding to all key fobs RKE
• If the light switch is turned in
transmitter buttons.
“AUTO” position (on/off AUTO
mode) and the ignition is switched in
RUN position, as in “low beam
mode” all lights turn on either in
31
Before Starting
Unlock the Doors, Fuel Filler
section “Dashboard Instruments and
See chapters “Passive Entry System”
Door and Trunk
Controls”.
and “Trunk Lid Operation” in this
section for further information.
Press and release the unlock button
Turn Headlights On with Remote key
on the key fob RKE transmitter once
This feature activates the headlights
to unlock the driver's door or twice
for up to 90 seconds when the doors
2
within five seconds to unlock all doors,
are unlocked with the key fob RKE
the fuel filler door and the trunk lid.
transmitter. The duration can be set as
The turn signal lights will flash for the
desired. To change the current setting,
unlock signal recognition. The
see “MTC+ Settings” in section
illuminated entry/exit system will also
“Dashboard Instruments and
turn on. See “Passive Entry System” in
Controls”.
this section for further information.
Locking Doors Sound Alarm
Unlock Driver Door/All Doors with
Remote Key 1st Press
This feature will cause the alarm to
activate when the doors are locked
This feature allows you to program the
with the key fob RKE transmitter. This
system to unlock either the driver's
feature can be enabled or disabled. To
door or all doors, the fuel filler door
change the current setting, see “MTC+
and the trunk lid, by the first press of
Settings” in section “Dashboard
the unlock button
on the key fob
Instruments and Controls”.
RKE transmitter. To change the current
setting, see “MTC+ Settings” in section
Unlatch the Trunk Lid
“Dashboard Instruments and
Press the button
on the key fob
Controls”.
RKE transmitter two times within five
Lock/Unlock Doors Flash Lights
seconds to unlatch the manual trunk
This feature will cause the flash of the
lid.
turn signal lights when the doors are
If the vehicle is equipped with Power
locked or unlocked with the key fob
Trunk Lid/Hands Free, besides
RKE transmitter. This feature can be
unlocking the trunk lid, the control
turned on or turned off. To change the
will fully open it.
current setting, see “MTC+ Settings” in
32
Before Starting
Requiring and Setting
Key fob Battery Replacement
Additional Key fobs
NOTE:
A low charge level of the key fob
Provide your Authorized Maserati
battery will be indicated on the
Dealer the following when ordering
additional key fob RKE transmitters:
instrument cluster display.
2
• all key fobs RKE transmitters in your
The recommended replacement
possession;
battery type is: CR2032.
• a personal ID;
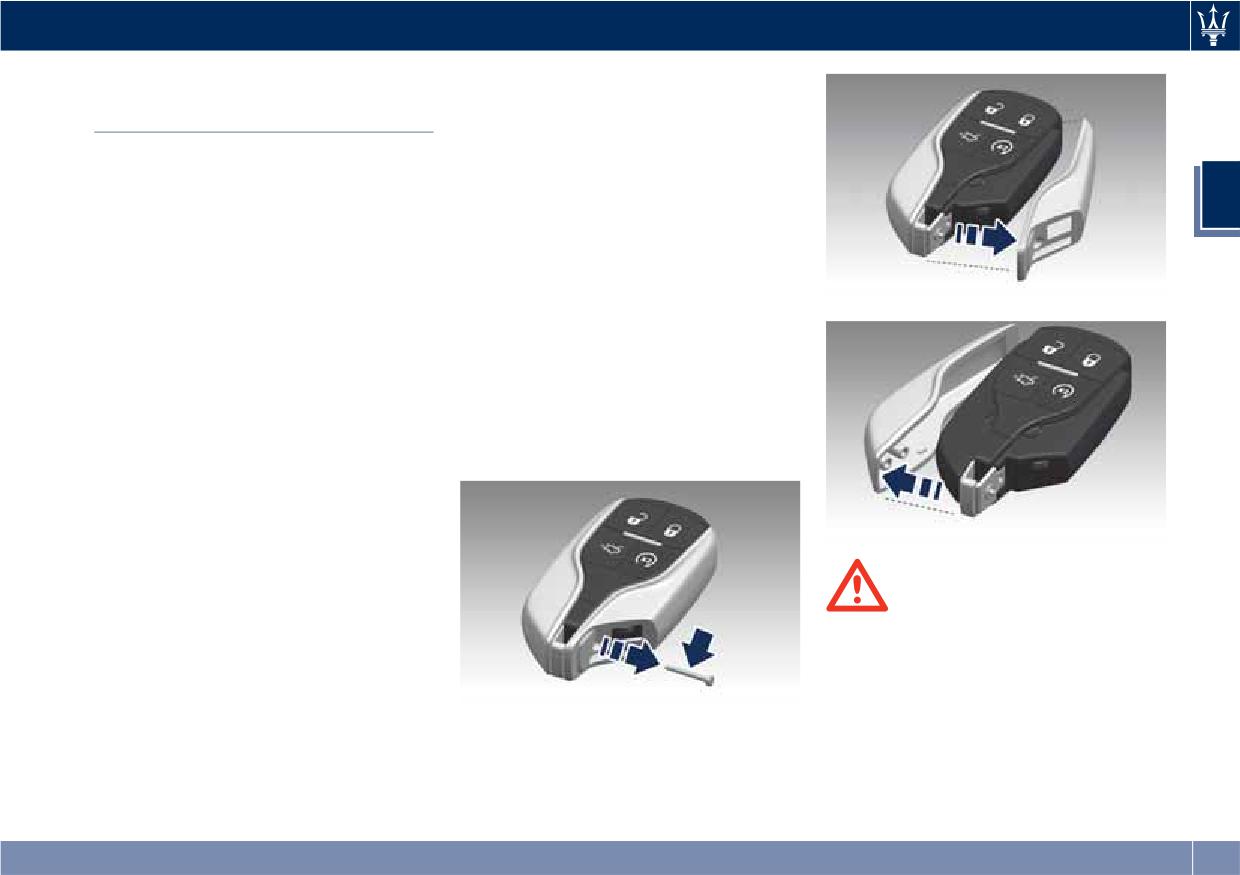
To replace the battery proceed as
• the identification and registration
follows:
documents proving ownership of the
• Remove the emergency key as
vehicle.
indicated in “Keys” chapter of the
Setting new key fobs or re-setting the
current section.
original ones can only be performed
• Loosen the lateral screw that
at an Authorized Maserati Dealer.
connects the two side covers with a
NOTE:
torx T6 screwdriver.
Codes of any key fob RKE transmitters
that are not present when the new
setting procedure is done will be
deleted from the memory to prevent
lost or stolen key fobs transmitters
being used to disarm the electronic
WARNING!
alarm system.
California Proposition 65
Operating, servicing and maintaining
a passenger vehicle or off-road vehicle
can expose you to chemicals including
• Separate the two lateral covers from
such as, engine exhaust, carbon
the key fob case.
monoxide, phthalates and lead, that
which are know to the State of
California to cause cancer and birth
(Continued)
33
Before Starting
(Continued)
defects or other reproductive harm. To
minimize exposure, avoid breathing
WARNING!
exhaust, do not idle the engine except
California Proposition 65
as necessary, service your vehicle in a
Operating, servicing and maintaining
well-ventilated area and wear gloves
a passenger vehicle or off-road vehicle
2
or wash your hands frequently when
can expose you to chemicals including
servicing your vehicle. For more
such as, engine exhaust, carbon
information go to:
monoxide, phthalates and lead, that
which are know to the State of
vehicle
California to cause cancer and birth
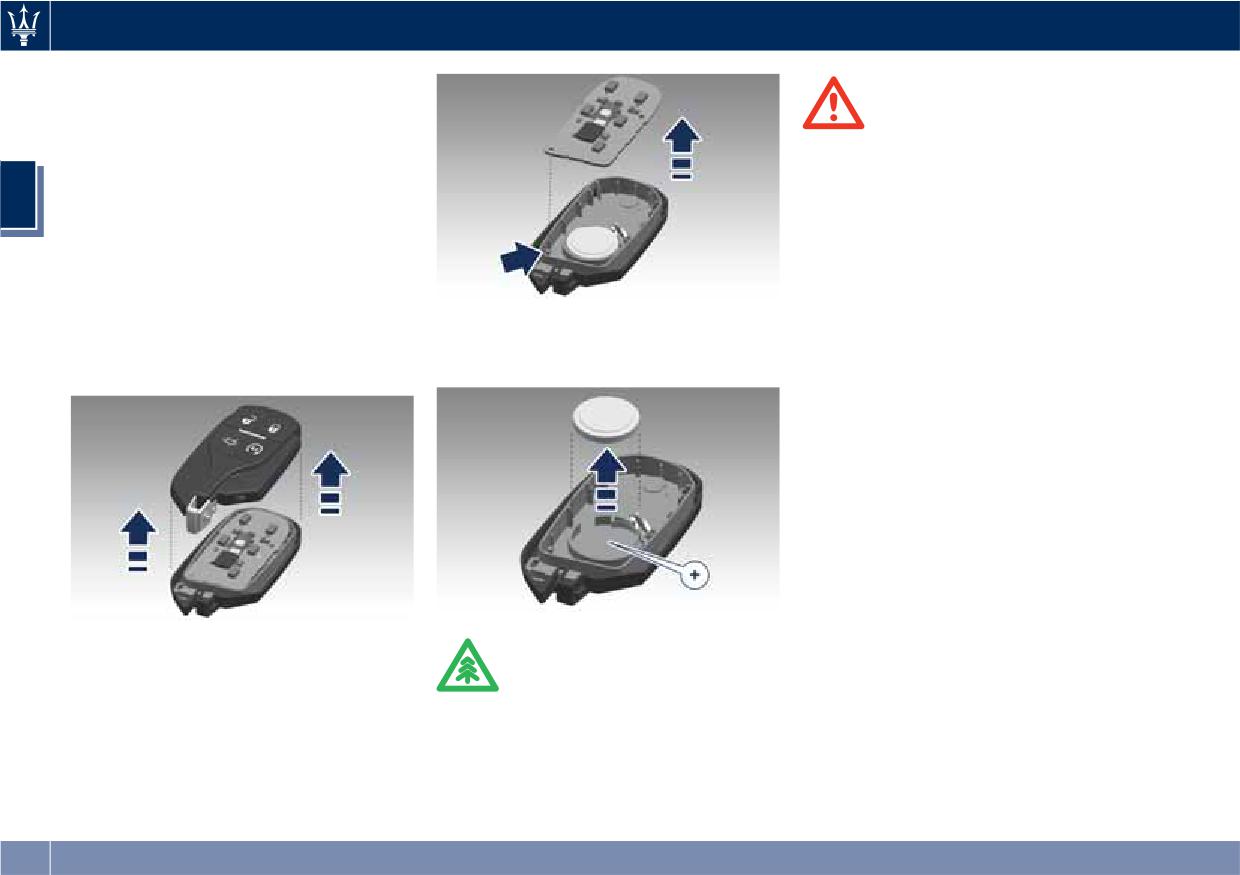
• Remove the battery from its seat and
defects or other reproductive harm. To
replace with a new recommended
• Separate both parts of the key fob
minimize exposure, avoid breathing
type of battery.
case.
exhaust, do not idle the engine except
as necessary, service your vehicle in a
well-ventilated area and wear gloves
or wash your hands frequently when
servicing your vehicle. For more
information go to:
vehicle
NOTE:
Avoid touching the new battery with
your fingers. Skin oils may cause
• Remove the card with PCB (Printed
battery deterioration. If you touch a
Circuit Board).
ENVIRONMENTAL!
battery, clean with alcohol.
Batteries contain dangerous materials
• Match the + sign on the battery to
that could harm the environment.
the + sign on the inside of the
Please dispose of them according to
battery clip, located on the back
local regulations or at an Authorized
cover.
Maserati Dealer.
34
Before Starting
• Replace the printed circuit board by
• Closeness to a radio transmitter such
Remote Start System
using the indicated pin for the
as a radio station tower, airport
sealing of the two covers.
transmitter, and some mobile or CB
This system enables the key fob RKE
radios.
transmitter to start the engine
• Assemble the key fob case and
conveniently from outside the vehicle
reassemble the two lateral covers: a
while still maintaining security. The
click will indicate successful sealing.
2
system has a range of approximately
• Combine the disassembled parts
300 ft (91 m). Obstructions between
with clamping screw and reassemble
the vehicle and the key fob may
the emergency key.
reduce this range.
Radio Frequency RKE
General Information
Transmitter - General
This device complies with Part 15 of
Information
the FCC rules and RSS 210 of Industry
Canada. Operation is subject to the
This device complies with Part 15 of
following conditions:
the FCC rules and RSS 210 of Industry
Canada.
• This device may not cause harmful
The current device feature is subject to
interference.
following conditions:
• This device must accept any
• This device may not cause harmful
interference received, including
interference.
interference that may cause
undesired operation.
• This device must accept any
interference received, including
NOTE:
interference that may cause
Changes or modifications not
undesired operation.
expressly approved by the party
If your key fob RKE transmitter fails to
responsible for compliance could void
operate from a normal distance, check
the user's authority to operate the
for these two conditions:
equipment.
• A weak battery in the key fob RKE
If your RKE transmitter fails to operate
transmitter. The expected life of the
from a normal distance, check for
battery in normal use is a minimum
these conditions:
of three years.
35
Before Starting
• A weak battery in the RKE
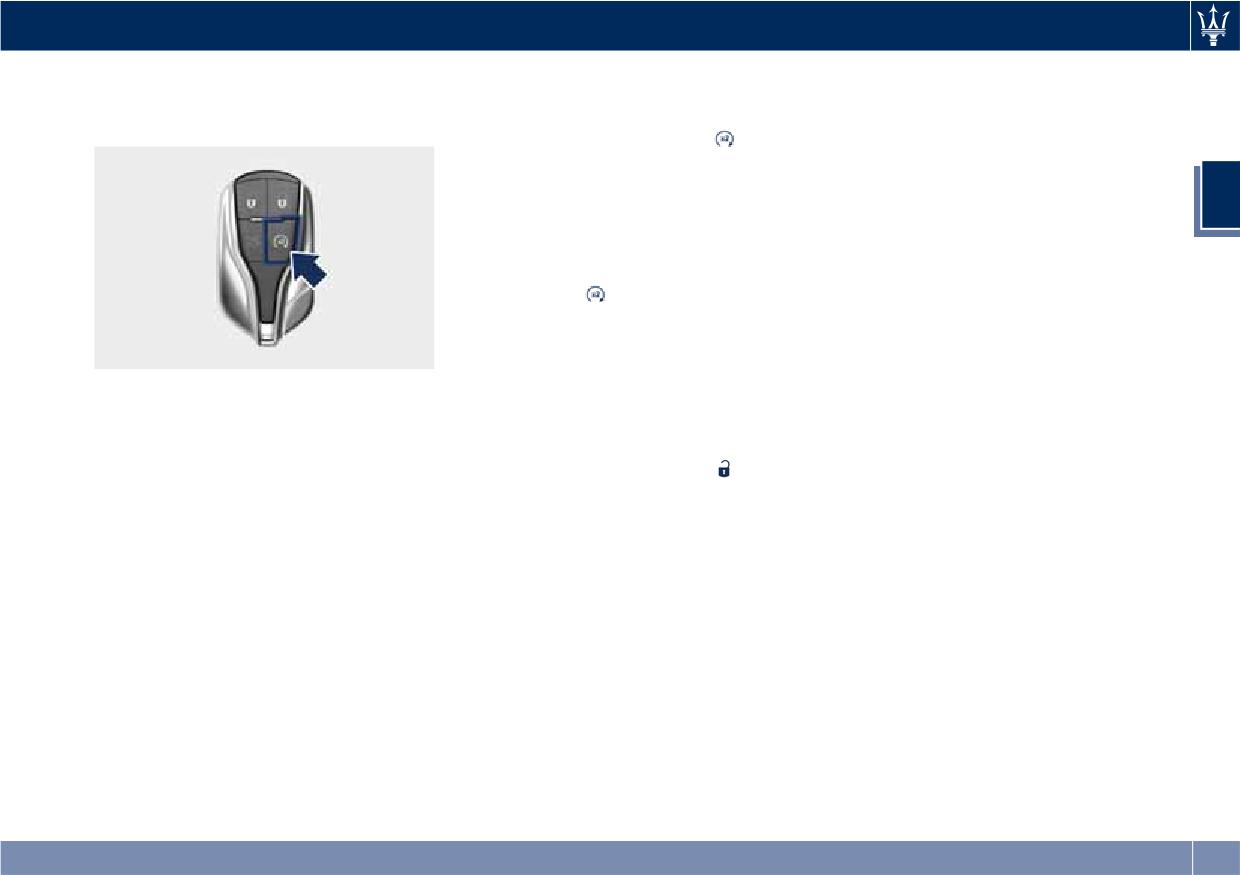
To enter Remote Start Mode
transmitter. The expected life of the
Press and release the button
on the
WARNING!
battery is a minimum of three years.
key fob RKE transmitter twice within
• Do not start or run an engine in a
• Closeness to a radio transmitter such
five seconds. The vehicle doors will
closed garage or confined area.
as a radio station tower, airport
lock, position lights will flash and the
Exhaust gas contains Carbon
2
transmitter, and some mobile or CB
horn will ring twice (if this function is
Monoxide (CO) which is odourless
radio.
set using the MTC+ System, refer to
and colourless
• Obstructions between the vehicle
“MTC+ Settings” in section
• Keep key fobs RKE transmitter away
and the Key Fob.
“Dashboard Instruments and
from children. Operation of the
Controls”). Then, the engine will start
How to use Remote Start
Remote Start System, windows, door
and the vehicle will remain in the
locks or other controls could cause
All of the following conditions must be
“Remote Start” mode for a 15-minute
serious injury or death.
met before the engine will remote
cycle.
start:
Engine Remote Start Abort
• System not disabled from previous
Message on Instrument Cluster
remote start event.
WARNING!
• Vehicle theft alarm not active.
The following messages will display on
California Proposition 65
the instrument cluster if the vehicle
Operating, servicing and maintaining
• Doors closed.
fails to remote start or exits remote
a passenger vehicle or off-road vehicle
• Hood closed.
start prematurely:
can expose you to chemicals including
• Power trunk lid closed.
such as, engine exhaust, carbon
• “Remote Start Canceled Door Open”.
• Hazard lights switched off.
monoxide, phthalates and lead, that
• “Remote Start Canceled Trunk
• Brake pedal not pressed by any
which are know to the State of
Open”.
passenger remained in the vehicle.
California to cause cancer and birth
• “Remote Start Canceled Fuel Low”.
• Battery at an acceptable charge level.
defects or other reproductive harm. To
• “Remote Start Canceled Time
minimize exposure, avoid breathing
• The shift lever is in P (Park) position.
Expired”.
exhaust, do not idle the engine except
• The vehicle transmission is in
• “Remote Start Disabled Start Vehicle
as necessary, service your vehicle in a
automatic mode.
to Reset”.
well-ventilated area and wear gloves
• The remote start has not been
The message on the instrument cluster
or wash your hands frequently when
activated yet two consecutive times.
stays active as long as the ignition
servicing your vehicle. For more
switch is in RUN position.
information go to:
36
Before Starting
To exit Remote Start Mode
Auto-On Comfort with Remote
vehicle
without Driving the Vehicle
Start
Press and release the button
one
The driver's heated and ventilated
time or allow the engine to run for
seat and the heated steering wheel (if
the entire 15-minute cycle.
provided) can be programmed to
2
come on during a remote start. Refer
NOTE:
to “Auto-On Comfort & Remote Start”
To avoid unintentional shutdowns, the
function in chapter “MTC+ Settings”,
system will disable the one time press
section “Dashboard Instruments and
of the button
for two seconds after
Controls”, for further information.
receiving a valid “Remote Start”
request.
NOTE:
To exit Remote Start Mode and
• In case of an engine fault or low fuel
Drive the Vehicle
level, the vehicle will start and then
Before the end of the 15-minute cycle,
shut down in 10 seconds.
press and release the button
on the
• The position lights will turn on and
key fob RKE transmitter to unlock the
remain lighted up during “Remote
doors and disarm the vehicle security
Start” mode.
alarm. Then, prior to the end of the
• For security reasons, power window
15-minute cycle, press and release the
and power sunroof operation are
START/STOP button.
disabled when the vehicle is in the
NOTE:
“Remote Start” mode.
The message “Remote Start Active
• The engine can be started two
Push Start Button” will display in the
consecutive times (two 15-minute
instrument cluster until you push the
cycles) with the key fob RKE
START/STOP button.
transmitter. However, the ignition
must be cycled to the RUN position
before you can repeat the start
sequence for a third cycle.
37
Before Starting
Doors Manual Lock
Therefore, make sure the key fob RKE
Doors Locking
transmitter is not inside the vehicle
To lock each door, push the door lock
before closing the door.
knob on each door trim panel
downward.
Power Doors Locking/
WARNING!
• For personal security and safety in
Unlocking
2
the event of an accident or robbery,
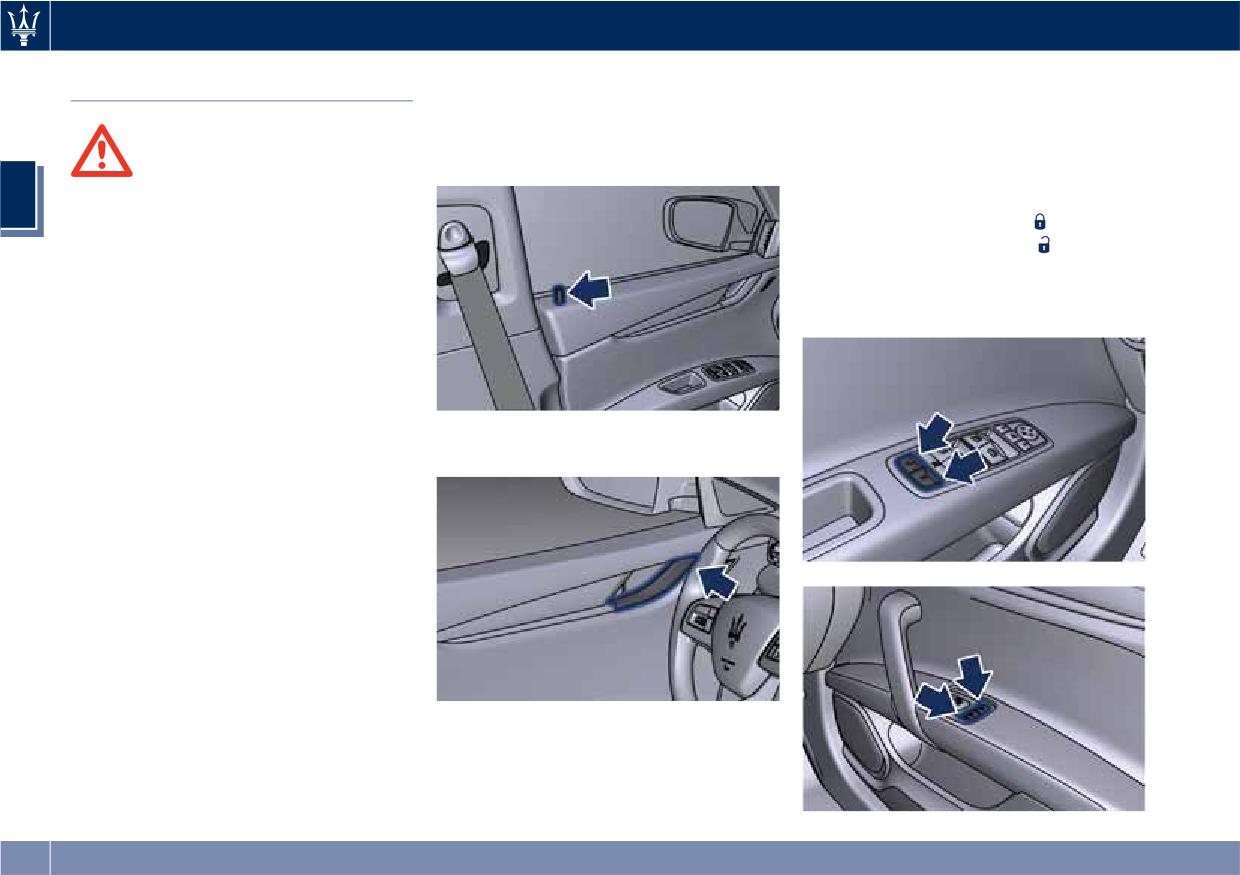
A power door lock switch
and a
lock the vehicle doors before you
power door unlock switch
are
drive as well as when parking and
positioned on the front door trim
leaving the vehicle unattended.
panel. Use this switches to lock or
• When leaving the vehicle, always
unlock the doors.
remove the key fob RKE transmitter
and lock your vehicle.
• Never leave children alone in a
vehicle, or with access to an
unlocked vehicle.
To unlock the front doors, pull the
inside door handle to the first detent.
• Do not allow children to be in a
vehicle unattended. A child or others
could be seriously or fatally injured.
Children must not touch the parking
brake trigger, brake pedal or the
shift lever.
• Do not leave the key fob in or near
the vehicle, and do not leave
ignition switch in the ACC or RUN
mode. A child could operate power
windows, other controls, or start the
engine and the vehicle.
To unlock the rear doors, pull the door
lock knob on the door trim panel
upward.
If the door lock knob is down when
you shut the door, the door will lock.
38
Before Starting
If the vehicle has been locked from
the door locks will lock automatically
Child-Protection Door Lock
inside with the above-figured
when the vehicle's speed exceeds
System - Rear Doors
switches, the fuel filler flap remains
15 mph (24 km/h). The auto door lock
To provide a safer environment for
unlocked.
feature can be enabled or disabled by
small children sitting in the rear seats,
If Power Trunk Lid/ Hands Free (if
an Authorized Maserati Dealer only
the rear doors are equipped with a
equipped) has been left open, it will
which can also service the vehicle.
2
child-protection door lock system.
stay open when you press lock button
Automatic Door Unlock on Exit
, and the locking feature will only
Engage or Disengage the
The doors will unlock automatically on
occur after the closing of the power
Child-Protection Door Lock
vehicles with power door locks if:
trunk lid.
• Open the rear door.
The doors can also be locked and
• The automatic unlock doors on exit
• Insert the tip of the emergency key
unlocked with the “Passive Entry”
feature is enabled.
into the lock and rotate to the lock
system. For further information, see
• The transmission is in gear and the
or
unlock position.
“Passive Entry System” in this section.
vehicle speed is 0 (mph - km/h).
• Repeat the first two steps on the
If you press the power door lock
• The transmission is in N (Neutral) or
opposite rear door.
switch while the ignition switch is in
P (Park).
the ACC or RUN position, and any
• The driver door is open.
front door is open, the power locks
• The doors were not previously
will not operate. This prevents you
unlocked.
from accidentally locking the key fob
RKE transmitter in the vehicle.
• The vehicle speed is 0 (mph - km/h).
Cycling the ignition to the OFF
Set Automatic Door Unlock on Exit
position or closing the door will allow
To change the current setting, see
the locks of the doors and fuel filler
“MTC+ Settings” in section
door to operate. If a door is open with
“Dashboard Instruments and
the key fob RKE transmitter inside the
Controls”.
cabin and the ignition is in the ACC or
RUN position, a beep will draw the
NOTE:
driver’s attention.
Use the automatic door unlock on exit
WARNING!
Automatic Locking Doors
feature in accordance with local
Avoid trapping anyone in a vehicle in
regulations.
a collision. Remember that the rear
The auto door lock feature default
condition is disabled. When enabled,
(Continued)
39
Before Starting
(Continued)
During the soft closing phase operated
Passive Entry System
doors can only be opened from the
by the system, it is possible to
outside when the child-protection
intervene manually by opening or
The “Passive Entry” system is an
locks are engaged (locked).
closing the door.
enhancement to the vehicle’s Remote
If you are pushing the door hard
Keyless Entry (RKE) system. This
NOTE:
enough to close just like a regular one,
feature allows you to lock and unlock
2
the system still works, but only to
the vehicle’s door(s) without having to
For emergency exit from the rear seats
check whether the door is properly
press the key fob RKE transmitter lock
when the child-protection door lock
closed.
or unlock buttons.
system is engaged, manually raise the
door lock knob to the unlocked
NOTE:
position, roll down the window, and
• “Passive Entry” may be programmed
open the door using the outside door
WARNING!
to on/off; see “MTC+ Settings” in
handle.
The system works properly if the ajar
section “Dashboard Instruments and
door has a gap , between exterior
Controls” for further information.
Soft Door Close System
door panel surface and exterior
• If wearing gloves, or if it has been
(optional)
bodyshell surface in the latch area , of
raining on the “Passive Entry” door
max 0.23 in (6 mm). In the presence of
This system makes doors easier to shut
handle, the unlock sensitivity can be
higher gap, the system is not able to
without having to slam if you do not
affected, resulting in a slower
close the door with the risk of
get it closed the first time. It increases
response time.
travelling with the door not
the vehicle's safety and comfort, in
• Access to the vehicle using “Passive
completely closed or even open.
particular for children in the back seat,
Entry” system may not work properly
it is not necessary to slam the door and
in case of interference caused by
it also prevents the risk of traveling
external sources such as metal
with the door ajar.
objects, mobile phones, overhead
The system uses a sensor to detect the
power lines, antennas, etc. In these
door ajar and an electric actuator to
cases, use the buttons of the key fob
close it. The sensor detects your
RKE transmitter to open and close
attempt to close the door and once
the vehicle or the emergency key,
the latch catches the handle the
inserting it into the driver side door
electric actuator pulls the door firmly
lock.
bringing the door back in the fully
closed position.
40
Before Starting
• The “Passive Entry” system does not
lock and unlock the doors directly
and immediately but with a slight
delay (about 2 seconds).
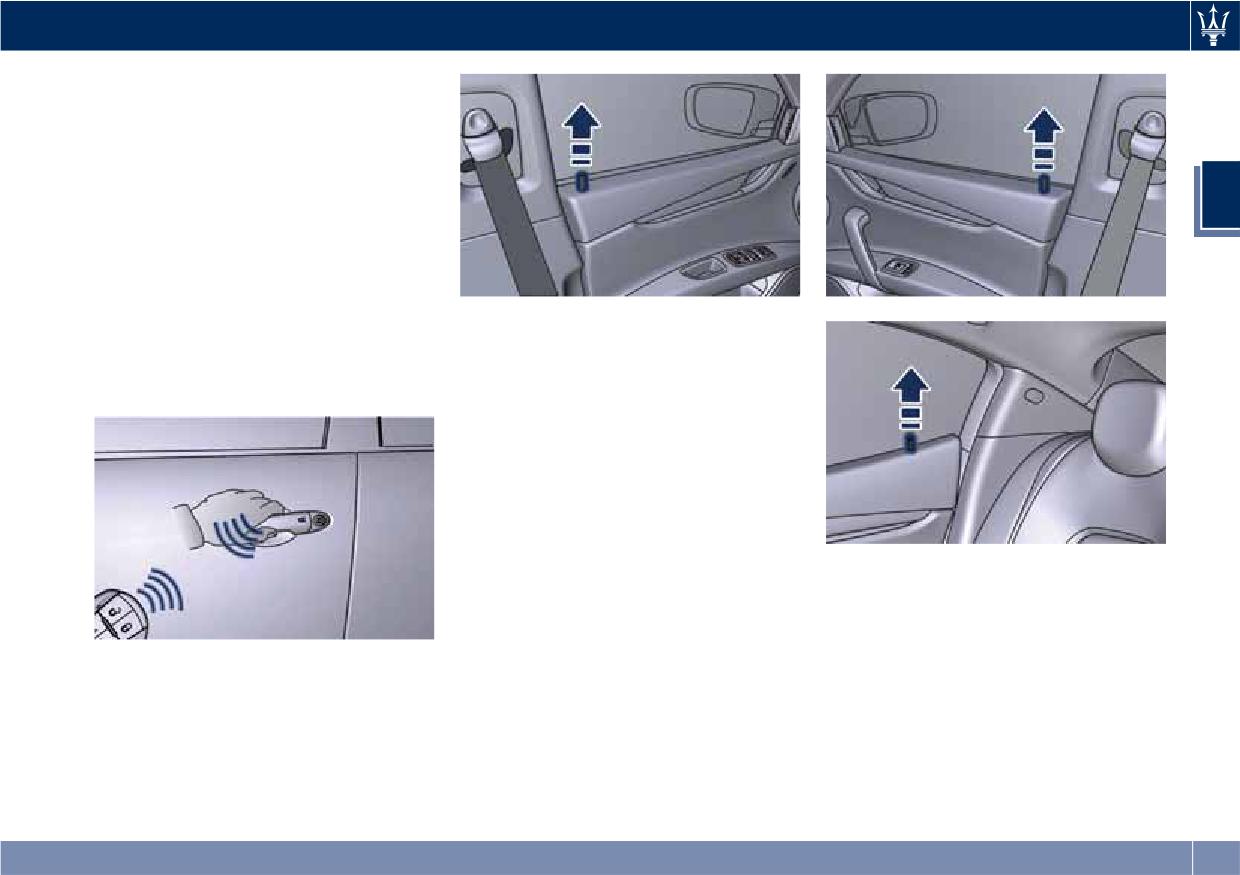
Unlock Door from the Driver
2
Side
With a valid key fob RKE transmitter
within 3.3 ft (1 m) of the driver's door
handle, grip the driver’s door outside
NOTE:
handle to unlock the door
automatically. The interior door panel
If “Unlock All Doors 1st Press” is
lock knob will rise when the door is
programmed on all doors will unlock
unlocked.
when you grip the front driver’s door
handle. To select between “Unlock
Driver Door 1st Press” and “Unlock All
Doors 1st Press”, see “MTC+ Settings”
in section “Dashboard Instruments
and Controls”.
Unlock Door from the
NOTE:
Passenger Side
All doors will unlock when you grip
With a valid key fob RKE transmitter
the front passenger door handle
within 3.3 ft (1 m) of the passenger
regardless of the driver’s door unlock
door handle, grip the front passenger
preference setting (“Unlock Driver
outside door handle to unlock all four
Door 1st Press” or “Unlock All Doors
doors automatically.
1st Press”).
The interior door panel lock knob will
rise when the door is unlocked.
41
Before Starting
Preventing Inadvertent Locking
NOTE:
of the Key fob RKE Transmitter
The vehicle unlocks the doors under
inside the Vehicle
any of the following conditions:
To minimize the possibility of
• the doors are manually locked using
unintentionally locking a key fob RKE
the door lock knob positioned on the
2
transmitter inside your vehicle, the
door panel;
“Passive Entry” system is equipped
with an automatic door unlock feature
which will function if the ignition
switch is in the OFF position.
• there is a valid key fob RKE
If one of the vehicle doors is open and
transmitter outside the vehicle and
the door panel switch
is used to lock
within 3.3 ft (1 m) of either “Passive
the vehicle, once all open doors have
Entry” door handle;
been closed, the system checks the
inside and outside of the vehicle for
• fifteen attempts are made to lock
any valid key fobs RKE transmitter.
the doors using the door panel
If one of the vehicle's key fobs RKE
switch and/or the RH button
(on
• there is a valid key fob RKE
transmitters is detected inside the
the vehicles equipped with Power
transmitter inside the vehicle;
vehicle, and no other valid key fobs
Trunk Lid/Hands Free) and then close
RKE transmitters are detected outside
• there is not a valid key fob RKE
the doors.
transmitter outside the vehicle.
the vehicle, the “Passive Entry” system
If the key fob RKE transmitter is inside
automatically unlocks all vehicle doors
the passenger compartment and one
and chirps the horn fourteen times (on
NOTE:
of the doors locked only to the first
the fifteenth attempt ALL doors will
The vehicle will not unlock the doors
detent of lock pawl (hence it is not
lock and the key fob RKE transmitter
under any of the following conditions:
fully closed), when the vehicle lock
will be locked in the vehicle). This will
• the doors are locked using the key
function with alarm system for trunk
happen even on vehicles equipped
fob RKE transmitter;
lid and doors is being activated by
with Power Trunk Lid/Hand Free
• the doors are locked using the
means of RH button
at the bottom
pressing RH button on its right lower
of the trunk lid, said function will be
button on the “Passive Entry” door
part to close and lock the trunk lid.
handles;
activated all the same.
In this condition, any attempt to duly
close the door that is partially open
42
Before Starting
will cancel vehicle lock and alarm
lights to open the trunk lid manually
system arming thus leaving vehicle
or automatically.
unlocked.
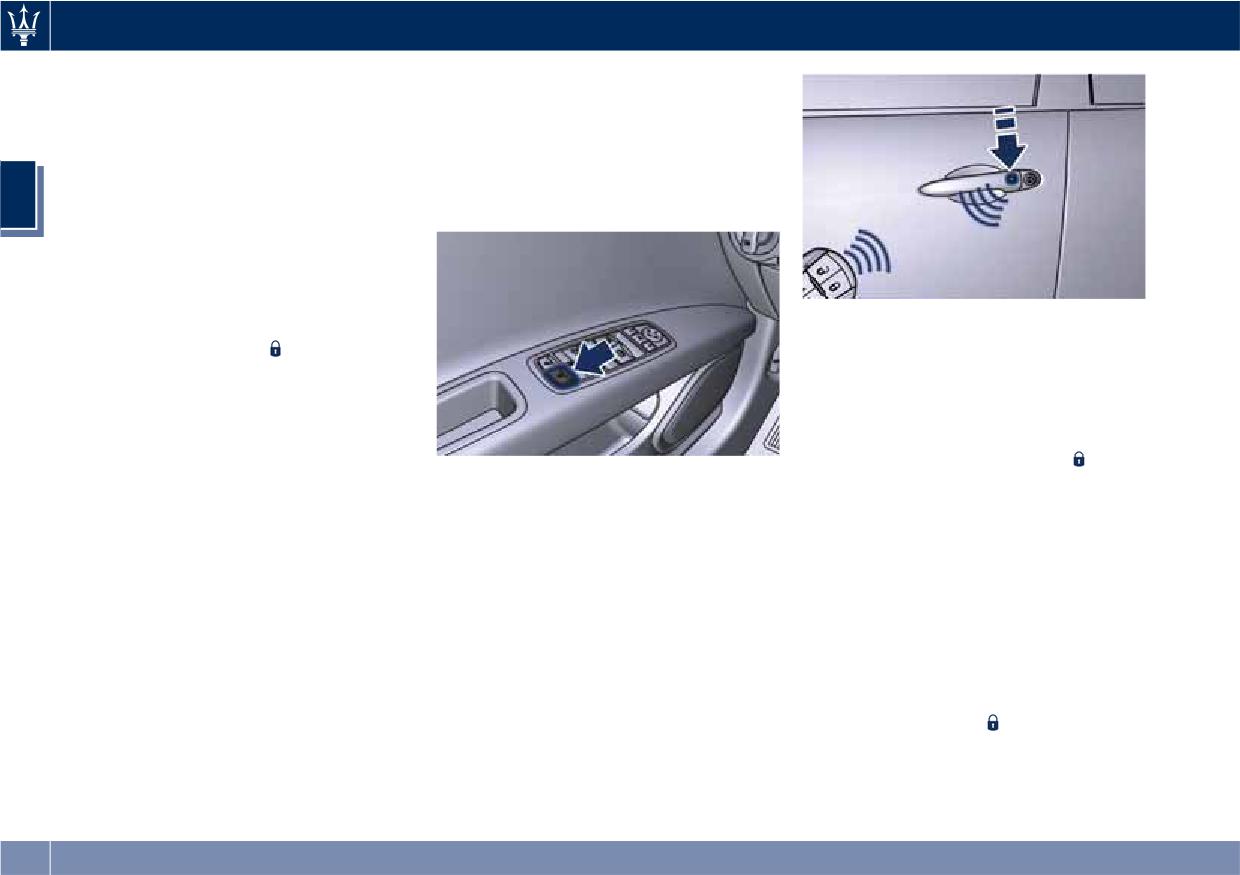
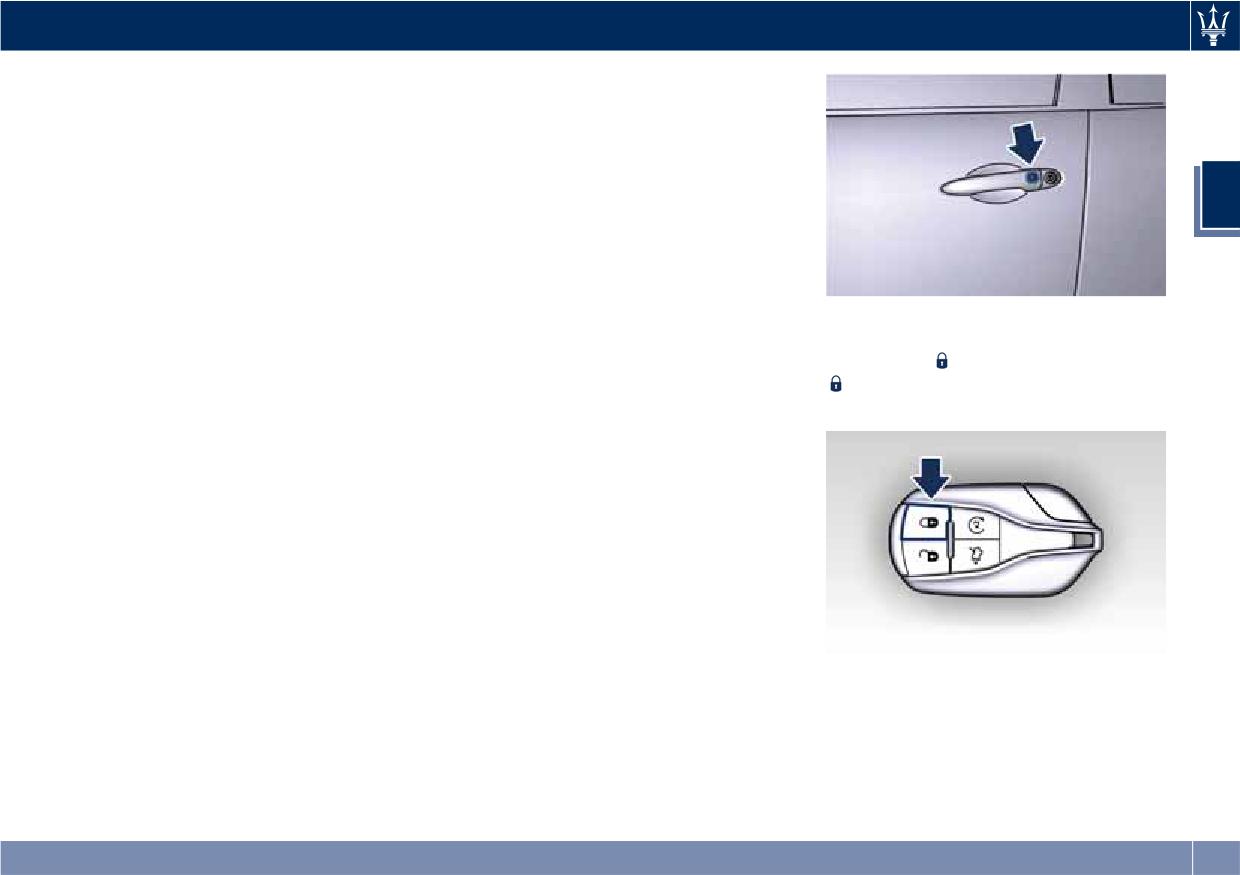
Manual Door Lock from
Since when the doors are locked, the
Outside
"Passive Entry" system waits for about
16 seconds before verifying if a key
With one of the vehicle’s key fobs RKE
2
fob RKE transmitter is present inside
transmitters within 3.3 ft (1 m) of the
the vehicle.
driver or passenger front door
handles, press the external door
Release the Lid and Enter the
handle button to lock all four doors.
Trunk
The vehicle doors can also be locked
NOTE:
For vehicles equipped with manual
by using the key fob RKE transmitter
trunk lid, with the key fob within 3.3
• After pressing the outside door
lock button
or the lock button
ft (1 m) of the lid, press the button
handle button, you must wait two
located on the vehicle’s inner door
located between the licence plate
seconds before you can lock or
panel.
lights and lift it manually.
unlock the doors using this door
For vehicles equipped with Power
handle. By pulling the external door
Trunk Lid/Hands Free, with the key fob
handle, you can check if the car
within 3.3 ft (1 m) of the lid, press the
remains locked, without “Passive
button located between the license
Entry” system reacting and
plate lights, the power trunk lid will
unlocking the doors.
automatically open until it has
• The “Passive Entry” system will not
reached its maximum height; if the
operate if the key fob RKE
same button is not pressed again to
transmitter battery is dead.
stop it (for more information, see
• If Power Trunk Lid/Hands Free (if
chapter “Trunk Lid Operation” in this
equipped) has been left open, it will
section).
stay open when you press the button
If the vehicle had already been
on door external handle, and the
unlocked through key fob or “Passive
locking feature will only occur after
Entry”, the presence of the key fob is
the closing of the power trunk lid.
not required; simply use the button
located between the license plate
43
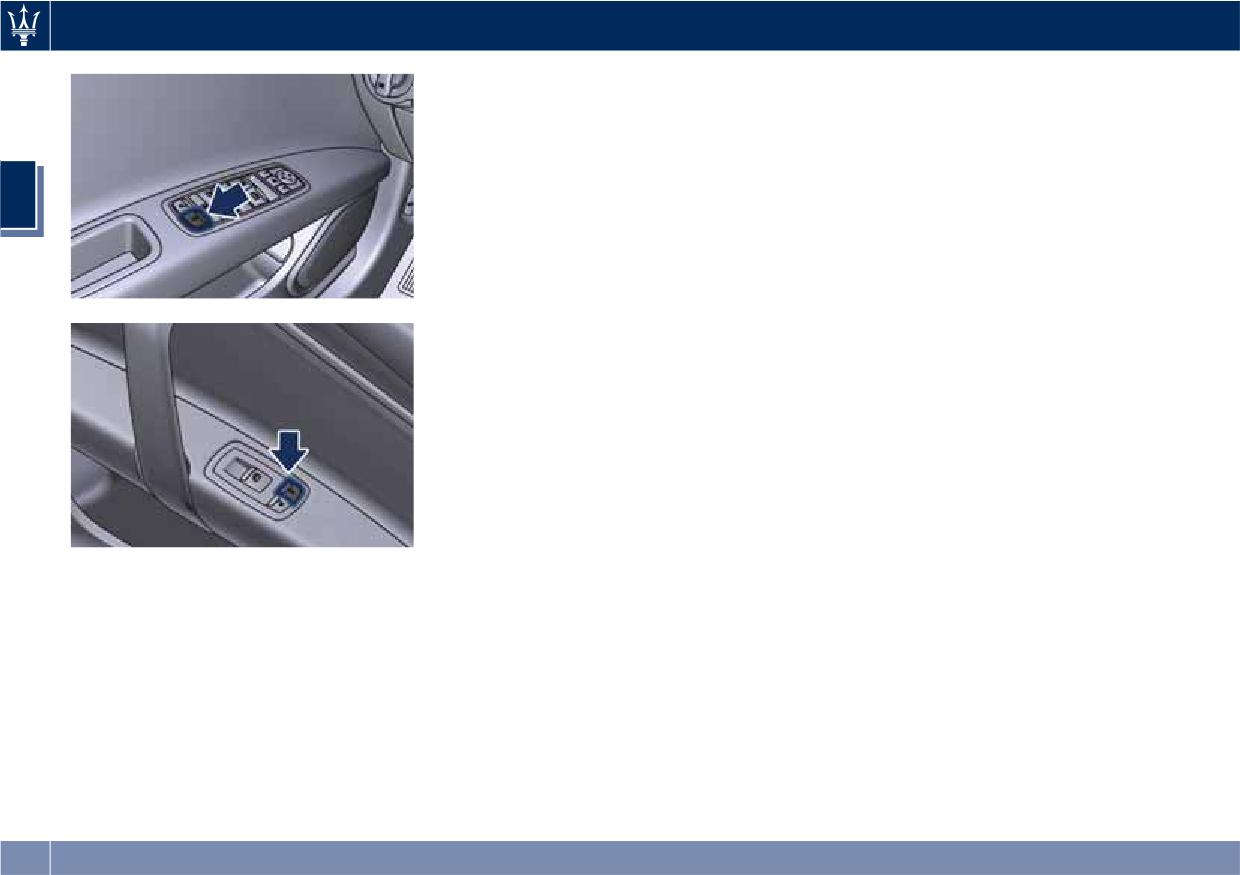
Before Starting
• This device must accept any
The device is covered by:
interference received, including
Continental FCC ID: M3N-40821703.
interference that may cause
undesired operation.
The device is covered by:
2
Continental FCC ID: M3N-7393490.
Ignition device (Keyless Enter-N-Go)
This device complies with Part 15 of
the FCC Rules.
Operation is subject to the following
two conditions:
• This device may not cause harmful
interference.
• This device must accept any
interference received, including
interference that may cause
undesired operation.
The device is covered by:
Continental FCC ID: OHT-40821803.
Control Unit (Keyless Enter-N-Go)
General Information
This device complies with Part 15 of
Key Fob (Keyless Enter-N-Go)
the FCC Rules.
This device complies with Part 15 of
Operation is subject to the following
the FCC Rules.
two conditions:
Operation is subject to the following
• This device may not cause harmful
two conditions:
interference.
• This device may not cause harmful
• This device must accept any
interference.
interference received, including
interference that may cause
undesired operation.
44
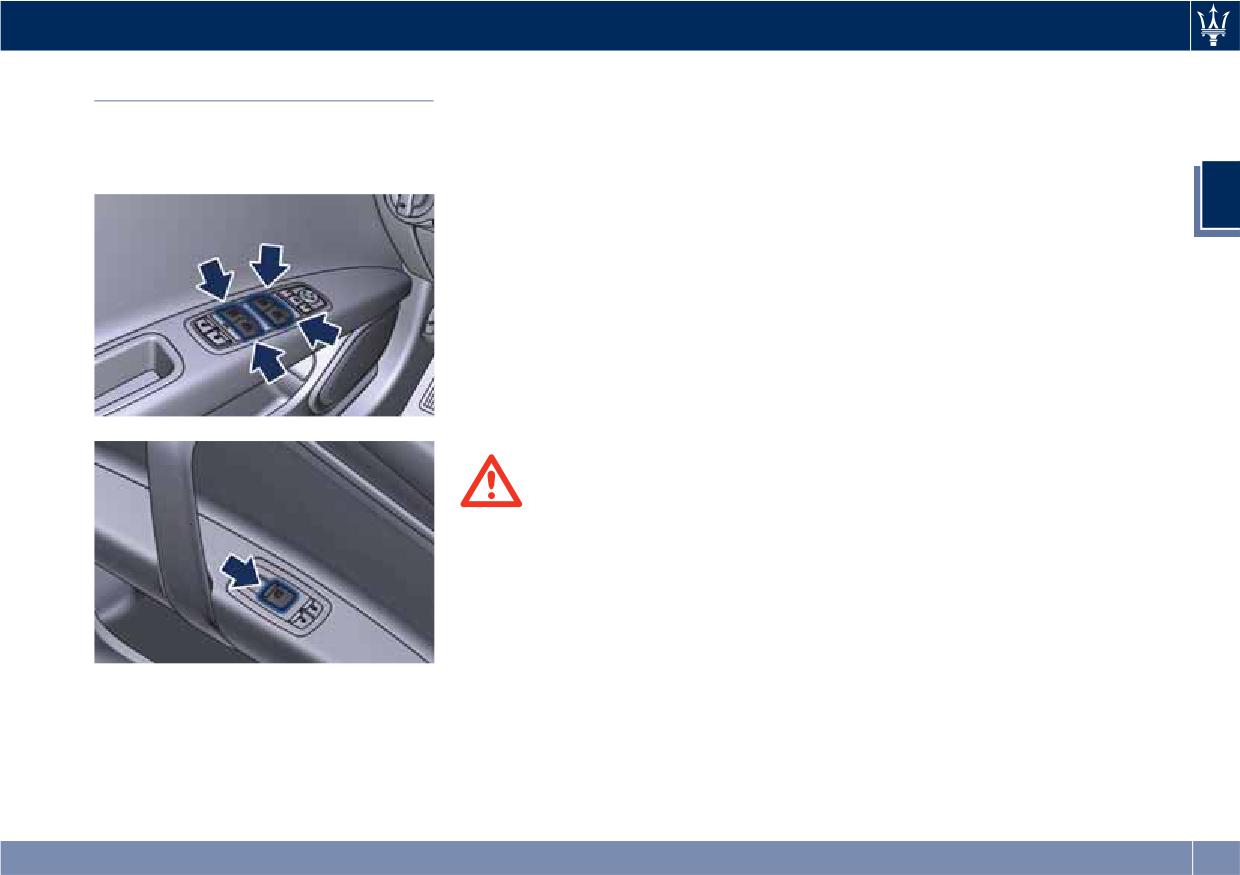
Before Starting
NOTE:
prevent the windows being
Power Windows
accidentally activated, posing a risk to
• The power window switches will
The window controls on the driver's
passengers remaining onboard.
remain active for up to 10 minutes
door panel govern all the door
after the ignition switch is turned to
windows.
the OFF position. Opening either
Auto-Down Feature
front door will cancel this feature.
2
The driver door power window switch
The time lapse can be set. See
and some model passenger door
“MTC+ Settings” in section
power window switches have an
“Dashboard Instruments and
auto-down feature.
Controls” for further information.
Press the window switch to the second
• Frequent activations of the power
detent, release, and the window will
windows could result in a temporary
go completely down automatically.
lock out of the motors. In this case,
To open the window part way, press
wait a moment before a new
the window switch to the first detent
activation.
and release it when you want the
window to stop.
To stop the window from going all the
way down during the auto-down
WARNING!
operation, pull up on the switch
Improper use of the power windows
briefly.
and the sunroof (if equipped) can
however be dangerous, even with the
Auto-Up Feature with
anti-pinch prevention system. Before
Anti-Pinch Protection
and during activation of the power
Lift the window switch to the second
window, always check that the
detent, release, and the window will
passengers are not exposed to the risk
go all the way up automatically.
There are single window controls on
of injury both by the moving window
To stop the window from going all the
each passenger door trim panel, which
and by personal objects that could be
way up during the auto-up operation,
operate the corresponding window.
dragged or hit by it. Do not leave
push down on the switch briefly.
The window controls will operate only
unattended children in a vehicle with
To close the window part way, lift the
when the ignition switch is in the ACC
a key fob RKE transmitter inside.
window switch to the first detent and
or RUN position.
When getting out the vehicle, always
remove the key fob RKE transmitter to
45
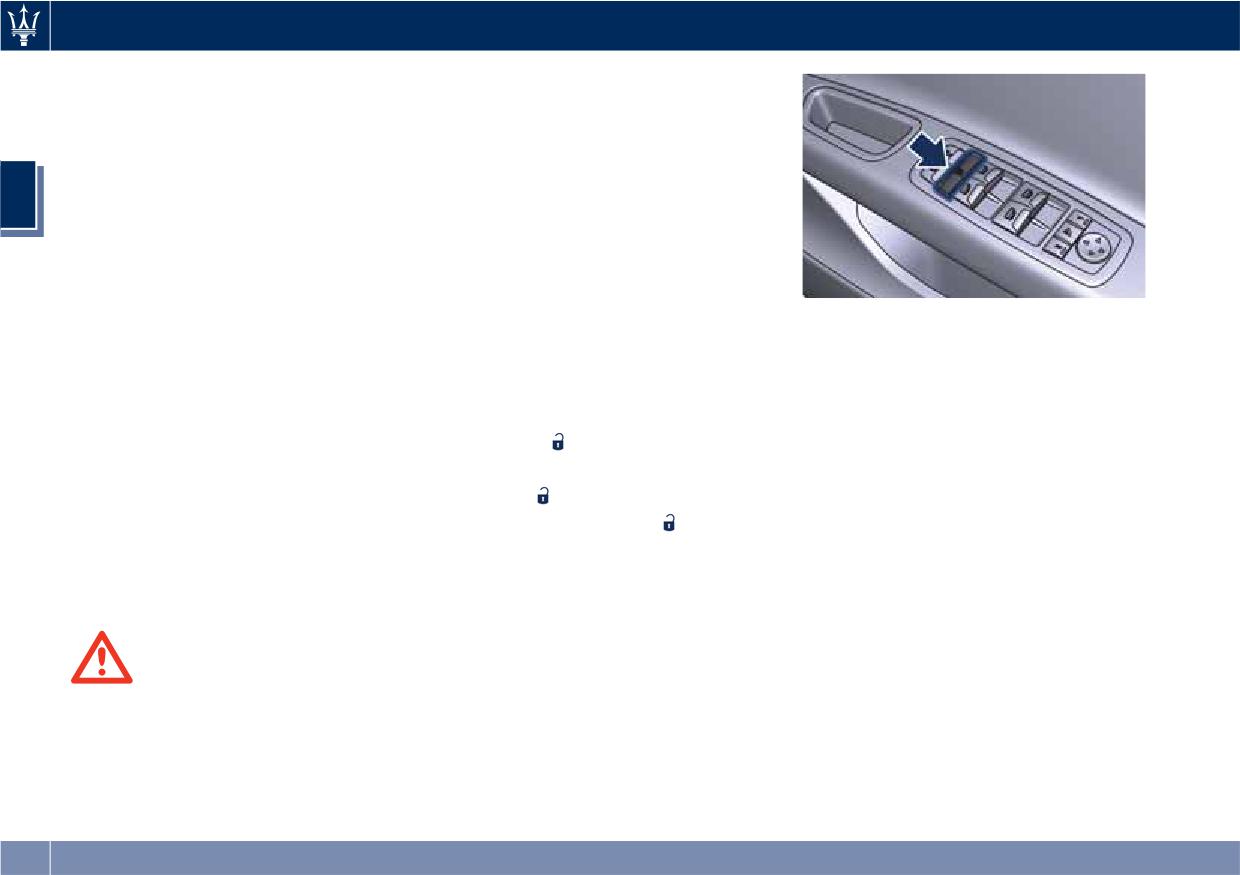
Before Starting
release it when you want the window
Reset Auto-Up/Down
to stop.
Should the auto-up/down feature stop
NOTE:
working, the window probably needs
to be reset.
• If the window runs into any obstacle
To reset auto-up/down, pull the
during auto-closure, it will reverse
2
window switch up to close the window
direction and then go back down.
completely and push the window
Remove the obstacle and use the
switch down to open the window
window switch again to close the
completely.
window.
• Any impact due to rough road
Open the Windows and
To enable the controls previously
conditions may trigger the auto
Sunroof with RKE Transmitter
described, press the window lockout
reverse function unexpectedly during
and Ignition Off
button again (setting it in the up
auto-closure. If this happens, pull the
position).
switch lightly to the first detent and
When the ignition switch is in OFF
hold to close the window manually.
position, windows can be opened by
Wind Buffeting
pressing the
button on the RKE
• Frequent activations of the
Wind buffeting can be described as
transmitter.
anti-pinch function could disable the
the perception of pressure or a
auto-down and auto-up function of
• Press the
button and release it;
helicopter-type sound. Your vehicle
the windows. In order to re-activate
• Press a second time the
button
may exhibit wind buffeting with the
this function proceed with a reset
and keep it pressed until complete
windows down, or the sunroof in open
cycle as described in the next
opening of the windows, if they
or partially open positions. This is a
paragraph.
were closed.
normal occurrence and can be
minimized. If the buffeting occurs with
Rear Window and Sunshade
the rear windows open, open the front
Lockout Button
and rear windows together to
WARNING!
The window lockout button on the
minimize the buffeting. If the
There is no anti-pinch protection when
driver's door trim panel allows to
buffeting occurs with the sunroof
the window is almost closed. Be sure
disable the window and sunshade
open, then adjust the sunroof opening
to clear all objects from the area
to minimize the buffeting.
control on the rear doors by pressing
before closing the window.
the window lockout button (setting it
in the down position).
46
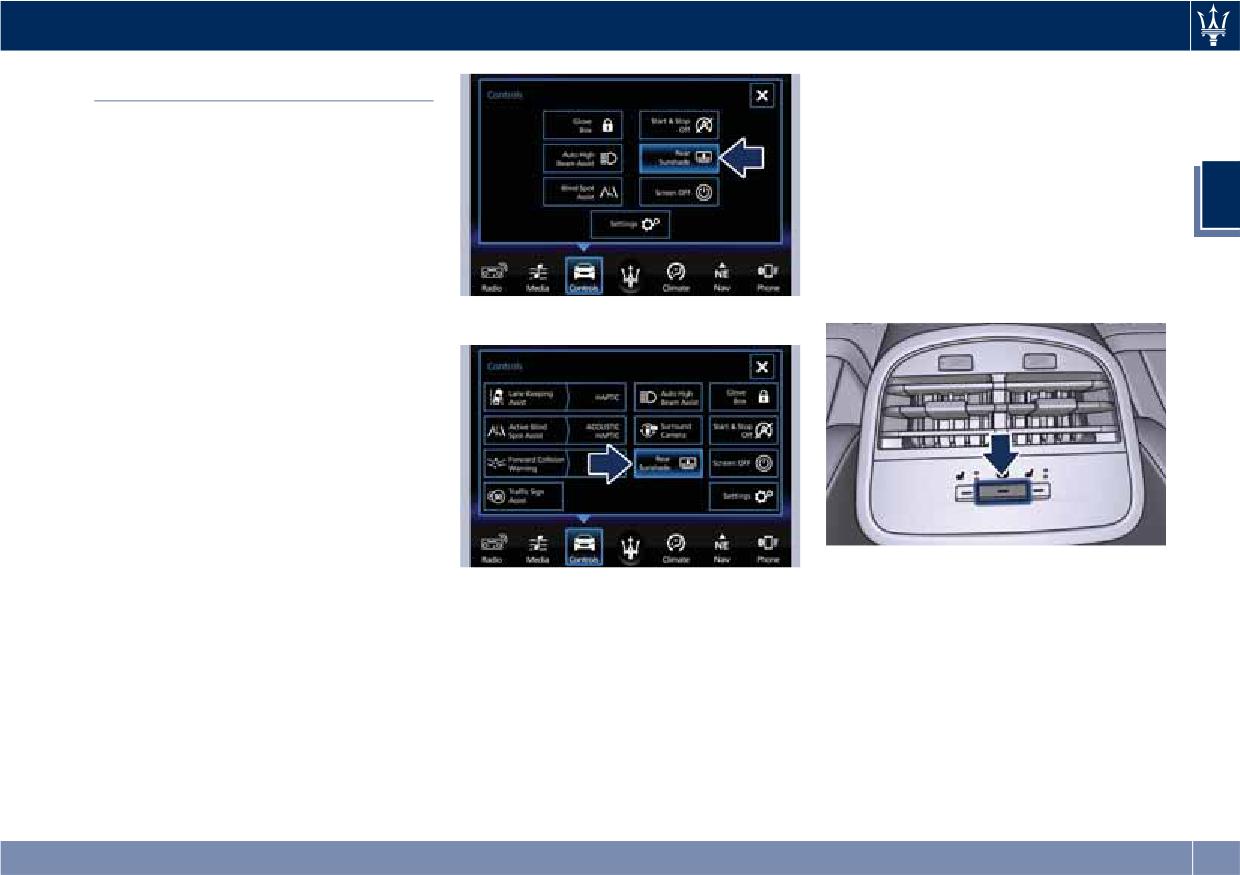
Before Starting
On versions equipped with heated
Rear Window
rear seats is available the trigger
Rear Window Defroster
button of the rear sunshade,
positioned at the rear of the central
The rear window defroster button is
console, which can be operated from
located on the climate control panel.
the rear passengers.
2
See “Air Conditioning Controls” in
• Press the button to raise the
section “Dashboard Instruments and
sunshade.
Controls”.
• Press the button a second time to
Power Sunshade (optional)
lower the sunshade.
Without ADAS
Your vehicle can be equipped on
request with a power sunshade that
will reduce the amount of sunlight
that will enter through the rear
window.
The sunshade is rolled in and stored
inside the cover behind the rear seats;
when activated, it rolls out upwards.
The power sunshade can be operated
using the MTC+ System.
• Touch the “Controls” soft-key.
NOTE:
• Within 15 seconds, touch the “Rear
With ADAS
The rear sunshade control and rear
Sunshade” soft-key to raise the
If the sunshade is in the raised
power windows switches, can be
power sunshade.
position and the gear lever is
locked by pressing the window
positioned in R (Reverse), the
• Within 15 seconds, touch the “Rear
lockout button on the driver side door
sunshade will automatically fully
Sunshade” soft-key a second time to
panel.
lower.
lower the sunshade.
When the gear lever is shifted out of R
(Reverse) the sunshade will
automatically return to the fully raised
position after approximately five
seconds.
47
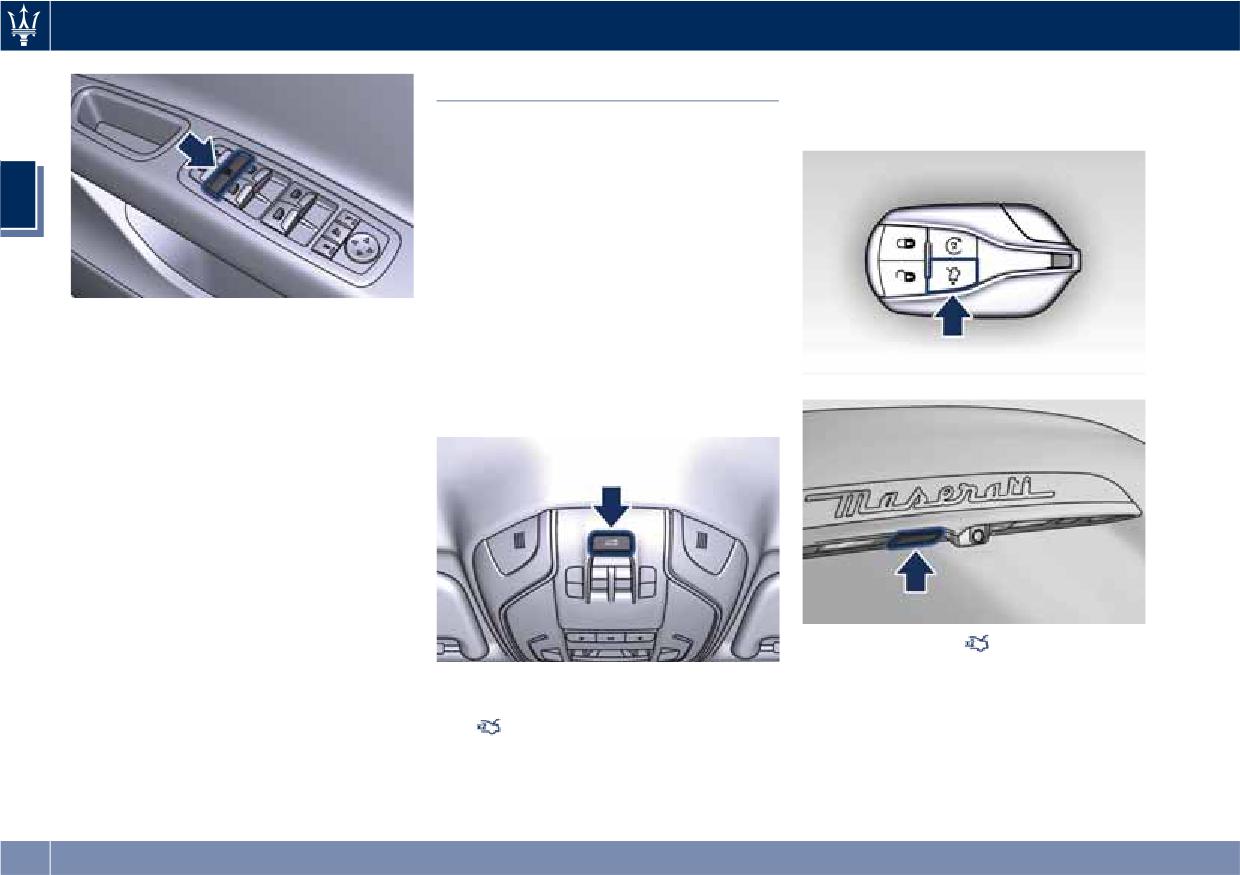
Before Starting
the license plate lights, when the
Trunk Lid Operation
vehicle has been unlocked using the
The manual trunk lid can be unlocked
key fob or the “Passive Entry” system.
from inside the vehicle by pressing the
button on the front dome console.
This command will fully open the
2
Power Trunk Lid/Hands Free (if
equipped). Pressing this button in
sequence, if the power trunk lid stops
in intermediate position, it resumes his
opening movement.
NOTE:
The shift lever must be in P (Park)
before the button can operate.
When the button
on the key fob is
pressed twice within five seconds, the
The manual trunk lid can be released
direction indicators flash twice to
from outside the vehicle by pressing
indicate the opening or closing of the
the
button on the key fob with
trunk lid, if the light flashing function
RKE transmitter twice within five
at closing is activated on MTC+ (for
seconds or by using the external
more information, see the chapter
release button located on the lower
"MTC+ Settings" in section
side of the trunk lid ledge, between
48
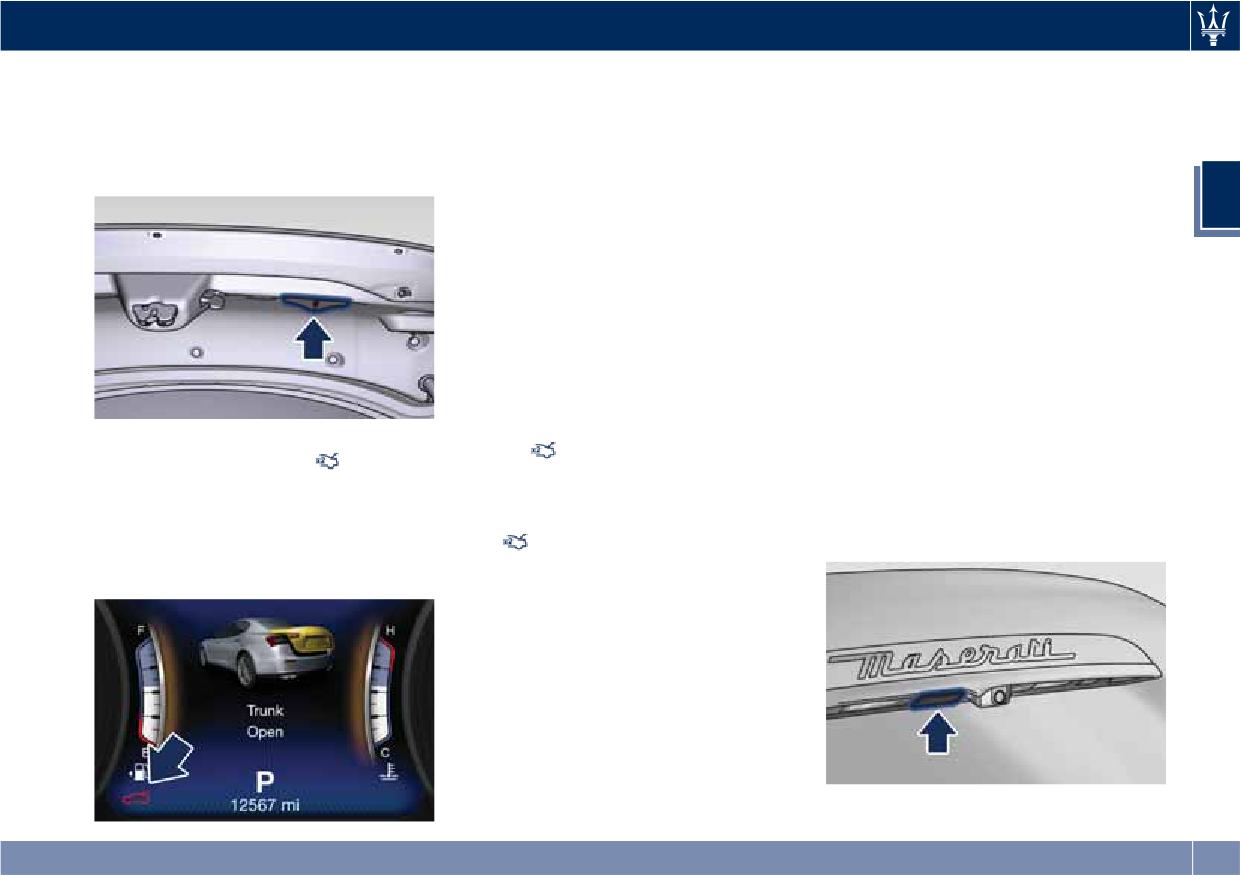
Before Starting
“Dashboard Instruments and
With the ignition device in the OFF
kick sensor option, as specified in the
Controls”).
position, the trunk open symbol and
paragraph “Hands Free Power Trunk
To manually close the trunk lid use the
message will display until closure.
Release and Closing”. In this latter
handle as indicated beside the closing
See “Passive Entry System” in this
case, the lid will be opened and closed
device.
section for more information on trunk
only if the “Passive Entry” system
lid operation with the “Passive Entry”
acknowledges the presence of the key
2
feature.
fob RKE transmitter within 3.3 ft (1 m)
of the trunk lid.
Power Trunk Lid/Hands Free
Power Trunk Lid/Hands Free uses the
(optional)
button in between the license plate
Automatic opening and closing
lights, indicated in figure, to activate
movement of the trunk lid is driven by
the opening once the car has been
electric actuators and a motorized
unlocked by the key fob or by the
latch ensuring lid locking upon
“Passive Entry” function.
closing.
By pressing this button when the
Power Trunk lid can be opened using
Power Trunk Lid/Hands Free is closed
With the ignition switch in RUN
button
on the key fob RKE
you can open it completely or by
position, the red symbol
will
transmitter and the button on driver
pressing the button again stop the
display on the instrument cluster with
side door trim panel used also for
opening process, or by pressing the
the message indicating that the trunk
non-power version.
button again invert the movement
lid is open. Once the trunk is closed
The
button on key fob and button
and close it completely.
both symbol and message will
on dome console not only allows user
disappear from the display.
to completely open the Power Trunk
Lid/Hands Free, but also to stop it at
any intermediate position by pressing
the button again at anytime you wish
to stop and resume the opening
process.
In addition to these commands, it is
possible open and close the Power
Trunk Lid/Hands Free by simply moving
your foot under the rear bumper, if
the vehicle is so equipped with the
49
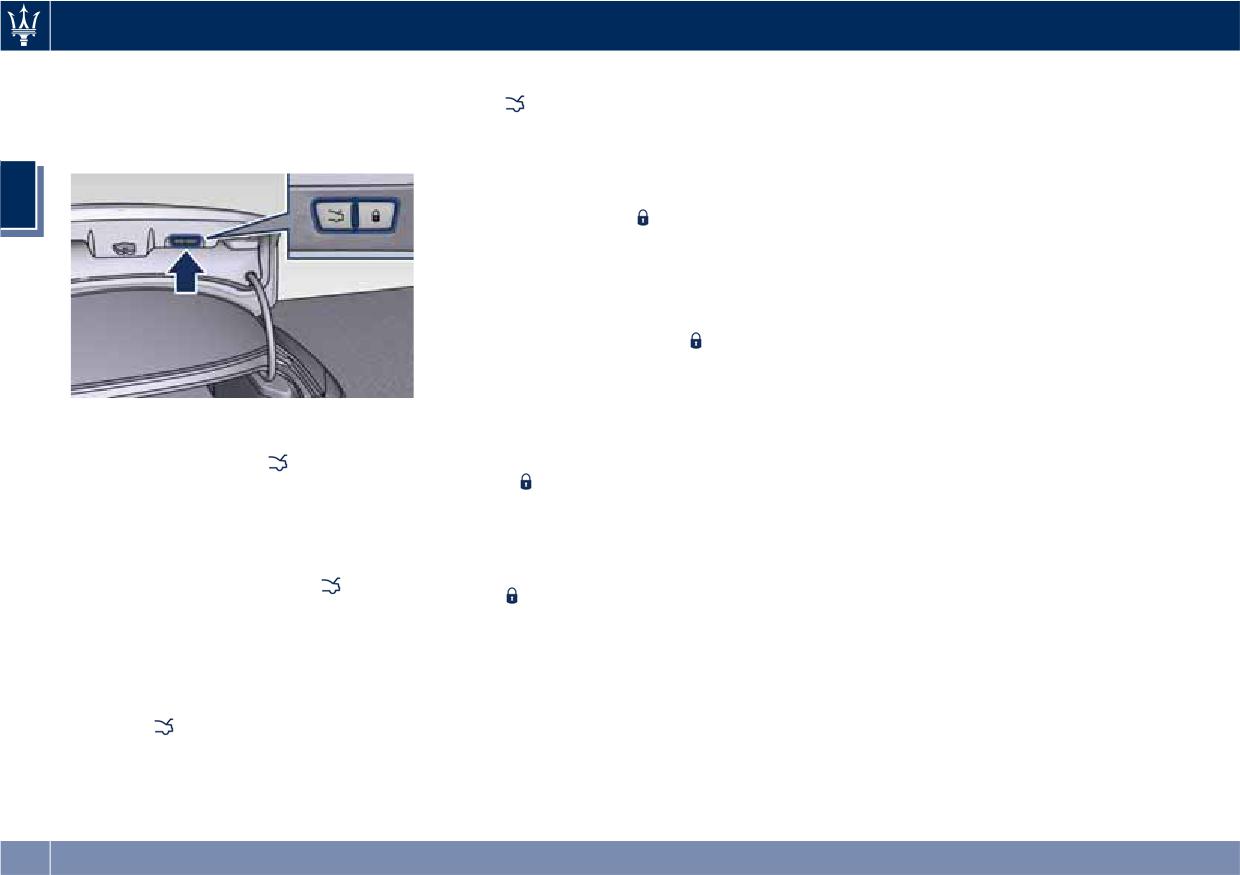
Before Starting
When the Power Trunk Lid/Hands Free
In any case, when you press the LH
NOTE:
is open, to move it there are two
button
, the doors will not be
• The order of the functions shown
buttons positioned on its right lower
locked and the alarm system will not
does not represent the sequence in
part as indicated in figure.
be armed.
which they can be performed.
When the power trunk lid is
• The buttons of the Power Trunk
2
completely open if you press and
Lid/Hands Free do not work if a gear
release the RH button
, the power
is engaged or if the vehicle speed is
trunk lid will be completely closed
higher than 0 (km/h - mph).
unless it is stopped;
• The Power Trunk Lid/Hands Free does
• if instead the power trunk lid is in an
not work with temperatures lower
intermediate position and you press
than -22 °F (-30 °C) or higher than
and release the RH button
during
150 °F (65 °C).
the closing or opening stroke, it will
• If the opening buttons or the
be stopped;
handles are operated while the
When the power trunk lid is
• if instead the power trunk lid is
Power Trunk Lid/Hands Free is
completely open if you press and
stopped in an intermediate position
closing, the stroke of lid stops.
release the LH button
, the power
and you press and release the RH
Pressing another time the same
button
, it will reverse its previous
trunk lid will be completely closed
command it reverses movement and
unless it is stopped;
movement and it will be completely
fully open.
opened or closed unless it is stopped
• if instead the power trunk lid is in an
• If the opening buttons or the handle
again.
intermediate position and you press
are operated while the Power Trunk
In any case, when you press the RH
and release the LH button
during
Lid/Hands Free is opening, the motor
button
, the doors will not be
the closing or opening stroke, it will
of the lid is disabled to allow manual
locked and the alarm system will not
be stopped;
operation.
be armed immediately, but only when
• if instead the power trunk lid is
• If the Power Trunk Lid/Hands Free
the power trunk lid will have reached
stopped in an intermediate position
finds several obstacles during the
the totally closed position as effect of
and you press and release the LH
same operating cycle, it will stop
every movement commands received
button
, it will reverse its previous
automatically and must be opened or
from every other available inputs.
movement and it will be completely
closed manually.
opened or closed unless it is stopped
• If the Power Trunk Lid/Hands Free is
again.
closing and a gear is engaged, the lid
50
Before Starting
will continue closing. In this
Power Trunk Lid/Hands Free
condition, it is possible that, during
Automatic Safe Movement
WARNING!
the closing stroke, it may find an
Power Trunk Lid/Hands Free safe
obstacle and stop.
• Activate Power Trunk Lid/Hand Free
opening and closing is ensured by a
only when vehicle is at a standstill.
protection system able to stop its
Set the Position of Maximum Power
movement when an obstacle is
• Always pay utmost attention when
2
Trunk Lid Opening
detected along the path: when
opening and closing Power Trunk
The maximum opening position of the
opening or closing, it stops
Lid/Hand Free.
trunk lid can be modified using the
automatically and then slightly moves
• After the closing command, always
previously described buttons on its
back.
make sure that Power Trunk
right lower side.
After the closing command, when
Lid/Hand Free is completely closed.
Power Trunk Lid/Hands Free starts
1. Activate the trunk lid and stop it in
closing, all the indicators will blink to
the new maximum opening
warn anyone within range. Apart
position to be set, by pressing the
CAUTION!
from activating indicators blinking
LH
button.
when power trunk lid is operated, it is
• Under extreme weather conditions,
2. Press the LH
and RH
buttons
also possible to activate a sound
trunk lid seal could freeze and
at the same time and keep them
warning by selecting the relevant
compromise Power Trunk Lid/Hand
pressed for 3 seconds.
function within MTC+ user settings
Free automatic opening and closing.
3. Release both buttons. Upon the
(see “MTC+ Settings” in section
• Before opening Power Trunk
following opening controls, the
“Dashboard Instruments and
Lid/Hand Free, make sure that no
trunk lid will stop in the stored
Controls”). When Power Trunk
objects or snow are set on trunk lid
position.
Lid/Hands Free edge reaches the car
or might jam or prevent its opening.
If you want to reset the maximum
body, the motor locking the latch is
possible opening position of the
activated automatically.
Hands Free Power Trunk Release and
power trunk lid, proceed as described
If necessary, the Power Trunk
Closing
below starting from the previously set
Lid/Hands Free can also be opened or
This mode is controlled by the “Passive
opening position.
closed manually. This operation could
Entry” system (see paragraph “Passive
1. Manually push the trunk lid to the
be required when the trunk lid
Entry System” in this section), which
maximum possible opening
remains open for a long period of
automatically releases and closes the
position.
time.
Power Trunk Lid/Hands Free when you
2. Repeat the previously performed
place your foot in the area under the
steps 2 and 3.
rear bumper.
51
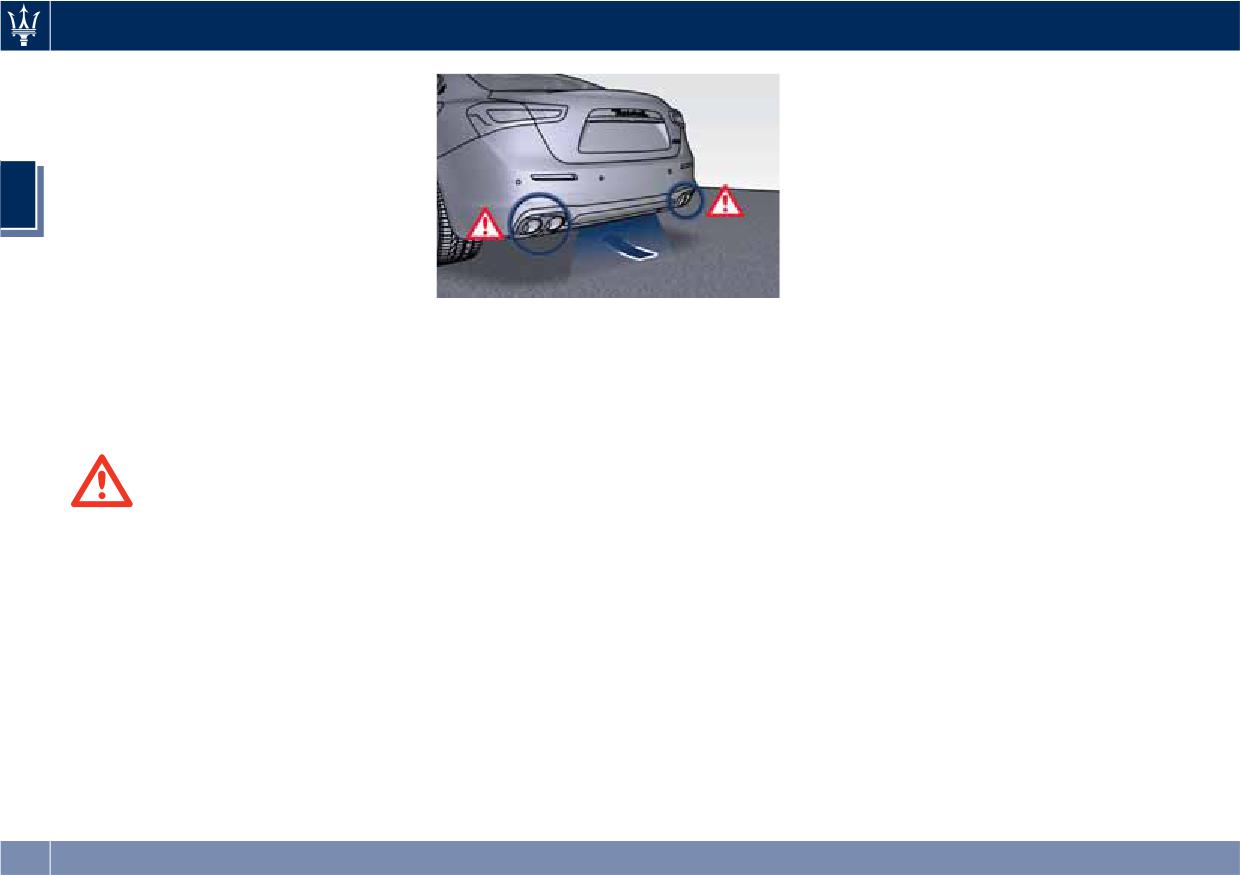
Before Starting
The system will only operate if the
• if the movement was stopped
system acknowledges the presence of
another kick operation will invert a
the key fob RKE transmitter within 3.3
complete opening.
ft (1 m) of the Power Trunk Lid/Hands
NOTE:
Free.
The range of the sensors that detect
• If your foot movement fails to
2
your foot movement extends along
activate the Power Trunk Lid/Hands
and underneath the central portion of
Free movement, wiggling your foot
the rear bumper.
under the bumper will not help.
To activate the Power Trunk Lid/Hands
Repeat the whole kick movement.
Free, stand behind the vehicle, near
• In particular situations, external
In order for the sensors to detect your
the trunk lid, and move your foot
factors affecting the sensor area may
foot movement, move your foot
under the bumper as if to kick
trigger the Hands free power trunk
towards the vehicle rather than
something. Do not place your foot too
lid release feature. For example,
sideways and immediately pull it back:
close to the bumper or touch the
when washing the vehicle, a water
from this moment, the Power Trunk
underbody.
jet aimed at the sensor area may
Lid/Hands Free will activate within two
trigger the “Hands free” power
seconds.
trunk release feature. Keep the key
If closed, with the foot movement the
fob RKE transmitter away from the
WARNING!
Power Trunk Lid/Hands Free will:
sensing range of the sensors (10 ft/3
• Pay careful attention to the exhaust
• unlock and completely open;
m) or disable the Hands free feature
tailpipes as they can reach high
• after another kick, will stop;
from the MTC+ menu (see “MTC+
temperatures and, in case of contact,
• after another kick, will reverse its
Settings” in section “Dashboard
they can cause severe burns.
movement and completely close
Instruments and Controls”). A key
• When it is not necessary to open the
unless stopped again.
fob RKE transmitter located in the
Power Trunk Lid/Hand Free with the
If open, with the foot movement the
front seat passenger area is
Hands Free mode, make sure the key
Power Trunk Lid/Hands Free will:
considered out of range of the
fob results outside the range of use
“Hand free” trunk release sensor.
(3.3 ft/1 m). Otherwise, the Power
• completely close but not lock;
• If somebody or something knocks
Trunk Lid/Hand Free can be opened
• another kick before the completed
against the Power Trunk Lid/Hands
accidentally by an unintentional
closing can stop the movement;
Free while it is moving, the safety
movement of the foot.
52
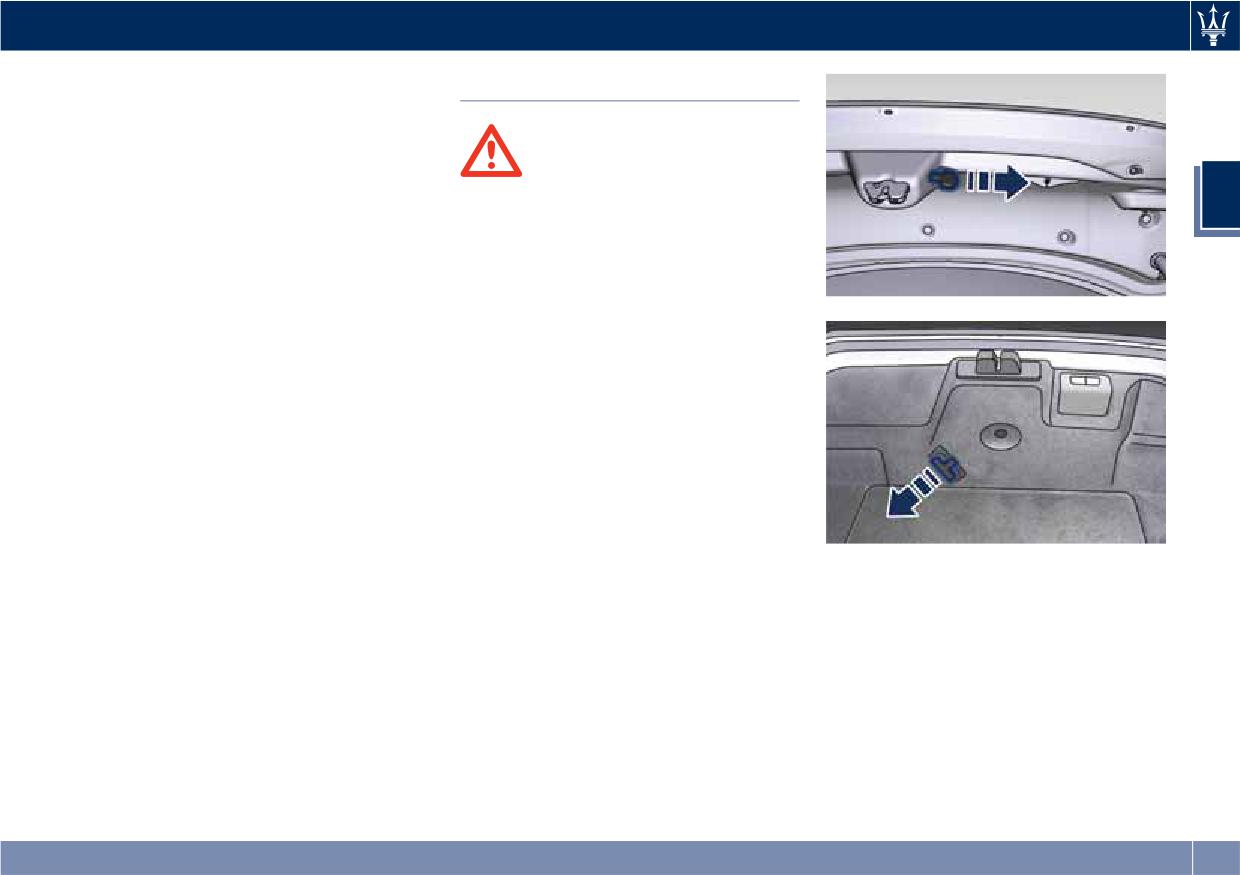
Before Starting
system might stop lid opening or
Trunk Safety
closing movement.
Trunk Lid Emergency Release
WARNING!
If accessing the trunk compartment
Do not allow children to have access
2
from the rear seats, operate the
to the trunk. Always close the trunk
emergency release lever (see the
lid when your vehicle is unattended.
chapter “Trunk Safety” in this section)
Once in the trunk, young children may
in order to lower the rear seat
not be able to escape. If trapped in
backrest (see “Cargo Area” in section
the trunk, children can die from
“Understanding the Vehicle”). If the
suffocation or heat stroke.
power release control operated by
pressing the button on the dome
Trunk Lid Emergency Release
console fails, it may be that the
from inside the Trunk
battery is critical. In this case, it is
possible to temporarily power the
As a security measure, an internal
system by using the battery remote
trunk emergency release lever is built
poles located inside the engine
into the trunk latching mechanism. In
compartment (see “Auxiliary
the event of a person trapped inside
Jump-Start Procedure” in section “In
the trunk, the trunk lid can be simply
an Emergency”). Then it is possible to
opened by pulling on the
With Power Trunk Lid/Hand Free Option
normally open the trunk lid by using
phosphorescent handle shown in
the key fob RKE transmitter. Have the
figures.
vehicle subsequently serviced by an
Authorized Maserati Dealer center in
order to solve the failure.
53
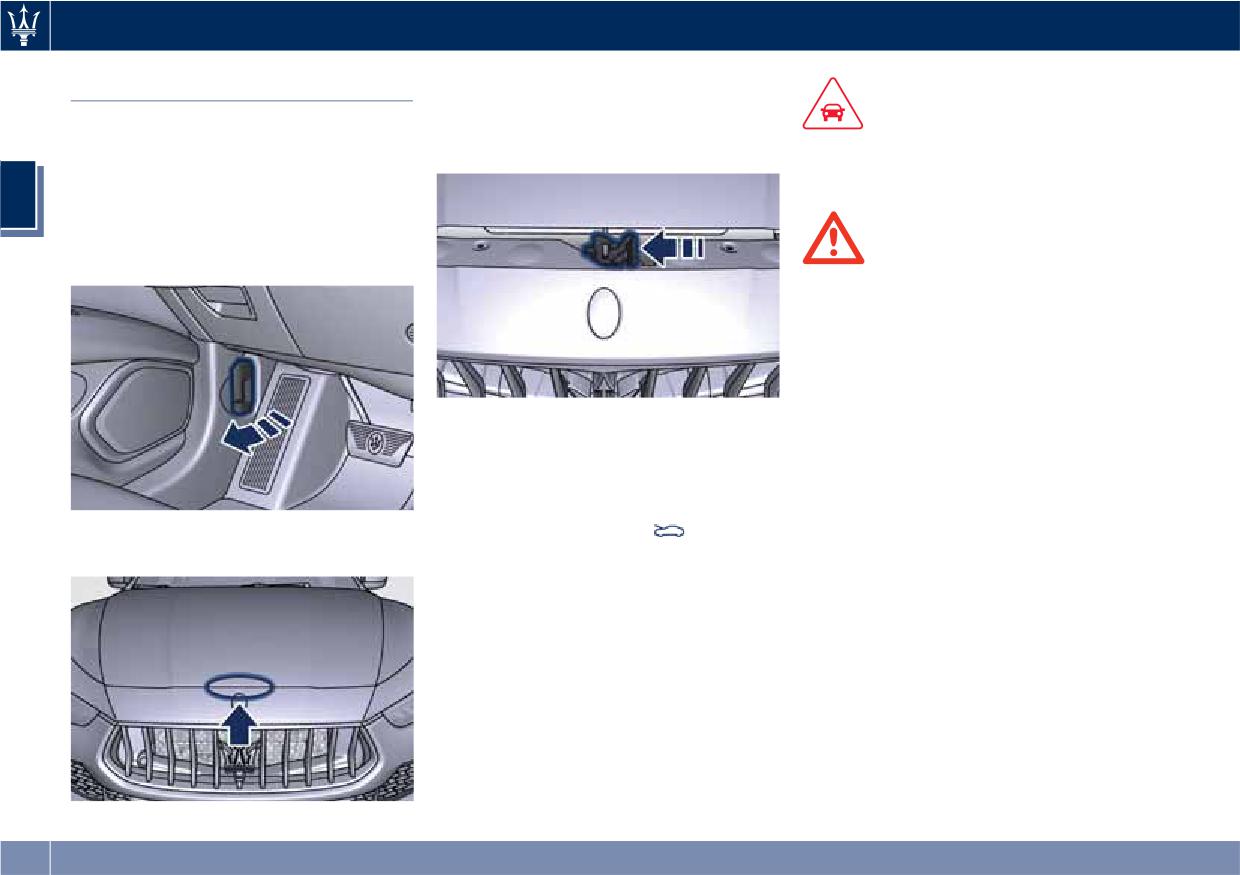
Before Starting
• Slightly lift the hood and push the
Hood Operation
safety catch as indicated by the
CAUTION!
Opening
arrow. The safety catch is located in
the center of the hood.
To prevent possible damage, do not
Two latches must be released to open
slam the hood to close it.
the hood.
2
• From inside the vehicle, pull the
hood release lever located under the
WARNING!
left lower side of the dashboard.
• Be sure the hood is fully latched
before driving your vehicle. If the lid
is not fully latched, it could open
when the vehicle is in motion and
block your vision. Failure to follow
this warning could result in serious
• Lift the hood completely: this
injury or death.
operation is facilitated by two gas
• Gear shifting is always active and
struts keeping the hood in the fully
may be performed even when one
open position.
or more doors, the hood or the trunk
With the ignition switch in RUN
lid are open. Therefore, in these
• Move to the outside and stand in
position, the red symbol
will
conditions, take great care to avoid
front of the vehicle front grille.
display on the instrument cluster with
moving the transmission shift lever
the message indicating that the hood
and so accidentally engage gears.
is open.
Closing
Lower the hood, and then drop it. This
should secure the inclusion of both
latches.
54
Before Starting
desired length to restrain a child seat
cause neck wounds or other injuries in
Occupants Restraint
or secure a large item in a seat.
an accident. Additionally, in an
Systems
Please pay close attention to the
accident, the lower section of the belt
information in this section. It tells you
could press against the upper part of
The listed occupants restraint systems
how to use your restraint system
your stomach rather than the pelvic
are some of the most important safety
properly, to keep you and your
area, causing serious internal injuries.
features in your vehicle:
2
passengers as safe as possible.
• Three-point seat belts (also called lap
If you are carrying children too small
NOTE:
and shoulder belts) for the driver
for adult-sized seat belts, the seat
The advanced air bags have a multi
and all passengers.
belts or the Lower Anchors and Tether
stage inflator. This allows the air bag
• Advanced front air bags for driver
for CHildren (LATCH) feature also can
to have different stages of inflation
and passenger.
be used to hold infant and child
based on the severity and type of
• Supplemental Side Air Bag Inflatable
restraint systems. For more
collision.
Curtains (SABIC) for the driver and
information on LATCH, refer to
passengers seated next to a window.
“Lower Anchors and Tether for
Here are some simple steps you can
CHildren (LATCH)” in this section.
take to minimize the risk of harm
• Supplemental driver side knee air
from a deploying air bag:
bag.
• Supplemental seat-mounted side air
• Children 12 years old and under
bags.
WARNING!
should always ride buckled up in a
To help provide maximum protection,
rear seat.
• An energy-absorbing steering
column and steering wheel.
you are advised to keep the seatback
in the most upright position possible
• Front seat belts incorporate dual
and the seat belt close to your chest
WARNING!
pretensioners that may enhance
and pelvis. If the seat belt is loose, in
occupant protection by managing
Infants in rear facing child restraints
the event of an accident you could
the energy created during an
should never ride in the front seat of
move too far forward and could be
impact.
a vehicle with a passenger Advanced
injured. Travelling with the seatback
Front Air Bag. An air bag deployment
• All seat belt systems (except the
too far reclined could also be
can cause severe or fatal injury to
driver’s) include Automatic Locking
dangerous: even if the seat belts are
infants in that position.
Retractors (ALR), which lock the seat
fastened, they may not work
Do not use child seats or child booster
belt webbing into position by
correctly. In fact, the belt itself may
cushions/backrests in the front
extending the belt all the way out
not be close enough to your body
and then adjusting the belt to the
(Continued)
and, if it is in front of you, it could
55
Before Starting
(Continued)
system to make sure that you are using
Buckle up even though you are an
passenger seat. Occupants in the front
it properly.
excellent driver, even on short trips.
passenger seat must never sit on the
Someone on the road may be a poor
• All occupants should always wear
edge of the seat, leaning toward the
driver and cause an accident that
their lap and shoulder belts properly.
dashboard or otherwise sit out of
includes you. This can happen far
• The driver and front passenger seats
position. The occupants’ back must be
away from home or on your own
2
should be moved back as far as
as upright as comfort allows, and
street.
possible to allow the Advanced
must rest against the seatback with
Front Air Bags room to inflate.
Statistics report that seat belts save
the seat belt properly fastened. Feet
must be on the floor (i.e. not on the
• Do not lean against the door or
lives and help reduce the seriousness
dashboard, seat or out of the
window. Your vehicle has
of injuries in an accident. Some of the
window).
Supplemental Side Air Bag Inflatable
worst injuries happen when people are
Curtains (SABIC) and Supplemental
thrown from the vehicle. Seat belts
Children that are not big enough to
reduce the possibility of ejection and
Seat-Mounted Side Air Bags (SAB),
wear the vehicle seat belt properly (see
the risk of injury caused by striking the
and if deployment occurs, the SABIC
“Child Restraints System” in this
inside of the vehicle.
and SAB air bags will inflate
section) should be secured in the rear
forcefully into the space between
Everyone in a motor vehicle should be
seat in child restraints seats or
belted at all times.
you and the door.
belt-positioning booster seats. Older
• If the air bag system in this vehicle
children who do not use child
Three-Point Seat Belts
needs to be modified to
restraints seats or belt-positioning
All seating positions in your vehicle are
accommodate a disabled person,
booster seats should ride properly
equipped with combination lap and
contact an Authorized Maserati
buckled up in the rear seat. Never
shoulder belts.
Dealer.
allow children to slide the shoulder
The belt retractor is designed to lock
belt behind them or under their arm.
during very sudden stops or impacts.
The safest place for a child that has
This feature allows the shoulder part
outgrown the child safety seat is in the
WARNING!
of the belt to move freely with you
rear seat using the standard seat belt
In an accident, all occupants can suffer
under normal conditions, conforming
in combination with a suitable booster
much greater injuries if not properly
to the body of the occupants.
seat if needed so the seat belt is
buckled up. You can strike the interior
However, in an accident, the belt will
properly located on the child.
of your vehicle or other occupants or
lock and reduce your risk of striking
You should read the instructions
you can be thrown out of the vehicle.
the inside of the vehicle or being
provided with your child restraint
Always be sure you and others in your
thrown out.
vehicle are buckled up properly.
56
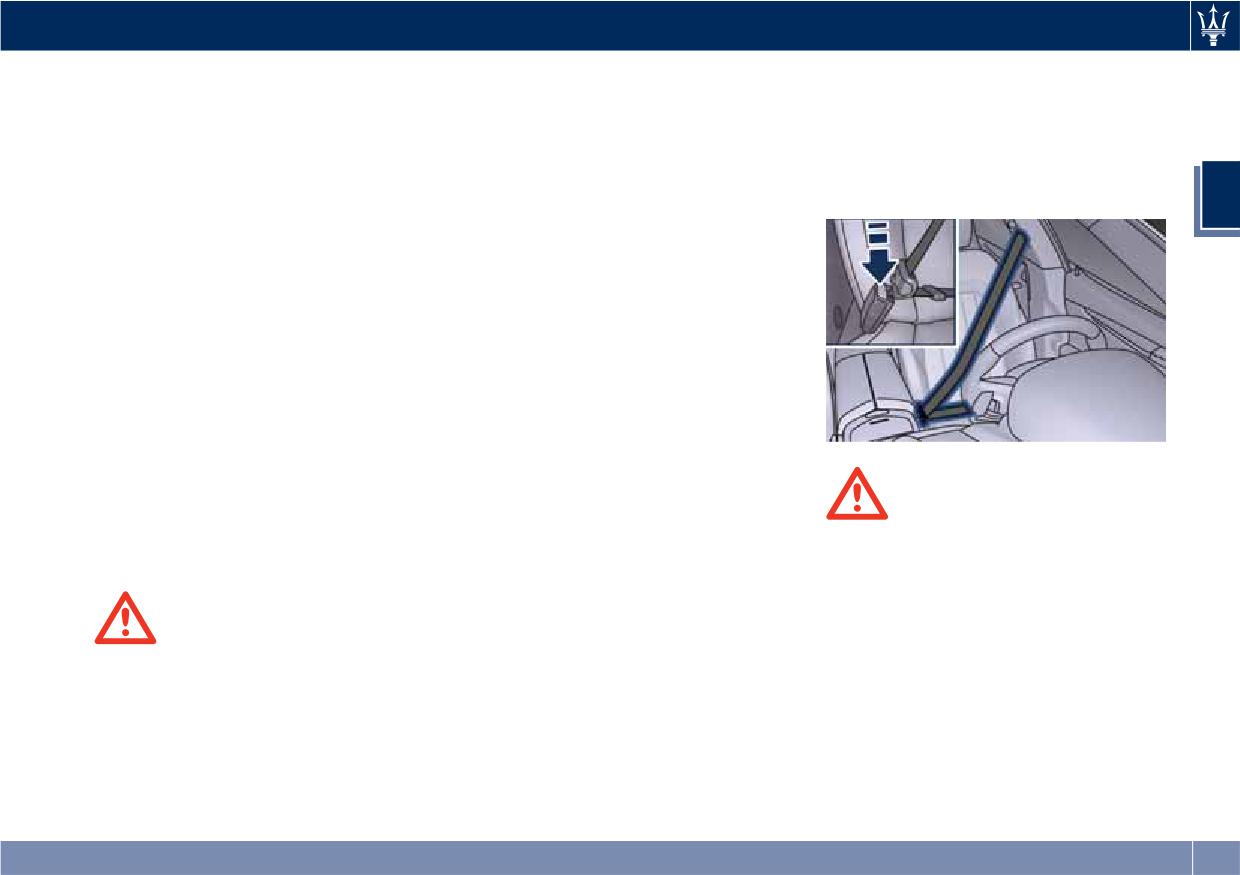
Before Starting
The driver is responsible for
equipped with seats and seat belts.
• Hold the latch plate and pull the belt
respecting, and ensuring that all the
across you, make the belt go around
• Be sure all passengers are in a seat
other occupants of the car also
your body and when the belt is long
and using a seat belt properly.
observe the local regulations
enough to fit, insert the latch plate
• Wearing your belt improperly could
concerning the use of seat belts.
into the buckle until you hear a
make your injuries in an accident
Always fasten the seat belts before
“click.”
2
much worse. You might suffer
starting the vehicle.
internal injuries, or you could even
Seat belts are designed to be used by
slide out of part of the belt. Follow
persons whose physical characteristics
these instructions to wear your seat
(age, height, weight) are provided for
belt properly and to keep your
by established legislation in each
passengers safe, too.
country. Anyone who does comply
with these provisions may not travel in
• Two people should never be belted
the front passenger seat. This also
into a single seat belt. People belted
applies to children. Their heads are
together can crash into one another
proportionally heavier and larger than
in an accident, hurting one another
those of adults, while their bones and
severely. Never use a lap/shoulder
muscles are relatively undeveloped. To
belt for more than one person.
help protect them in case of a
• Remember that, in the event of an
collision, they must use special
accident, the rear seat passengers
WARNING!
restraint or safety systems, even in the
not wearing the seat belts are not
• The seat belts height must be
rear seat area.
only subject to personal injuries but
adjusted only with the vehicle
also represent a serious danger for
stationary.
the front seat occupants.
• Do not bring sharp edges in contact
WARNING!
with a seat belt. This could reduce
Three-Point Seat Belts Use Instructions
their initial strength and cause them
• It is forbidden and dangerous to ride
in a cargo area. In an accident,
• Enter the vehicle and close the door.
to tear in the event of a crash.
people riding in these areas are
Sit back and adjust the seat.
• If a seat belt has been brought in
more likely to be seriously injured or
• The seat belt latch plate is on the
contact with a sharp edge, or has
killed.
rear door pillar, above the seat on
been used to pin something to it,
• Do not allow any person to ride in
the external side.
have it immediately replaced by our
any area of your vehicle that is not
(Continued)
57
Before Starting
(Continued)
rewinding, to prevent it from
Authorized Maserati Dealer.
twisting.
WARNING!
• A belt that is latched into the wrong
• A lap belt worn too high can
buckle will not protect you properly.
increase the risk of internal injury in
The lap portion of the belt could ride
WARNING!
an accident. The belt forces won't
2
too high on your body, possibly
A frayed or torn belt could break in an
impact on the strong hip and pelvic
causing internal injuries. Always
accident and leave you with no
bones, but across your abdomen.
latch your belt into the
protection. Inspect the belt system
Always wear the lap belt as low as
corresponding buckle.
periodically, checking for cuts, frays, or
possible and keep it comfortable.
• A belt that is too loose will not
loose parts. Damaged parts must be
• A twisted belt will not protect you
protect you properly. In a sudden
replaced immediately.
properly. In a collision, it could even
stop, you could move too far
Do not disassemble or modify the
cut into you. Be sure the belt is
forward, increasing the possibility of
system. Seat belt/retractor assemblies
straight. If you can't straighten a
injury. Wear your seat belt
must be replaced by an Authorized
belt in your vehicle, take it to a
comfortably.
Maserati Dealer after an accident if
Service Center immediately.
they have been damaged (bent
• A belt that is worn under your arm is
• Do not use devices (clips, fastenings
retractor, torn belt, etc.).
dangerous. Your body could strike
etc.) that prevent the seat belts from
the inside surfaces of the vehicle in
laying close to the occupants bodies.
Three-Point Seat Belt Height
an accident, increasing head and
Adjustment
neck injury. A belt worn under the
• Never carry children on a passenger’s
arm can also cause internal injuries.
lap.
• The lower part must adhere to the
• Position the shoulder belt on your
WARNING!
pelvis rather than the abdomen of
chest so that it is comfortable and
The seat belts height must only be
the occupant. To fasten the lap belt
not resting on your neck. The
adjusted when the vehicle is
pull slightly up the diagonal portion
retractor will withdraw any slack in
stationary.
of the shoulder belt. To loosen the
the belt.
lap belt if too tight, tilt the latch
The vehicle has a shoulder belt height
• To release the belt, push the red
plate and pull on the lap belt. A snug
adjuster for the driver and front
button on the buckle. The belt will
belt reduces the risk of sliding under
passenger seating positions.
automatically retract to its stowed
the belt in an accident.
Adjust the guide so that the shoulder
position. If necessary, guide the seat
portion of the belt is on the shoulder
belt with your hand while it is
58
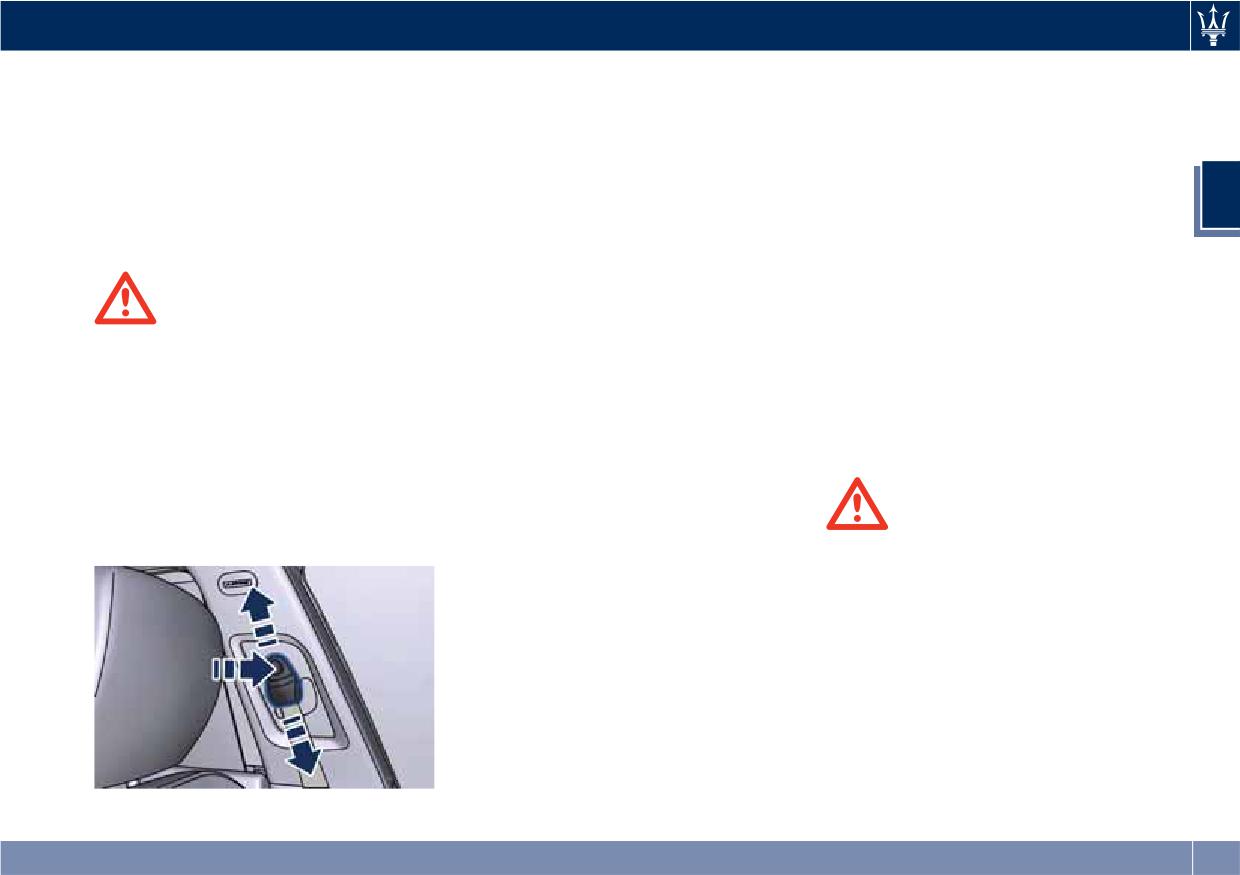
Before Starting
and not falling off of it. The belt
When you release the anchorage try
“Child Restraint Systems” in this
should be close to, but not contacting,
to move the belt slider up and down
section.
the neck.
to make sure that it is locked in
If the passenger seat position should
Push the indicated button above the
position.
not be used to accommodate a child
shoulder belt guide to release the
restraint system, only pull the belt out
Three-Point Seat Belt
anchorage, then move the belt slider
far enough to comfortably wrap
2
Untwisting Procedure
up or down to the fixed position that
around the occupant so as to not
fits you best.
Use the following procedure to
activate the ALR. If the ALR is
untwist a twisted three point belt.
activated, you will hear a ratcheting
sound as the belt retracts. In this case,
• Position the latch plate as close as
allow the belt to retract completely
WARNING!
possible to the anchor point.
and then carefully pull out only the
After the adjustment, always check
• At about 0.5 to 1 ft (15 to 30 cm)
amount of belt necessary to
that the slider to which the oscillating
above the latch plate, grasp and
comfortably wrap around the seat
ring is fixed, is locked into one of the
twist the belt 180 degrees to create
occupant.
positions provided. With the handgrip
a fold that begins immediately
Slide the latch plate into the buckle
released, push again downward to
above the latch plate.
until you hear a "click".
allow the anchoring device to click
• Slide the latch plate upward over the
into place, in the event that it has not
folded belt. The folded belt must
been released in one of the positions
enter the slot at the top of the latch
provided.
WARNING!
plate.
• Remember that, in the event of a
• Continue to slide the latch plate up
violent impact, the passengers in the
until it clears the folded belt.
rear seats who are not wearing the
seat belts are not only subject to
Passengers Seat Belts
personal injury but also represent a
All passengers seat belts are equipped
danger for passengers sitting in the
with Automatic Locking Retractors
front seats.
(ALR) and can be used to secure a
• Always fasten the seat belts.
child restraint system. For additional
• Traveling without the seat belts
information, see “Installing Child
fastened significantly increases the
Restraint Systems using the Vehicle
Seat Belt equipped with ALR” under
(Continued)
59
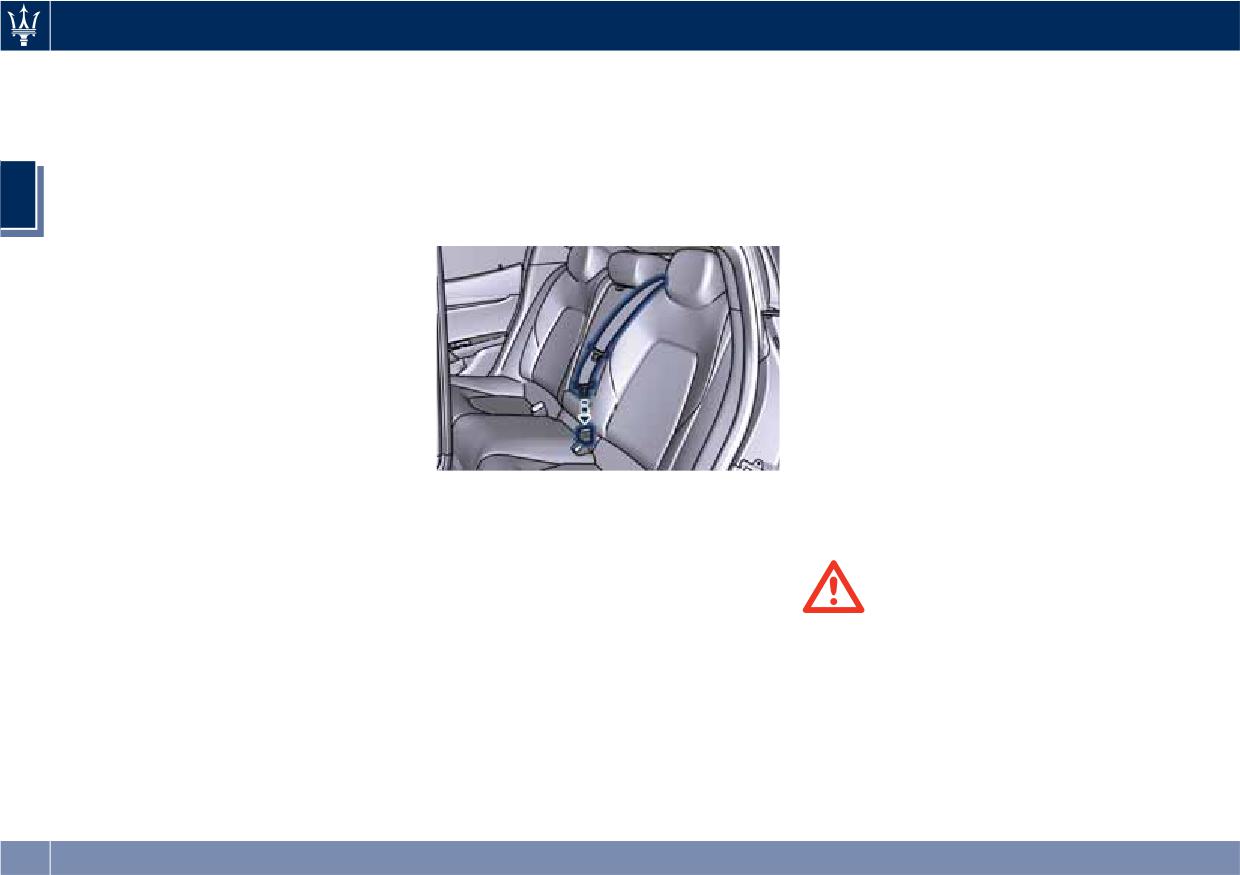
Before Starting
(Continued)
retractor in a normal manner,
Children under 5 ft (1.50 m) in height,
risk of serious injury in the event of
without twisting it.
should be properly buckled up in a
a collision, even with the air bags.
child restraint system.
• Insert the first latch plate located at
• In the event of a collision, the seat
the end of the shoulder portion of
Automatic Locking Mode Setting
belts help reduce the possibility of
the belt inside the left buckle (this is
• Buckle the lap and shoulder belt.
2
the vehicle’s occupants being thrown
the one without the red unlatch
• Grasp the shoulder portion and pull
against the structures of the
button on the top of the slot).
downward until the entire belt is
passenger compartment or out of
extracted.
the vehicle.
• Allow the belt to retract. As the belt
• The air bags are designed to work
retracts, you will hear a clicking
together with the seat belts, not to
sound. This indicates the safety belt
substitute them. The front air bags
is now in the automatic locking
only deploy in the event of certain
mode.
head-on collisions of sufficient
intensity. They may not be activated
Automatic Locking Mode Unsetting
if the vehicle rolls over, or in the
Unbuckle the three point seat belt and
event of rear bumps or minor frontal
allow it to retract completely to
collisions, or non-frontal collisions.
disengage the automatic locking mode
• Insert the latch plate located at the
and activate the vehicle emergency
end of the lap portion of the belt
Seat Belt for Rear Central Seat
locking mode.
inside the right buckle.
The rear central seat belt has two
To unlatch the seat belt, release the
buckles and two metal latch plates; in
right plate of the lap portion by
this way it is possible to release it from
clicking on the red button.
WARNING!
the seat and fold down the long part
• The belt and retractor assembly must
(60) of the seatback (refer to “Cargo
Using Seat Belt in Automatic
be checked by an Authorized
Area” in section “Understanding the
Locking Retractor Mode (ALR)
Maserati Dealer and must be
Vehicle” for further information). To
Use the seat belt automatic locking
replaced if the Automatic Locking
buckle the seat belt proceed as
mode anytime a child safety seat is
Retractor (ALR) feature or any other
follows:
installed in a seating position that has
seat belt function is not working
• Take place in the central seat and
a belt with this feature.
properly.
pull out the belt from the upper
• Failure to replace the belt and
60
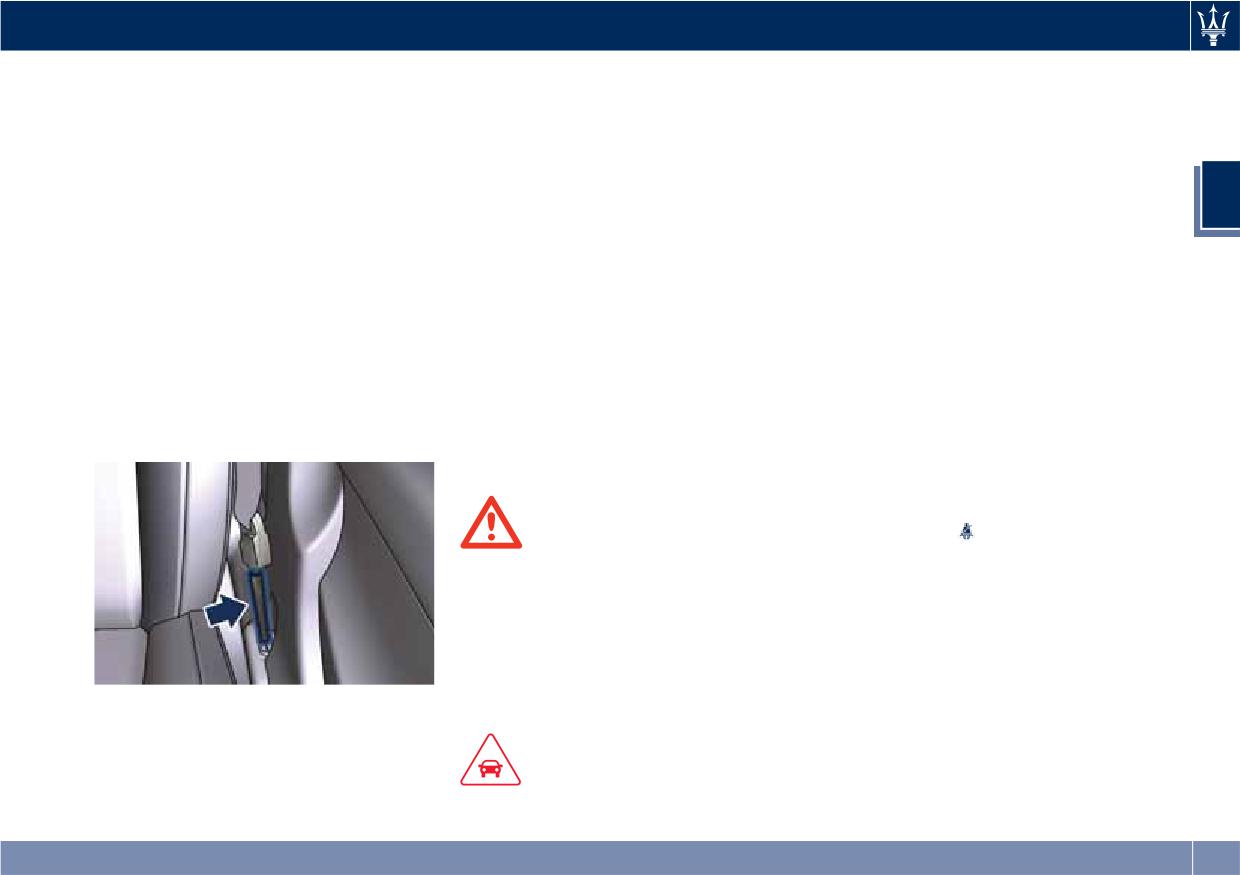
Before Starting
retractor assembly could increase
NOTE:
vibrations or localized heating (over
the risk of injury in collisions.
212°F/100°C for a maximum of 6 hours
To obtain the highest degree of
max.) in the area around the
protection from the action of the
Seat Belt Pretensioners
pretensioning device, wear the seat
pretensioners may damage or deploy
them erroneously. These devices are
belt tight to the chest and pelvis.
The car is equipped with front seat
not affected by vibrations caused by
2
belt pretensioners, that reduce slack in
Pretensioners are triggered by the
uneven road surfaces or low obstacles.
the belts in the event of a severe
Occupant Restraint Controller (ORC). A
Contact the Authorized Maserati
frontal impact. This guarantees the
pretensioner may be used only once
Dealer for any intervention that may
perfect adherence of the seat belts to
because it is a pyrotechnic device.
be required.
the occupants bodies before the
Pretensioners do not require any
restraining action begins.
maintenance or lubrication: any
Enhanced Seat Belt Use
This car is also equipped with a second
changes to its original conditions will
Reminder System (BeltAlert®)
pretensioner in the kick plate area. Its
invalidate its efficiency. If, due to
activation is signalled by the
unusual natural events (floods, sea
BeltAlert® is a feature intended to
shortening of the metal cable and
storms, etc.), the device has been
remind the driver and front passenger
curling of its protective sheath.
affected by water and mud, it must be
to fasten their seat belts.
replaced.
The feature activates with engine
running. If the driver or front seat
passenger is unbelted, the seat belt
reminder light
and the related
WARNING!
message will turn on in the instrument
It is strictly forbidden to remove or
cluster. Message remains on for 5
tamper with the pretensioner
seconds.
components. Any service intervention
must be carried out only by qualified
and authorized personnel. Always
contact an Authorized Maserati
Pretensioners work for all size
Dealer.
occupant restraint systems, including
the child restraint systems.
CAUTION!
Operations which lead to impacts,
61
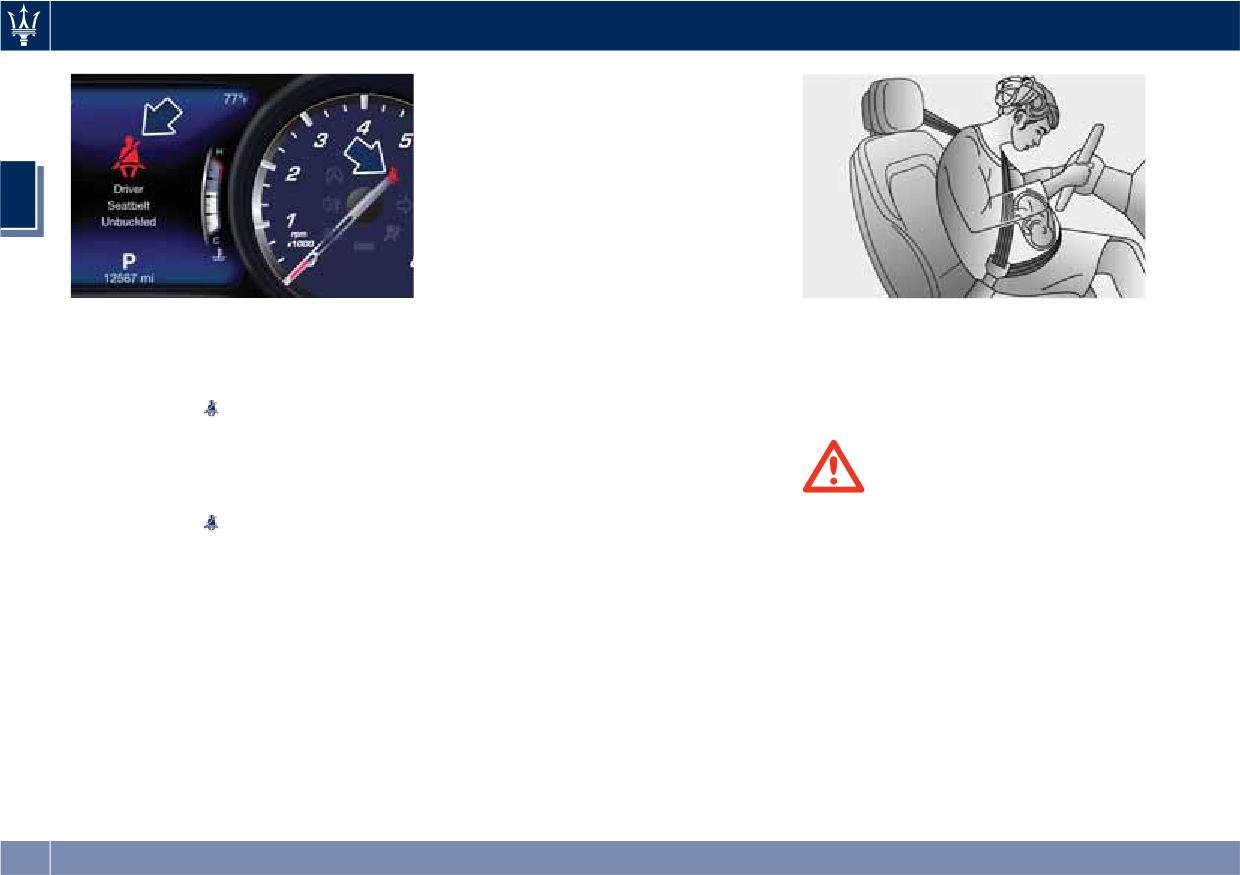
Before Starting
If a front seat belt is unbuckled while
traveling at speeds greater than 5 mph
(8 km/h), BeltAlert® will provide both
audio and visual notification on the
instrument cluster.
2
The front passenger seat BeltAlert® is
not active when the front passenger
seat is not occupied. BeltAlert® may be
triggered when an animal or heavy
object is on the front passenger seat. It
is recommended to restrain pets in the
The BeltAlert® warning sequence
When a safety belt is worn properly, it is
rear seat, in pet harnesses or pet
begins after the vehicle speed is over 5
more likely that the baby will not be hurt
carriers that are secured by seat belts,
mph (8 km/h) for more than 19
in a crash. For pregnant women, as for
and properly stow cargo.
seconds, by blinking the seat belt
anyone, the key to making safety belts
reminder light
and message and by
effective is wearing them properly.
Seat Belts and Pregnant
sounding an intermittent chime.
Women
Once the sequence starts, it will
continue for the entire duration. After
Seat belts should be worn by pregnant
WARNING!
the sequence completes, the seat belt
women: the risk of injury in the event
Pregnant women should observe the
reminder light
remains illuminated
of an accident is greatly reduced for
above indications, as well as local
until the respective seat belts are
them and the unborn child if they are
regulation concerning the use of seat
fastened and the message remains on
wearing a seat belt. The best way to
belts.
for 5 seconds.
protect the fetus is to protect the
If the opened front door on the driver
mother.
or passenger side is closed and the
Pregnant women must position the
occupant presence sensor detects a
lower part of the belt below the belly
status change from occupant not
so that it passes over the pelvis and
present to occupant present the
under the abdomen (see figure).
system will repeat the warning
sequence.
The driver should instruct all other
occupants to fasten their seat belts.
62
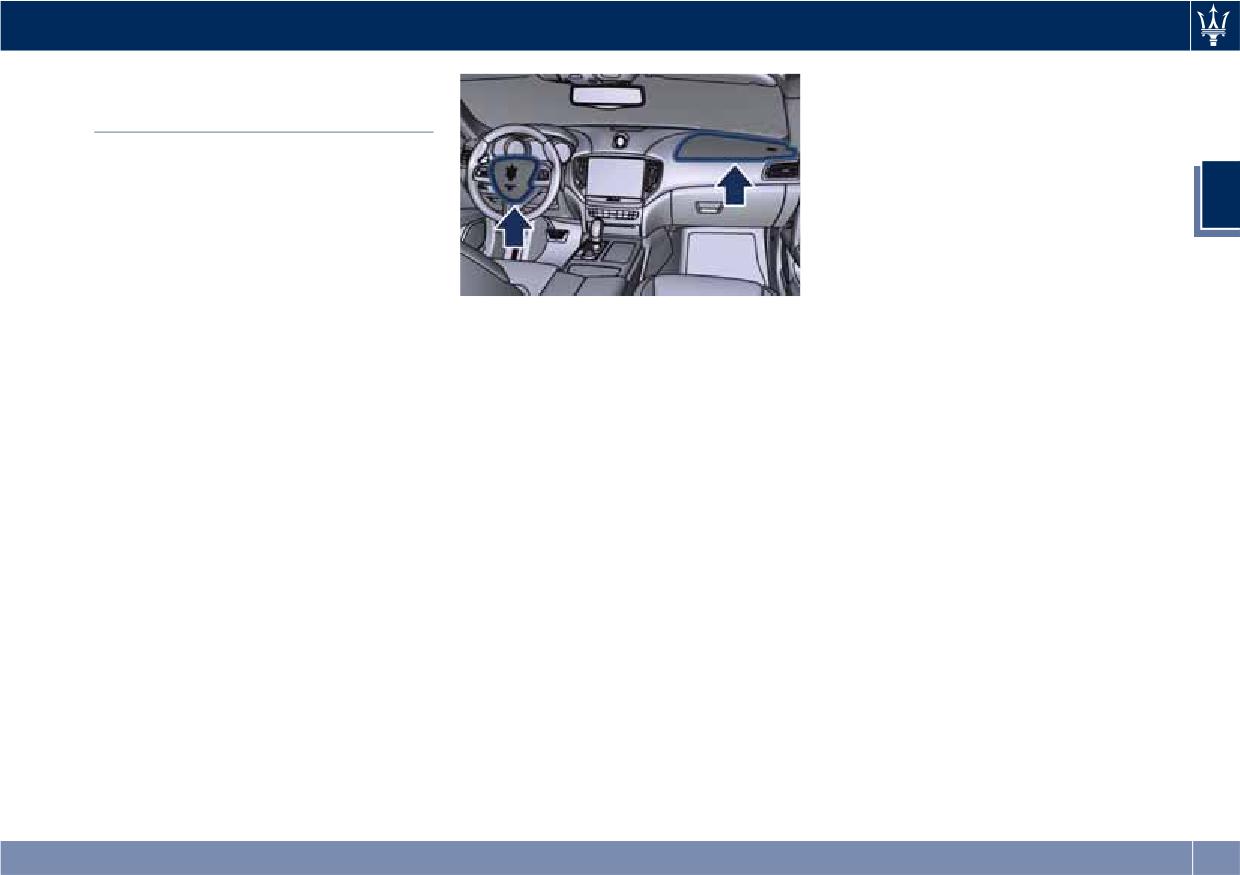
Before Starting
side windows and their covers are also
Supplemental Restraint
labeled “AIR bag”.
System (SRS) - Air Bags
This vehicle is also equipped with
Supplemental Seat-Mounted Side Air
This vehicle has advanced front air
Bags (SAB) for driver and passenger
bags for both the driver and front
passenger as a supplement to the seat
pelvis-chest-shoulder protection
2
during a side impact. The
belt restraint systems.
Supplemental Seat-Mounted Side Air
The driver's advanced front air bag is
Bags are mounted on front seats and
mounted in the center of the steering
are located in the outboard side of the
wheel in the area shown in the
front seats.
picture. On this area is embossed the
The advanced front air bags have a
word “SRS AIRBAG” for easier
multistage inflator design. This allows
NOTE:
recognition.
the air bag to have different rates of
After any accident, the vehicle should
The passenger's advanced front air
inflation based on the severity and
be taken to the Authorized Maserati
bag is mounted in the dashboard,
type of collision.
Dealer immediately.
above the glove compartment in the
This vehicle is equipped with driver
area shown in the picture. On this
and front passenger seat track
area is embossed the word “AIRBAG”
position sensors that may adjust the
Air Bag System Components
for easier recognition.
inflation level of the advanced front
Your vehicle may be equipped with
In addition, the vehicle is equipped
air bags based upon seat position.
the following air bag system
with a supplemental driver side knee
This vehicle is also equipped with a
components:
air bag mounted in the dashboard
front passenger seat belt buckle
• Occupant Restraint Controller (ORC);
below the steering column.
sensor that detects whether the front
• Air bag warning light on the
passenger seat belt is fastened. The
NOTE:
instrument cluster;
seat belt buckle sensor may adjust the
These air bags are designed to the
inflation rate of the advanced front
• Steering wheel and column;
advanced air bag regulatory
air bag.
• Instrument cluster;
requirements.
This vehicle is equipped with
• Driver advanced front air bag;
Supplemental Side Air Bag Inflatable
• Passenger advanced front air bag;
Curtains (SABIC) to protect the heads
• Supplemental driver side knee air
of front and rear outer occupants. The
bag.
SABIC air bags are located above the
63
Before Starting
• Supplemental Seat-Mounted Side Air
information from the front impact
on the passenger side of the
Bags (SAB);
sensors.
dashboard since they could interfere
• Supplemental Side Air Bag Inflatable
The first stage inflator is triggered
with correct inflation of the
Curtains (SABIC);
immediately during an impact that
passenger air bag and also cause
requires air bag deployment. This
serious injury to the occupants.
• Front and side impact sensors;
2
inflation rate is used in less severe
• Do not place anything on or around
• Front seat belt pretensioners;
collisions. A higher energy output,
the air bag covers or attempt to
• Seat belt buckle switch and seat track
inflation rate, is used for more severe
open them manually. You may
position sensors;
collisions.
damage the air bags and you could
• Pyrotechnical charge to cut power
be injured because the air bags may
from the battery; it is located on the
no longer be functional. The
positive battery terminal.
CAUTION!
protective covers for the air bag are
• The electronic control unit provides
designed to open only when the air
for the activation of the
bags are inflating.
WARNING!
pretensioners, front air bags or side
• Always drive with your hands on the
The air bag is not a substitute for the
air bags (front and rear) based on
steering wheel rim, so that the air
seat belts. Correct use of the seat
different criteria, according to the
bag can inflate freely if required.
belts, in combination with the air bag,
type of impact. Failure of one or
During the drive your back must be
will offer protection for the driver and
more systems to activate is not
as upright as comfort allows and be
passenger in the front seat in the
indicative of a system malfunction.
against the seat back with the seat
event of a head-on collision.
• The front and/or lateral air bags may
belt properly fastened.
inflate if the vehicle suffers a violent
• Do not apply stickers or other
Advanced Front Air Bags
impact involving the underbody
objects on the steering wheel, on
Properties
area, for example in case of violent
the dashboard in the passenger’s
impacts against steps, sidewalks,
The advanced front air bag system has
side air bag area, on roof side trims
speed bumps, or when the vehicle
multistage driver and front passenger
or on the seats.
falls into potholes, or similar.
air bags. This system provides air bag
• Do not travel with objects in your lap,
inflation rates which are appropriate
in front of your chest or especially with
to the severity and type of collision as
a pipe, pencil or other objects in your
WARNING!
determined by the Occupant Restraint
mouth. In the event of a collision, the
• Never place objects (e.g. mobile
Controller (ORC), which may receive
intervention of the air bag could result
phones, toys, folders, tablets, ecc..)
in serious injury.
64
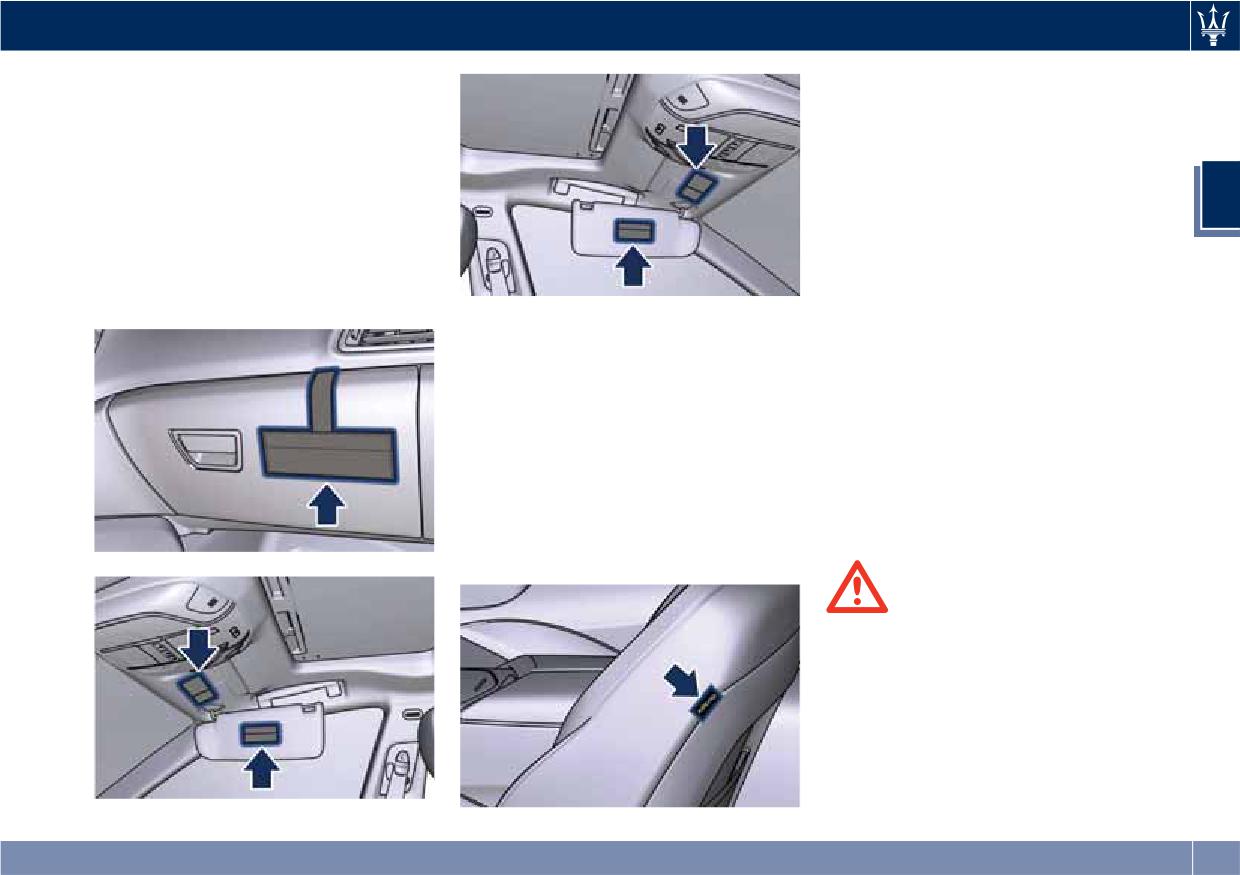
Before Starting
• EXTREME HAZARD! Do not place a
When the air bag deploys, it opens the
rearward-facing infant seat onto the
seam between the front and side of
front seat in front of a not
the seat's trim cover. Each air bag
deactivated air bag (see warning
deploys independently; a left side
plate on the dashboard and above
impact deploys the left air bag only
and behind the sun visors).
and a right side impact deploys the
2
Deployment of the air bag in an
right air bag only.
accident could cause fatal injuries to
Supplemental Side Air Bag Inflatable
the baby regardless of the severity
Curtain (SABIC)
of the collision.
SABIC air bags are designed to protect
Supplemental Air bags
the head of front and rear occupants
Supplemental Seat-Mounted Side Air
in the event of a side impact, thanks
Bags (SAB)
to the wide cushion inflation surface.
Each air bag features inflated
Supplemental Seat-Mounted Side Air
chambers placed adjacent to the head
Bags (SAB) protect the pelvis, chest
of each outboard occupant that
and shoulder area of the occupants in
reduce the potential for side-impact
the event of a side impact of
head injuries. The SABICS deploy
medium/high severity. The SAB is
downward, covering both windows on
marked with “AIRBAG” label sewn
the impact side.
into the outboard side of the front
seats.
WARNING!
• Side air bags also need room to
inflate. Do not rest your head, arms
or elbows on the door, windows or
the area in which the window bag is
located to avoid possible injury
during air bag inflation. Sit upright
in the centre of the seating area.
• Do not cover the front seatbacks
(Continued)
65
Before Starting
(Continued)
front seat belt pretensioners, as
type and location of impact, advanced
with clothes or covers. Do not use
required, depending on the severity
front air bags may deploy in crashes
accessory seat covers or place
and type of impact.
with little vehicle front-end damage
objects between you and the side air
On top of what previously described,
but that produce a severe initial
bags; the performance could be
the characteristics of the collision
deceleration.
adversely affected and/or objects
registered by the sensors and sent to
The side air bags will not deploy in all
2
could cause serious injury.
the control unit of the ORC can also
side collisions. Side air bag deployment
• Do not add roof racks that require
cause a sudden cut of the power from
will depend on the severity and type
permanent attachments (bolts or
the battery, “blowing” the
of collision. Because air bag sensors
screws) for installation on the
pyrotechnical charge located on the
measure vehicle deceleration over
vehicle roof. Do not drill into the
positive battery terminal.
time, vehicle speed and damage
roof of the vehicle for any reason.
merely are not good indicators of
whether or not an air bag should have
CAUTION!
Supplemental Driver Side Knee Air
deployed.
bag
After a collision that has caused the
Seat belts are necessary for your
ignition of the pyrotechnical charge,
protection in all accidents, and also are
The supplemental driver side knee air
this must be replaced at an Authorized
needed to help keep you in position,
bag provides enhanced protection and
Maserati Dealer.
away from an inflating air bag. The
works together with the driver
ORC monitors the readiness of the
advanced front air bag during a
Advanced front air bags are designed
electronic parts of the air bag system
frontal impact.
to provide additional protection by
whenever the ignition switch is in the
supplementing the seat belts in certain
Air Bag Deployment Sensors
RUN position. If the ignition switch is
frontal collisions depending on the
and Controls
in the OFF position, in the ACC
severity and type of collision.
position, or not active, the air bag
Occupant Restraint Controller (ORC)
Advanced front air bags are not
system is not activated and the air
expected to reduce the risk of injury in
The Occupant Restraint Controller
bags will not inflate.
rear, side, or rollover collisions.
(ORC) determines if deployment of the
The ORC contains a backup power
The advanced front air bags will not
front air bags and/or side air bags in a
supply system that may deploy the air
deploy in all frontal collisions,
frontal or side collision or rollover
bags even if the battery has low power
including those that may produce
event is required. Based on the impact
or it becomes disconnected prior to
substantial vehicle damage, for
sensor's signals, a central electronic
deployment. When starting the
example, some pole collisions, truck
ORC deploys the advanced front air
vehicle, ORC turns on the air bag
under rides, and corner impacts. On
bags, SABIC and SAB air bags, and
warning light
on the instrument
the other hand, depending on the
66
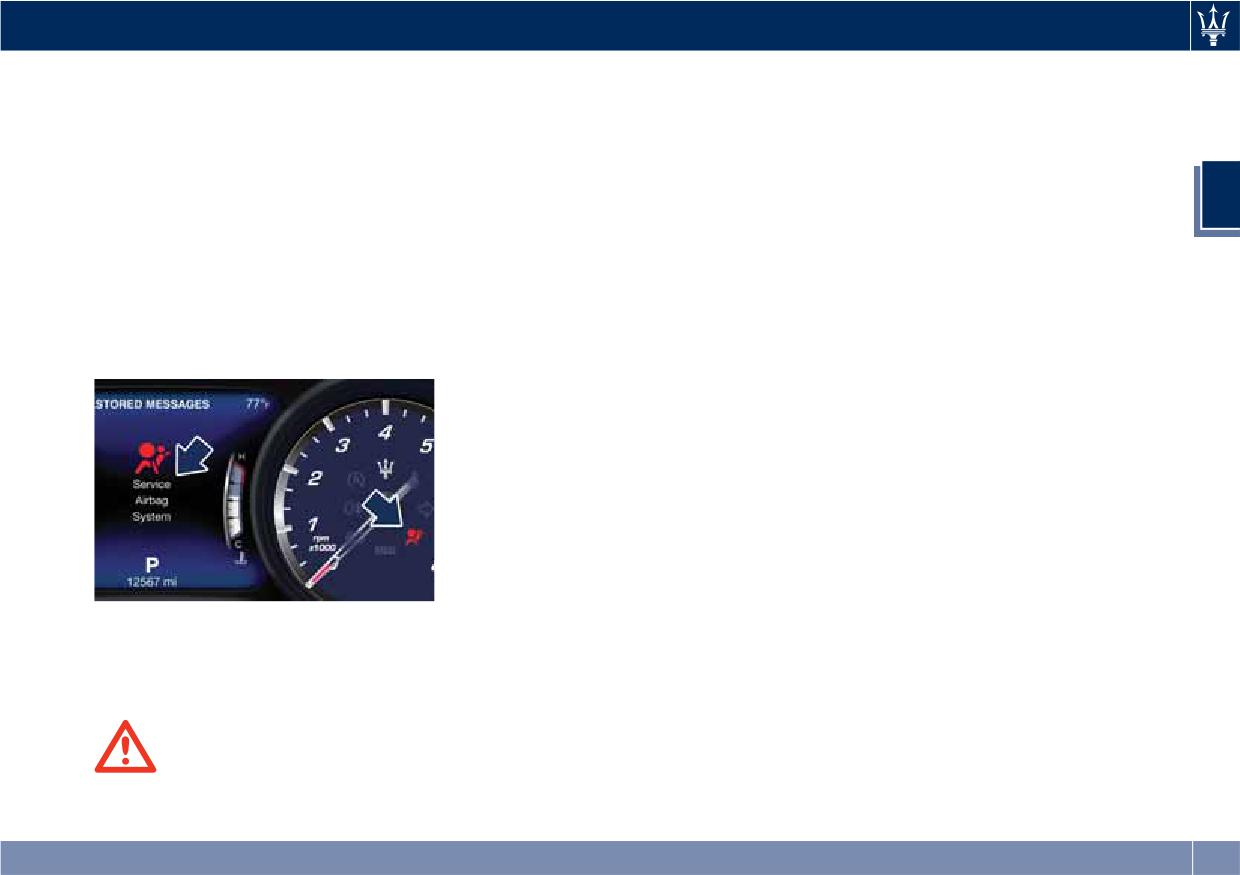
Before Starting
cluster for approximately 4 to 8
vehicle is in complete stop, the air
quantity of nontoxic gas is generated
seconds for a test.
bags can be deployed in case of
to inflate the advanced front air bags.
After the test, the air bag warning
collision. For this reason, children
The steering wheel hub trim cover and
light will turn off. If the ORC, during
must never occupy the front seat in
the upper right side of the dashboard
the diagnosis phase detects a
a rearward facing seat even if the
separate and fold out of the way as
malfunction that could affect the air
car is not moving. Deployment of
the air bags inflate to their full size.
2
bag system, it turns on the air bag
the air bag following an impact
The air bags then quickly deflate while
warning light and the “Service Airbag
could cause fatal injuries to the
helping to restrain the driver and
System” message either momentarily
child. Please note that when the
front passenger. The advanced front
or continuously. The diagnostics also
ignition switch is in the OFF or ACC
air bag gas is vented through the vent
record the nature of the malfunction.
position or is turned off, the air bag
holes in the sides of the air bag. In this
A beep will sound if the light
will not deploy in case of collision.
way, the air bags do not interfere with
illuminates again after initial startup.
Therefore, in these cases, lack of air
your control of the vehicle.
bag deployment is not an indication
Supplemental Driver Side Knee Air
of a system malfunction.
Bag Inflator Unit
• Ignoring the air bag warning light
The supplemental driver side knee air
and message in your instrument
bag unit is located in the dashboard
cluster could mean you won't have
trim beneath the steering column.
the air bags to protect you in the
When the ORC detects a collision
event of a collision. If the light does
requiring the air bag, it signals the
not come on as a bulb check when
inflator units. A large quantity of
the ignition is first turned on, stays
non-toxic gas is generated to inflate
on after you start the engine, or if it
the supplemental driver side knee air
comes on as you drive, have an
The air bag warning light monitors
bag. The trim cover separates and
Authorized Maserati Dealer service
the internal circuits and
folds out of the way allowing the air
the air bag system immediately.
interconnecting wiring associated with
bag to inflate to the full size.
air bag system electrical components.
Supplemental Seat-Mounted Side Air
Front Air Bag Inflator Units
Bag (SAB) Inflator Units
When the ORC detects a collision
The ORC unit determines if a side
requiring the advanced front air bags,
WARNING!
collision requires the side air bags to
it signals the inflator units. A large
• If the ignition switch is in RUN
inflate, based on the severity and type
position, the engine is off and the
of collision. Based on the severity and
67
Before Starting
type of collision, the side air bag
injure you if you are not belted and
• disconnect the battery with a
inflator on the crash side of the vehicle
seated properly, or if items are
pyrotechnic charge.
may be triggered, releasing a quantity
positioned in the area where the side
Air Bag Deployment Result
of nontoxic gas.
curtain air bag inflates. This especially
The advanced front air bags are
The inflating SAB exits through the
applies to children.
designed to deflate immediately after
2
seat seam into the space between the
The SABICs may also help reduce the
deployment.
occupant and the door. The side air
risk of partial or complete ejection of
If you do have a collision which
bag moves at a very high speed and
vehicle occupants through side
deploys the air bags, any or all of the
with such a high force that it could
windows in certain rollover events
following may occur:
injure you if you are not seated
(because equipped with rollover
properly, or if items are positioned in
sensing).
• The nylon air bag material may
the area where the side air bag
sometimes cause abrasions and/or
Front and Side Impact Sensors
inflates. This especially applies to
skin reddening to the driver and
In front and side impacts, impact
children.
front passenger as the air bags
sensors can aid the ORC in determining
deploy and unfold.
Supplemental Side Air Bag Inflatable
appropriate response to impact events.
Curtain (SABIC) Inflator Units
• As the air bags deflate, you may see
Enhanced Accident Response System
some smoke-like particles. The
During collisions where the impact is
In the event of an impact causing air
particles are a normal by-product of
confined to a particular area of the
bag deployment, if the communication
the process that generates the
side of the vehicle, the ORC may
network and the power remains intact,
non-toxic gas used for air bag
deploy the SABIC air bags, depending
depending on the nature of the
inflation. These airborne particles
on the severity and type of collision. In
accident, the ORC will determine
may irritate the skin, eyes, nose, or
these events, the ORC will deploy the
whether the enhanced accident
throat. If these particles settle on
SABIC only on the impact side of the
response system will have to perform
your clothing, follow the garment
vehicle. A quantity of non-toxic gas is
the following functions:
manufacturer's instructions for
generated to inflate the side curtain
cleaning. Do not drive your vehicle
air bag.
• cut off fuel to the engine;
after the air bags have deployed. If
The inflating side curtain air bag
• turn hazard lights and interior lights
you are involved in another collision,
pushes the head/s of the occupant/s
on as long as the battery has power
the air bags will not be in place to
seating in the outside seats from the
or until the ignition switch is turned
protect you.
edge of the headliner out of the way
off;
and covers the window. The air bag
• unlock the doors automatically;
inflates with enough force to possibly
68
Before Starting
pretensioners cannot protect you in
are made. Take your vehicle to an
another collision. Have the air bags,
Authorized Maserati Dealer for any
ENVIRONMENTAL!
seat belt pretensioners, and the
air bag system service. If your seat
Air bag inflation releases a small
front seat belt retractor assemblies
including your trim cover and
amount of powder. This powder is not
replaced by a Maserati Service
cushion needs to be serviced in any
harmful to the environment.
Center. Also, have the Occupant
way (including removal or
2
Restraint Controller (ORC) system
loosening/tightening of seat
serviced as well.
attachment bolts), take the vehicle
to an Authorized Maserati Dealer.
• Have the air bag checked, serviced
WARNING!
and replaced only by an Authorized
• Only Maserati manufacturer
California Proposition 65
Maserati Dealer.
approved seat accessories may be
Operating, servicing and maintaining
used. If it is necessary to modify the
a passenger vehicle or off-road vehicle
Air Bag System Maintenance
air bag system for persons with
can expose you to chemicals including
disabilities, contact an Authorized
such as, engine exhaust, carbon
Maserati Dealer.
monoxide, phthalates and lead, that
which are know to the State of
WARNING!
• If the speedometer, Rev Counter, or
California to cause cancer and birth
• Modifications to any part of the air
any engine related gauges are not
defects or other reproductive harm. To
bag system could cause it to fail;
working, the Occupant Restraint
minimize exposure, avoid breathing
thus you could be injured if the air
Controller (ORC) may also be
exhaust, do not idle the engine except
bag system is not there to protect
disabled. The air bags may not be
as necessary, service your vehicle in a
you. Do not modify the components
ready to inflate for your protection.
well-ventilated area and wear gloves
or wiring. Do not modify the front
Promptly check the fuse block for
or wash your hands frequently when
bumper, vehicle body structure, or
blown fuses. To identify the air bag
servicing your vehicle. For more
add aftermarket side steps or
fuse see “Fuse Replacement” in
information go to:
running boards.
section "Maintenance and Care". See
• It is dangerous to try to repair any
an Authorized Maserati Dealer if the
vehicle
part of the air bag system without
fuse is efficient.
the necessary know-how.
• Do not attempt to modify any part
of your air bag system. The air bag
WARNING!
may inflate accidentally or may not
• Deployed air bags and seat belt
function properly if modifications
69
Before Starting
Transport of persons with
Event Data Recorder (EDR)
NOTE:
disability
EDR data are recorded by your vehicle
This vehicle is equipped with an event
only if a non-trivial crash situation
If it is necessary to modify the
data recorder (EDR). The main purpose
occurs; no data are recorded by the
advanced air bag system of your
of an EDR is to record, in certain crash
EDR under normal driving conditions
vehicle to accommodate a person with
or near crash-like situations, such as an
2
and no personal data (e.g., name,
disabilities, contact an Authorized
air bag deployment or hitting a road
gender, age, and crash location) are
Maserati Dealer.
obstacle, data that will assist in
recorded. However, other parties, such
understanding how a vehicle’s systems
as law enforcement, could combine
have performed.
the EDR data with the type of
The EDR is designed to record data
WARNING!
personally identifying data routinely
related to vehicle dynamics and safety
• The advanced air bag system of your
acquired during a crash investigation.
systems for a short period of time,
vehicle is not designed to protect
typically 30 seconds or less.
adults with disabilities that require
To read data recorded by an EDR,
The EDR in this vehicle is designed to
deactivation of the passenger or
special equipment is required, and
record such data as:
driver air bag.
access to the vehicle or the EDR is
• how various systems in your vehicle
needed.
• If you or another occupant is an
were operating;
In addition to the vehicle
adult with a medical condition that
manufacturer, other parties, such as
requires air bag deactivation, please
• whether or not the driver and
law enforcement, that have the special
contact an Authorized Maserati
passenger safety belts were
equipment, can read the information
Dealer. For further information on
buckled/fastened;
if they have access to vehicle or the
disabled driver or passengers see
• how far (if at all) the driver was
EDR.
depressing the accelerator and/or
brake pedal; and
• As long as the air bag is activated,
persons with disabilities are advised
• how fast the vehicle was traveling.
not to travel in the front seat in
These data can help provide a better
order to avoid the risk of serious
understanding of the circumstances in
injuries or death, even in minor
which crashes and injuries occur.
crashes.
70
Before Starting
not hold the child, no matter how
Convertible child seats can be used
Child Restraint Systems
strong you are. The child and others
either rearward-facing or
NOTE:
could be badly injured. Any child
forward-facing in the vehicle.
riding in your vehicle should always
Convertible child seats often have a
A child restraint system can help
be in a proper restraint system
higher weight limit in the
protect a child in a vehicle so ensure
suitable for the child’s size.
rearward-facing direction than infant
2
that the child restraint selected has a
carriers do, so they can be used
certification label applicable to FMVSS
There are different sizes and types of
rearward-facing by children who have
213 in the U.S., or CMVSS 213 in
restraint systems for children from
outgrown their infant carrier but are
Canada.
newborn size to the child almost large
still younger than at least two years
enough for an adult safety belt.
old.
Everyone in your vehicle must be
Always refer to the manual provided
Children should remain rearward-
buckled up all the time, including
with child seat to ensure it is the
facing until they reach the highest
babies and children. Every state in the
proper type according the travelling
weight or height allowed by their
United States and all Canadian
child. Use the restraint system that is
child seat. Both types of child restraint
provinces require that small children
correct for your child.
systems are fixed to the car by the
ride in proper restraint systems. Please
lap/shoulder belt or the LATCH child
be reminded that you can be
Infants and Child Restraints
restraint anchor system. Refer to
prosecuted for ignoring this law.
Safety experts recommend that
“Lower Anchors and Tether for
Children 12 years or younger should
children ride rearwardfacing in the
CHildren (LATCH)” in this section.
ride properly buckled up in a rear seat,
vehicle until they are two years old or
if available. According to crash
until they reach either the height or
statistics, children are safer when
weight limit of their rear facing child
properly restrained in the rear seats
WARNING!
seat.
rather than in the front.
• Never place a rear facing infant seat
Two types of child restraint systems
in front of an air bag. A deploying
can be used rearward-facing: infant
Passenger Advanced Front Air Bag
carriers and convertible child seats.
WARNING!
The infant carrier is only used
can cause death or serious injury to
a child 12 years or younger,
In a collision, an unrestrained child,
rearward-facing in the vehicle. It is
including a child in a rearward
even a baby, can become a projectile
recommended for children from birth
facing infant seat.
inside the vehicle. The force required
until they reach the weight or height
to hold even an infant on your lap
limit of the infant carrier.
(Continued)
could become so great that you could
71
Before Starting
(Continued)
cushion while the back is against the
NOTE:
• Only use a rearward-facing child
seatback, they should use a
For additional information, refer to
restraint in a vehicle with a rear seat.
belt-positioning booster seat.
www.seatcheck.org or call
The child and belt-positioning booster
1-866-SEATCHECK. Canadian residents
Older Children and Child
seat are fixed to the car by the
should refer to Transport Canada’s
Restraints
lap/shoulder belt.
website for additional information:
2
Children who are two years old or who
Children Too Large for Booster
safedrivers/childsafety/index.htm
have outgrown their rear-facing child
Seats
seat can ride forward-facing in the
Children who are large enough to
vehicle. Forward-facing child seats and
wear the shoulder belt comfortably
convertible child seats used in the
and whose legs are long enough to
WARNING!
forward-facing direction are for
bend over the front of the seat when
• Improper installation can lead to
children who are over two years old or
their back is against the seatback
failure of an infant or child restraint.
who have outgrown the rear-facing
should use the lap/shoulder belt in a
It could come loose in a collision. The
weight or height limit of their
rear seat.
child could be badly injured or killed.
rear-facing child seat.
Follow the restraint manufacturer’s
Children should remain in a
• Make sure that the child is upright in
directions exactly when installing an
forward-facing child seat with a
the seat.
infant or child restraint.
harness for as long as possible, up to
• The lap portion should be low on the
the highest weight or height allowed
• A rearward-facing child restraint
hips and as snug as possible.
by the child seat. These child seats are
should only be used in a rear seat. A
• Check belt fit periodically. A child’s
also fixed to the car by the
rearward-facing child restraint in the
squirming or slouching can move the
lap/shoulder belt or the LATCH child
front seat may be struck by a
belt out of position.
restraint anchorage system. Refer to
deploying passenger air bag, which
• If the shoulder belt contacts the face
“Lower Anchors and Tether for
may cause severe or fatal injury to
or neck, move the child closer to the
CHildren (LATCH)” in this section.
the infant.
center of the vehicle. Never allow a
All children whose weight or height is
child to put the shoulder belt under
above the forward-facing limit for the
Here are some tips on getting
an arm or behind their back.
child seat should use a belt-positioning
the most out of your child
booster seat until the vehicle’s seat
restraint
belts fit properly. If the child cannot sit
• Before buying any restraint system,
with knees bent over the vehicle’s seat
make sure that it has a label
72
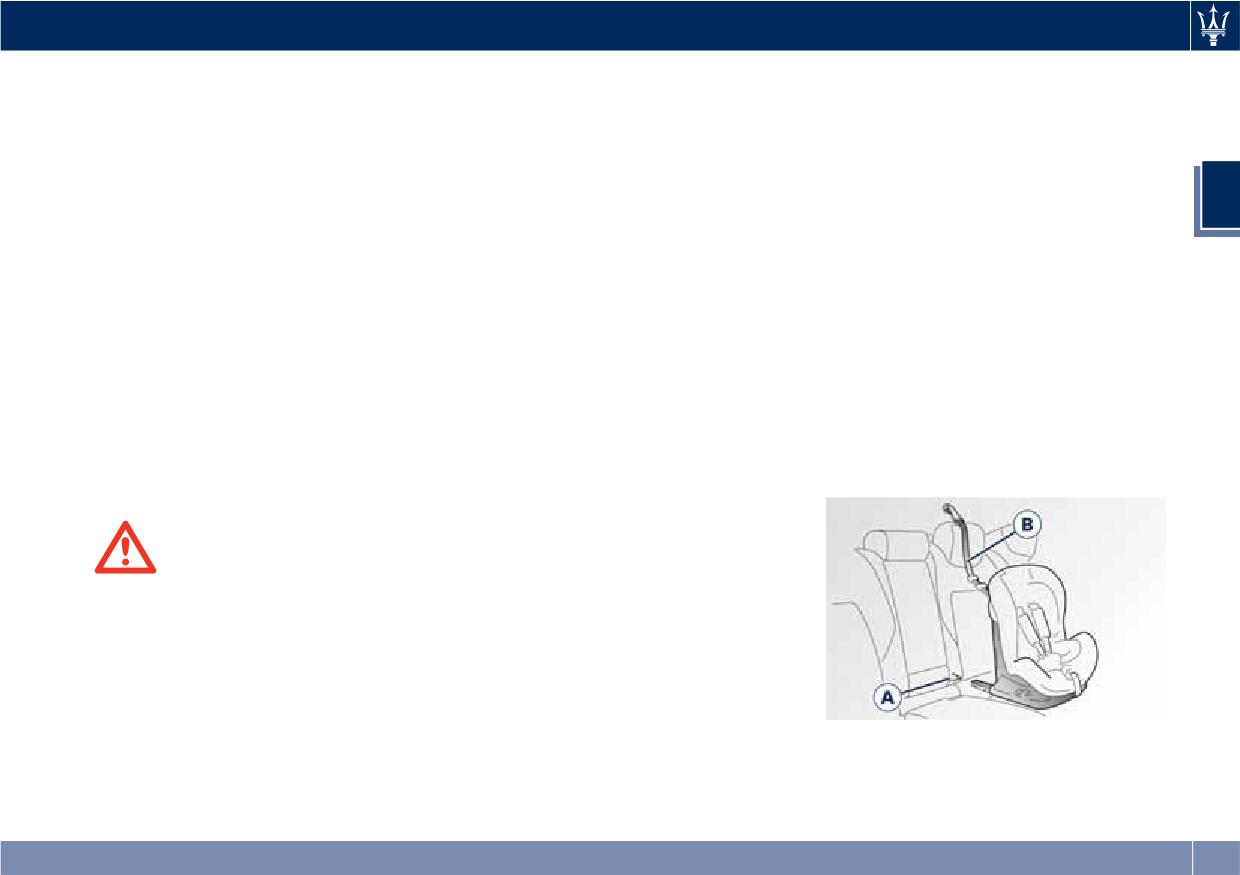
Before Starting
certifying that it meets all applicable
Installing Child Restraint
tighten it around the child restraint
Safety Standards. Maserati also
Systems using the Vehicle Seat
seat. All seat belts will loosen over
recommends that you make sure
time, it is therefore necessary to check
Belt equipped with ALR
that you can install the child
them periodically and set them
All the passenger seat belts are
restraint in the vehicle where you
properly.
equipped with an Automatic Locking
will use it before you buy it.
2
Retractor (ALR) to secure child
Lower Anchors and Tether for
• The restraint system must be
protection through a Child Restraint
Children (LATCH)
appropriate for your child’s weight
System (CRS). These types of seat belts
and height.
Your vehicle's rear outboard seats are
are designed to keep the lap portion
• Check the label on the restraint
all equipped with the child restraint
of the seat belt tight around the child
system for weight and height limits.
anchorage system called LATCH.
restraint seat avoiding to use a locking
The LATCH system allows the child
• Carefully follow the instructions that
clip.
restraint systems to be fixed without
come with the restraint system.
The ALR will make a ratcheting noise
using the vehicle's seat belts, instead
• If installed improperly, it may not
if the entire belt is pulled out of the
fixing the child restraint system to the
work when needed.
retractor in order to enable the belt to
vehicle structure, using lower
• Fit the child into the seat according
retract subsequently. For additional
anchorages A and upper tether strap
to the child restraint manufacturer’s
information on ALR, see “Using Seat
B.
directions.
Belt in Automatic Locking Retractor
(ALR) Mode” in “Occupants Restraint
Systems” in this section.
To install a Child Restraint System with
WARNING!
ALR, pull enough of the belt out of
When your child restraint system is
the retractor leading it through the
not in use, secure it in the vehicle with
belt path of the protection device.
the seat belt or remove it from the
Slide the latch into the buckle until it
vehicle. Do not leave it loose in the
clicks, then remove the entire safety
vehicle. In a sudden stop or accident,
belt from the retractor in order to
it could strike the occupants or
rewound. While rewinding a click will
seatbacks and cause serious personal
indicate the safety belt is now in
LATCH-Compatible child restraint
injury.
Automatic Locking mode.
systems are now available. You should
Exert then a traction on the exceeded
never install LATCH child seats so that
lap section of the belt in order to
73
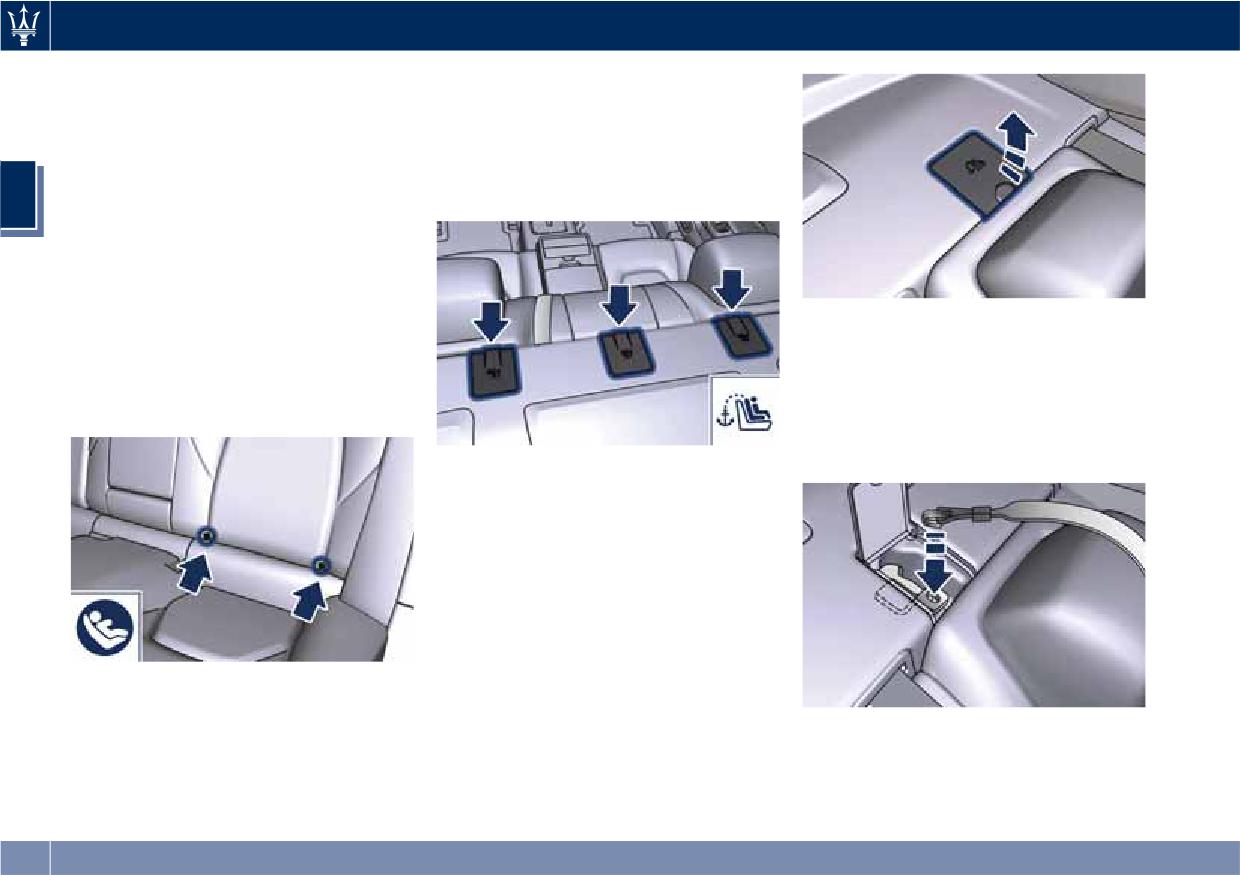
Before Starting
two seats share a common lower
NOTE:
anchorage.
The top tether strap anchorage behind
If your child restraints are not
the central rear seat should be used to
LATCH-Compatible, install the
secure a child restraint system with the
restraints using the vehicle's seat belts.
vehicle's seat belts.
2
Installing a LATCH- Compatible Child
Restraint System
The lower LATCH anchorages are
“U-shaped” metal rings located on the
rear seat where the cushion meets the
seatback just below the symbol shown
• Route the top tether strap to provide
in the picture, but are not visible. You
the most direct path between the
will find them if you run your finger
anchorage and the child restraint
along the intersection of the seatback
system passing it over the headrest.
and seat cushion surfaces.
• Attach the hook of the top tether
strap (provided with the child
restraint system) to the anchor.
To install a LATCH-Compatible child
restraint seat proceed as follows.
• Secure the child seat to the
“U-shaped” lower metal rings
positioned on the rear seat.
• Fix the top tether strap (provided
with the child seat), to the anchor
located in the panel between the
rear seat back and the rear window.
In addition, there are tether strap
• Lift the plastic cover located behind
anchorages behind each rear seat.
the seat where you want to install
• Tighten the upper strap until you
the child restraint system.
reach the tension level
recommended by the restraint
system manufacturer.
74
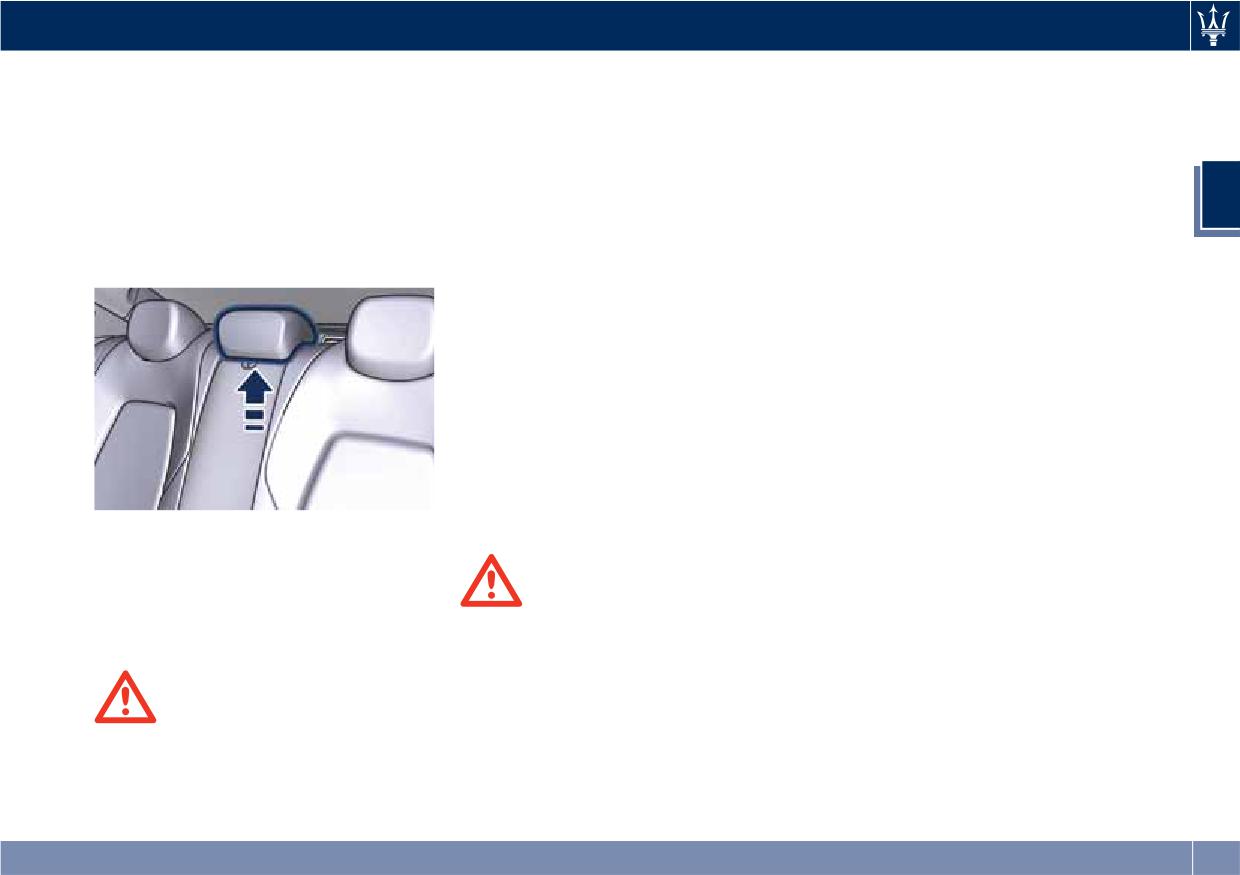
Before Starting
To install a child restraint system in the
the manufacturer must supply with
• Child restraint anchorages are
center seating position route the hook
the child restraint system.
designed to withstand only those
end of the tether strap between the
loads imposed by correctly fitted
• An incorrectly anchored tether strap
seatback and adjustable headrest
child restraints. Under no
could lead to increased head motion
(with the headrest in the full up
circumstances are they to be used
and possible injury to the child. Use
position) then attach the hook to the
for adult seat belts, harnesses, or for
only the anchor position directly
2
anchor located in the panel between
attaching other items or equipment
behind the child seat to secure a
the rear seatback and the rear
to the vehicle.
child restraint top tether strap.
window.
NOTE:
Important Safety Notice for
Transporting Children
• Ensure that the tether strap does not
slip into the opening between the
• Install the child seat on the rear seat
seatbacks as you remove slack in the
as this is the safest position in case of
strap.
collisions.
• When using a LATCH-Compatible
• Keep the instructions in the vehicle
child restraint system, please ensure
together with the documents and
that all seat belts not being used for
this owner’s manual. Do not use a
occupant restraints are stowed and
child restraint system which does not
out of reach of children.
contain instructions for use.
NOTE:
• Every child has to use one child
For any further details on installation
restraint system; never carry two
and/or use of child restraint system,
children using only one child seat.
WARNING!
refer to the instructions provided with
• If using the vehicle seat belt, always
the child seat.
• Improper installation of a child
check that the belt does not restrain
restraint system to the LATCH
the child's throat.
anchorages can lead to failure of an
• Firmly pull the seat belt to check
infant or child restraint. The child
that it is correctly buckled.
WARNING!
could be badly injured or killed.
• A child seat should be fitted only
Follow the child restraint
• Never allow a child to seat
when the car is stationary. Follow
manufacturer's directions exactly
improperly or to unbuckle the seat
the instructions for assembly,
when installing an infant or child
belt while driving.
disassembly and positioning that
restraint system.
75
Before Starting
• Never allow a child to wear the
Transporting Pets
Rear Parking Camera
shoulder portion of the belt under
the arms or behind the back.
Air bags deploying in the front seat
Your vehicle is equipped with a rear
could harm your pet. An unrestrained
parking camera that allows you to see
• Never carry children on your lap, not
pet will be thrown about and possibly
an image on the MTC+ screen of the
even newborns. No one can restrain
injured, or injure a passenger during
rear surroundings of your vehicle
2
a child in the event of an accident.
panic braking or in an accident.
whenever the shift lever is put into R
• In case of accident, replace the child
Pets should be restrained in the rear
(Reverse).
seat with a new one.
seat in pet harnesses or pet carriers
When “Parkview Backup Camera
that are secured by vehicle seat belts.
Delay” mode is enabled, the rear view
image shall be displayed for up to 10
seconds after shifting out of R
(Reverse).
When “Rearwiew Camera Delay”
mode is enabled, the rear view image
shall be displayed for up to 10 seconds
after shifting out of R (Reverse).
To assist the driver during maneuvers
on dead-ends/roads and on
intersections, the vehicle may be
equipped with an optional surround
view camera system. For more details
on this option, see chapter "Surround
View Camera System (optional)" in this
section.
The image will be displayed along with
a caution note to “Check Entire
Surroundings” across the top of the
screen. After five seconds this note will
disappear.
The rear parking camera is located on
the rear of the vehicle above the rear
license plate.
76
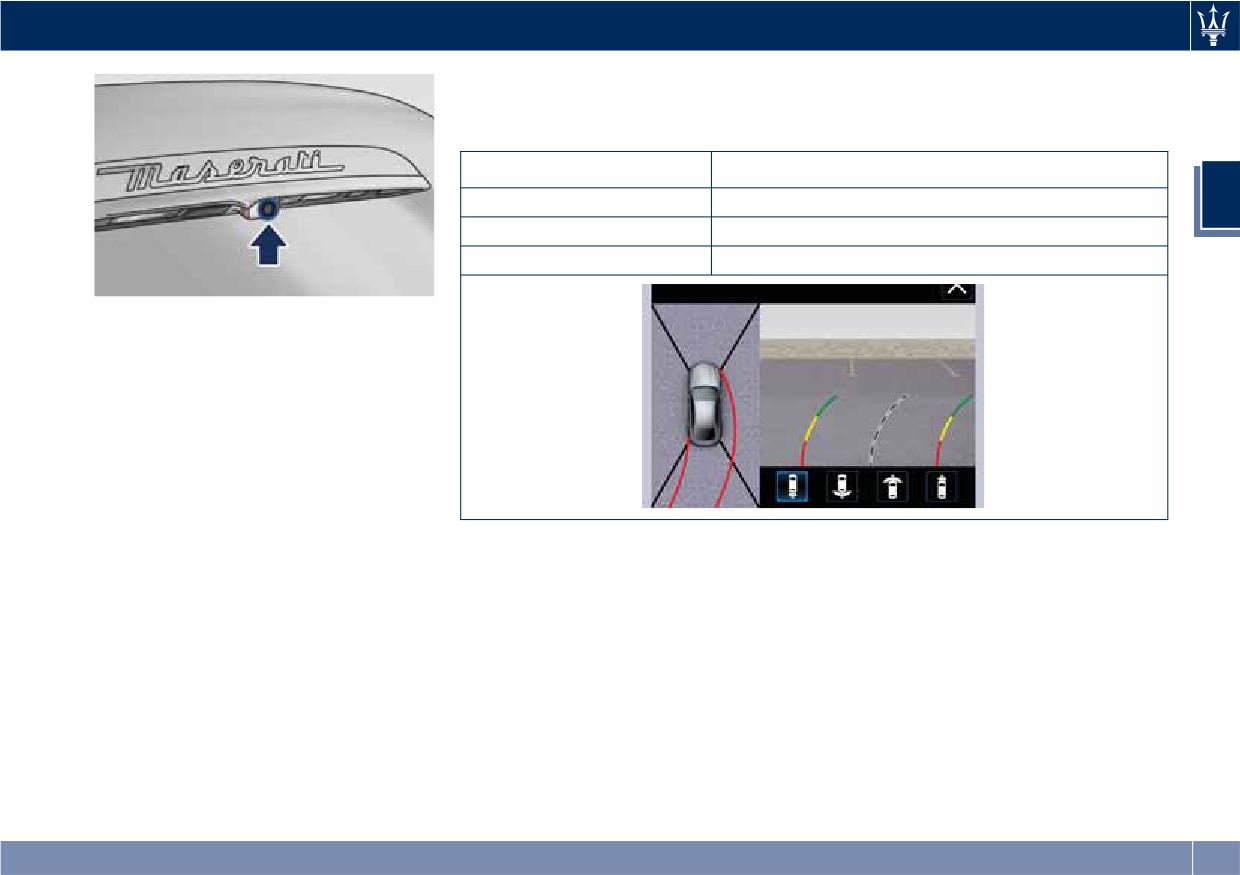
Before Starting
The following table shows the
approximate distances for each zone
and color:
Zone
Distance to the rear of the vehicle
Red
11 - 12 in (28 - 30 cm)
2
Yellow
12 - 78 in (30 cm - 2 m)
Green
78-157 in (2-4 m) or greater
When the shift lever is shifted out of R
(Reverse), the rear camera mode is
exited and the navigation or audio
screen appears again.
When displayed, dynamic grid lines (if
the function is set to “MTC+ Settings”)
will illustrate the width of the vehicle
while a dashed center-line will
indicate the center of the vehicle to
assist with parking or aligning to a
hitch/receiver. The dynamic grid lines
will show separate zones in different
color that will help indicate the
distance to the rear of the vehicle.
77
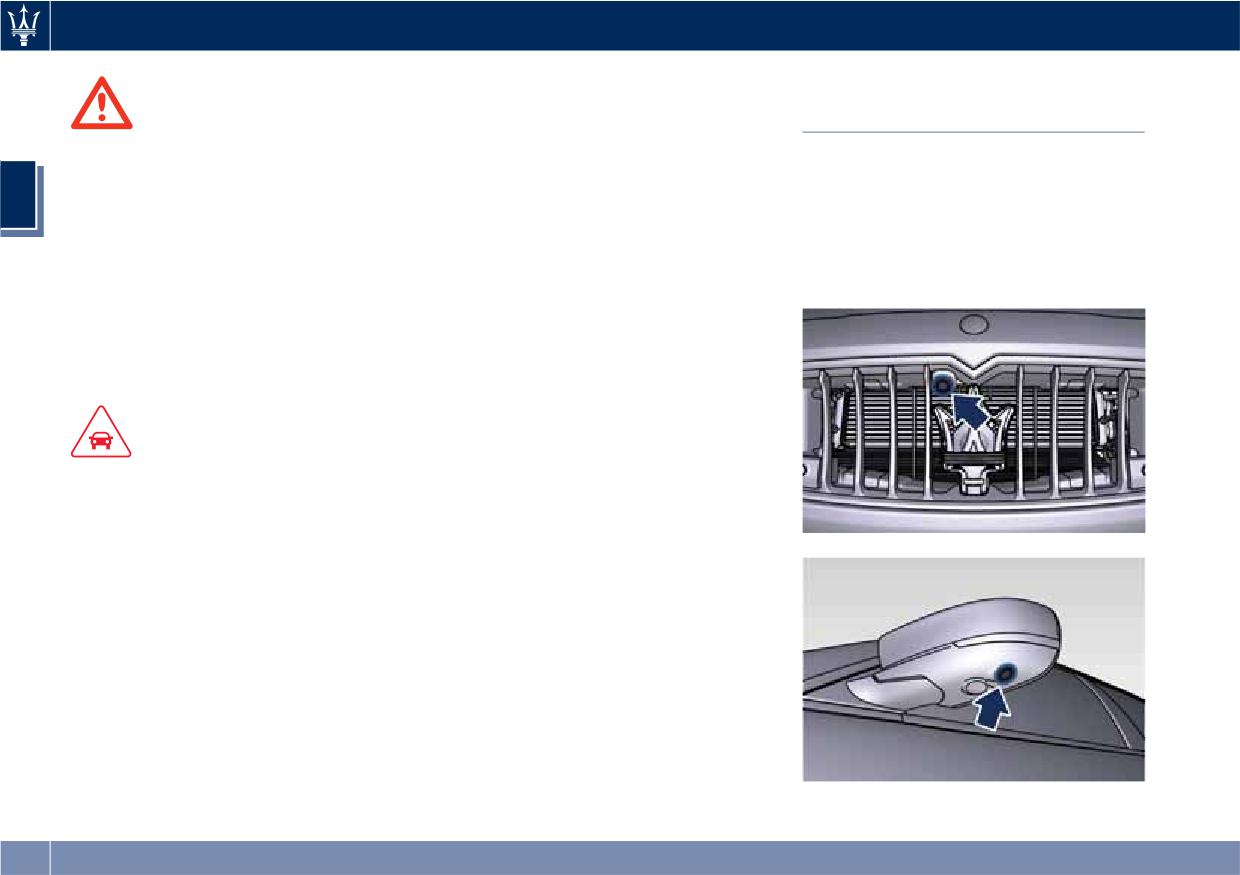
Before Starting
NOTE:
Surround View Camera
If snow, ice, mud, or any other
WARNING!
System (optional)
substance builds up on the camera
Drivers must be careful when
lens, clean the lens, rinse with water,
System components
reversing even when using the rear
and dry with a soft cloth. Do not cover
view camera. Always check carefully
The system uses four cameras to
2
the lens.
behind your vehicle, and be sure to
monitor the area around the vehicle,
check for pedestrians, animals, other
placed on the front grid, under the
vehicles, obstructions, or blind spots
side rearview mirrors and on the trunk
before reversing. You are responsible
lid, between the number plate lights.
for the safety of your surroundings
and must continue to be careful while
reversing. Failure to do so can result in
serious injury or death.
CAUTION!
• To avoid vehicle damage, the rear
camera should only be used as a
parking aid, as the rear camera is
unable to view every obstacle or
object in your drive path.
• To avoid vehicle damage, the vehicle
must be driven slowly when using
the rear camera to be able to stop in
time when an obstacle is seen. It is
recommended that the driver looks
frequently over his/her shoulder
when using the rear camera.
78
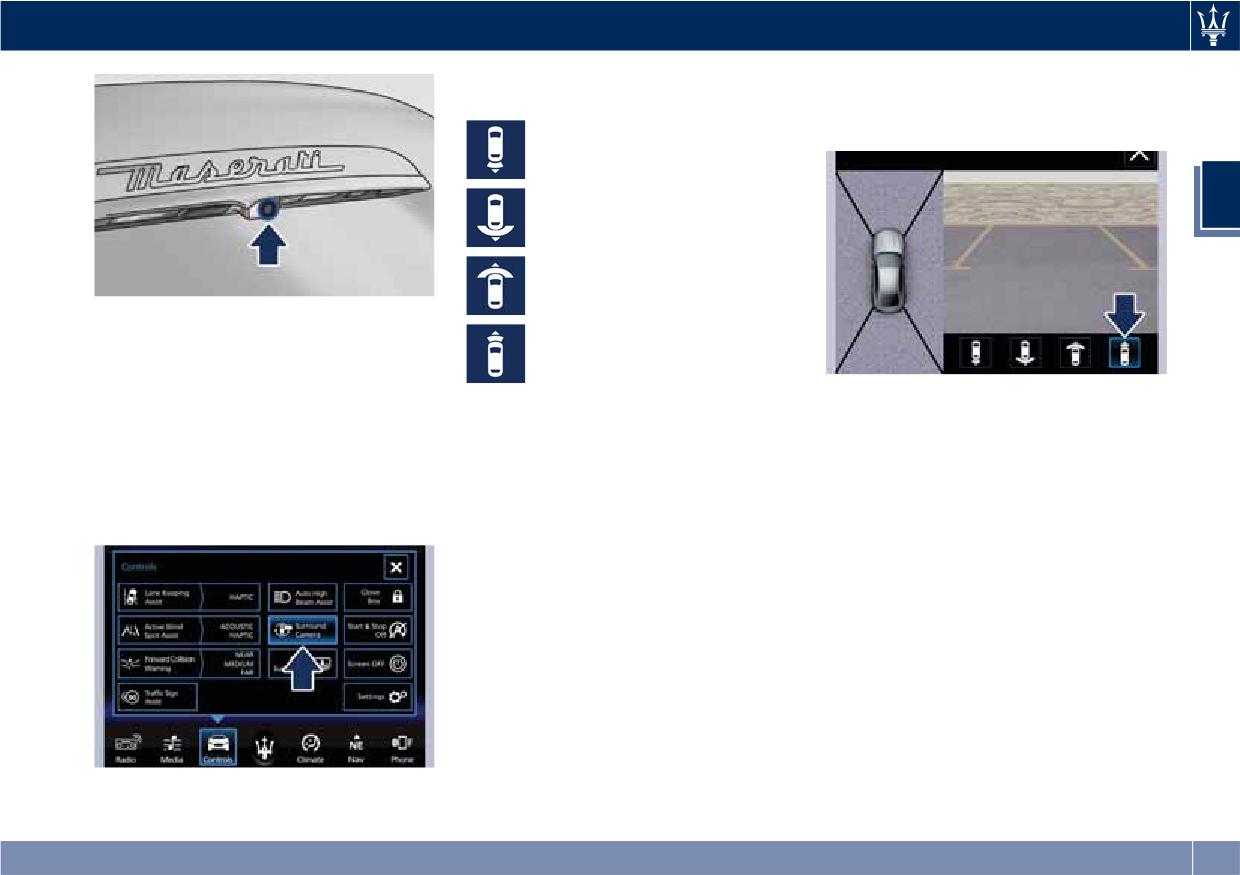
Before Starting
which images to display according to 4
present under the images. The button
possible settings.
will highlight and the type of setting
will appear on each image.
Rear view and top view
Rear cross path view
2
Front cross path view
When the shift lever is shifted to R
(Reverse) position, camera images will
Front view and top view
be automatically displayed on MTC+
display.
In the top view, the vehicle is
Instead, when the shift lever is shifted
In any shift lever condition, when
represented as it is during the
to P (Park), N (Neutral) or D (Drive)
“Surround View” screen is displayed, a
maneuver, therefore any open doors
position, it is possible to activate/
pop-up message will appear in the
will be visible in the image (see
deactivate the system by pressing
upper part for 5 seconds.
example in the figure).
“Surround Camera” softkey in
With gear in P (Park), N (Neutral) or D
To display also the dynamic lines of
“Controls” screen of MTC+ display.
(Drive), the upper right corner of the
the trajectory you are setting, it is
screen will show the “X” key: touch it
necessary to set this function by
to go back to the previous screen of
accessing the “Settings” menu on
MTC+ display, before entering in
MTC+, at “Safety & Driving Assistant”
“Controls”.
item. Once this menu is displayed, it is
The deactivation of the rear
also possible to set the function that
visualization via “X” soft-key is not
delays the exit from this screen in
possible when the transmission is in R
special situations when the gear lever
(Reverse) position.
is in D (Drive), N (Neutral) and P (Park)
Choose the most suitable setting for
position. For further information, see
the situation and the maneuver you
“MTC+ Settings” in section
Once the “Surround Camera” screen is
are performing or going to perform,
“Dashboard Instruments and
by touching the relevant button
Controls”.
displayed, it is possible to choose
79
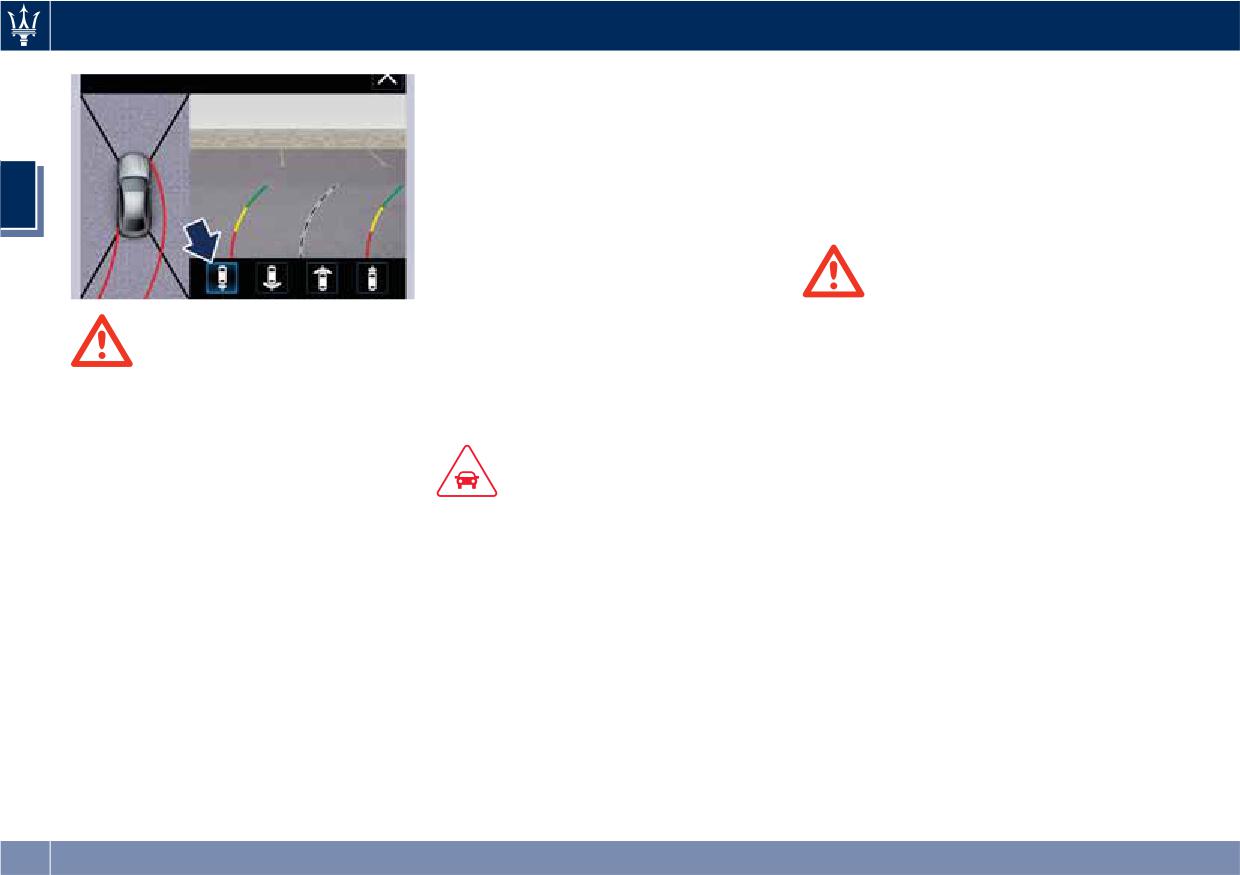
Before Starting
day or under good lighting
NOTE:
conditions. Do not use and rely on
If snow, ice, mud, or any other
the system under poor lighting
substance builds up on the camera
conditions.
lens, clean the lens, rinse with water,
• Distance lines and trajectory lines
and dry with a soft cloth. Do not cover
2
must be used only as a reference and
the lens.
only when vehicle is on a flat
ground. The distance shown on
MTC+ display must be interpreted as
a reference and might be different
WARNING!
from the distance actually present
California Proposition 65
between the vehicle and any
Operating, servicing and maintaining
WARNING!
displayed objects.
a passenger vehicle or off-road vehicle
Failure to follow the precautions
can expose you to chemicals including
• Any obstacles present above the
below might result in serious injury or
such as, engine exhaust, carbon
cameras cannot be detected.
even death.
monoxide, phthalates and lead, that
which are know to the State of
• Drivers must be careful during
California to cause cancer and birth
maneuvers also when using the
CAUTION!
defects or other reproductive harm. To
camera system with surround view.
• To avoid vehicle damage, the camera
minimize exposure, avoid breathing
• Always check carefully the areas
system with surround view should
exhaust, do not idle the engine except
around your vehicle, before
only be used as a parking aid, as the
as necessary, service your vehicle in a
proceeding forward or backward.
cameras are unable to view every
well-ventilated area and wear gloves
• Be sure to always check for any
obstacle or object in your drive path.
or wash your hands frequently when
pedestrians, animals, other vehicles,
servicing your vehicle. For more
• To avoid vehicle damage, the vehicle
obstructions, or blind spots.
information go to:
must be driven slowly when using
• The driver must use the utmost
the camera system with surround
caution while using the system to
view, to be able to stop in time when
vehicle
avoid damage to property or
an obstacle is seen. It is
personal injury.
recommended that the driver looks
• The camera system with surround
frequently over his/her shoulder
view is designed for use during the
when using this system.
80
Before Starting
• Do not run the engine in a closed
Safety Tips
garage or in confined areas any
WARNING!
Transporting Passengers
longer than needed to move your
vehicle in or out of the area.
California Proposition 65
Operating, servicing and maintaining
• If it is necessary to sit in a parked
a passenger vehicle or off-road vehicle
vehicle with the engine running,
2
WARNING!
can expose you to chemicals including
adjust your heating or cooling
• Do not leave children or animals
such as, engine exhaust, carbon
controls to force outside air into the
inside parked vehicles in hot
monoxide, phthalates and lead, that
vehicle. Set the blower at high
weather. Interior heat build-up may
which are know to the State of
speed.
cause serious injury.
California to cause cancer and birth
• If you are required to drive with the
• Never ride in a cargo area, inside of
defects or other reproductive harm. To
trunk open, make sure that all
a vehicle.
minimize exposure, avoid breathing
windows are closed and the climate
exhaust, do not idle the engine except
• Do not allow people to ride in any
control blowers switch is set at high
as necessary, service your vehicle in a
area of your vehicle that is not
speed. DO NOT use the recirculation
well-ventilated area and wear gloves
equipped with seats and seat belts.
mode.
or wash your hands frequently when
• Be sure everyone in your vehicle is
servicing your vehicle. For more
in a seat and using a seat belt
The best protection against carbon
information go to:
properly.
monoxide entry into the passenger
compartment is a properly maintained
vehicle
Exhaust Gas
engine exhaust system.
Whenever detecting a change in the
Vehicle Safety Checks
sound of the exhaust system or
eventual exhaust fumes inside the
Seat Belts
WARNING!
vehicle have the Authorized Maserati
• Inspect the belt system periodically,
Exhaust gases can injure. They contain
Dealer inspect the complete exhaust
checking for cuts, frays, and loose
carbon monoxide (CO), which is
system and adjacent body areas for
parts. Damaged parts must be
colorless and odorless. Breathing it
broken, damaged, deteriorated, or
replaced immediately.
can make you unconscious and can
mispositioned parts.
eventually poison you. To avoid
• Do not disassemble or modify the
Open seams or loose connections
breathing (CO), follow these safety
system.
could permit exhaust fumes to seep
tips:
• If the belt has been sharply pulled,
into the passenger compartment.
for example as the result of an
81
Before Starting
accident, the safety belt, together
vehicle end of life disposal. See
NOTE:
with the anchoring devices, the
The Authorized Maserati Dealer can
anchoring device mounting screws
perchlorate.
provide you with any information
and the pretensioner must be
about the available Maserati floor
completely replaced. Even if the belt
Defroster
mats included in the “Genuine
2
does not present any exterior signs
Check operation by selecting the
Accessories” range.
of wear or damage, it may have lost
defrost mode and place the fan system
its restraining properties.
on high speed (see “Air Conditioning
Air Bag Warning Light
Controls” chapter in section
“Dashboard Instruments and
WARNING!
The
light should illuminate and
Controls”).
Pedals that cannot move freely can
remain lit for a few seconds bulb
You should be able to feel the air
cause loss of vehicle control and
checking when the ignition switch is
directed against the windshield and
increase the risk of serious personal
pushed in RUN position (see
front side windows. Contact
injury.
“Supplemental Restraint System (SRS)
Authorized Maserati Dealer for service
• Always make sure that floor mats
- Air Bags” chapter in this section).
if your defroster is inoperable.
are properly attached to the proper
• If the light
does not illuminate
Floor Mat
fasteners.
while starting, contact the
Always use floor mats designed to fit
• Never place or install floor mats or
Authorized Maserati Dealer.
the footwell of your vehicle. Use only
other floor coverings in the vehicle
• If the light stays on, flickers, or comes
floor mats that leave the pedal area
that cannot be properly secured to
on while driving, have the system
unobstructed and that are firmly
prevent them from moving and
checked by the Authorized Maserati
secured so that they cannot slip out of
interfering with the pedals.
Dealer.
position and interfere with the pedals
• Never put floor mats or other floor
or impair safe operation of your
coverings on top of already installed
vehicle.
floor mats. Additional floor mats and
WARNING!
other coverings will reduce the size
Certain components of this vehicle
of the pedal area and interfere with
such as air bag modules, seat belt
the pedals.
pretensioners, adaptive steering
• Check mounting of mats on a regular
columns, and button cell batteries may
basis. Always properly reinstall and
contain Perchlorate material. Special
secure floor mats that have been
handling may apply for service or
82
Before Starting
removed for cleaning.
Lights and Indicator Lights
monoxide, phthalates and lead, that
which are know to the State of
• Always make sure that objects
• Have someone observe the
California to cause cancer and birth
cannot fall into the driver footwell
operation of exterior lights while
defects or other reproductive harm. To
while the vehicle is moving. Objects
you operate the controls (see
minimize exposure, avoid breathing
can become trapped under the
“Lights” chapter in section
brake pedal and accelerator pedal
“Understanding the Vehicle”).
exhaust, do not idle the engine except
2
as necessary, service your vehicle in a
causing a loss of vehicle control.
• Check turn signal and high beam
well-ventilated area and wear gloves
• Mounting posts must be properly
indicator lights on the instrument
or wash your hands frequently when
installed, if not equipped from the
cluster (see “Instrument Cluster”
servicing your vehicle. For more
factory. Failure to properly follow
chapter in section “Dashboard
information go to:
floor mat installation or mounting
Instruments and Controls”).
can cause interference with the
Door Latches
vehicle
brake pedal and accelerator pedal
• Check for positive closing, latching,
operation causing loss of control of
and locking of doors and trunk lid
the vehicle.
(see “Unlock the Vehicle with Key
fob” chapter in this section).
Tires
Fluid Leaks
• Examine tires for excessive tread
wear and uneven wear patterns.
• Check area under vehicle after
• Check for stones, nails, glass, or
overnight parking for recent fluid
other objects lodged in the tread or
leaks (oil, fuel, etc.).
sidewall.
• If gasoline fumes are detected or
• Inspect the tread for cuts and cracks.
fluid leaks are suspected, contact the
Authorized Maserati Dealer.
• Inspect sidewalls for cuts, cracks and
bulges.
• Check the wheel nuts for tightness.
WARNING!
• Check the tires (see “Tire Inflation
California Proposition 65
Pressure” chapter in section
Operating, servicing and maintaining
“Features and Specifications”) for
a passenger vehicle or off-road vehicle
proper cold inflation pressure.
can expose you to chemicals including
such as, engine exhaust, carbon
83
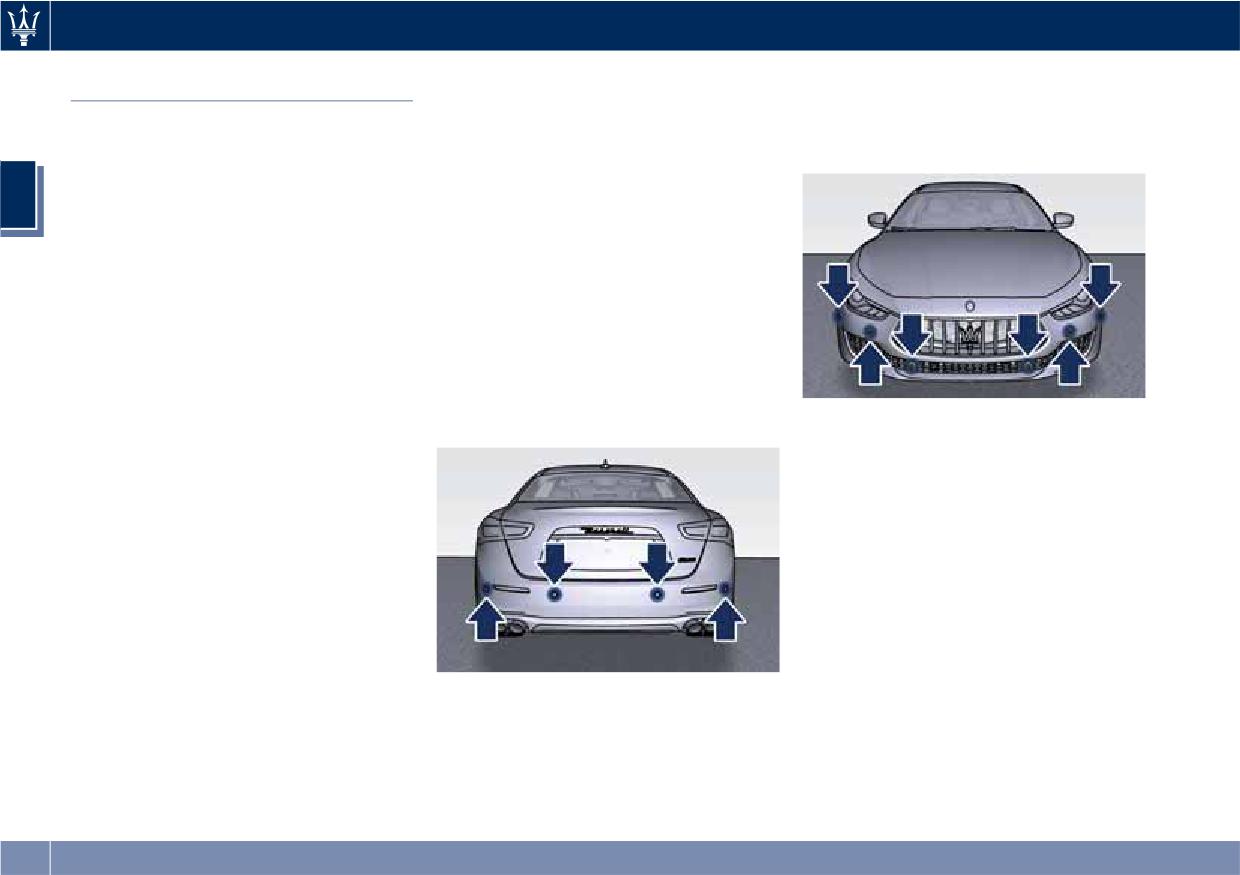
Before Starting
increased to approximately 7.5 mph
cm) from the front bumper in the
Park Assist (if equipped)
(12 km/h) or above. The system will
horizontal direction, depending on the
The Park Assist (also called
become active again if the vehicle
location, type and orientation of the
“ParkSense”) system provides visual
speed is decreased to speeds less than
obstacle.
and audible indications of the distance
approximately 6.2 mph (10 km/h).
between the rear and/or front bumper
2
Park Assist Sensors
and a detected obstacle when backing
up or moving forward, e.g. during a
The four Park Assist sensors, located in
parking maneuver.
the rear bumper, monitor the area
Besides the use of the sensors available
behind the vehicle that is within the
on the bumpers and of the rear
sensors' field of view. The sensors can
parking camera, the vehicle may be
detect obstacles up to approximately
equipped with surround view cameras
78 in (200 cm) from the rear bumper in
(optional) to assist the driver during
the horizontal direction, depending on
maneuvers on dead-ends/roads and on
the location, type and orientation of
intersections. For more details on this
the obstacle.
Park Assist Warning Messages
option, see chapter "Surround View
Display
Camera System (optional)" in this
The Park Assist Warning screen will
section.
only be displayed if “Sound + Display”
Refer to “Park Assist System Usage
is selected from the MTC+ System.
Precautions” for limitations of this
Refer to “MTC+ Settings” in section
system and recommendations.
“Dashboard Instruments and Controls”
Park Assist system will retain the last
for further information.
system state (enabled or disabled)
The Park Assist Warning screen is
from the last ignition cycle when the
located on the instrument cluster
ignition is changed to the RUN
display.
position.
It provides visual warnings to indicate
Park Assist system can be active only
The six Park Assist sensors, located in
the distance between the rear bumper
when the shift lever is in R (Reverse) or
the front bumper, monitor the area in
and/or front bumper and the detected
D (Drive).
front of the vehicle that is within the
obstacle.
If Park Assist is enabled at one of these
sensors' field of view.
The warning display will turn on
shift lever positions, the system will
The sensors can detect obstacles up to
indicating the system status (ready or
remain active until the vehicle speed is
a distance of approximately 50 in (120
off) when the vehicle is in R (Reverse)
84
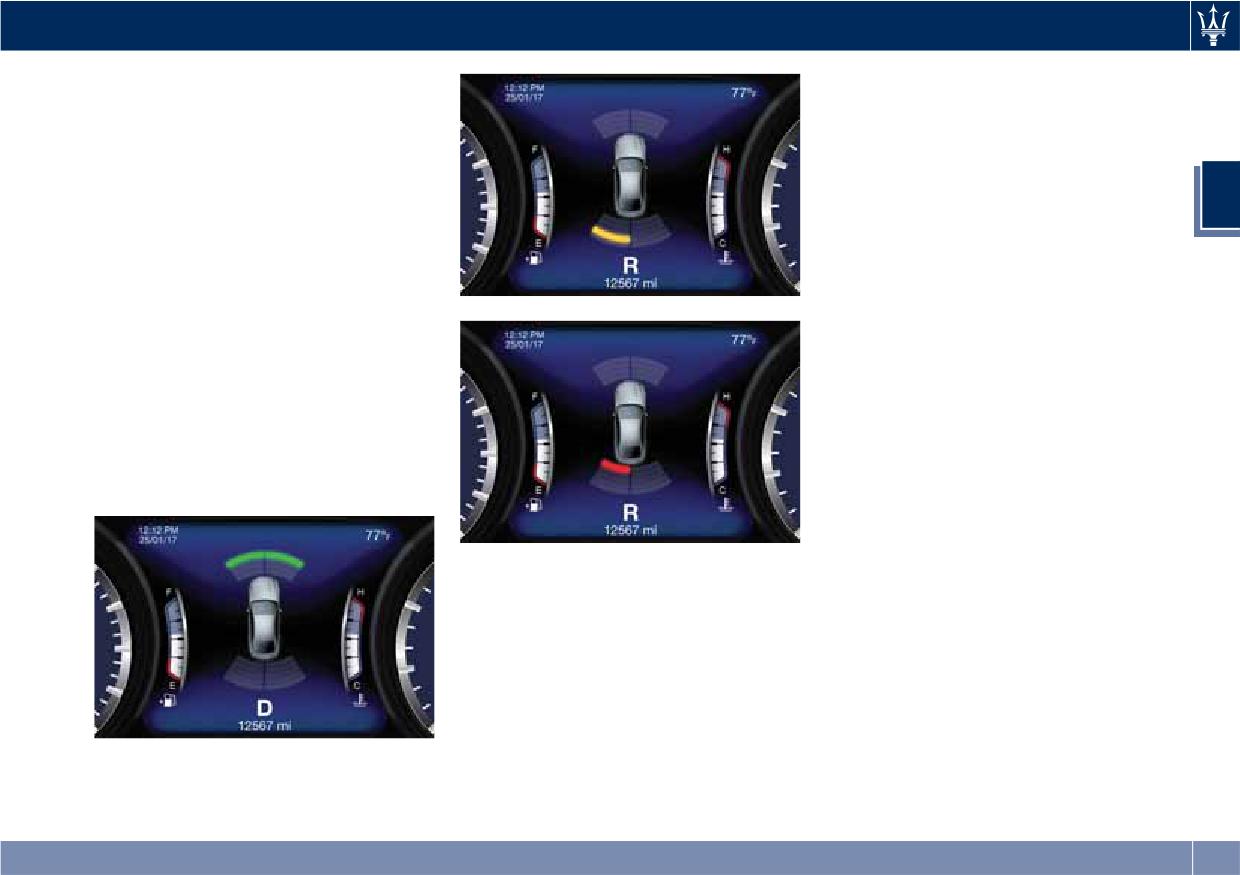
Before Starting
or in D (Drive) and an obstacle has
one flashing red arc only, combined
been detected.
with a continuous sound.
The detection area in front of the
The following charts show the
vehicle is divided into two parts with
warning alert visualization when the
four arcs while the two detection
system is detecting an obstacle.
areas behind the car into five arcs.
2
The system will indicate a detected
obstacle by displaying arcs with fixed
or flashing light and a characteristic
sound according to the obstacle
distance. The color indicates the
distance and the arc indicates the
position of the detected obstacle. The
green color of the outer arc indicates
the maximum distance, the amber
color of the middle arcs indicates the
medium distance, while the red color
of the nearest arc indicates the
minimum distance.
As the vehicle moves closer to the
object, the instrument cluster will
display the arc moving towards the
vehicle and the sound tone will
change from single to slow, to fast
and to continuous.
The vehicle is close to the obstacle
when the instrument cluster displays
85
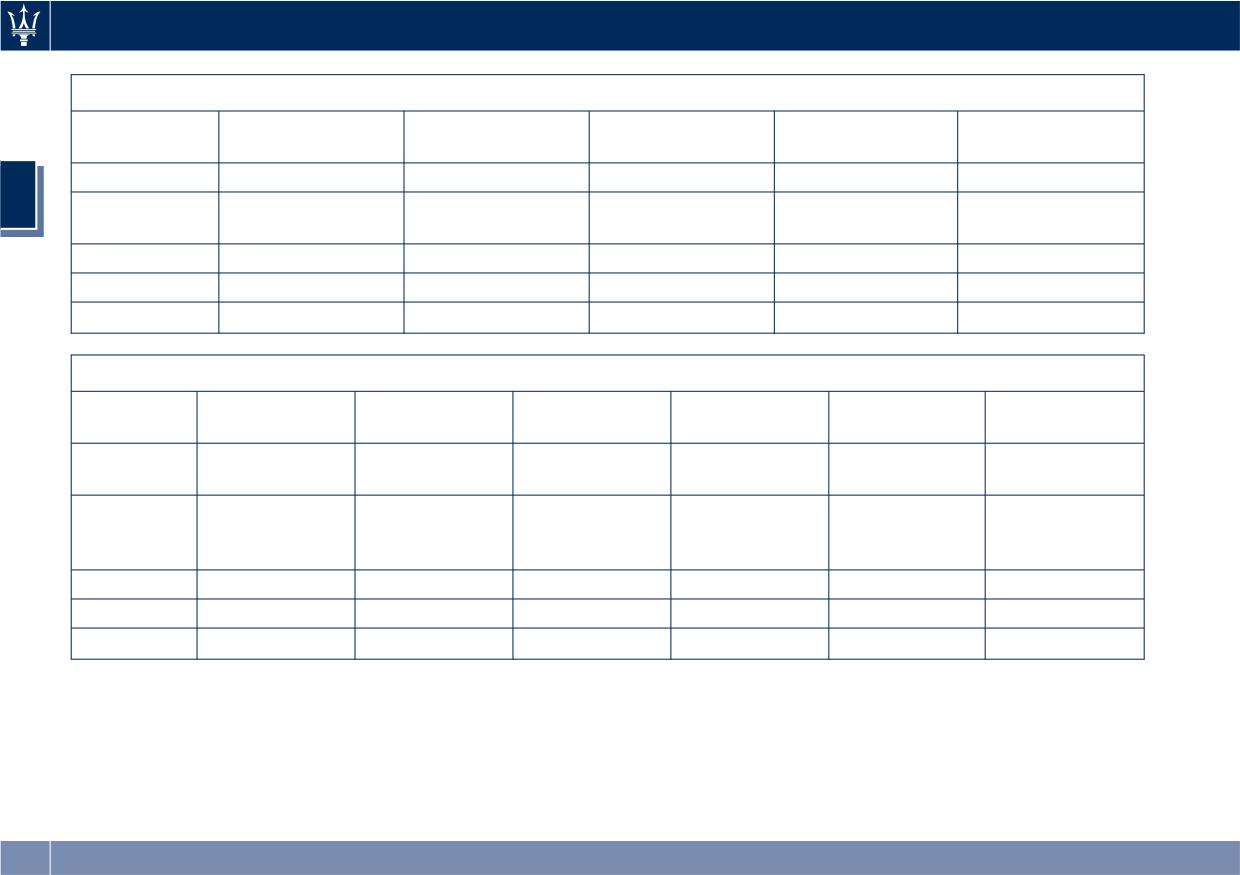
Before Starting
Front Sensors - Warning Alerts
More than 50 in
50-40 in
40-24 in
23.6-12.2 in
Less than 12 in
Front distance
(120 cm)
(120-101 cm)
(100-61 cm)
(60-31 cm)
(30 cm)
Audible Alert
None
None
Slow
Fast
Continuous
2
Arc in left and
None
4th
3rd
2nd
1st (inner most)
right areas
Light type
None
Solid
Solid
Flash
Flash
Arc color
-
Green
Amber
Amber
Red
Radio sound
Active
Active
Mute
Mute
Mute
Rear Sensors - Warning Alerts
Rear
More than 78 in
78-59.4 in
60-40 in
40-24 in
23.6-12.2 in
Less than 12 in
distance
(200 cm)
(200-151 cm)
(150-101 cm)
(100-61 cm)
(60-31 cm)
(30 cm)
Audible
None
Single
Slow
Slow
Fast
Continuous
Alert
Arc in left
and right
None
5th
4th
3rd
2nd
1st (inner most)
areas
Light type
None
Solid
Solid
Solid
Flash
Flash
Arc color
-
Green
Amber
Amber
Amber
Red
Radio sound
Active
Mute
Mute
Mute
Mute
Mute
NOTE:
• Maserati reserves the right to change specifications without prior notification.
• Park Assist will turn off the front park assist audible alert (chime) after approximately 4 seconds when an obstacle has
been detected, the vehicle is stationary, and brake pedal is applied.
86
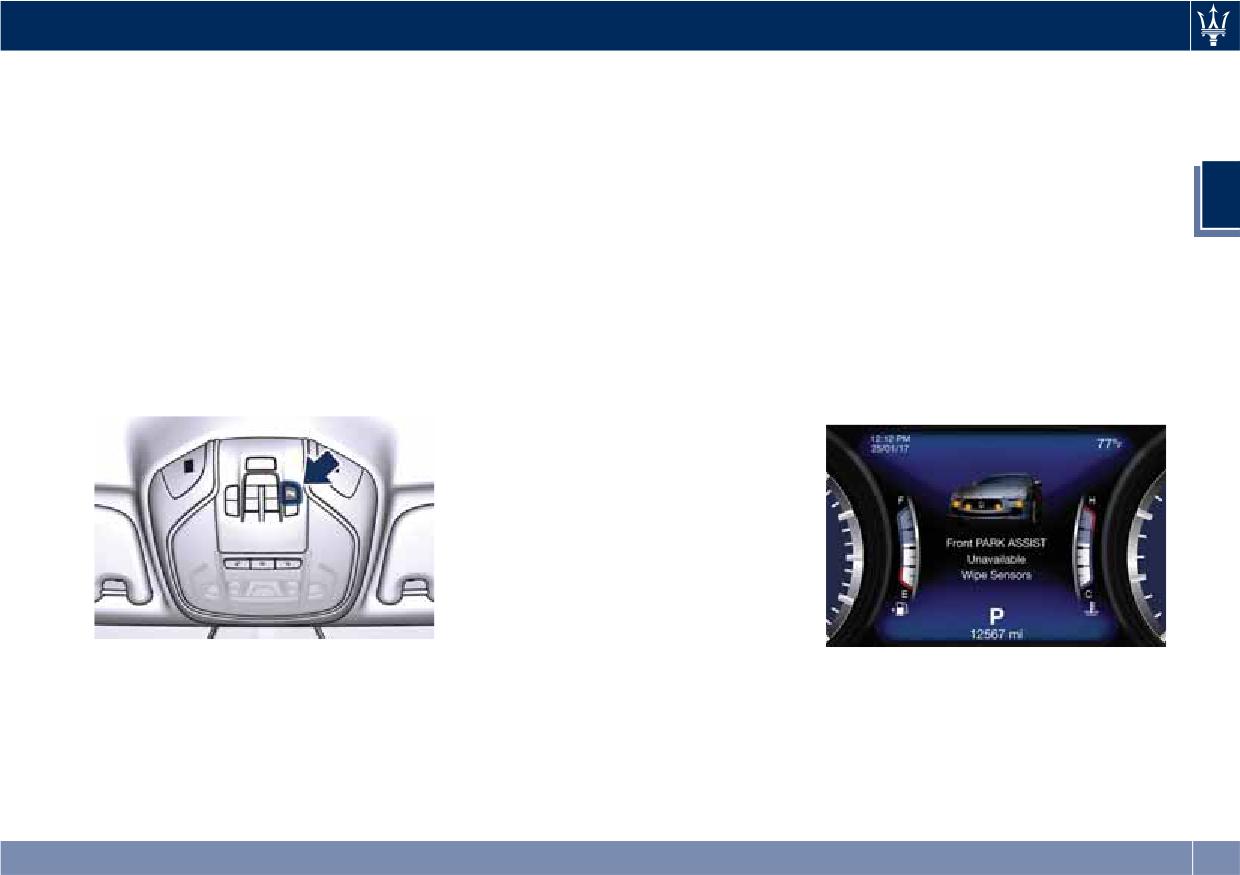
Before Starting
Enabling and Disabling Park
the system requires service, the LED
(11 km/h). Under this condition Park
Assist
will blink momentarily, and then the
Assist will not operate. See
LED will be on.
“Instrument Cluster” in section
By accessing the submenu “Safety &
When the shift lever is moved to R
“Dashboard Instruments and
Driving Assistant” from MTC+ System,
(Reverse) or to D (Drive) at a speed of
Controls” for further information.
the “Park Assist” can be disabled
7 mph (11 km/h) or below and the
If the instrument cluster displays a
2
(option “Off”). The available options
system is disabled, the instrument
message prompting you to clean the
regarding the warning alerts are:
cluster will display the “PARK ASSIST
sensors, make sure the outer surface
“Sound” or “Sound + Display”. Refer
Off” message for 5 seconds until the
and the underside of the rear bumper
to “MTC+ Settings” in section
shift lever remains in R (Reverse) or
and/or front bumper is clean and clear
“Dashboard Instruments and
when the shift lever is moved in D
of snow, ice, mud, dirt or other
Controls” for further information.
(Drive).
obstruction and then cycle the ignition
The front sensors can be enabled or
switch. If the message continues to
disabled at any time by pressing the
Service the Park Assist System
appear contact the Authorized
button on the front dome console.
In case of malfunction of the Park
Maserati Dealer.
Assist system, the instrument cluster
will actuate a single sound, once per
ignition cycle. The instrument cluster
will display a message when any of
the rear or front sensor(s) are blocked
by snow, mud, or ice and the vehicle is
shifted into R (Reverse) or D (Drive).
The instrument cluster will display a
message when any of the rear or front
sensors are damaged and require
service.
After pressing the button the
If a failure message is displayed on the
When the shift lever is moved to R
instrument cluster will display the
instrument cluster, contact the
(Reverse) or D (Drive) and the system
state of front parking sensors for
Authorized Maserati Dealer.
has detected a faulted condition, the
approximately five seconds. The
instrument cluster will display the
button LED will be on when the front
corresponding message for the time
sensors are disabled. The button LED
lapse the vehicle is in R (Reverse) or D
will be off when the front sensors are
(Drive) at speeds less than 7 mph
enabled. If the button is pressed and
87
Before Starting
Cleaning the Park Assist
surroundings. Failure to do so can
Sensors
result in serious injury or death.
CAUTION!
When cleaning the sensors, take
• Park Assist is only a parking aid and
Park Assist Volume
special care not to scratch or damage
it is unable to recognize every
them; therefore, do not use dry, rough
The volume of the acoustic signal
2
obstacle, including small obstacles.
or hard cloths.
emitted by the front and rear parking
Parking curbs might only be
The sensors must be washed with clean
sensors is set to the medium level.
temporarily detected or not detected
water, possibly adding car shampoo.
Three different levels of volume can be
at all. Obstacles located above or
Should you need to repaint the
selected via the submenu “Safety &
below the sensors will not be
bumper or in case of paint touch-ups
Driving Assistant” from the MTC+
detected when they are in close
in the sensor area, please contact
System.
proximity.
exclusively the Authorized Maserati
Low level is useful in certain conditions
Dealer. Incorrect paint application
• The vehicle must be driven slowly
when the parking sensor acoustic
could affect the parking sensors
when using Park Assist in order to be
signal keeps coming on although there
operation.
able to stop in time when an
is no actual collision hazard. This may
obstacle is detected. When backing
typically occur when driving in a queue
Park Assist System Usage
up, it is recommended that the driver
or when the vehicle is overtaken by
Precautions
looks over his/her shoulder when
motorcycles or other vehicles on one
using Park Assist.
or both sides in a queue of traffic.
NOTE:
When you set the volume, only the
• Jackhammers, large trucks, and other
parking sensor acoustic signal will be
vibrations could affect the
affected. The radio or any other
performance of Park Assist.
WARNING!
devices connected to the vehicle sound
• Objects such as bicycle carriers, trailer
Drivers must be careful when backing
system will not be affected.
hitches, etc., must not be placed
up even when using the Park Assist
Refer to chapter “MTC+ Settings” in
within 12 in (30 cm) from the rear
system. Always check carefully behind
section “Dashboard Instruments and
bumper while driving the vehicle.
your vehicle, look behind you, and be
Controls” for further information.
Failure to do so can result in the
sure to check for pedestrians, animals,
system misinterpreting a close object
other vehicles, obstructions, and blind
as a sensor problem, causing the
spots before backing up. You are
service Park Assist message to be
responsible for safety and must
displayed in the instrument cluster.
continue to pay attention to your
88
3 - Understanding the Vehicle
Interior Components
90
Front Power Seats
93
Driver Memory Seat
97
Rear Seats
99
Power Steering Wheel Adjustment
101
Adjustable Pedals (if equipped)
103
Rearview Mirrors
103
Lights
106
Windshield Wipers and Washers
118
Interior Features
121
Cargo Area
129
Power Sunroof with Sunshade
132
HomeLink (optional)
134
Air Conditioning Distribution
138
89
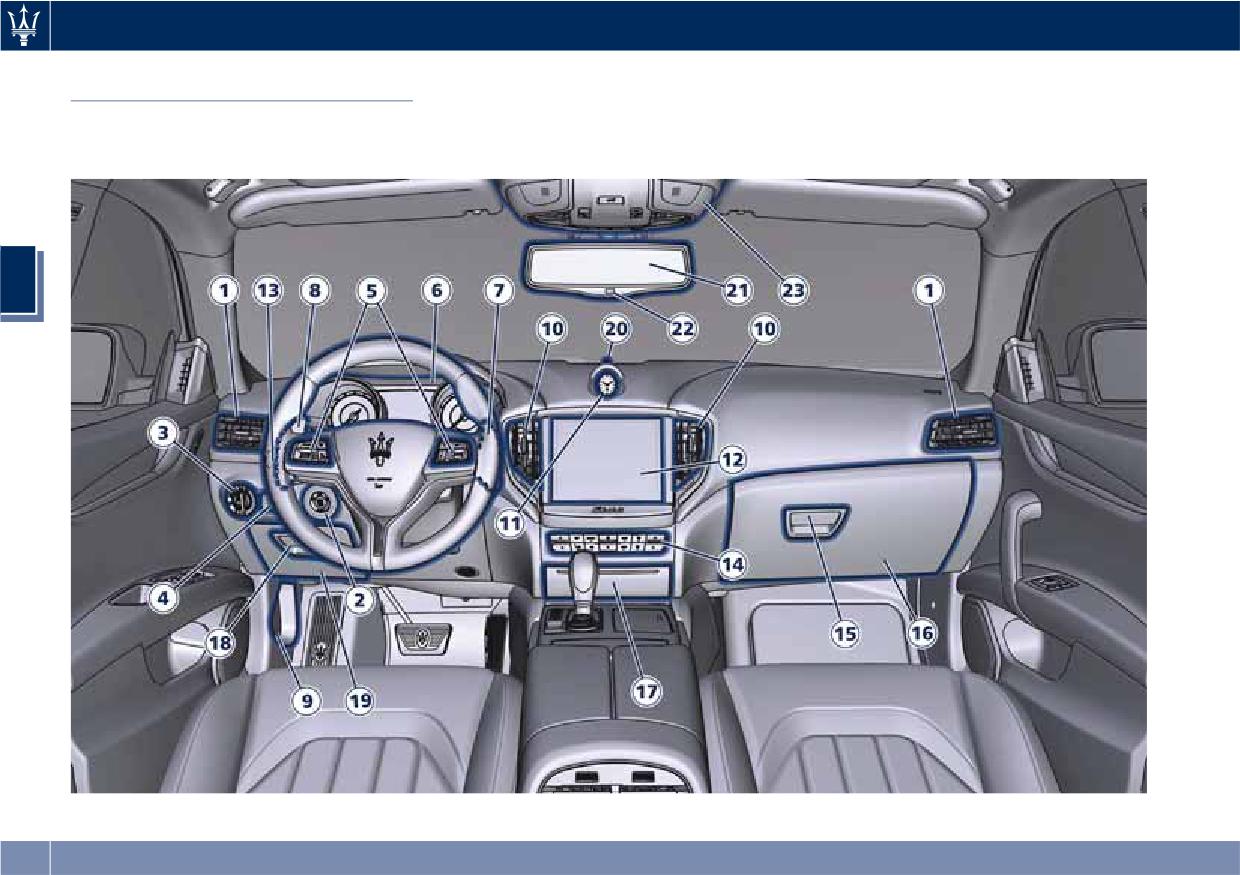
Understanding the Vehicle
Interior Components
Dashboard Components
3
90
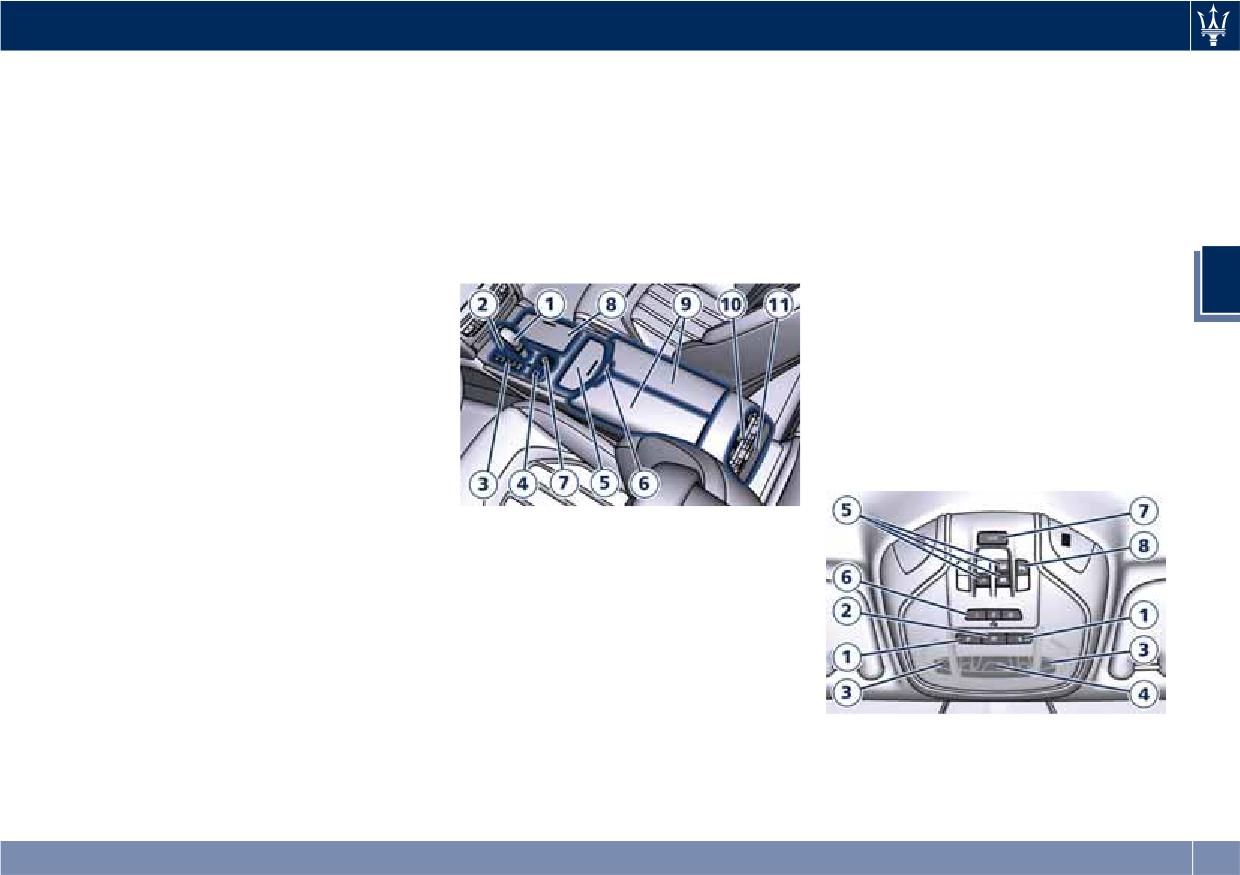
Understanding the Vehicle
1
Adjustable side air outlets.
21
Internal rear view mirror.
8
Cover for cupholder and power
socket compartment (some
2
Engine START/STOP button.
22
Auto-dimming on/off button.
versions can have the
3
Light switch.
23
Front dome console.
compartment with cupholder
4
Light dimmer controls.
(*) If equipped
and power socket visible,
5
Steering wheel controls.
without access cover).
6
Instrument cluster.
Central Console Components
9
Central console covers with
armrest function.
7*
Right shift paddle +.
3
10
Air outlets (adjustable).
8*
Left shift paddle -.
11
Rear power sunshade and rear
9
Hood release.
seats comfort controls panel (if
10
Adjustable central air outlets.
equipped).
11
Analog clock.
12
MTC+ display.
Front Dome Console
13
Multifuction lever (windshield
Components
wipers, headlight washer and
headlight selection, turn
signals).
14
Climate controls.
1
Automatic transmission shift
lever.
15
Dashboard glove box handle.
2
Hazard lights switch.
16
Dashboard glove box.
3
Drive mode switches.
17
Cover for compartment with
AUX, USB, SD memory card
4
Electric Parking Brake lever.
port and slide phone drawer.
5
Glove compartment.
18
Storage compartment handle.
6
Unlock button for central
19
Storage compartment.
console with cupholder and
1
Reading lights control button.
power outlet.
20
Vehicle security light and solar
2
Central light control button.
sensor.
7
Rotary selectors and buttons
for the multimedia navigation.
3
Reading lights.
91
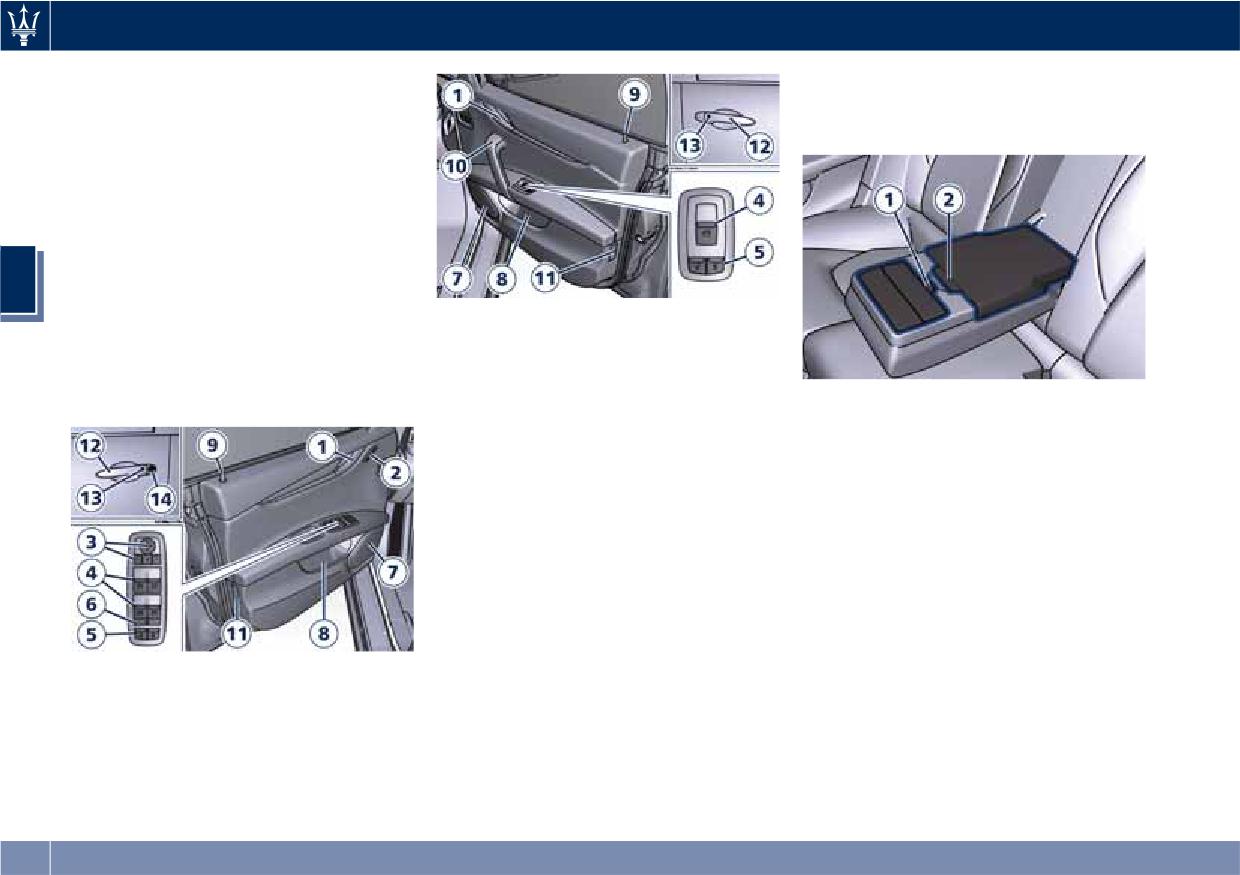
Understanding the Vehicle
Components between the Rear
4
Central light.
Seats
5
Sunroof controls.
6
HomeLink controls (optional).
7
Button to release the manual
trunk lid or to open
fully/partially the power trunk
lid (optional).
3
8
Button to enable/disable front
sensors of the Park Assist system
(if equipped).
1
Internal door handle.
2
Driver’s seat and rear mirrors
Front Doors Components
memory switch.
3
Rear view mirrors switches.
1
Armrest cupholder covers
4
Power window switch.
unlock button (some versions
can have the cupholder visible,
5
Power door unlocks/locks.
without access cover).
6
Rear windows and sunshade
2
Armrest compartment unlock
lockout button.
button with power outlet and
7
Loudspeakers.
USB port (optional).
8
Storage compartment.
9
Internal door lock/unlock knob.
10
Passenger door panel grip.
11
Reflex reflector.
12
External door handle.
13
Door lock button with “Passive
Entry” function.
14
Door outboard opening lock.
92
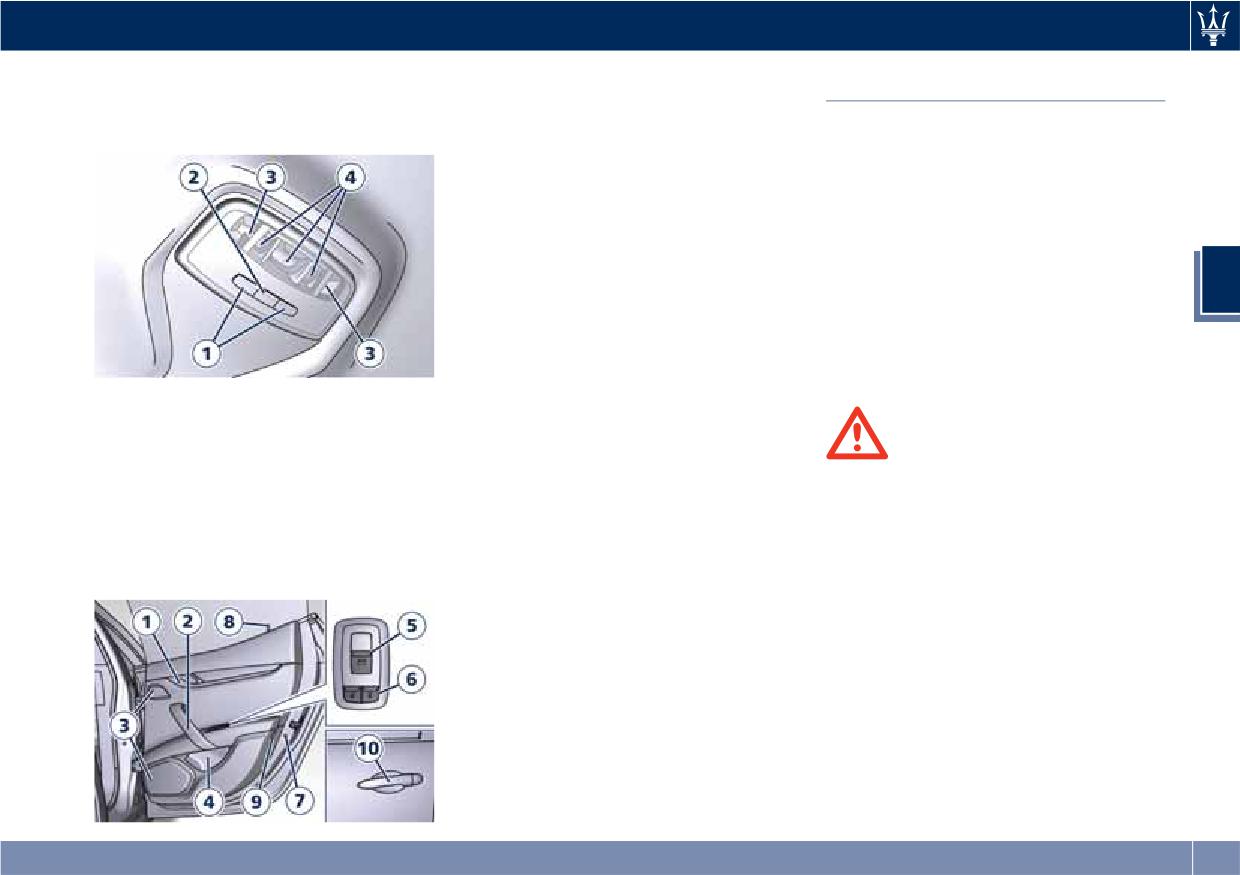
Understanding the Vehicle
Rear Dome Console
Front Power Seats
1
Internal rear door handle.
Components
2
Grip.
Seats and seat belts are part of the
3
Loudspeaker.
Occupant Restraint System of the
vehicle.
4
Door storage pockets.
For further information, see chapter
5
Power window switch.
“Occupant Restraint System” in
6
Power doors lock/unlock
Section “Before Starting”.
buttons.
Depending on the different markets
and versions, the front seats may have
3
7
“Child protection” door lock
different controls for adjustment and
system.
optional features. The configurations
8
Inside door lock/unlock knob.
shown below may differ from the ones
9
Reflex reflector.
in your vehicle.
10
External door handle.
1
Reading lights control button.
2
Central light control button.
WARNING!
3
Reading light LED.
Be sure everyone in your vehicle is in
4
Central light LEDs.
a seat and using a seat belt properly.
Rear Doors Components
Front Power Seat Controls
The power seats switches are located
on the outboard side of the seat
cushion.
Use the front switch 1 to move the
seat up or down, forward or rearward
or to recline the seat cushion.
Use the switch 2 to recline the
seatback.
Use the rear switch 3 to adjust the
lumbar support.
93
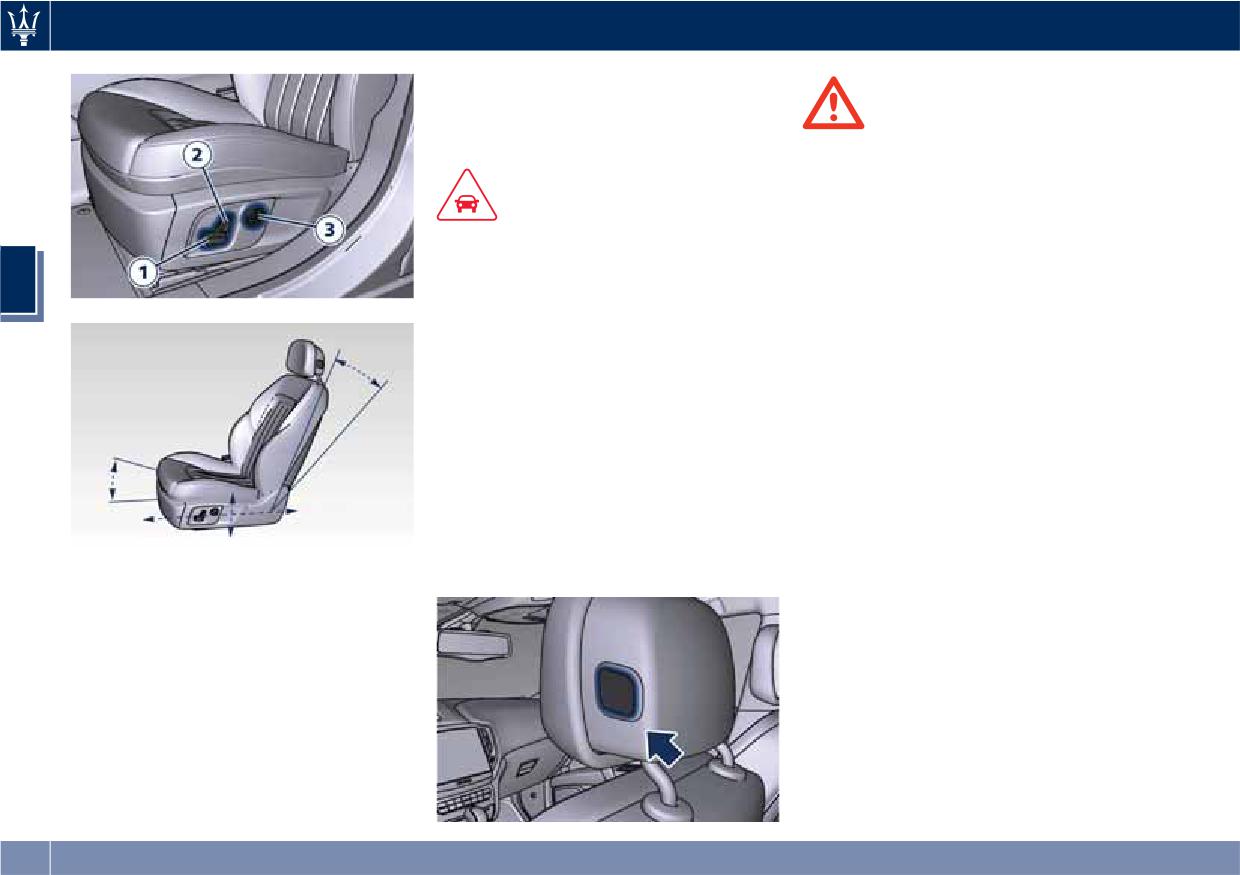
Understanding the Vehicle
Grip switch 1 from the back side and
push it down or up.
WARNING!
Release the switch 1 when the desired
position is reached.
Remember that the headrests must be
positioned so that their upper edge is
aligned with the top of the occupant’s
CAUTION!
head.
If the seat's movement does not work,
make sure that the corresponding fuse
Seat Tilt Control (Up/Down)
3
is not tripped (see chapter “Fuse
The angle of the seat cushion can be
Replacement” in section “Maintenance
adjusted in four directions.
and Care”).
Pull upward or push the front of the
switch 1, to move the front cushion
Head Restraints Adjustment (for
seat in the direction of the switch.
Comfort Seat only)
Release the switch 1 when the desired
To manually lift or lower the head
position is reached.
restraints on the Comfort Seat press
Seat Back Tilt Control
the indicated lateral button.
The angle of the seatback can be
NOTE:
adjusted forward or rearward.
The optional Sport Seat does not
Push the seatback switch 2 forward or
include the head restraint adjustment.
rearward, the upper seatback will
Seat Forward/Rearward Adjustment
move in the direction of the switch.
The seat can be adjusted both forward
Release the switch 2 when the desired
and rearward.
position is reached.
Push the seat switch 1 forward or
Power Lumbar
rearward, the seat will move in the
Push the switch 3 forward or rearward
direction of the switch.
to increase or decrease the lumbar
Release the switch 1 when the desired
support.
position is reached.
Push the switch 3 upward or
Seat Up/Down Adjustment
downward to raise or lower the
The height of the seat can be adjusted
lumbar support.
up- or downward.
94
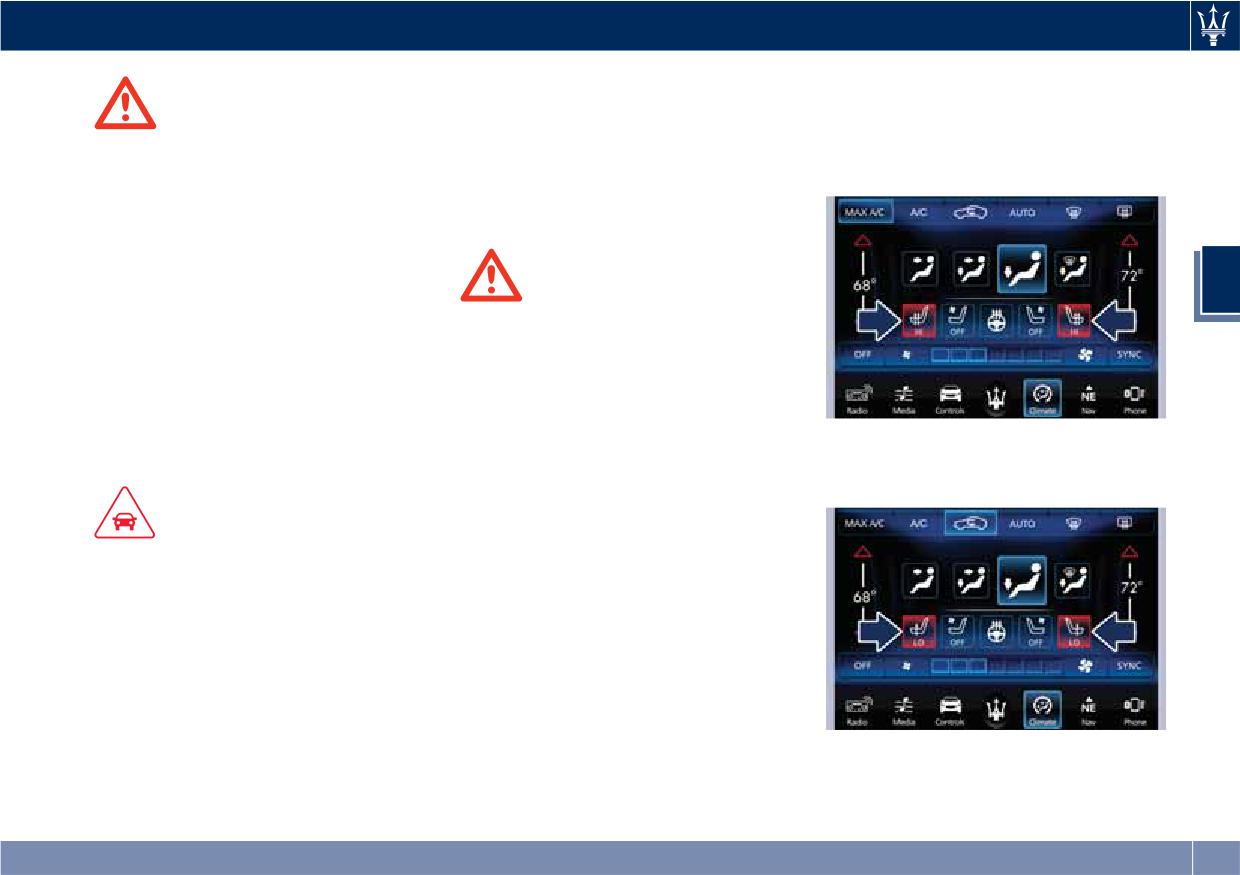
Understanding the Vehicle
The seats comfort commands are in
• Starting from the state “OFF”,
the “Climate” screen of the MTC+.
indicated below the respective icon,
WARNING!
They are present in the "Climate"
within 15 seconds touch the driver or
• Never adjust the seat while driving.
screen even when the A/C is off. See
passenger seat soft-key once to
You could lose control of the vehicle.
“Air Conditioning Controls” in section
select HI-level heating.
Moving the seat could distract you
“Dashboard Instruments and
or make you press a pedal
Controls” for further details.
unintentionally.
• Seats should be adjusted before
3
fastening the seat belts and while
WARNING!
the vehicle is parked.
• Persons with low skin sensitivity
• Do not travel with the seatback
because of advanced age, chronic
reclined so that the shoulder belt is
illness, diabetes, spinal cord injury,
no longer resting against your chest.
medication, alcohol use, exhaustion
In a collision you could slide under
or other physical conditions must be
the seat belt, which could result in
careful when using the seat heater.
• Within 15 seconds, touch the driver
serious injury or death.
It may cause irritation even at low
or passenger seat soft-key a second
temperatures, especially if used for
time to select LO-level heating.
long periods of time.
CAUTION!
• Do not place anything on the seat
Do not place any object under a
that insulates against heat, such as a
power seat or obstruct its movement
blanket or cushion. This may cause
as it may cause damage to the seat
the seat heater to overheat.
controls. Seat movement may become
limited if there is an obstruction in the
Front Seats Heat Function
way.
NOTE:
The engine must be running for the
Front Heated Seats
heated seats to operate.
The front seats are equipped with
• Within 15 seconds, touch the same
heaters in both seat cushions and
• Touch the “Climate” softkey on the
soft-key a third time to shut off the
seatbacks.
lower part of the MTC+ display.
seat heating.
95
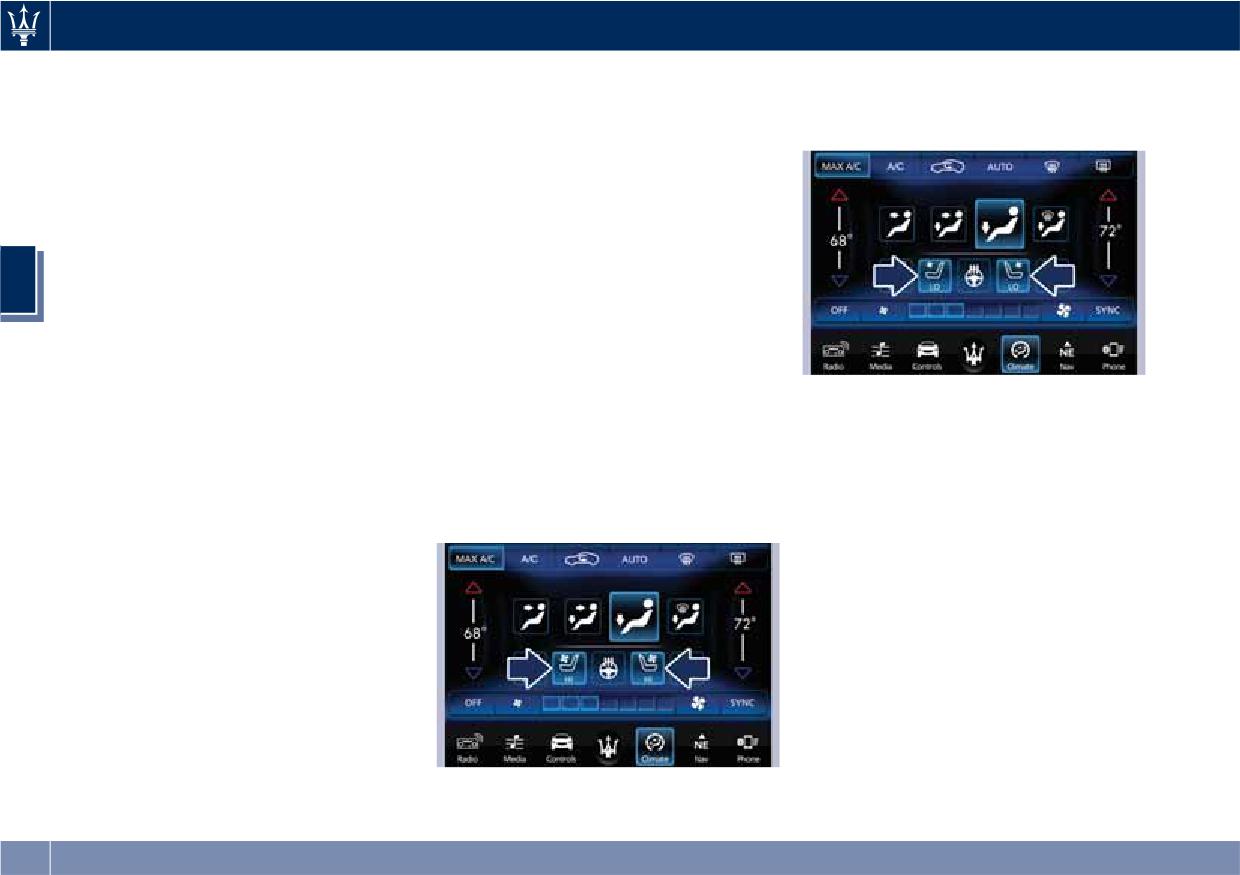
Understanding the Vehicle
NOTE:
The seats comfort commands are in
• Within 15 seconds, touch the driver
the “Climate” screen of the MTC+.
or passenger seat soft-key a second
Once a heat setting is selected, heat
They are present in the “Climate”
time to select LO-level ventilation.
will be felt within 2 to 5 minutes.
screen even when the A/C is off. See
When the HI-level setting is selected,
“Air Conditioning Controls” in section
the heater will provide a boosted heat
“Dashboard Instruments and Controls”
level during the first 4 minutes of
for further details.
operation.
Front Ventilated Seats Function
Then, the heat output will drop to the
3
normal HI-level.
NOTE:
If the HI-level setting is selected, the
The engine must be running for the
system will automatically switch to
ventilated seats to operate.
LO-level after a maximum of 60
minutes of continuous operation.
• Touch the “Climate” softkey on the
At that time, the display will indicate
• Within 15 seconds, touch the same
lower part of the MTC+ display.
the change from HI to LO.
soft-key a third time to shut off the
• Starting from the state “OFF”,
The LO-level setting will turn OFF
seat ventilation.
indicated below the respective icon,
automatically after a maximum of
within 15 seconds touch the driver or
approximately 45 minutes.
passenger seat soft-key once to select
HI-level ventilation.
Front Ventilated Seats
(optional)
To enhance occupants comfort by high
external temperatures, both the driver
and passenger seats, on request, can
be ventilated.
Small fans are located in the seat
cushion and seatback, they draw air
from the seat surface through fine
perforations in the seat cover to help
keep the driver and front passenger
cooler when the temperature is high.
96
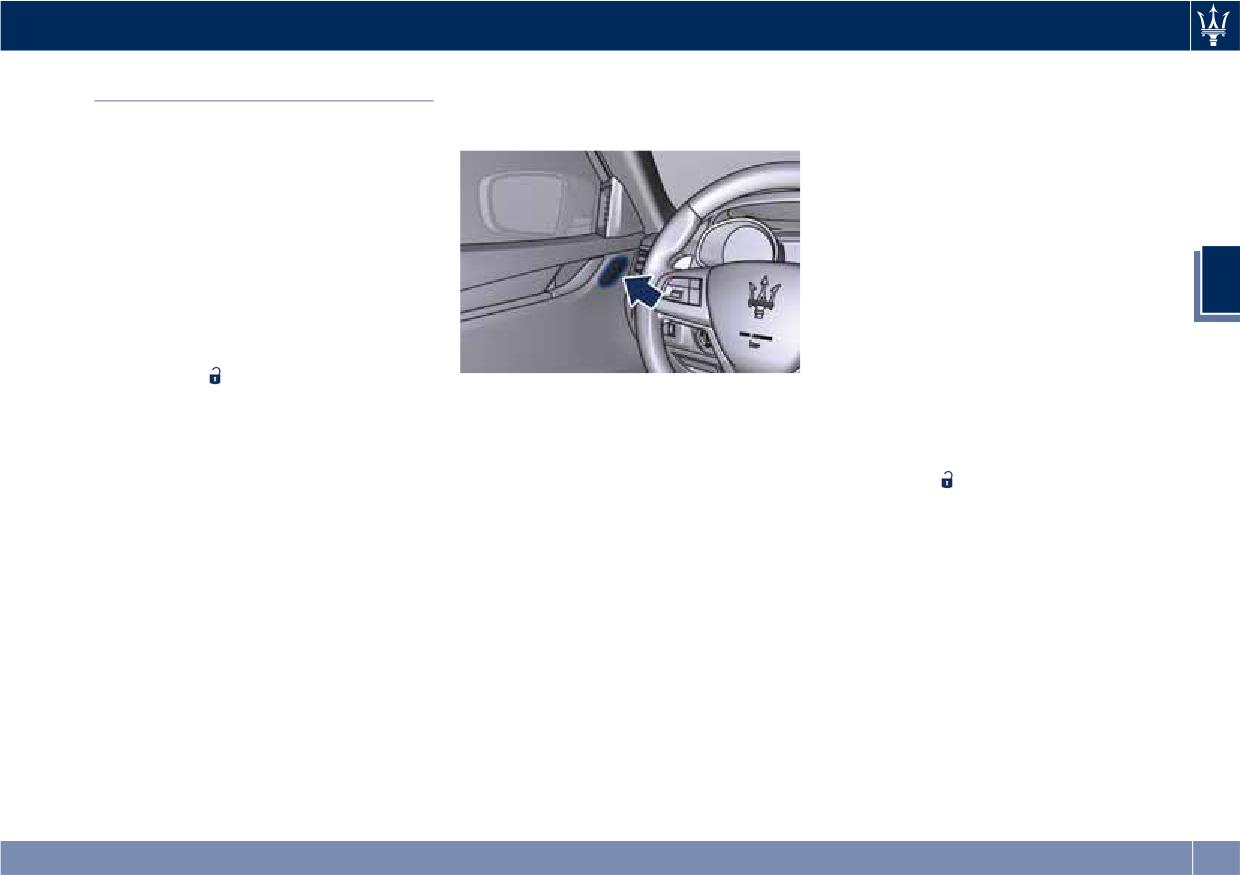
Understanding the Vehicle
• The “1” and “2” buttons which are
• Check on the instrument cluster for
Driver Memory Seat
used to recall either of two
the positive response of the actions
This feature allows the driver to store
programmed memory profiles.
“Memory 1 (or 2) profile set”.
up to two different memory profiles
After these steps, the profile set will
for easy recall through a memory
be memorized in the selected position.
switch. Each memory profile contains
NOTE:
desired position settings for the driver
seat, external side mirrors, adjustable
Memory profiles can be set without
pedals (optional), and power tilt and
the vehicle in P (Park), but the vehicle
telescopic steering column and a set of
must be in P (Park) to recall a memory
3
programmed radio stations.
profile.
Your key fob RKE transmitter can also
be set to recall the same positions by
Pairing Remote Keyless Entry
pressing the
button.
Transmitter to Seats Memory
Memory Profiles Setting
NOTE:
Your key fob with RKE transmitters
NOTE:
can be programmed to recall one of
• Only one key fob RKE transmitter
can be linked to each of the memory
Saving a new memory profile will
two programmed memory profiles by
pressing the
button on the RKE
positions.
erase an existing profile from memory.
transmitter.
• “Passive Entry” door handles cannot
To create a new memory profile,
be linked to the memory function.
NOTE:
perform the following:
Use either the memory recall switch
This feature can be enabled or
or the key fob RKE transmitter (if
• Cycle the ignition device to the ACC
disabled using the MTC+ System, refer
linked to the memory feature) to
or RUN position.
to “MTC+ Settings” in section
recall memory positions 1 or 2.
• Adjust all memory profile settings to
“Dashboard Instruments and
desired preferences (i.e., seat, side
The memory seat switch is located on
Controls” for further information.
mirrors, adjustable pedals (optional),
the driver's door trim panel. The
power tilt and telescopic steering
To program your key fobs RKE
switch consists of three buttons:
column, and radio station presets).
transmitter, perform the following
• The “S” (SET) button, which is used
actions:
• Press and release the “S” button on
to activate the memory save
the memory switch.
• Cycle the ignition device to the RUN
function.
• Within 5 seconds, press and release
position.
the memory button “1” or “2”.
97
Understanding the Vehicle
• Move the seat and/or the other
Memory Position Recall
Easy Entry/Exit Driver Seat
adjustable devices in the position
NOTE:
This feature provides automatic driver
that you wish to memorize, or recall
seat positioning to enhance driver
a previously memorized profile,
The vehicle must be in P (Park) to recall
mobility when entering and exiting
pressing the corresponding memory
memory positions. If a recall is
the vehicle.
button “1” or “2”.
attempted when the vehicle is not in P
The distance the driver seat moves
(Park), a message will display in the
• Cycle the ignition device to the OFF
depends on where you have the driver
instrument cluster.
position.
seat positioned when you place the
• Press and release the “S” button.
ignition device to the OFF position.
3
To recall the memory settings for
• Within 5 seconds, press and release
driver, press memory button number
• When you cycle the ignition device
the memory button “1” or “2”.
“1” or “2” on the driver's door trim
to the OFF position the driver seat:
• Press and release the
button on
panel or the
button on the RKE
• will move about 2.36 in (60 mm)
key fob RKE transmitter.
transmitter linked to memory position
rearward if the driver seat position
• Within 3 seconds, press and release
“1” or “2” with ignition device in the
is greater than or equal to ca. 5.51
the
button on the key fob RKE
RUN position.
in (140 mm) forward of the rear
transmitter.
A recall can be canceled by pressing
stop;
To check if the system has memorized
any of the buttons (“S”, “1”, or “2”)
• will move to a position of ca. 3.15
the correct profile, you can move the
during a recall. When a recall is
in (80 mm) rearward of the rear
seat and press the
button: the seat
canceled, the driver seat, external side
stop if the driver seat position is
will move to the memorized position.
mirrors, adjustable pedals (optional),
between 5.51 in (140 mm) and 3.15
and power tilt and telescopic steering
NOTE:
in (80 mm) forward of the rear
column stop moving.
stop.
Your key fobs RKE transmitter can be
A delay of at least one second will
• The seat will return to its previously
unlinked to your memory settings by
occur before selecting a new recall.
set position when you place the
pressing the “S” button followed by
ignition device into the ACC or RUN
the
button on the key fob RKE
position.
transmitter.
• The Easy Entry/Exit feature is
disabled when the driver seat
position is less than 3.15 in (80 mm)
forward of the rear stop. In this
position, there would be no benefit
98
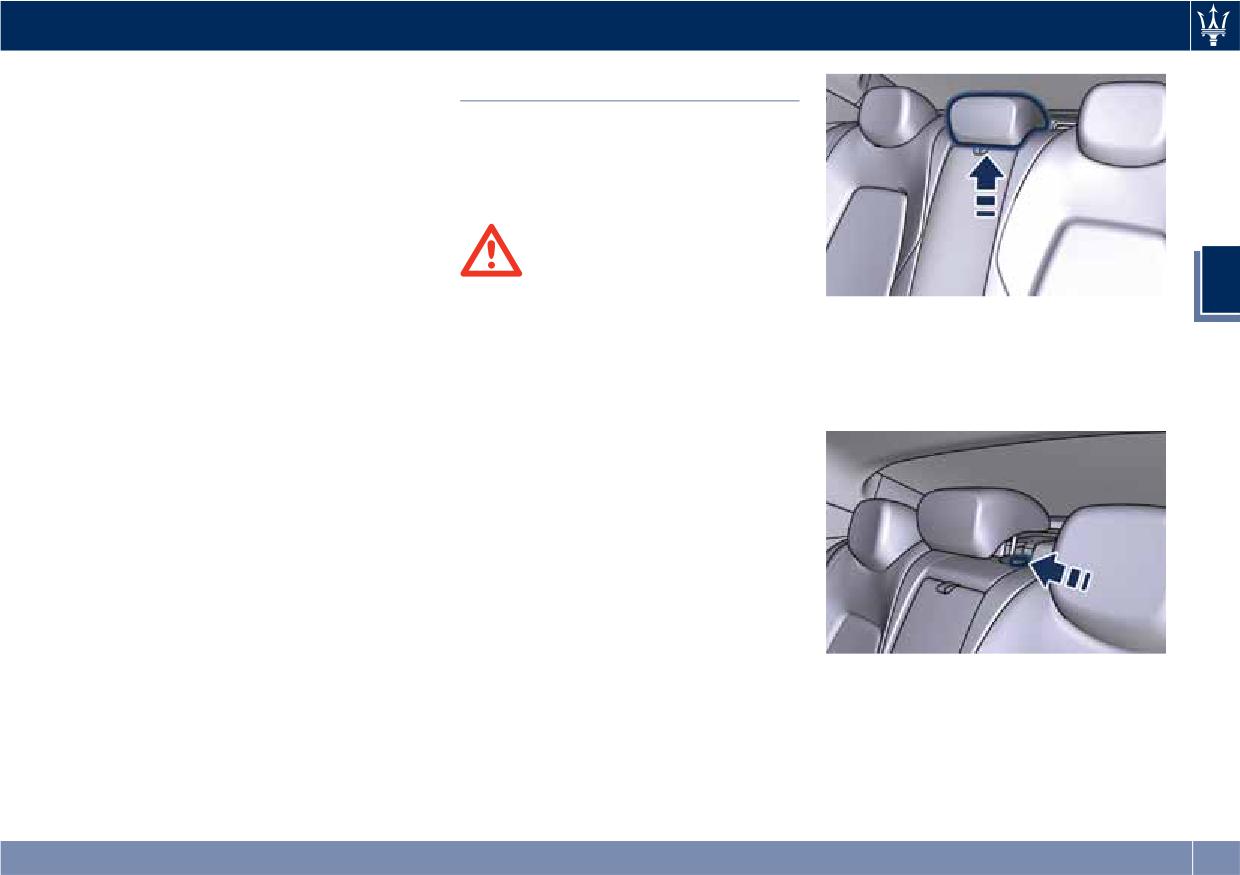
Understanding the Vehicle
to the driver by moving the seat for
Rear Seats
Easy Exit or Easy Entry.
Each stored memory setting will have
Rear seats can fit three passengers.
an associated easy entry/exit position.
Seats and seat belts are parts of the
occupant restraint system of the
NOTE:
vehicle.
The Easy Entry/Exit feature can be
enabled or disabled using the MTC+
System, refer to “MTC+ Settings” in
WARNING!
section “Dashboard Instruments and
3
Be sure everyone in your vehicle is in
Controls” for further information.
a seat and using a seat belt properly.
• To lower the head restraint, press
the push button, located at the foot
NOTE:
of the head restraint on the left side,
and push downward on the head
See chapter “Occupants Restraint
restraint.
Systems” in section “Before Starting”
for seat belt positioning.
Rear Head Restraints
Side seats are endowed with fixed
head restraints.
The center seat head restraint has two
positions, up or down.
When the center seat is being
occupied the head restraint should be
in the raised position.
NOTE:
When there are no occupants in the
center seat the head restraint can be
To remove the head restraint of
lowered in order to provide the driver
central seat see “Cargo Area” in this
for maximum visibility.
section.
• To raise the head restraint, pull
upward on the head restraint.
99
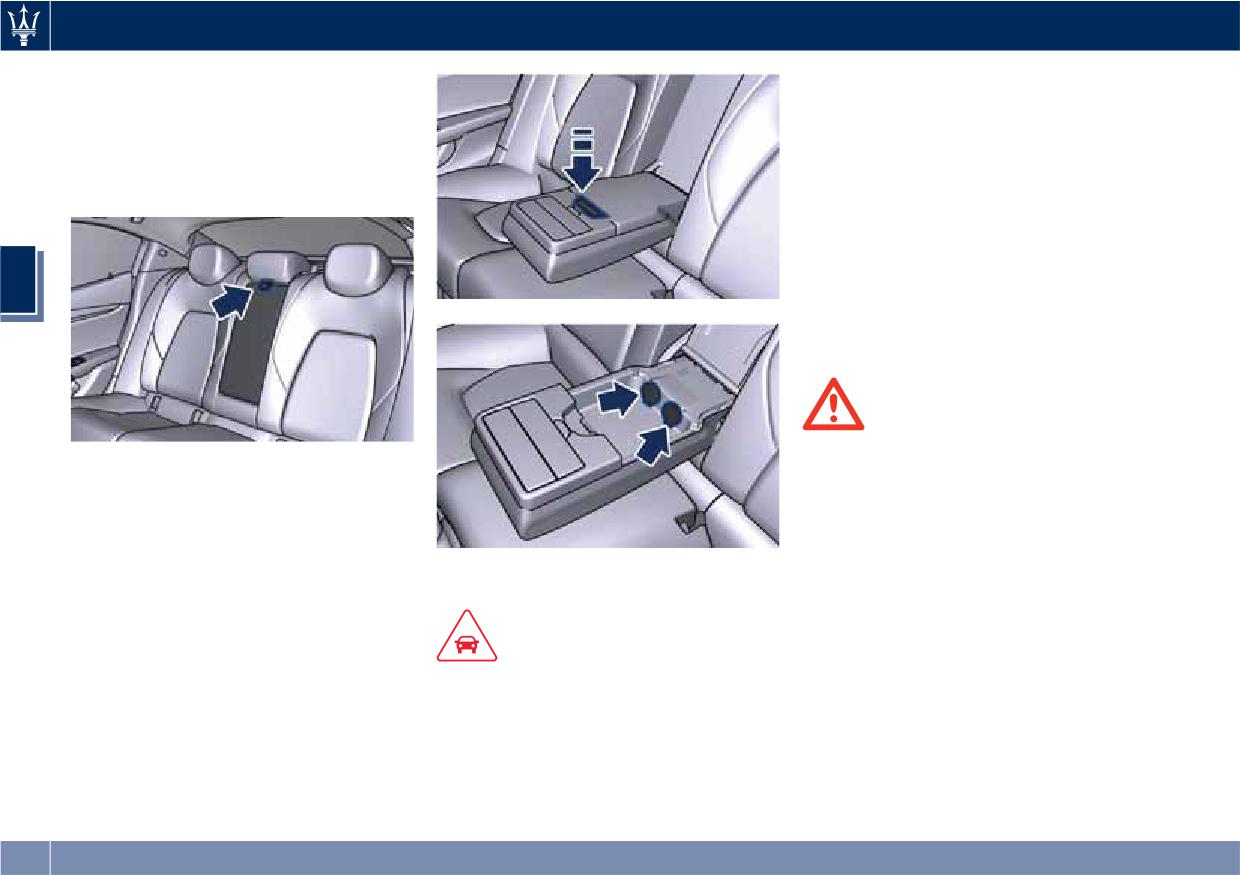
Understanding the Vehicle
Rear Armrest
Rear Side Heated Seats
(optional)
The rear armrest is mobile and can be
folded up into the seat back.
The side rear seats can be equipped
with heaters both in seat cushion and
• To lower it, pull the stripe as
seatback.
indicated.
Rear seats heating can be adjusted by
operating control devices on the panel
located on the rear side of the central
3
console. The panel also includes
command for the rear window
sunshade (see “Rear Windows” in
section “Before Starting”).
WARNING!
• Persons with low skin sensitivity
• To close it, pull it upwards then push
because of advanced age, chronic
it back into its seat.
illness, diabetes, spinal cord injury,
On the front part of the armrest there
medication, alcohol use, exhaustion
are two cupholders (see “Interior
or other physical conditions must be
Features” in this section).
careful when using the seat heater. It
• To close the compartment, lower the
Inside the armrest there is a glove or
may cause irritation even at low
cover.
document compartment. Pressing the
temperatures, especially if used for
opening button and lifting the cover
long periods of time.
of the armrest box you access to an
CAUTION!
• Do not place anything on the seat
illuminated compartment where you
The armrest is not designed to support
that insulates against heat, such as a
can find on request a 12 V power
the weight of an adult or a child:
blanket or cushion. This may cause
outlet and an USB charging port.
please use it only to store beverages,
the seat heater to overheat. Sitting
small objects or documents.
in a seat that has been overheated
could cause irritation due to the
100
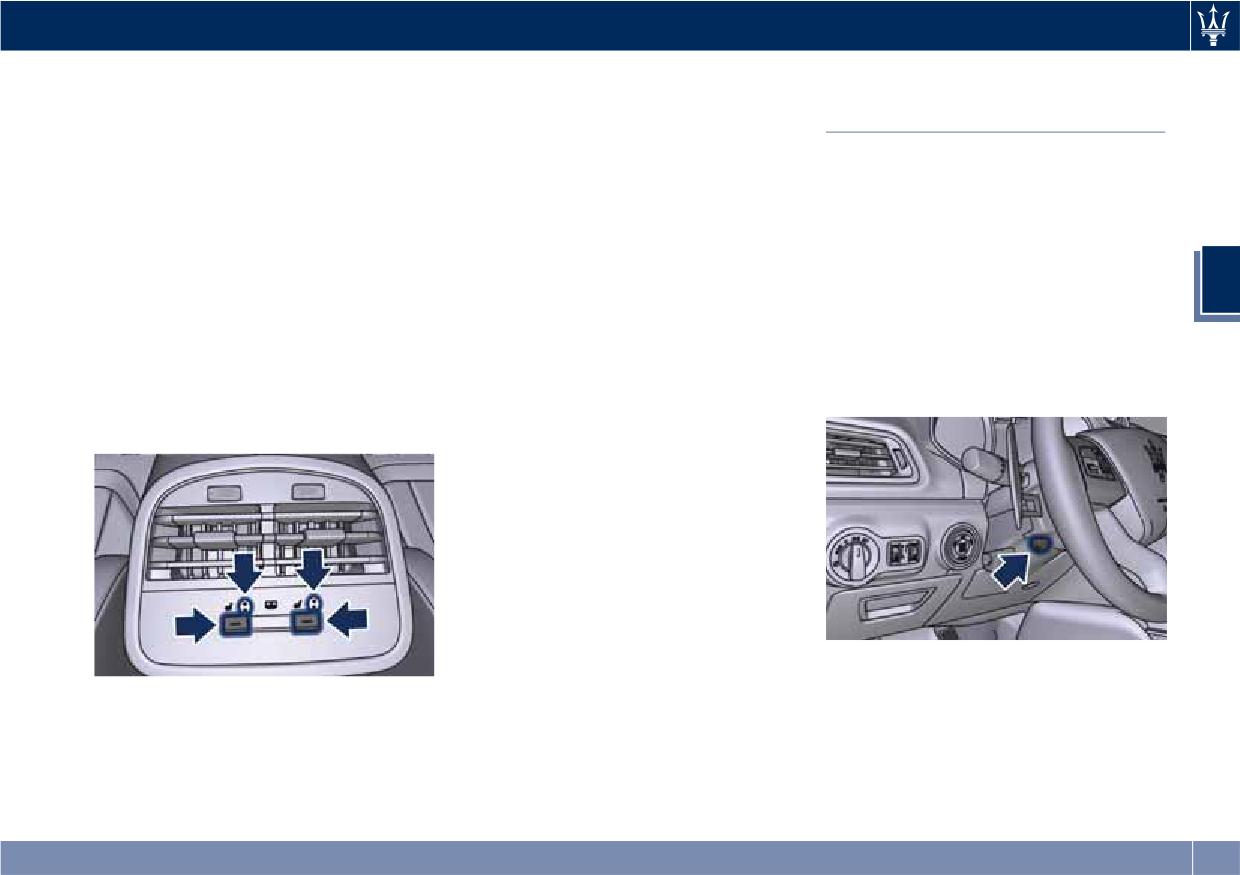
Understanding the Vehicle
increased surface temperature of the
• The engine must be running for the
Power Steering Wheel
seat.
heated seats to operate.
Adjustment
The buttons on the panel with the
By selecting the HI-level setting, the
This feature allows you to tilt the
resistance icon activate the heating on
heater will provide a boosted heat
steering column upward or downward
one or both seats.
level during the first four minutes of
or to lengthen or shorten it in order to
operation. Then, the heat output will
• Push the button once to select the
adjust the steering wheel to an
drop to the normal HI-level.
highest heating level. The upper LED
optimized position.
By setting the HI-level, the system will
located on the side of the icon will
automatically switch to LO-level after
The power tilt/telescoping steering
illuminate.
3
a maximum of 60 minutes of
column/wheel switch is located on the
• Push the same button a second time
continuous operation. The LO-level
lower left side of the steering column.
to select the lowest level. The lower
setting will turn off automatically
To adjust the tilt of the steering
LED will illuminate.
after a maximum of approximately 45
column/wheel, move the switch up or
• Push the same button a third time to
minutes.
down as desired.
shut the heating elements OFF. The
LED will turn off.
To lengthen or shorten the steering
column/wheel, pull the switch toward
NOTE:
you or push the switch away from you
• Once a heat setting is selected, heat
as desired.
will be felt within two to five
minutes.
101
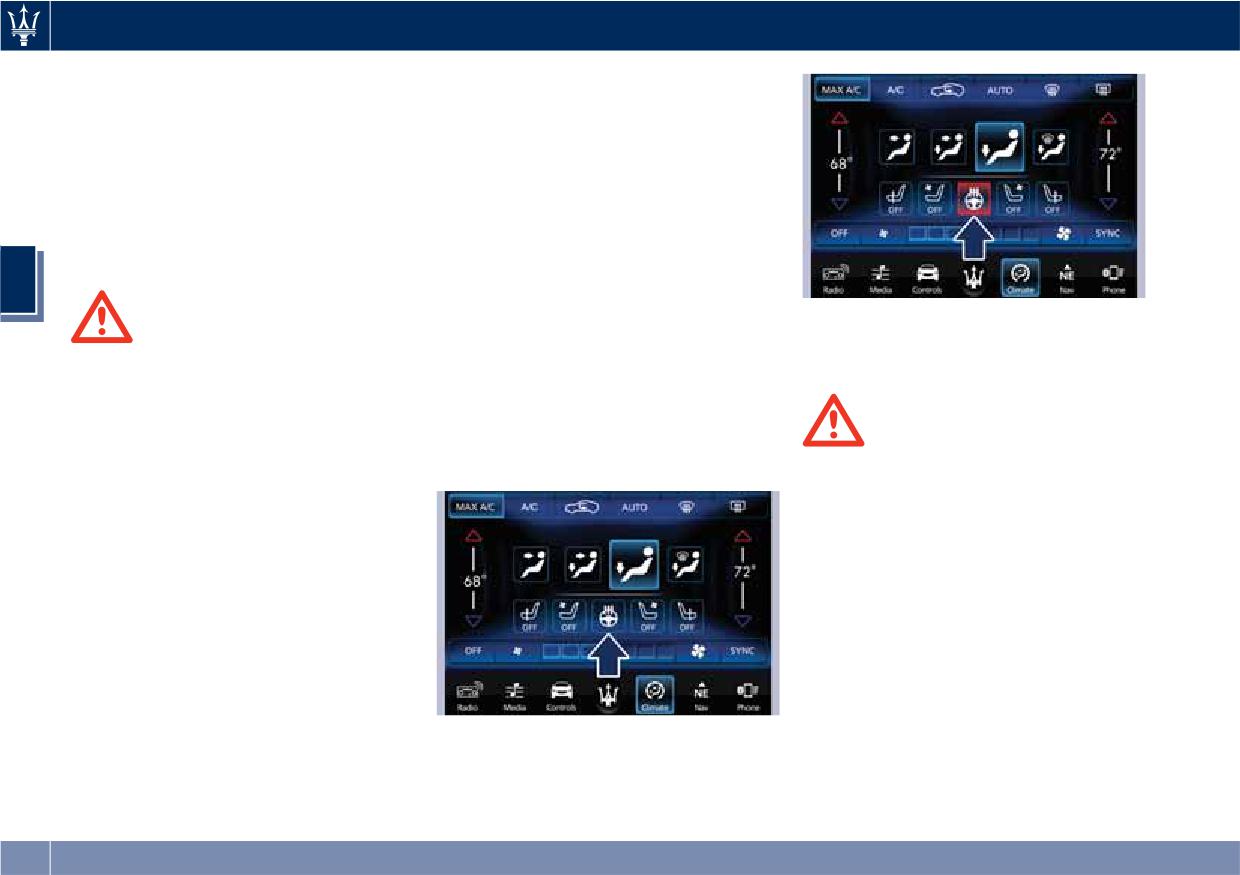
Understanding the Vehicle
NOTE:
The heated steering wheel can shut off
early or may not turn on when the
You can use your key fob with RKE
steering wheel is already warm.
transmitter or the memory buttons on
The heating steering wheel command
the driver's door trim panel to return
is in the “Climate” screen of MTC+. See
the tilt/telescopic steering
“Air Conditioning Controls” in section
column/wheel to programmed
“Dashboard Instruments and Controls”
positions. See “Driver Memory Seat” in
for further details.
this section.
NOTE:
3
The engine must be running for the
• Within 15 seconds, touch the heated
heated steering wheel to operate.
WARNING!
steering wheel soft-key a second
Do not adjust the steering
time to turn it off.
• Touch the “Climate” softkey located
column/wheel while driving.
on the lower part of the MTC+
Adjusting the steering column/wheel
display.
while driving could cause the driver to
WARNING!
• When the heating function is in the
lose control of the vehicle. Be sure the
off state, soft-key is not highlighted.
• Persons with low skin sensitivity
steering column/wheel is adjusted
because of advanced age, chronic
before driving your vehicle. Failure to
illness, diabetes, spinal cord injury,
follow this warning may result in
medication, alcohol use, exhaustion
serious injury or death.
or other physical conditions must be
careful when using the seat heater. It
Heated Steering Wheel
may cause irritation even at low
(optional)
temperatures, especially if used for
The steering wheel contains a heating
long periods of time.
element inside the rim that helps
• Do not place anything on the
warm driver’s hands by cold weather.
steering wheel that insulates against
The heated steering wheel has only
heat, such as a blanket or steering
• Within 15 seconds, touch the heated
one temperature setting. Once turned
wheel covers of any type and
steering wheel soft-key to turn on
on, this function will operate for
material. This may cause the steering
the function.
approximately 58 to 70 minutes before
wheel heater to overheat.
automatically shutting off.
102
//////////////////////////////////////////