BMW Motorcycle (R1100RT, R1100RS, R850/1100GS, R850/1100R). Manual - part 58
 

  Index      Manuals     BMW AG Motorcycle (R1100RT, R1100RS, R850/1100GS, R850/1100R). Repair Manual


Search            


Content   ..  56  57  58 


BMW Motorcycle (R1100RT, R1100RS, R850/1100GS, R850/1100R). Manual - part 58


63.8

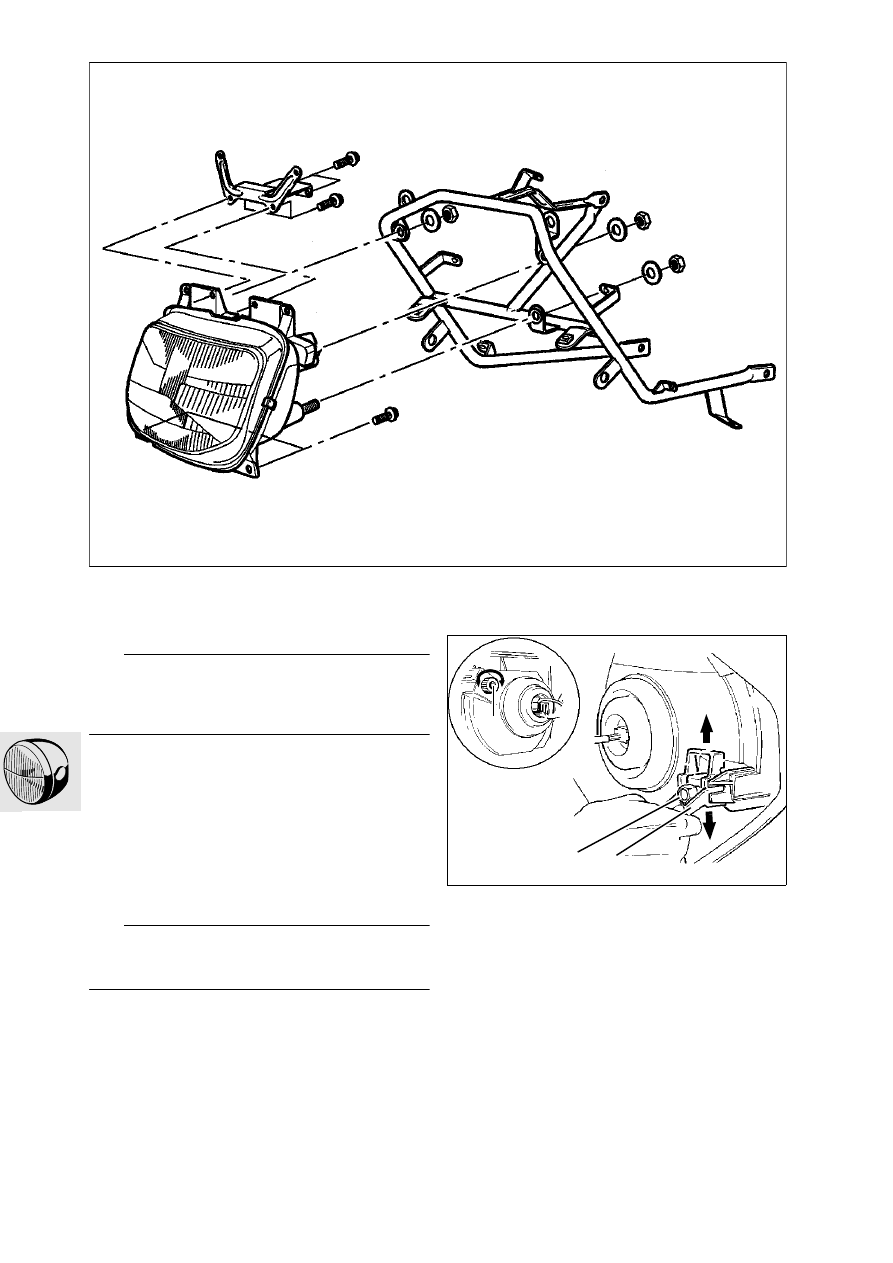
[RS] Removing and installing head-
light

e

 Caution:

Switch off ignition.
Disconnect ground (earth) lead from battery.
Insulate ground (earth) lead.

Remove side trim.

Remove inner cover for trim.

Detach windshield.

Detach instrument bracket.

Detach front section of trim.

Detach headlight at fairing holder.

Detach headlight at front section of fairing.

Detach windshield holder at headlight.

Remove headlight.

Install in the reverse order of work.

e

 Caution:

Do not touch inner surface of reflector or bulbs with 
bare hands.

Adjusting headlight

Move swivel lever (1) to top position.

Correct headlight beam throw with adjusting 
screw (2).

Counter-clockwise rotation: ....................... longer
Clockwise rotation: ....................................shorter
Adjustment distance:

..... -15 cm (5.91 in) at a distance of 10 m (32.81 ft)

Adjust side angle with adjusting screw (3).

RS630010

3

2

1

RT630020

63.9

[GS] Removing and installing head-
light

e

 Caution:

Switch off ignition.
Disconnect ground (earth) lead from battery.
Insulate ground (earth) lead.

Remove windshield.

Remove headlight insert.

e

 Caution:

Do not touch inner surface of reflector or bulbs with 
bare hands.

Detach instrument cluster.

L

 Note:

The center retaining screw (1) is in the headlight 
housing.

Unfasten headlight beam throw adjuster.

Remove headlight housing.

RS630030

1

GS620020

63.10

Adjusting headlight

Unscrew locknut on adjusting linkage (arrow).

Correct vertical beam throw with adjusting link-
age.

Adjustment distance

..... -25 cm (9.85 in) at a distance of 10 m (32.81 ft)

Tighten locknut firmly.

[GS] Removing and installing front 
flashing turn indicator

e

 Caution:

Switch off ignition.
Disconnect ground (earth) lead from battery.
Insulate ground (earth) lead.

Procedure: same as for removing headlight.

Remove headlight holder

Remove indicator lenses, pull cable connector 
off reflector and pull cable through indicator 
holder.

e

 Caution:

Do not touch inner surface of reflector or bulbs with 
bare hands.

Remove turn indicator holder.

Remove indicators.

Install in the reverse order of work.

[R] Removing and installing head-
light

e

 Caution:

Switch off ignition.
Disconnect ground (earth) lead from battery.
Insulate ground (earth) lead.

e

 Caution:

Do not touch inner surface of reflector or bulbs with 
bare hands.

Adjusting headlight

Beam throw can be adjusted within the limited 
rapid resetting range by tilting the headlight up-
wards or downwards.

Correct beam throw with the adjusting linkage 
(arrow).

L

 Note:

Wrench size = 6 mm (0.24 in)

Adjustment distance:

..... -25 cm (9.85 in) at a distance of 10 m (32.81 ft)

GS630040

RS630050


Content   ..  56  57  58