BMW Motorcycle (R1100RT, R1100RS, R850/1100GS, R850/1100R). Manual - part 16


  Index      Manuals     BMW AG Motorcycle (R1100RT, R1100RS, R850/1100GS, R850/1100R). Repair Manual


Search            


Content   ..  14  15  16  17   ..


BMW Motorcycle (R1100RT, R1100RS, R850/1100GS, R850/1100R). Manual - part 16


11.76

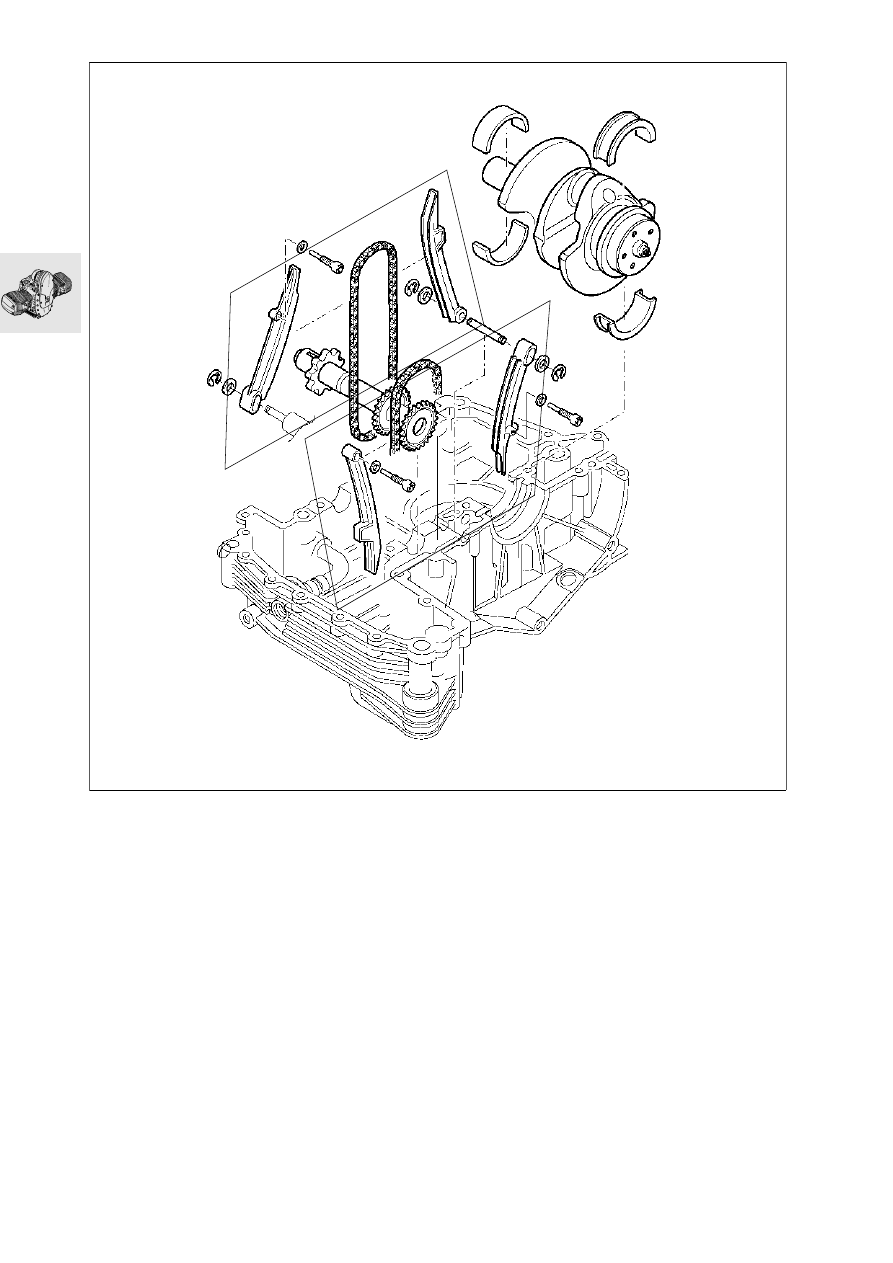
Removing crankshaft, auxiliary shaft 
and timing chain tensioning and slide 
rails

RS110290
11.77

Removing and installing oil pick-up 
basket

X

 Tightening torque:

M6 screw ........................................9 Nm (0.354 in)

e

 Caution:

Make sure that the O-ring is not omitted, and is 
installed undamaged.

Replacing oil level sight glass

Pierce the plastic disc with a large screwdriver 
and lever out the oil level sight glass.

Coat the sealing face of the new oil level sight 
glass with engine oil and drive it in with drift, 
BMW No. 00 5 550

Removing conrods

Clamp crankshaft in a vise provided with protec-
tive jaws.

Remove conrod

e

 Caution:

Do not accidentally confuse the conrods.

Checking conrods 

Check conrod dimensions.

a

See Technical Data.

e

 Caution:

Sintered-metal conrods must never be straightened 
– risk of fracture.

RS110300

11.78

Measuring main and big end bearing 
play

easuring radial bearing play

Measure main bearing journal with an external 
micrometer crosswise in two planes, A and B.

Enter measured values on record sheet.

a

See Technical Data.

e

 Caution:

The crankshaft can only be reground in 
grinding stage 0; after this it must be rehardened 
and finished. Grinding stages are identified by a 
paint mark on the front crank web.
a See Technical Data
If the bearing shells have to be replaced, note 
colored marks on crankpins and big end bearings.

RS110310

11.79

Install main bearings

Insert tensioner rail/slide rail pivot pin (1) for 
centering purposes.

Tighten M8 and M10 housing screws..

Tightening torque/tightening sequence:
1. M10 screw (oiled) ..................................... 45 Nm
2. M8 screw (oiled) ....................................... 20 Nm

Measure main bearings front/back in the load 
direction.

Enter measured values on record sheet and 
determine main bearing play values.

a

See Technical Data.

Measuring axial bearing play

Place crankshaft in engine block.

Insert tensioning rail/slide rail pivot pin (1) for 
centering purposes.

Tighten housing screws.

Screw measuring device BMW No. 00 2 500
with dial gauge, BMW No. 00 2 510, in the 
tapped hole for the alternator mount cover.

Move crankshaft forwards and backwards, and 
read off play at dial gauge.

a

See Technical Data.

1

RS110320

00 2 500

00 2 510

RS110910

11.80

Measuring big end bearing play

Measure crankpin with an external micrometer in 
the thrust direction and offset through 90

.

Install bearing shells and assemble conrods.

Tighten big end bolt with tightening angle 
indicator, BMW No. 11 2 210.

X

 Tightening torque:

Big end bolts oiled
Joint torque.................................................. 20 Nm
Wrench angle .................................................... 80°

Measure big end bearing with internal gauge in 
thrust direction.

Enter measured values on record sheet and 
determine big end bearing clearances.

a

See Technical Data.

RS110340

11 2 210

RS110350

RS110360

11.81

Assembling engine

Installing conrod

Clamp crankshaft in a vise provided with 
protective jaws.

Screw big end bolts (oiled) in by hand and tighten 
with tightening angle indicator, 
BMW No. 11 2 210.

e

 Caution:

Oil the bearings. Do not accidentally confuse 
conrods or bearing shells. Always use new big 
end bolts.

Installed direction of conrods:

...................................................lettering facing up

X

 Tightening torque:

Big end bolts (oiled)
Joint torque.................................................. 20 Nm
Wrench angle .................................................... 80°

11 2 210

RS110370

11.82

Installing crankshaft

e

 Caution:

Oil the bearings.

Installing timing chain tensioning and 
slide rails

Seal pivot pin for tensioning rail/slide rail at 
clutch side (arrow) with  3-Bond 1209.

Insert pivot screw (1) into chain tensioner rail, us-
ing a new sea.

X

 Tightening torqu:

Chain guide rail pivot pin .............................. 18 Nm

Installing auxiliary shaft/timing chains

e

 Caution:

Timing chains (2) must mesh fully with auxiliary shaft 
sprockets.

1

u

2

RS110291

11.83

Assembling engine block

Coat clean, grease-free sealing faces (arrow) 
with 3-Bond 1209.

Secure the timing chain with rubber band (1) to 
the timing chain tensioning and slide rail.

M6

x

5

0

M6

x

2

5

M6

x

3

5

M

10x

1

0

0

M6x

5

0

M6

x

2

5

M6

x

3

5

M6x

3

5

M6

x

5

0

M6x

5

0

M1

0x

1

0

0

M6

x

5

0

M6

x

3

5

M6x

3

5

M6

x

3

5

M6

x

5

0

M6

x

3

5

M6

x

5

0

M6

x

5

0

M6

x

5

0

M6x

2

5

1

u

RS110920


Content   ..  14  15  16  17   ..