Motorcycle BMW R1150RT. Manual - part 6
 

  Index      motorcycles     Motorcycle BMW R1150RT - service repair manual 2001 year


Search            


Content   ..  4  5  6  7   ..


Motorcycle BMW R1150RT. Manual - part 6


00.20 

Installing front mudguard

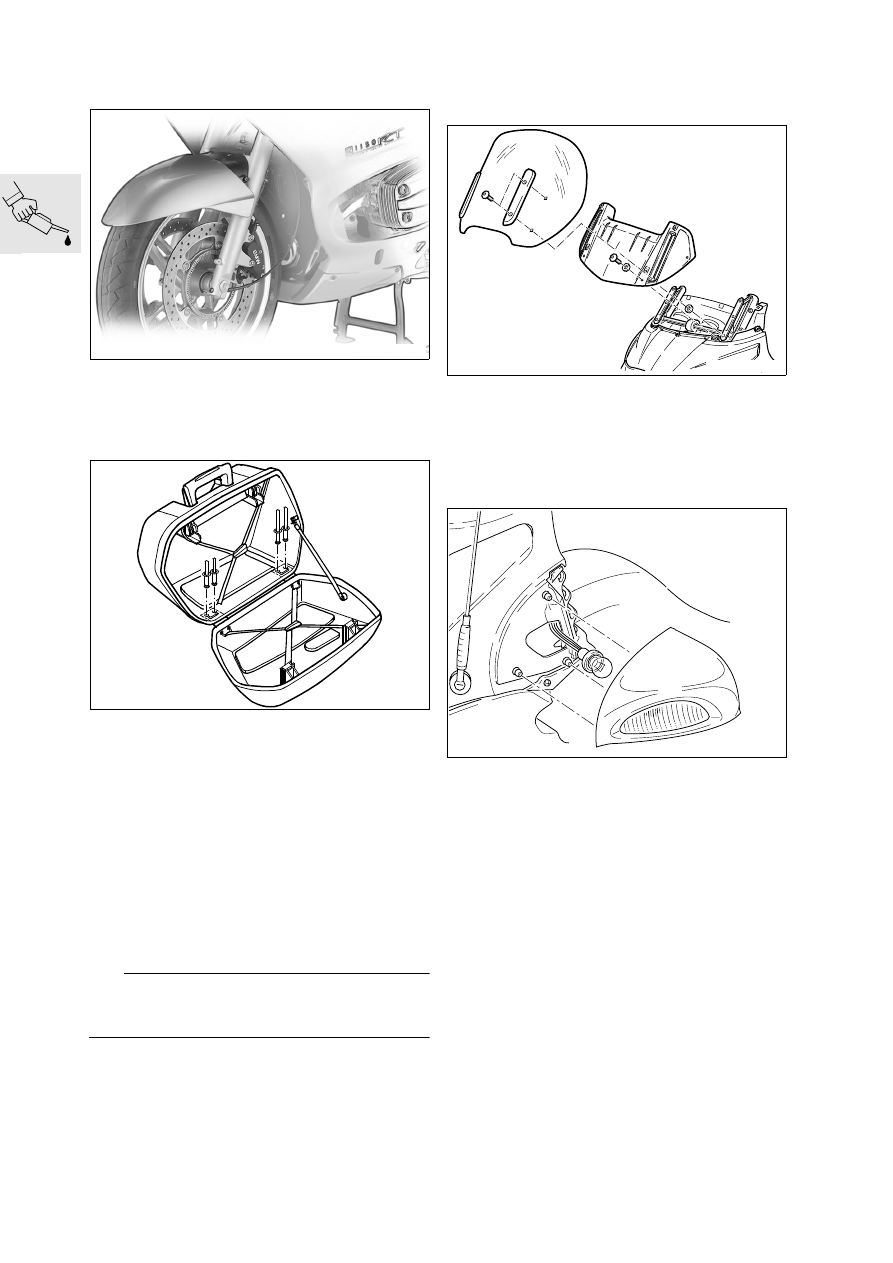
Assembling case

Position the lid on the case for alignment. Open 
the hinges of the lid and guide them into the base 
with the guide hook.

From the inside, insert the pop rivets into the 
base and the hinges.

2x long rivets in hinge at rear, as viewed in 
forward direction of travel.

2x short rivets in hinge at front, as viewed in 
forward direction of travel.

Engage riveting tool on rivets, hold the hinge at 
the outside to keep it in position and secure all 
four rivets.

Oil the seal in the bottom of the case, using the 
sponge provided for the purpose.

e

 Attention:

Make sure that the seal is not squeezed out of 
shape and that the lid closes without catching.

Carefully close the case.

Insert the lock cylinder into the case with the key 
in the lock and turn the lock.

Affix the stickers.

Installing cover for windscreen 
adjuster and installing windscreen

Install the cover for the windscreen adjuster.

Install windscreen with washers.

Install the aerial.

Installing mirrors

Connect the turn indicators.

Position the mirror at the 3 attachment points.

Engage by pressing at the front first, then 
the rear.

R22000030

R22000070

R22000060

RT460280

 00.21

Filling and charging the battery

Remove seat.

Remove left side fairing panel.

Remove the air filter cover.

Remove air intake pipe.

Disengage the rubber strap holding the battery.

Disconnect the battery breather hose.

Pull the battery to the left to remove.

d


Warning:

Battery acid is highly caustic.
It must not contact the eyes, face hands, clothing or 
the motorcycle’s paintwork.

Fill all the cells with pure battery acid of 
density 1.28 to the upper mark.

Allow the battery to stand for approximately 
30 minutes.

4x

3x

4x

4x

2x

R22460020

R22000040

00.22 

The battery does not achieve full charge capacity 
from being filled, so it has to be charged with a 
battery charger.

L

 Note:

Follow the instructions for use supplied with the bat-
tery charger.

Charge current (amps)

.........................10 % of rated battery capacity (Ah)

Charging time

............................................................. 5-10 hours

Battery charge can be measured by checking 
the density of the battery acid.

Acid density
Battery full charged

............ 1.26-1.30 at a temperature of 20 °C (68 °F)

Shake the battery slightly to allow the gas bub-
bles to escape.

Wait until the battery acid has settled, check that 
no more bubbles rise and if necessary, top up 
the acid to the max. mark.

Reinstall the plugs.

Make a note of the charging date on the battery.

e

  Attention:

Connect the positive battery terminal first, then the 
negative terminal.

Connect the positive cable, coat with acid-proof 
grease and install the protective cap.

Install the battery.

Connect the negative cable and coat with acid-
proof grease.

Assembly is the reverse of the disassembly pro-
cedure.

Install the left side fairing panel.

Install the engine spoiler.

Install the covers.

Switch on the ignition.

L

 Note:

After switching on the ignition, always wait for the 
BMW Integral ABS to complete its self-diagnosis.
Do not operate the brake lever until self-diagnosis 
has completed.

With the ignition switched on, bed in the brake 
pads against the brake discs.

Without starting the engine, fully open the throttle 
once or twice so that the Motronic control unit 
can register the throttle-valve positions.

L

 Note:

Disconnecting the battery means that the entries in 
the fault memory of the Motronic MA2.4 control unit 
are deleted and the adaptation values are reset.
This can temporarily impair the operating character-
istics when the engine is restarted.

R22000050

 00.23

Integral ABS: Performing bleed test 
with BMW 
MoDiTeC 

d

 Warning:

Self-diagnosis is not performed unless both brake 
levers are in their fully released positions. Prior 
to conclusion of the self-diagnosis, only RESIDUAL 
BRAKING FUNCTION is available.

Perform BMW Integral ABS self-diagnosis:

Release the brake levers, if necessary.

Switch on the ignition.

With the ignition switched on, bed in the brake 
pads against the brake discs.

ABS warning light.............................flashes at 4 Hz
General warning light ........................................ ON

Self-diagnosis is in progress

ABS warning light.............................flashes at 1 Hz
General warning light ....................................... OFF

Self-diagnosis successfully completed.

Perform bleed test with BMW MoDiTeC:

Remove front and rear seats.

Connect the BMW MoDiTeC to the diagnosis 
connector.

d

 Warning:

When performing maintenance and repair work on 
BMW Integral ABS, never pump quickly or 
vigorously.

Perform bleed test.

Perform all requisite repair work.

Perform BMW Integral ABS pull-away test:

When a speed of 5 km/h (3 mph) is reached, the 
ABS warning light must go out.

L

 Note:

The ABS warning light and the general warning light 
must both be OFF after successful self-diagnosis 
and the pull-away test.

Checking engine oil level when 
cold, adding oil if necessary

L

 Note:

The difference between the oil level indicated when 
the engine is at operating temperature and the oil 
level indicated when the engine is very cold due to 
extremely low outdoor temperatures can be as 
much as 10 mm (0.3937 in).

Check oil level with the motorcycle upright.

e

 Attention:

Never top up the engine-oil level past the “MAX” 
mark.

Specified level: .............................................. MAX

R22000080

BMW recommends Castrol


Content   ..  4  5  6  7   ..