Volkswagen Golf / Golf GTI / Jetta. Manual - part 723


  Index      Volkswagen     Volkswagen Golf / Golf GTI / Jetta - service repair manual 1999-2005 year


Search            copyright infringement  


Content   ..  721  722  723  724   ..


Volkswagen Golf / Golf GTI / Jetta. Manual - part 723


Double cartridge gun VAS5237  
 
Application nozzle  
 

Stoplight, removing and installing


Installing


Warning!  

Primer dries very fast and permanently stains painted 
surfaces.  
 
If any visible part of the vehicle gets stained with 
primer, clean it thoroughly before primer dries.  
 

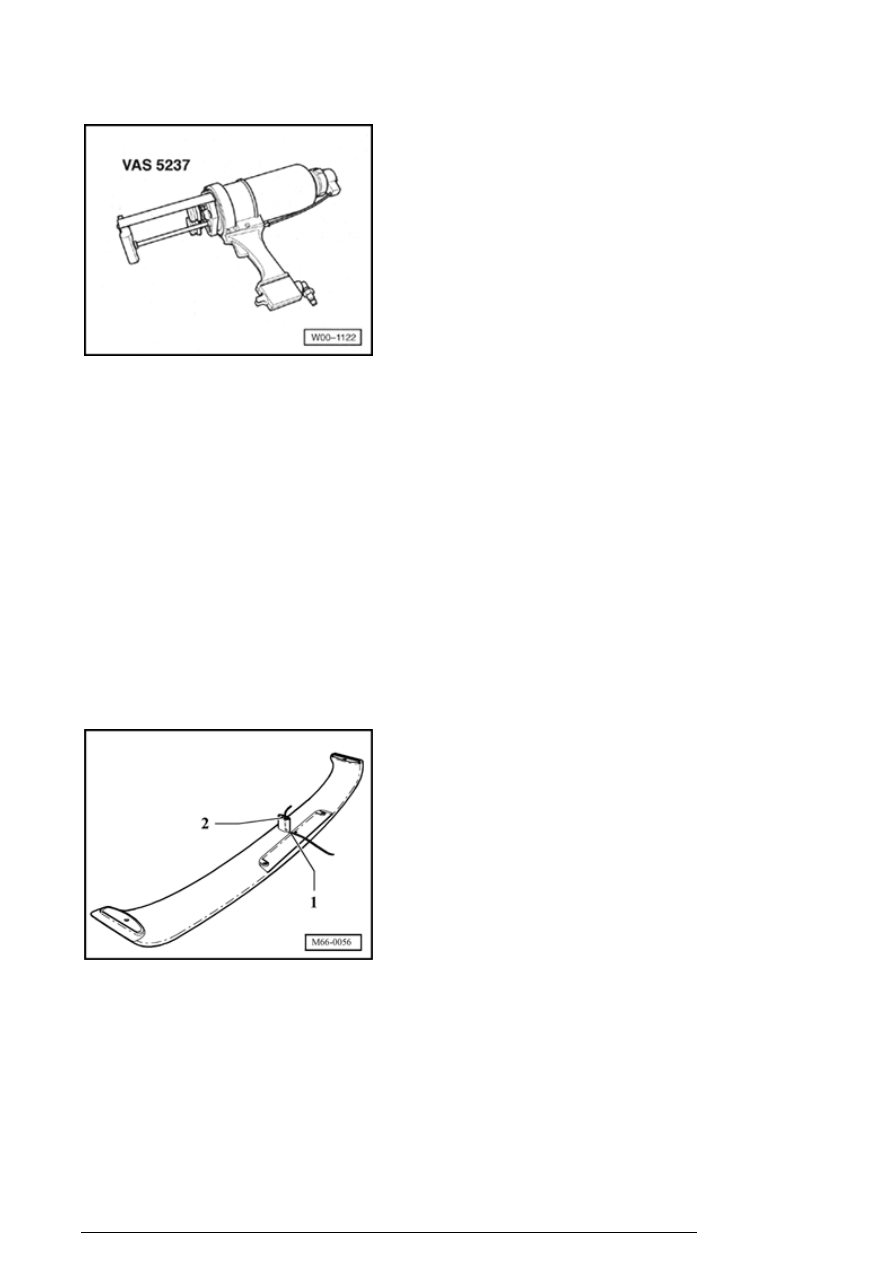
- Slide stoplight wiring harness through hole in stoplight 
support - 1 - 

- Route wiring harness through drill hole in spoilerand pull 
wiring harness from support base - 2 - 

Note: 

Make sure that stoplight is pulled tight to support, and if 
needed adjust slack in wiring harness.  

Rear spoiler with integrated stoplight

13/2/2005


- Attach stoplight to spoiler by screwing stoplight  - 1 - into 
spoiler support base. 

- Insert wiring harness into grommet - 1 - 

- Pull grommet toward spoiler support base  - arrow - 

Removing


- Removal of stoplight once spoiler has been installed to 
vehicle is impossible, in that case, whole spoiler kit has to 
be replaced 

- If spoiler has not yet been installed remove in reverse 
order of installing 

Rear spoiler, general notes


Note: 

If rear lid is damaged and needs to be replaced, rear 
spoiler also has to be changed and rear lid preparation has 
to be done before proceeding with installation procedure of 
rear spoiler/rear lid  
 
Two different procedures are listed below, a procedure that 
applies when rear lid is damaged and therefore shall be 

Rear spoiler with integrated stoplight

13/2/2005


changed and a procedure that applies when either spoiler 
or stoplight malfunction.  
 

Rear spoiler with rear lid change, removing 
and installing


Rear lid preparation


- Cut installation template as indicated and paste it to 
vehicle rear lid following illustrated dimensions.  

Note: 

Jetta 2004 Rear Spoiler Installation Template can be found 
and printed in: 

 Library/Additional Information; Other 

Topics, Jetta 2004 Rear Spoiler Installation Template   
 

- With a soft pencil or crayon, draw outline of gray shapes  
a - 
directly on vehicle surface 

- Drill holes to rear lid as indicated on Installing Template 

- Remove Installing Template 

- Apply scotch tape to outer borders of outlined surfaces to 
mask them before primer application 

- Clean thoroughly with alcoholic cleaner and then apply 
primer to outlined surfaces (three surfaces) on top of rear 
lid - a - and allow to dry 

Installing


Rear spoiler with integrated stoplight

13/2/2005


- Apply primer to base of spoiler (three surfaces)  - 1 - and 
allow to dry 

- Apply adhesive material to the base of spoiler (three 
surfaces) - 1 - using VAS 5237 

Note: 

Spoiler has to be attached to rear lid of vehicle within 5 
minutes after adhesive has been applied, otherwise 
adhesive will loose effectiveness  
 

- Attach spoiler to rear lid of vehicle making sure that the 
drilled holes match with the attaching holes on spoiler 

- Route stoplight wiring harness through the center hole 
drilled pulling it firmly to make grommet fit 

Warning!  

Make sure that the stoplights cable passes through the 
central hole drilled  
 
Make sure that the grommet attached to the stoplights 
cable fits in central hole  
 
Avoid squeezing stoplights cable with spoilers central 
base  

Rear spoiler with integrated stoplight

13/2/2005


Content   ..  721  722  723  724   ..