Volkswagen Golf / Golf GTI / Jetta. Manual - part 1215


  Index      Volkswagen     Volkswagen Golf / Golf GTI / Jetta - service repair manual 1999-2005 year


Search            copyright infringement  


Content   ..  1213  1214  1215  1216   ..


Volkswagen Golf / Golf GTI / Jetta. Manual - part 1215


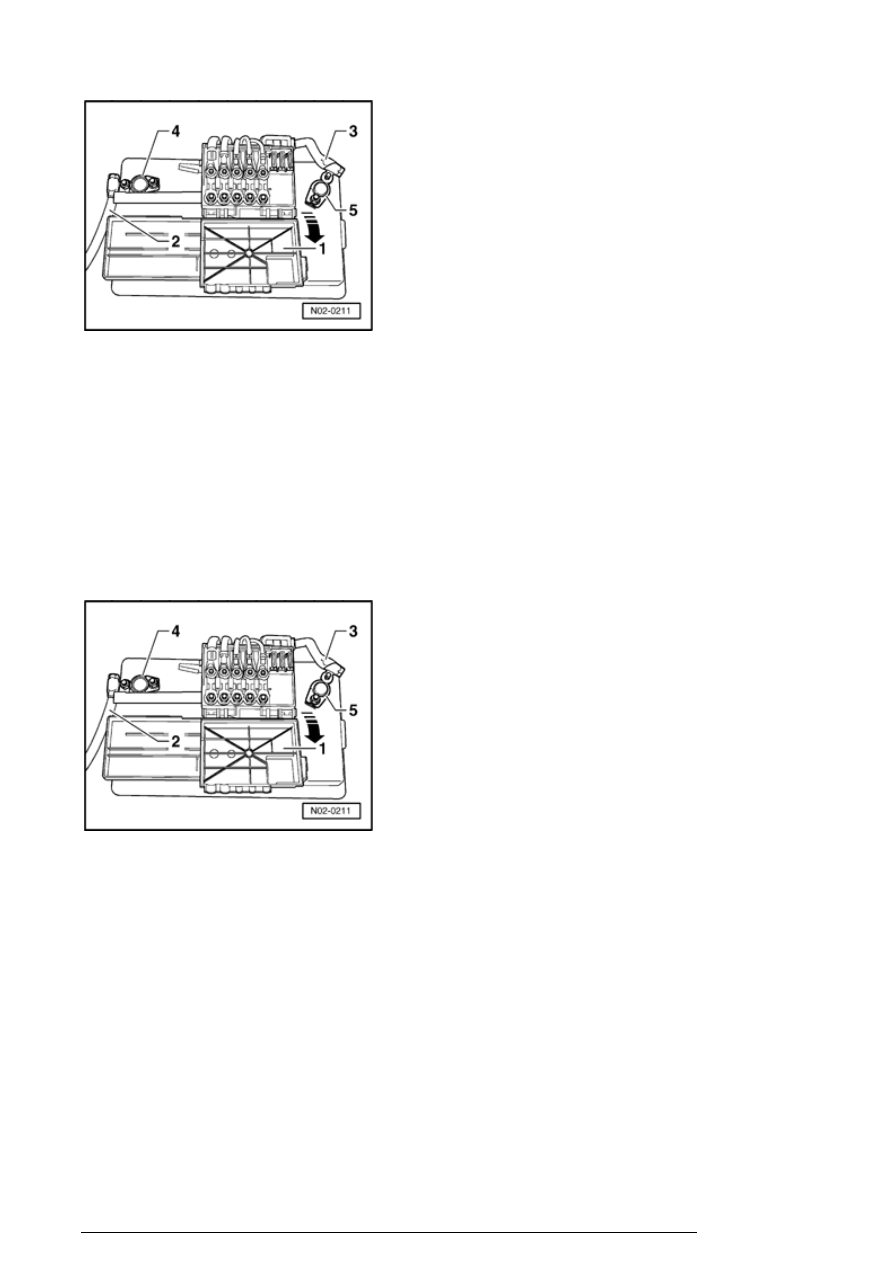
- By manually moving battery plus (B+) cable - 2 - and 
ground (GND) cable - 3 - check whether battery 
connections - 4 - and - 5 - are tight. 

Warning!  


If battery positive (B+) connection is loose, disconnect 
ground (GND) cable first before attempting to remove 
or tighten plus connection, to prevent personal injury.


If the battery clamp on positive terminal (B+) is not 
seated securely:

- Disconnect ground (GND) cable connection - 5 - on 
battery. 

- Tighten battery plus (B+) connection to 5 Nm.  

- Reconnect ground connection - 5 - on battery and tighten 
to 5 Nm. 


If the battery clamp on negative terminal is not seated 
securely:

- Tighten ground connection - 5 - on battery to 5 Nm. 

Battery, checking


- Work procedure: 

Description of work (part 1 of 2)

13/2/2005


Repair Manual, Electrical Equipment, Repair Group 27, 

Battery


Engine oil level, checking


Note: 

After stopping engine, wait at least 3 minutes to allow oil to 
flow back into oil pan.  
 
Pull out oil dipstick and wipe with clean rag. Replace 
dipstick and push down to stop.  
 
Observe waste disposal regulations  
 

- Pull out dipstick again and read oil level. 

Area a 
-

Oil must be topped off. After topping off it is sufficient when the oil level is somewhere 
in area - b - 

Area b 
-

Oil does not have to be topped off.

Area c 
-

Oil must not be topped off.

Note: 

If oil level is above area - - c - -, the catalytic converter can 
be damaged.  
 
If the oil level is below the -min- mark, fill up with oil to the -
max- mark. Observe oil specification 


01-7, Engine oils

 .  


Airbag for driver and passenger, visual 
inspection of airbag components


Description of work (part 1 of 2)

13/2/2005


Driver side airbag


Identification of airbag is embossed as "AIRBAG" on 
upholstered cover of steering wheel. 

- Perform a visual inspection for any damages to 
upholstered cover - 1 - 

Warning!  


Adhesive from tape, stickers, etc. and other residues 
or unauthorized work on airbag units can affect airbag 
function. So that future airbag function is ensured. 
make certain the customer is aware of this.


Upholstered cover of steering wheel may only be 
cleaned with a dry or damp cloth.

Front passenger side airbag


Identification of airbag is embossed as "AIRBAG" on right 
side of instrument panel. 

- Perform a visual inspection for any damages to surface of 
instrument panel - 2 - 

Warning!  


Adhesive from tape, stickers, etc and other residues or 

Description of work (part 1 of 2)

13/2/2005


unauthorized work on airbag units can affect airbag 
function. So that future airbag function is ensured. 
make certain the customer is aware of this.


Surface of airbag module may only be cleaned with a 
dry or damp cloth.

On Board Diagnostic (OBD), check DTC 
memory of all systems 

Special tools, testers and auxiliary items required 

Vehicle Diagnosis, Testing and Information System VAS 
5051 A or  
 
Vehicle Diagnosis and Service System VAS 5052 or 
subsequent devices  
 

Diagnostic cable VAS 5051/6A  
 

- Connect the diagnostic tester 


01-6, Diagnostic scan 

tool, connecting


- Switch ignition on. 

- On the display of the diagnostic tester, select the mode of 
operation "Guided Fault-finding" . 

Description of work (part 1 of 2)

13/2/2005


Content   ..  1213  1214  1215  1216   ..