Volkswagen Jetta / Jetta Hybrid. Manual - part 3


  Index      Volkswagen     Volkswagen Jetta / Jetta Hybrid service manual 2011-2013 year


Search            copyright infringement  


Content   ..  1  2  3  4  ..


Volkswagen Jetta / Jetta Hybrid. Manual - part 3


and hose clamp

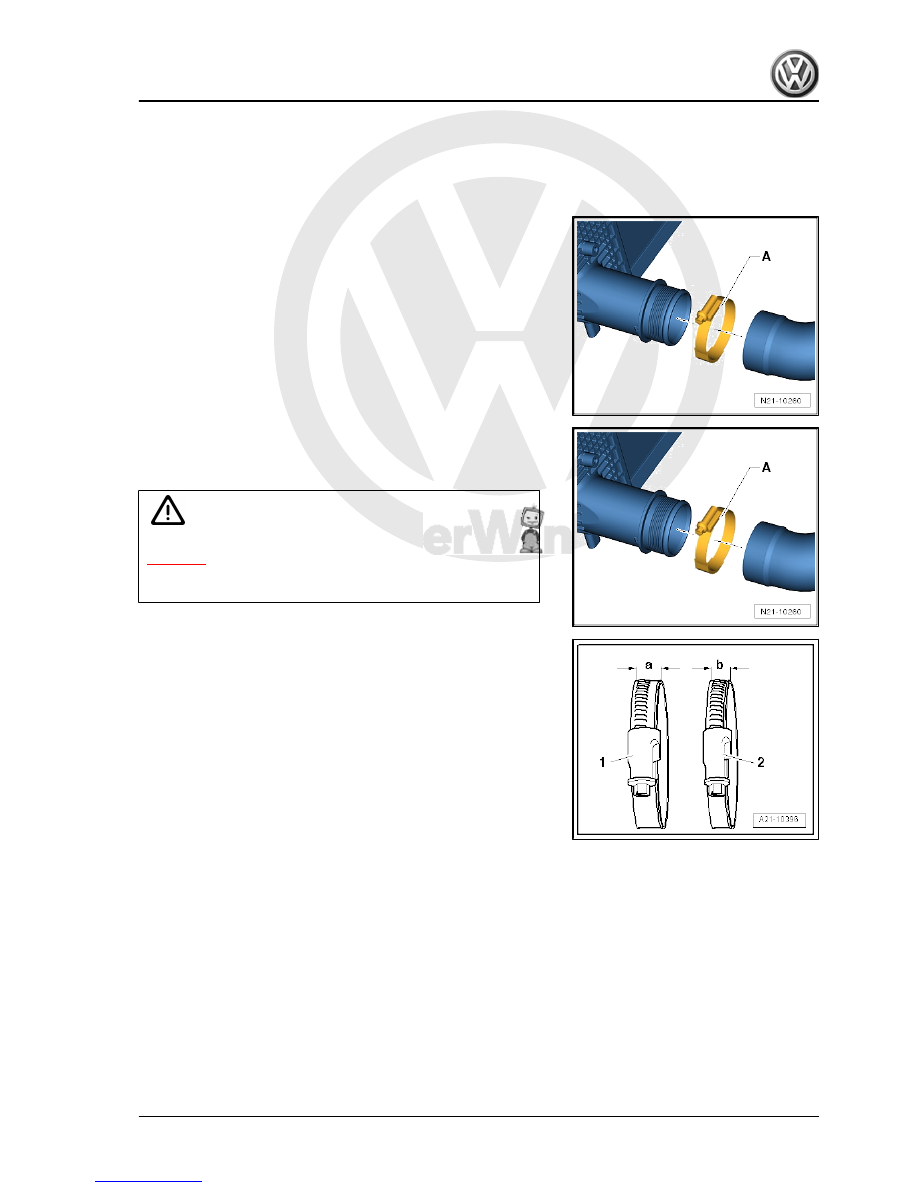
Removing pressure hose
Carry out following work:
– Loosen screw of hose clamp -A-.
– Pull pressure hose together with hose clamp -A- off the ribbed

union.

Fitting pressure hose
Carry out following work:

– Push pressure hose together with hose clamp -A- onto ribbed

union as far as it will go.

– Tighten screw of hose clamp -A-.

Caution

The hose clamp screw -A- must be tightened as prescribed

⇒ page 9

 . If the tightening torque is too low or too high, the

pressure hose may slip off the ribbed union when the vehicle

is being driven.

Specified torque for hose clamps
1 - Hose clamp -a- = 13 mm wide: 5.5 Nm
2 - Hose clamp -b- = 9 mm wide: 3 Nm

Jetta 2011 ➤ , Jetta Hybrid 2013 ➤

1. Lock carrier    

9


2.1

Tools

Special tools and workshop equipment required
♦ Torque wrench -V.A.G 1783-

Jetta 2011 ➤ , Jetta Hybrid 2013 ➤

10


Note

Only the left side is shown. The right side is similar.

1 - Wing

❑ Removing and installing

⇒ page 11

2 - Bolt

❑ Qty. 1, A-pillar.
❑ Qty. 2, wheel housing
❑ Qty. 1, side member
❑ Qty. 2, wing bracket
❑ Qty. 3, wing connection

piece

❑ Specified torque: 6 Nm.

3 - Wing end plate

❑ Removing and installing

⇒ page 15

4 - Insulation of wing end plate

❑ Placed in front of wing

end plate 

⇒ page 14

❑ Not installed in all model

versions

5 - Foam element

❑ Inserted between wing

and longitudinal mem‐

ber for top of wheel arch

⇒ page 14

 .

6 - Wing bracket

❑ Removing and installing

⇒ page 15

7 - Bolt

❑ Qty. 2.
❑ Specified torque: 6 Nm.

2.3

Removing and installing front wing

Note

The removal and installation sequence is only described for the

left wing. Removal and installation of the right wing is similar.

Jetta 2011 ➤ , Jetta Hybrid 2013 ➤

2. Wing    

11


Carry out following work:
– Remove wheel housing liners 

⇒ page 236

 .

– Pull out foam between wing and longitudinal member

⇒ Item 5 (page 11)

 .

– Pull out insulation of wing end plate, if it exists

⇒ Item 4 (page 11)

 .

– Remove wing end plate 

⇒ page 15

 .

– Remove front bumper cover 

⇒ page 175

 .

– Remove guide at side for front bumper cover 

⇒ page 179

 .

– If featured, remove water channel 

⇒ page 274

 .

– Remove bolts -2-.
– Remove wing -1- carefully.

Jetta 2011 ➤ , Jetta Hybrid 2013 ➤

12


Content   ..  1  2  3  4  ..