Suzuki Grand Vitara JB416 / JB420. Manual - part 381
9D-11 Wipers / Washers:
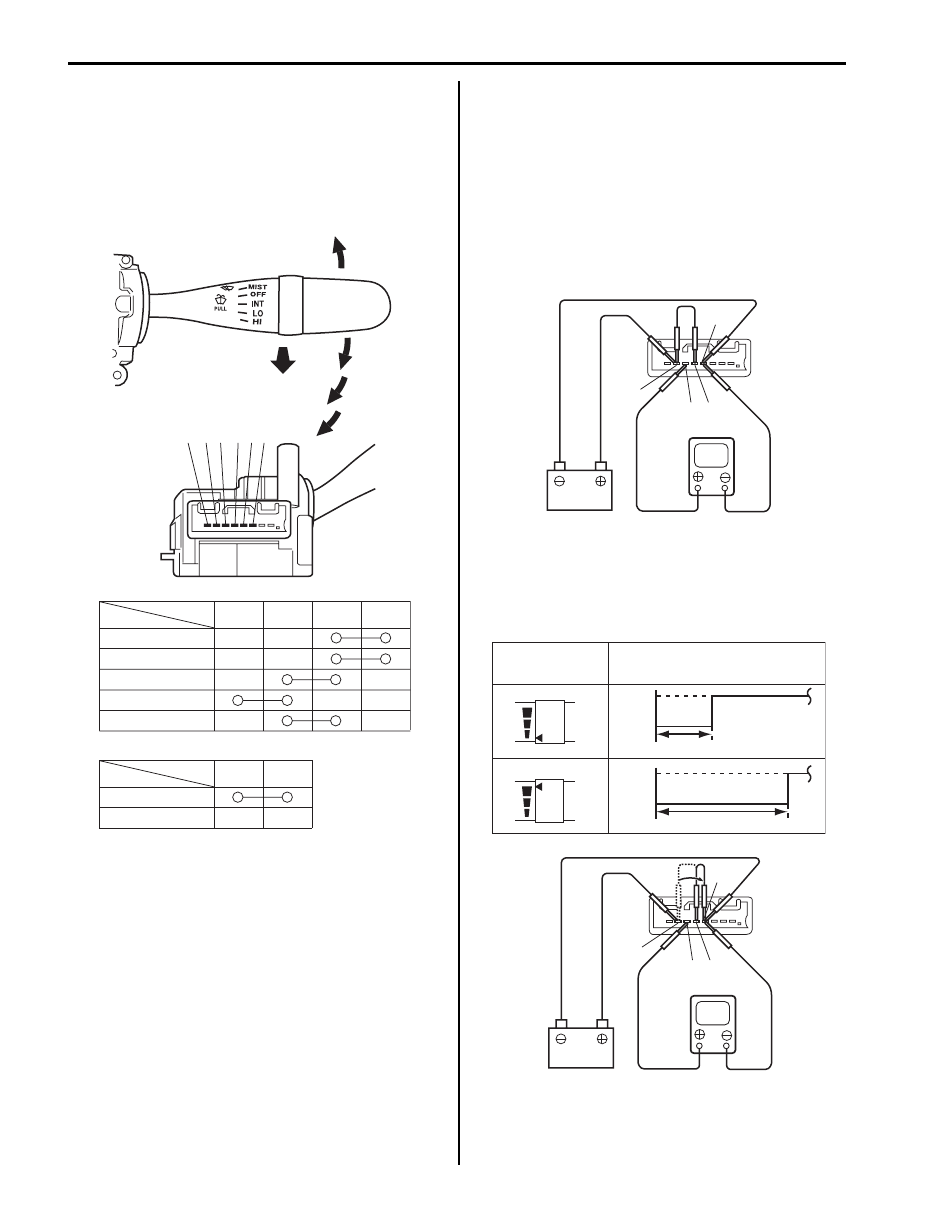
Windshield Wiper and Washer Switch
Inspection
S5JB0A9406009
Windshield Wiper and Washer Switch
Check for continuity between terminals at each switch
position. If check result is not as specified, replace
switch.
Intermittent Wiper Relay Circuit
1) Turn the windshield wiper switch to “INT” position.
2) Connect battery positive (+) terminal to terminal “5”
and its negative (–) terminal to terminal “2”.
3) Connect voltmeter positive lead to terminal “4” and
its negative lead to terminal “2”.
4) Check that the voltmeter indicates the battery
voltage (10 – 14 V).
5) Connect terminal “3” and terminal “5” by a jumper
wire.
6) Disconnect end of the jumper wire from terminal “5”.
7) Connect disconnected jumper wire end to terminal
“2”, then check that voltage between terminal “4” and
terminal “2” changes as shown.
If check result is not satisfied, replace switch.
Terminal
Wiper SW
OFF
INT
6
5
4
3
MIST
Terminal
Washer SW
OFF
1
2
ON
LO
HI
MIST
INT
LO
HI
WASHER ON
6
5
4
3 2 1
I4RS0B940009-03
V
2
3
4
5
I4RS0B940010-01
V
INT
TIME
INT
TIME
INT time control
switch position
Voltage
10-14V
0V
1.6 ± 1 sec.
10-14V
0V
10.7 ± 5 sec.
2
3
4
5
I4RS0B940011-01