Content .. 1076 1077 1078 1079 ..
Nissan Cube. Manual - part 1078
FRONT WIPER DRIVE ASSEMBLY
WW-149
< REMOVAL AND INSTALLATION >
C
D
E
F
G
H
I
J
K
M
A
B
WW
N
O
P
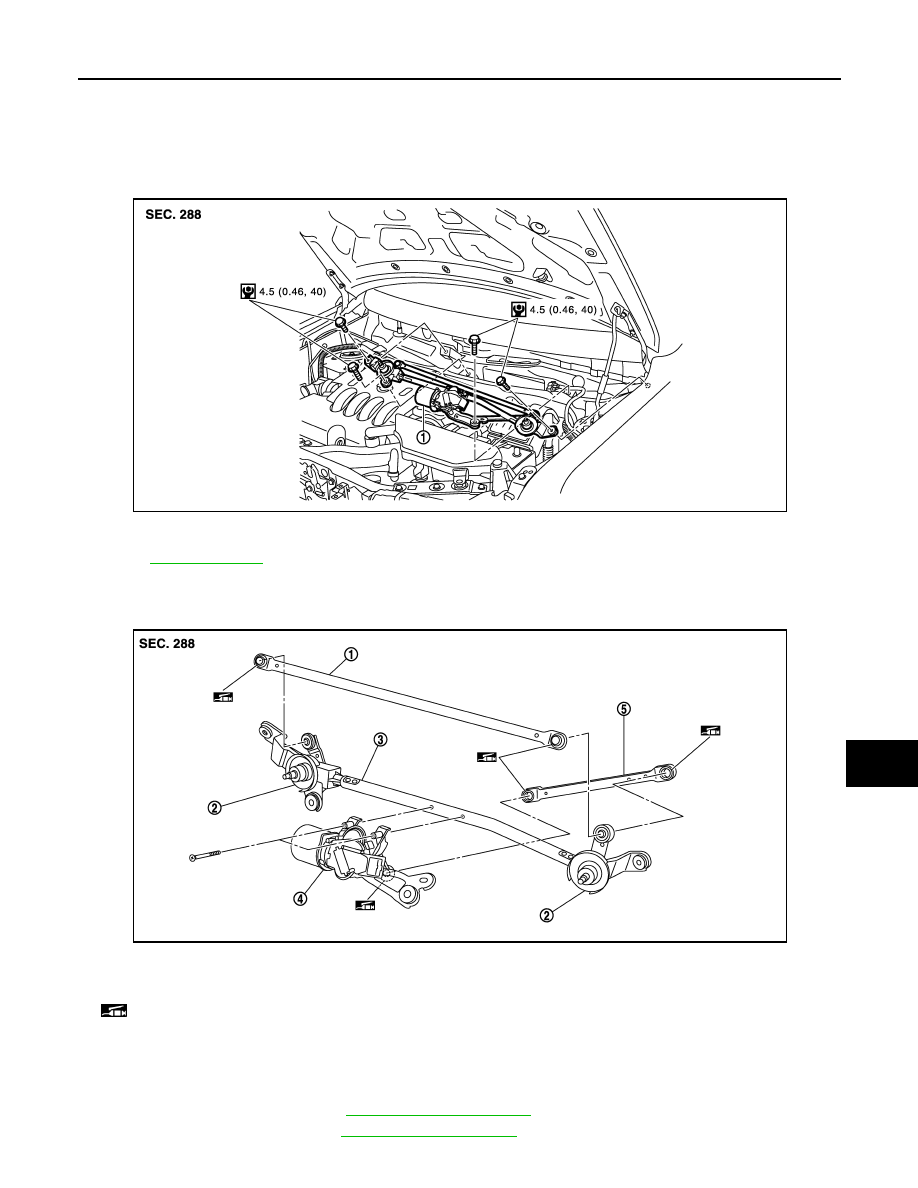
FRONT WIPER DRIVE ASSEMBLY
Exploded View
INFOID:0000000009945883
REMOVAL VIEW
DISASSEMBLY VIEW
Removal and Installation
INFOID:0000000009945884
REMOVAL
1.
Remove front wiper arm. Refer to
2.
Remove cowl top cover. Refer to
1.
Front wiper drive assembly
Refer to
JPLIA1764GB
1.
Front wiper linkage 2
2.
Front wiper frame
3.
Shaft seal
4.
Front wiper motor
5.
Front wiper linkage 1
: Multi
−
purpose grease or an equivalent
JPLIA1765ZZ