Nissan Versa Sedan. Manual - part 574
DOOR MIRROR
MIR-15
< REMOVAL AND INSTALLATION >
C
D
E
F
G
H
I
J
K
M
A
B
MIR
N
O
P
DOOR MIRROR
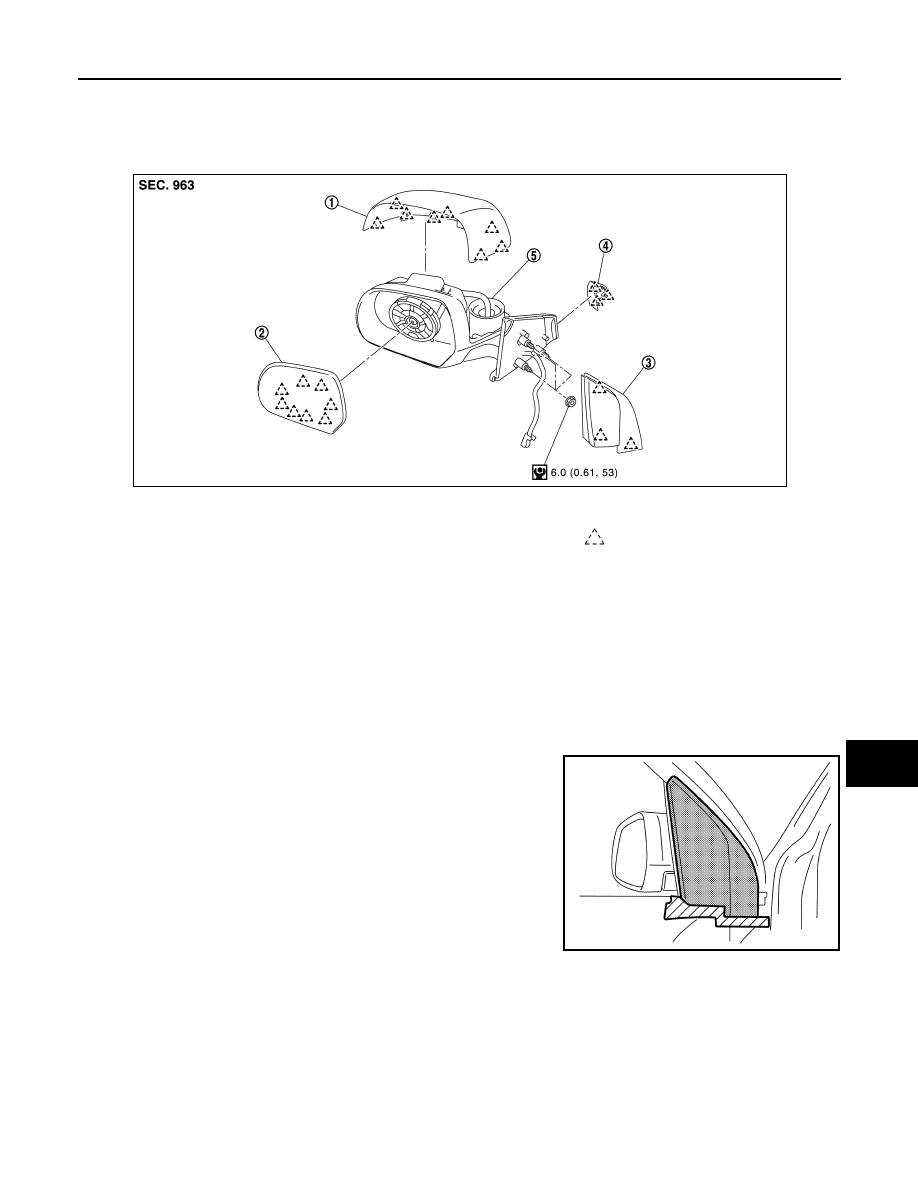
Exploded View
INFOID:0000000009269096
DOOR MIRROR ASSEMBLY
DOOR MIRROR ASSEMBLY : Removal and Installation
INFOID:0000000009269097
REMOVAL
CAUTION:
Use the following steps to disengage the door mirror corner cover from the mirror assembly. Other
methods to remove the door mirror corner cover may damage the pawls.
1. Remove door mirror corner cover.
a. Fully open door window.
b. Apply protective tape where the door mirror corner cover con-
tacts the front door finisher.
1.
Door mirror rear finisher
2.
Door mirror glass
3.
Door mirror corner cover
4.
Front door corner finisher
5.
Door mirror assembly
Pawl
JMLIA2085GB
JMLIA2087ZZ