Nissan Versa Sedan. Manual - part 378
TIMING CHAIN
EM-47
< REMOVAL AND INSTALLATION >
[HR16DE]
C
D
E
F
G
H
I
J
K
L
M
A
EM
N
P
O
TIMING CHAIN
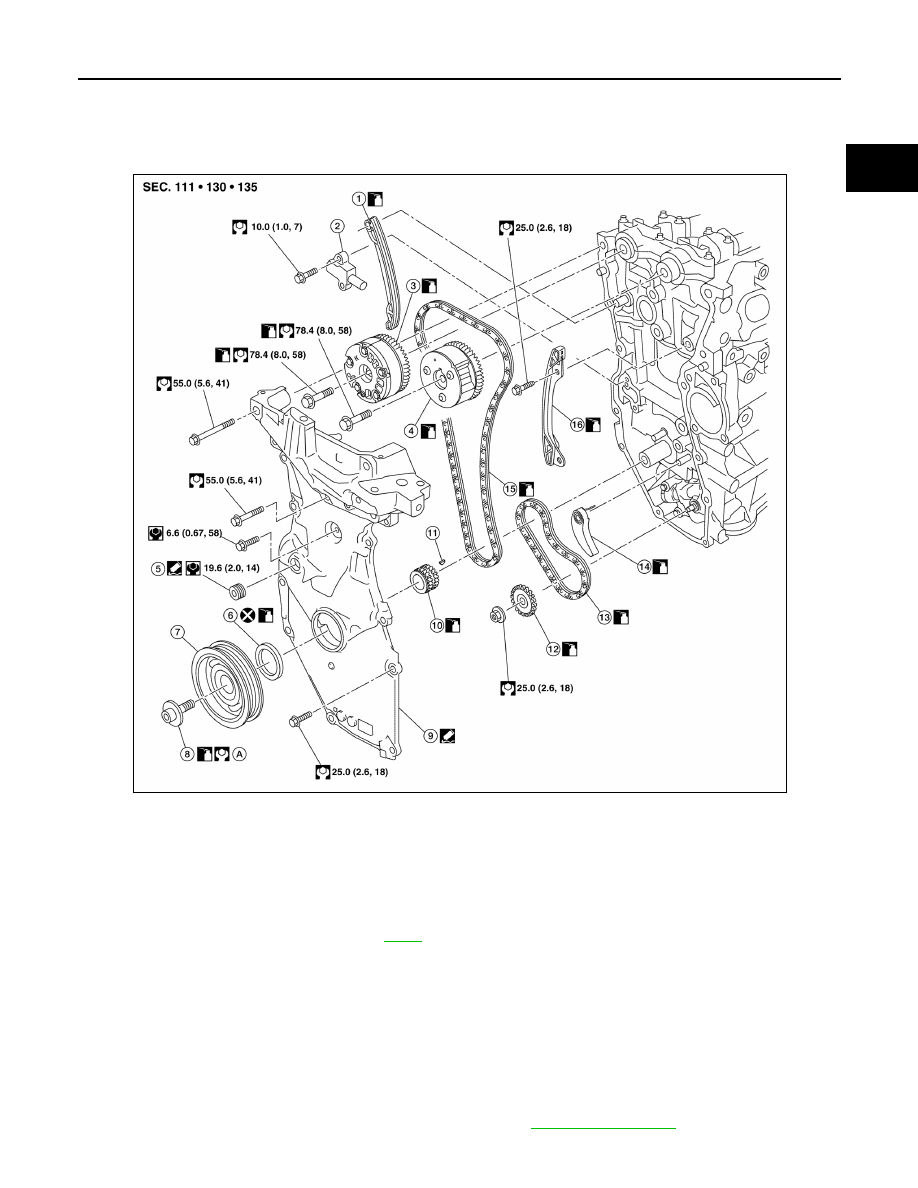
Exploded View
INFOID:0000000009266657
Removal and Installation
INFOID:0000000009266658
CAUTION:
The rotation direction indicated in the text is as viewed from the engine front.
NOTE:
When removing components such as hoses, tubes/lines, etc., cap or plug openings to prevent fluid from spill-
ing.
REMOVAL
1. Remove front wheel and tire (RH) using power tool. Refer to
.
1.
Timing chain slack guide
2.
Timing chain tensioner
3.
Camshaft sprocket (EXH)
4.
Camshaft sprocket (INT)
5.
Plug
6.
Front oil seal
7.
Crankshaft pulley
8.
Crankshaft pulley bolt
9.
Front cover
10. Crankshaft sprocket
11. Crankshaft sprocket key
12. Oil pump sprocket
13. Oil pump drive chain
14. Oil pump drive chain tensioner
15. Timing chain
16. Timing chain tension guide
A.
Refer to installation procedure. Refer
to
AWBIA1475ZZ