Nissan Leaf. Manual - part 844


  Index      Nissan     Nissan Leaf (2011-2014 year) - Service and Repair Manual


Search            


Content   ..  842  843  844  845   ..


Nissan Leaf. Manual - part 844


RADIATOR

HCO-15

< REMOVAL AND INSTALLATION >

D

E

F

G

H

I

J

K

L

M

A

B

HCO

N

O

P

Removal and Installation

INFOID:0000000010119133

REMOVAL

WARNING:

Do not remove the reservoir tank cap if the drive motor or other high voltage part is hot. Hot liquid may

spray out from the radiator, causing serious injury.

NOTE:

When removing components such as hoses, tubes/lines, etc., cap or plug openings to prevent fluid from spill-

ing.
1. Remove front under cover. Refer to 

EXT-23, "FRONT UNDER COVER : Removal and Installation"

.

2. Remove the fender protector. Refer to 

EXT-21, "FENDER PROTECTOR : Removal and Installation"

.

3. Remove the apron bracket. Refer to 

EXT-13, "Removal and Installation"

.

4. Drain coolant from radiator drain plug. Refer to 

HCO-11, "Draining"

.

5. Remove the radiator upper grille. Refer to 

DLK-165, "RADIATOR UPPER GRILLE : Removal and Installa-

tion"

.

6. Remove the washer tank inlet. Refer to 

WW-43, "Exploded View"

.

7. Disconnect the water temperature sensor connector.  .

8. Remove the reservoir tank. 
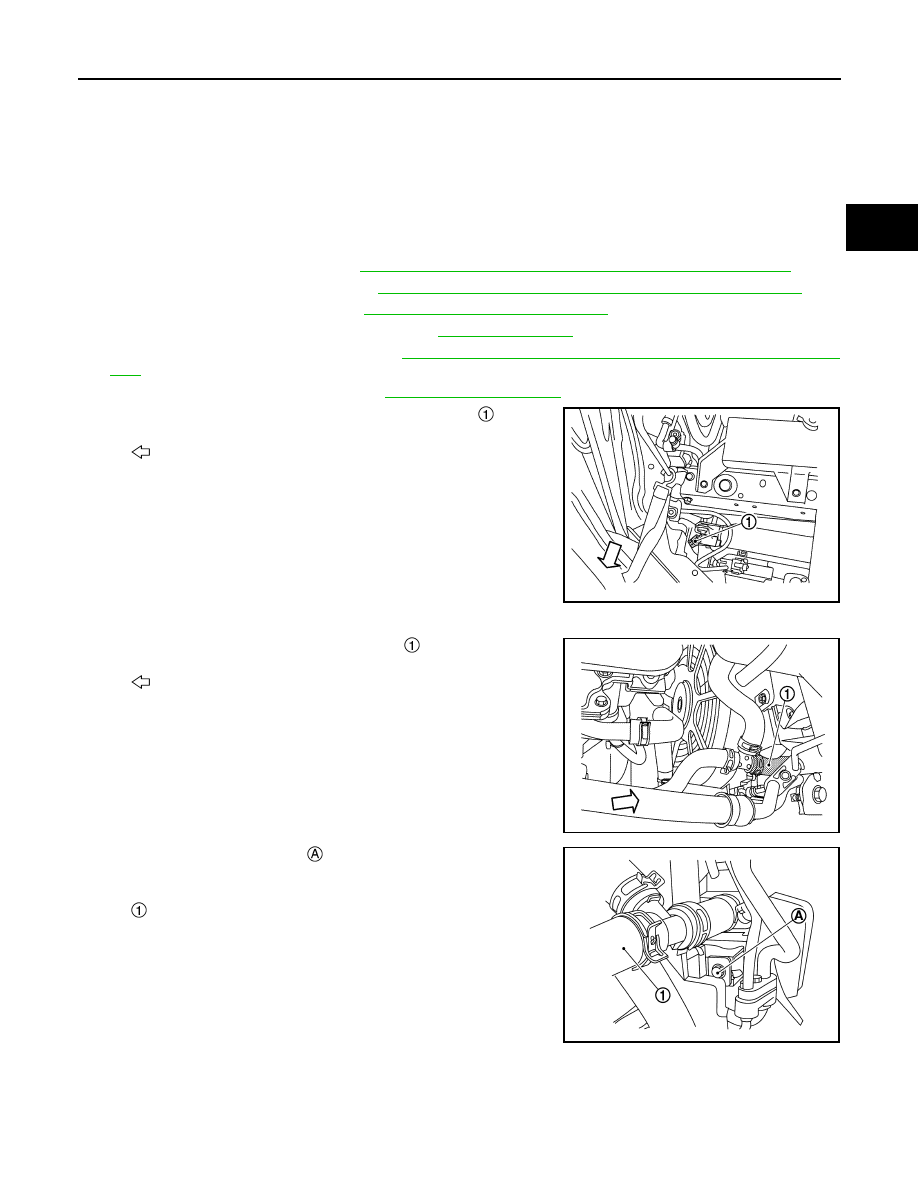
9. Disconnect the radiator hose (upper front)  .

10. Remove the condenser bolt  . (Models without heat pump sys-

tems)

: Front

JSCIA0525ZZ

: Front

JSCIA0526ZZ

: Radiator hose (upper rear)

JSCIA0527ZZ

HCO-16

< REMOVAL AND INSTALLATION >

RADIATOR

11. Remove the radiator bolt (top left)  .

12. Use rope or other means   to support the condenser with the

radiator core support assembly.

13. Remove the air guide bottom clips  .

14. Remove the radiator core support lower. Refer to 

DLK-163, "RADIATOR CORE SUPPORT LOWER :

Removal and Installation"

.

CAUTION:

Be careful not to damage the radiator core.

15. Lift up the chipping guard   and disconnect the parts   which

mate with the radiator.

: Front

JSCIA0528ZZ

: Front

JSCIA0529ZZ

JSCIA0530ZZ

JSCIA0534ZZ

RADIATOR

HCO-17

< REMOVAL AND INSTALLATION >

D

E

F

G

H

I

J

K

L

M

A

B

HCO

N

O

P

16. Remove the radiator bolts  .

17. Press the radiator top left tab   while lowering the radiator   downwards to disengage it from the con-

denser  . (Models without heat pump systems)

CAUTION:

Because there is a risk of bending the air conditioner pipe, do not lift up the capacitor more than is

necessary to disengage it.

18. Disconnect the radiator side of the radiator hose (lower).
19. Remove the radiator by pulling it out downwards from between

the chipping guard and condenser.

CAUTION:

Be careful not to damage the condenser core.

INSTALLATION

Note the following, and install in the reverse order of removal.

CAUTION:

Be sure to perform correct air bleeding after adding coolant. Refer to 

HCO-12, "Refilling"

.

Radiator

JSCIA0535ZZ

JSCIA0536ZZ

JSCIA0537ZZ

HCO-18

< REMOVAL AND INSTALLATION >

RADIATOR

• When installing the radiator, securely insert the engaging points shown by the arrows (

) in the figure.

(Models without heat pump systems)

Chipping Guard

• When installing the chipping guard, securely insert the engaging points shown by the arrows (

) in the fig-

ure.

Radiator Hose / Water Hose

• When inserting the radiator hose and water hose, insert all the way until it contacts the end, regardless of

whether or not there is a stopper  .

JSCIA0538ZZ

JSCIA0539ZZ

With stopper

No stopper

JPCIA0358ZZ


Content   ..  842  843  844  845   ..