Nissan Leaf. Manual - part 423
HOOD LOCK
DLK-187
< REMOVAL AND INSTALLATION >
C
D
E
F
G
H
I
J
L
M
A
B
DLK
N
O
P
HOOD LOCK
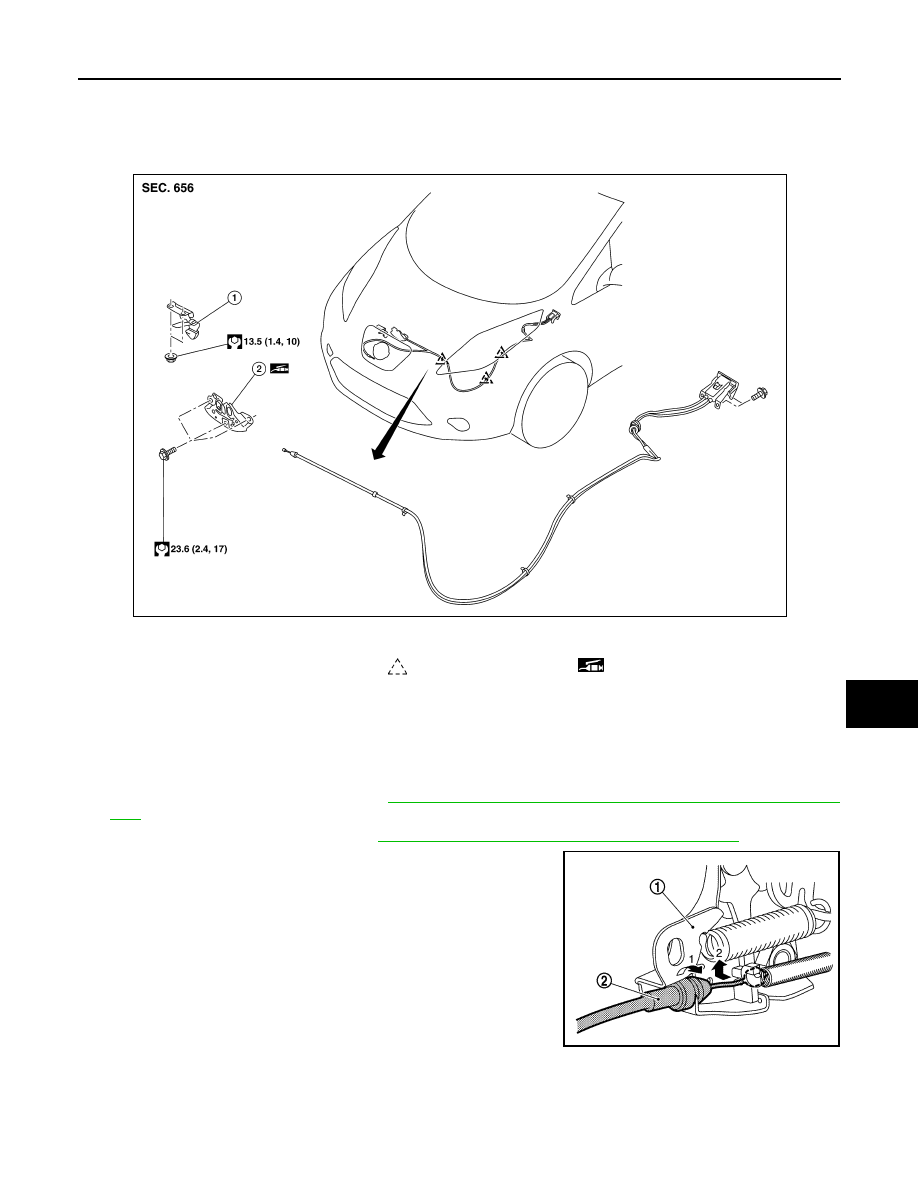
Exploded View
INFOID:0000000010119885
HOOD LOCK
HOOD LOCK : Removal and Installation
INFOID:0000000010119886
REMOVAL
1. Remove radiator upper grille. Refer to
DLK-165, "RADIATOR UPPER GRILLE : Removal and Installa-
2. Remove hood lock assembly. Refer to
DLK-187, "HOOD LOCK : Removal and Installation"
.
3. Disconnect hood lock control cable (2) from hood lock assembly
(1).
4. Disconnect the harness connector from the hood lock assembly (if equipped).
5. Remove the hood lock assembly.
INSTALLATION
1.
Hood lock secondary control
2.
Hood lock assembly
3.
Hood lock control cable
A.
To charge port lid lock
Clip
Grease
AWKIA2419ZZ
JMKIA6504ZZ