Nissan Frontier D22. Manual - part 164
VACUUM PIPING
BR-23
C
D
E
G
H
I
J
K
L
M
A
B
BR
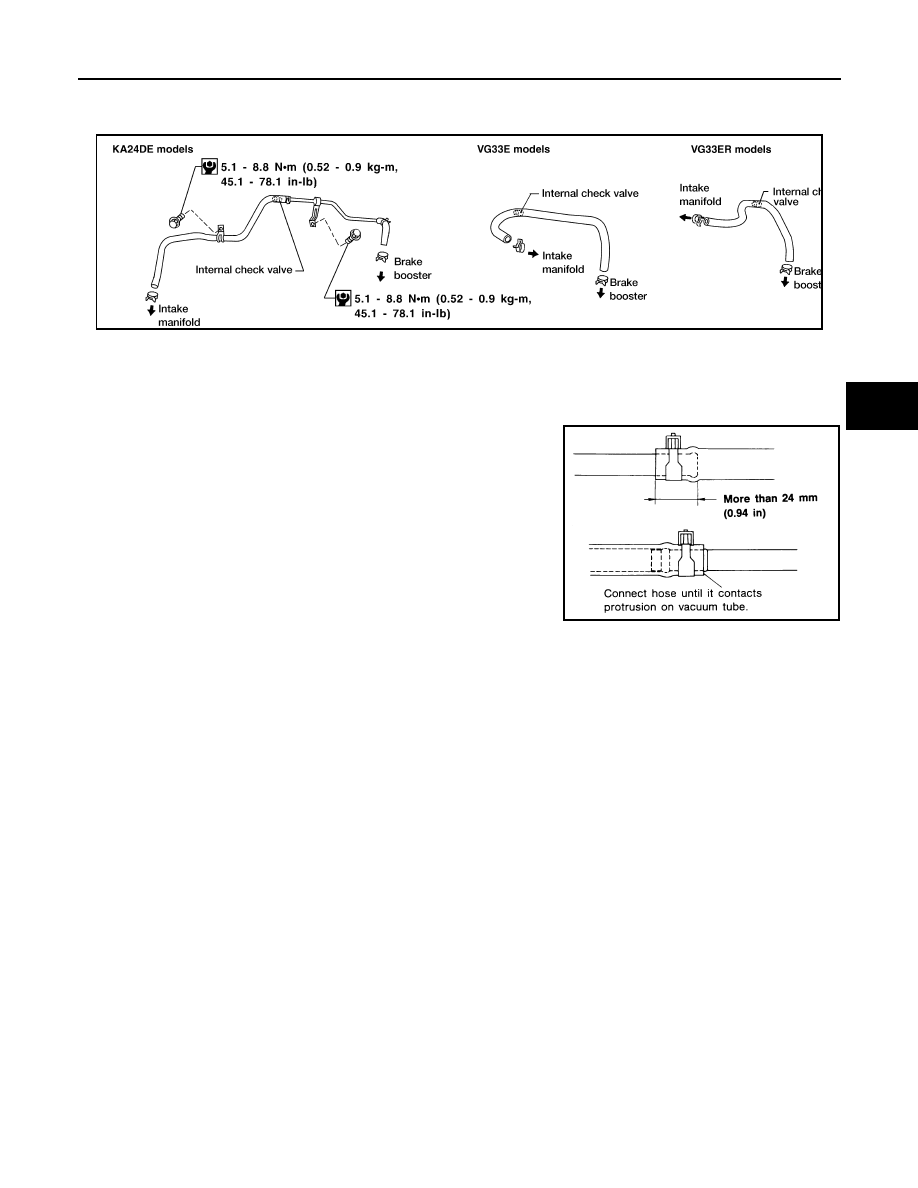
VACUUM PIPING
PFP:47474
Vacuum Hose
EFS003FR
Removal and Installation
EFS003FS
CAUTION:
When installing vacuum hoses, pay attention to the following points.
●
Do not apply any oil or lubricants to vacuum hose with
check valve.
●
Insert vacuum tube into vacuum hose as shown.
●
Install vacuum hose with internal check valve, paying atten-
tion to its direction.
LBR159
SBR225B