Nissan Xterra. Manual - part 447
GW-10
< UNIT REMOVAL AND INSTALLATION >
WINDSHIELD GLASS
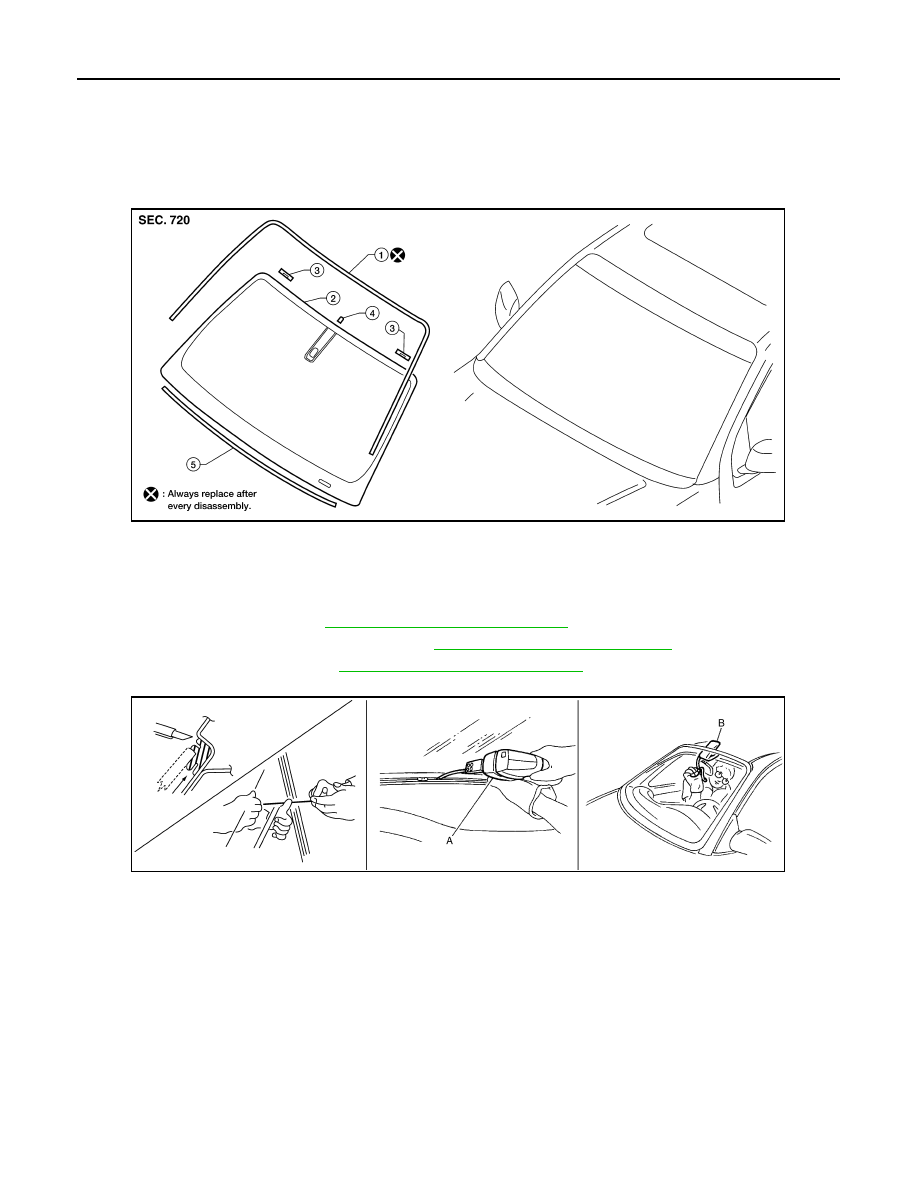
UNIT REMOVAL AND INSTALLATION
WINDSHIELD GLASS
Removal and Installation
INFOID:0000000009484311
REMOVAL
1. Remove inside mirror. Refer to
MIR-19, "Removal and Installation"
.
2. Remove the front pillar upper finisher. Refer to
INT-18, "Removal and Installation"
.
3. Remove cowl top cover. Refer to
EXT-20, "Removal and Installation"
.
4. Remove glass using piano wire or power cutting tool (A) and an inflatable pump bag (B).
• Apply protective tape around the windshield glass to protect the painted surface from damage.
• If the windshield glass is to be reused, mark the body and the glass with matching marks.
WARNING:
When cutting the glass from the vehicle, always wear safety glasses and heavy gloves to help pre-
vent glass splinters from entering your eyes or cutting your hands.
CAUTION:
• When the windshield glass is to be reused, do not use a cutting knife or power cutting tool.
• Be careful not to scratch the glass when removing.
• Do not set or stand glass on its edge. Small chips may develop into cracks.
INSTALLATION
Installation is in the reverse order of removal.
• Use a Genuine NISSAN Urethane Adhesive Kit (if available) or equivalent and follow the instructions fur-
nished with it.
• While the urethane adhesive is curing, open a door window. This will prevent the glass from being forced out
by passenger compartment air pressure when a door is closed.
1.
Molding
2.
Windshield
3.
Windshield position pins
4.
Mirror base
5.
Insulator
LIIA1684E
PIIB5779E