Nissan Almera Tino V10. Manual - part 958
NRS122
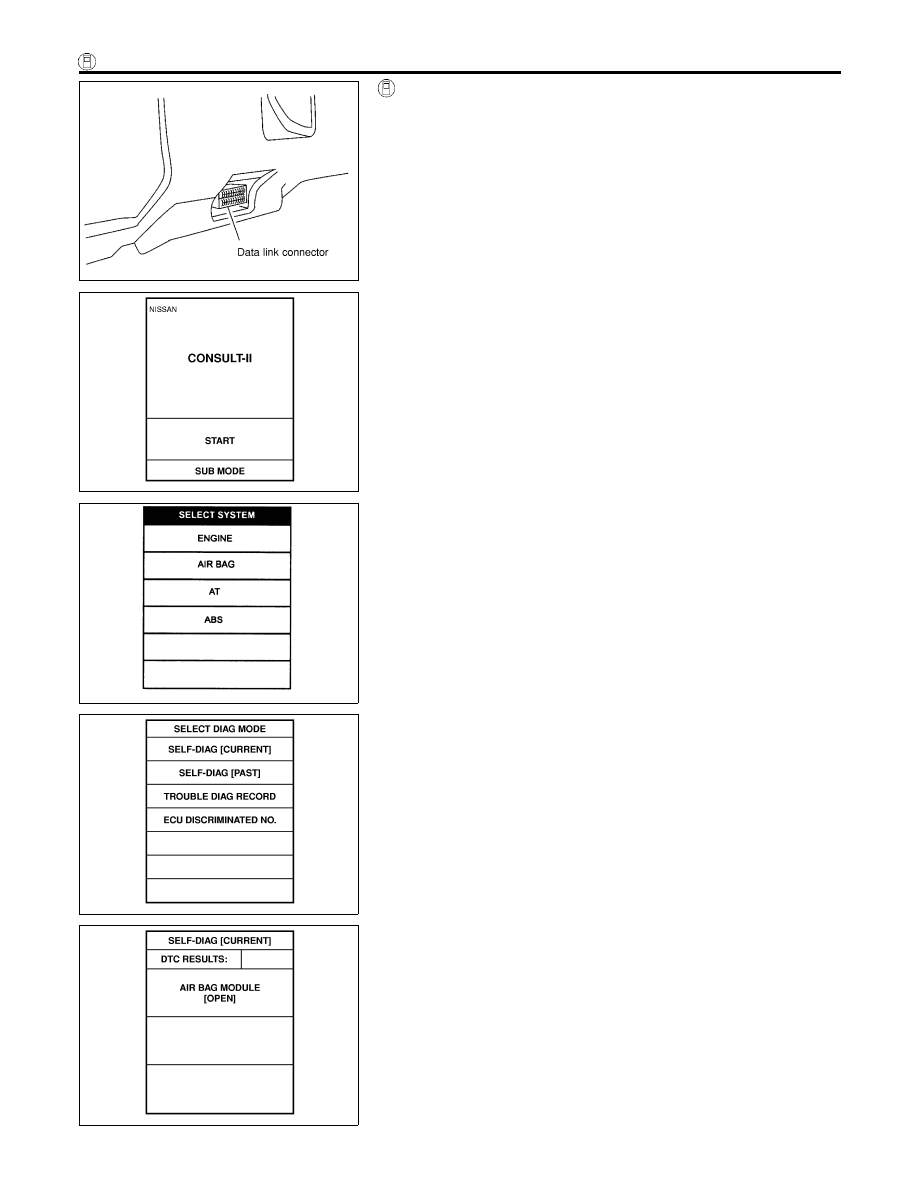
Trouble Diagnoses with CONSULT-II
=NLRS0048
DIAGNOSTIC PROCEDURE 2
NLRS0048S01
Inspecting SRS malfunctioning parts by using CONSULT-II —
Diagnosis mode
1.
Turn ignition switch “OFF”.
2.
Connect CONSULT-II to data link connector.
SRS695
3.
Turn ignition switch “ON”.
4.
Touch “START”.
C2SSE01
5.
Touch “AIR BAG”.
SRS697
6.
Touch “SELF-DIAG [CURRENT]”.
SRS772
7.
Diagnostic codes are displayed on “SELF-DIAG [CURRENT]”.
SUPPLEMENTAL RESTRAINT SYSTEM (SRS)
Trouble Diagnoses with CONSULT-II
RS-44