Content .. 1207 1208 1209 1210 ..
Nissan Teana J32. Manual - part 1209
VTL-22
< ON-VEHICLE REPAIR >
[WITHOUT 7 INCH DISPLAY]
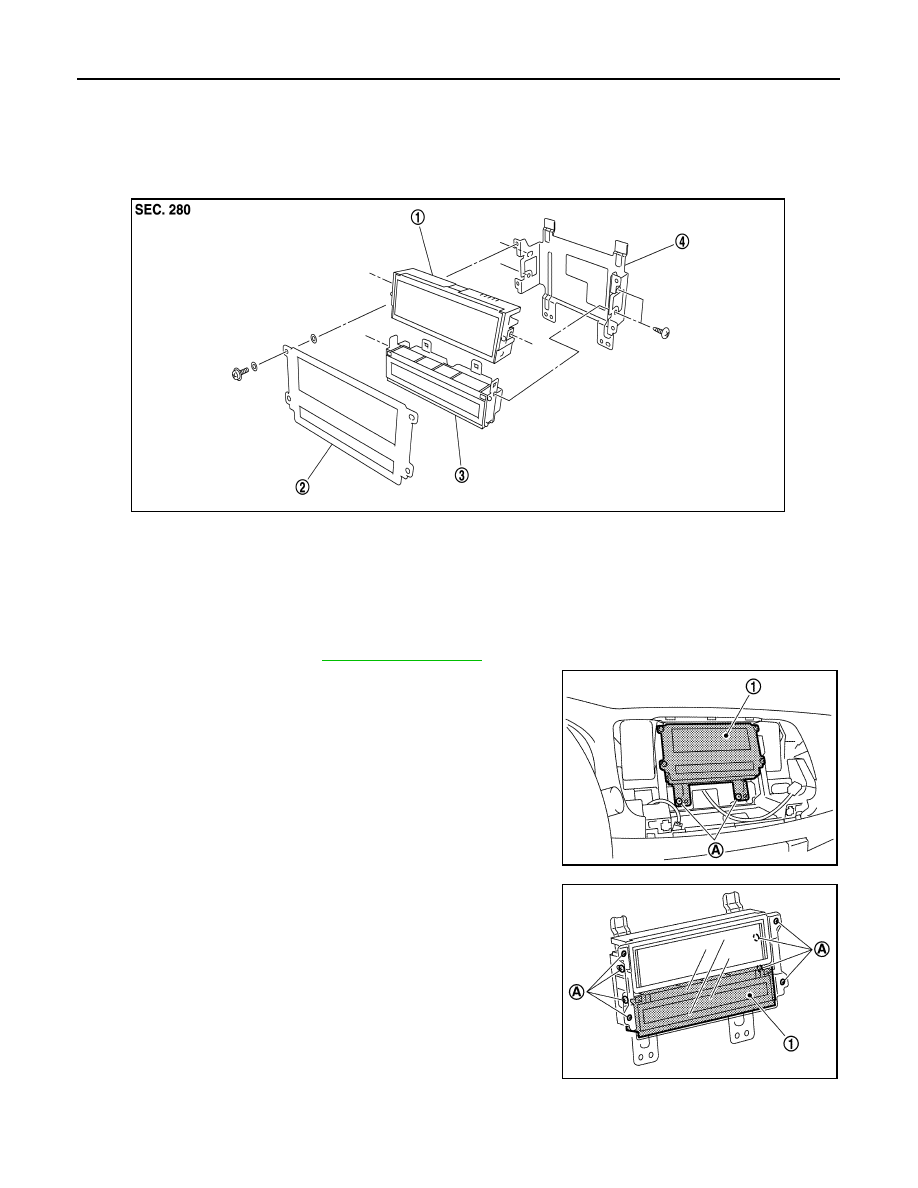
A/C DISPLAY
A/C DISPLAY
Exploded View
INFOID:0000000003774659
DISASSEMBLY
Removal and Installation
INFOID:0000000003774660
REMOVAL
1.
Remove cluster lid D. Refer to
2.
Remove mounting screws (A), and then remove audio display
with bracket as a single unit (1).
3.
Remove mounting screws (A), and then remove A/C display (1).
INSTALLATION
Installation is basically the reverse order of removal.
1.
AV display
2.
CRT filter
3.
A/C display
4.
Bracket
JPNIA1028ZZ
JPIIA0950ZZ
JPIIA0951ZZ