содержание .. 1718 1719 1720 1721 ..
Nissan X-Trail 32. Manual - part 1720
PG-134
< BASIC INSPECTION >
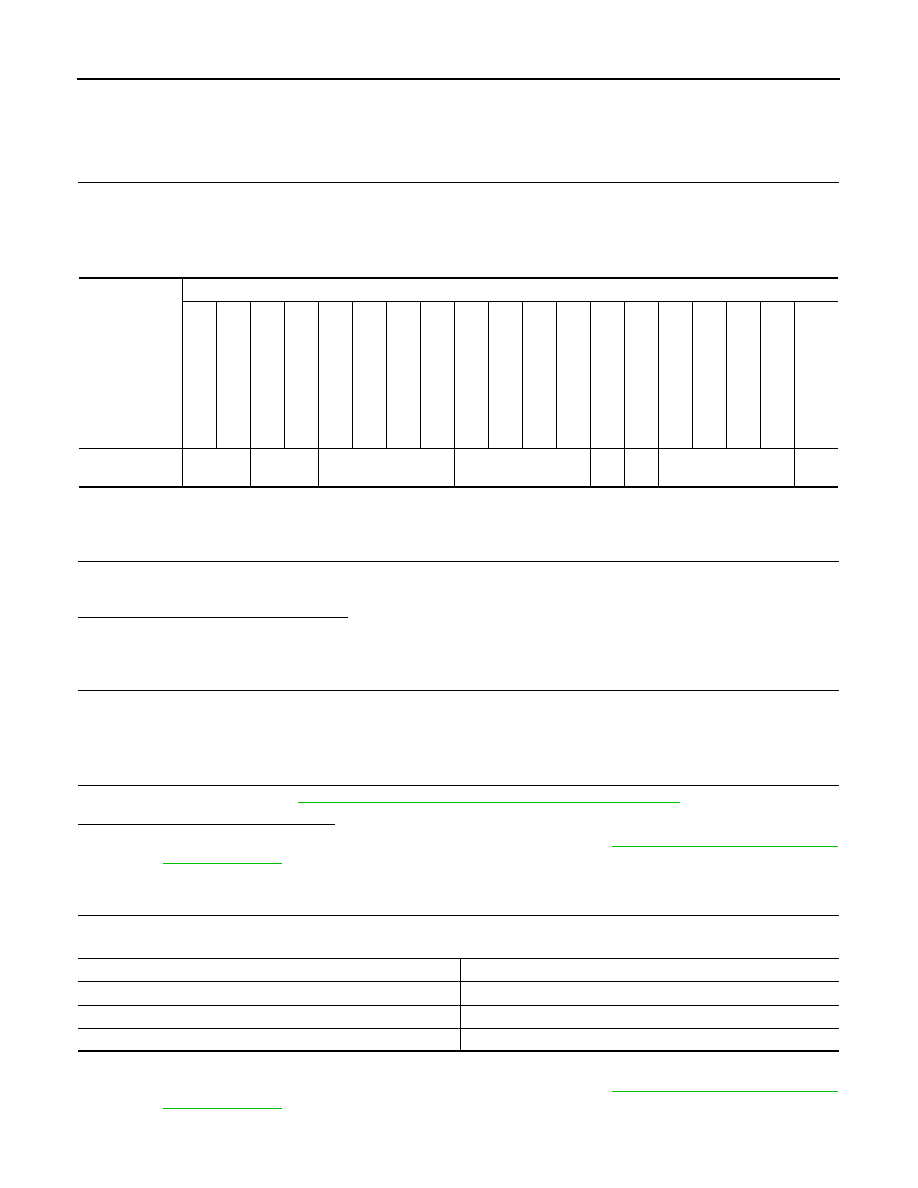
BATTERY CHARGING CHART
BATTERY CHARGING CHART
Slow Charge
INFOID:0000000010709233
1.
DETERMINE INITIAL CHARGING CURRENT
1.
Determine initial charging current from specific gravity.
2.
Check battery type and determine the specified current using the table.
NOTE:
After starting charging, adjustment of charging current is not necessary.
Initial Charging Current Setting (Slow Charge)
>> GO TO 2.
2.
CHARGE BATTERY
1.
Charge battery.
2.
Check charge voltage 30 minutes after starting the battery charge.
Is the voltage between 12 V and 15 V?
YES
>> GO TO 3.
NO
>> Replace battery.
3.
CHARGE BATTERY
Continue to charge for 12 hours.
>> GO TO 4.
4.
CHECKING SPECIFIC GRAVITY
Check specific gravity. Refer to
PG-121, "EXCEPT FOR R9M : How to Handle Battery"
Is the specific gravity 1.240 or more?
YES
>> Complete slow charge. Perform “CAPACITY TEST”. Refer to
NO
>> GO TO 5.
5.
CONDUCT ADDITIONAL CHARGE
Add charging time depending on specific gravity.
Additional Charge (Slow Charge)
>> Complete slow charge. Perform “CAPACITY TEST”. Refer to
CAUTION:
CONVERTED
SPECIFIC
GRAVITY
BATTERY TYPE
28
B1
9L
/R
34
B1
9L
/R
46
B2
4L
/R
55
B2
4L
/R
50
D2
3L
/R
55
D2
3L
/R
0
2
5
[YUAS
A
type
cod
e
]
0
2
7
[YUAS
A
type
cod
e
]
80
D2
3L
/R
65
D2
6L
/R
80
D2
6L
/R
0
6
7
[YUAS
A
type
cod
e
]
0
9
6
[YUAS
A
type
cod
e
]
75
D3
1L
/R
95
D3
1L
/R
1
1
5D31
L/
R
1
1
0D26
L/
R
95
E4
1L
/R
13
0E4
1
L
/R
Below 1.100
4.0 (A)
5.0 (A)
7.0 (A)
8.0 (A)
8.5
(A)
9.0
(A)
10.0 (A)
14.0
(A)
SPECIFIC GRAVITY
CHARGING TIME (h)
Below 1.150
5
1.150 - 1.200
4
1.200 - 1.240
2