содержание .. 447 448 449 450 ..
Nissan Primera P12. Manual - part 449
EM-142
[F9Q]
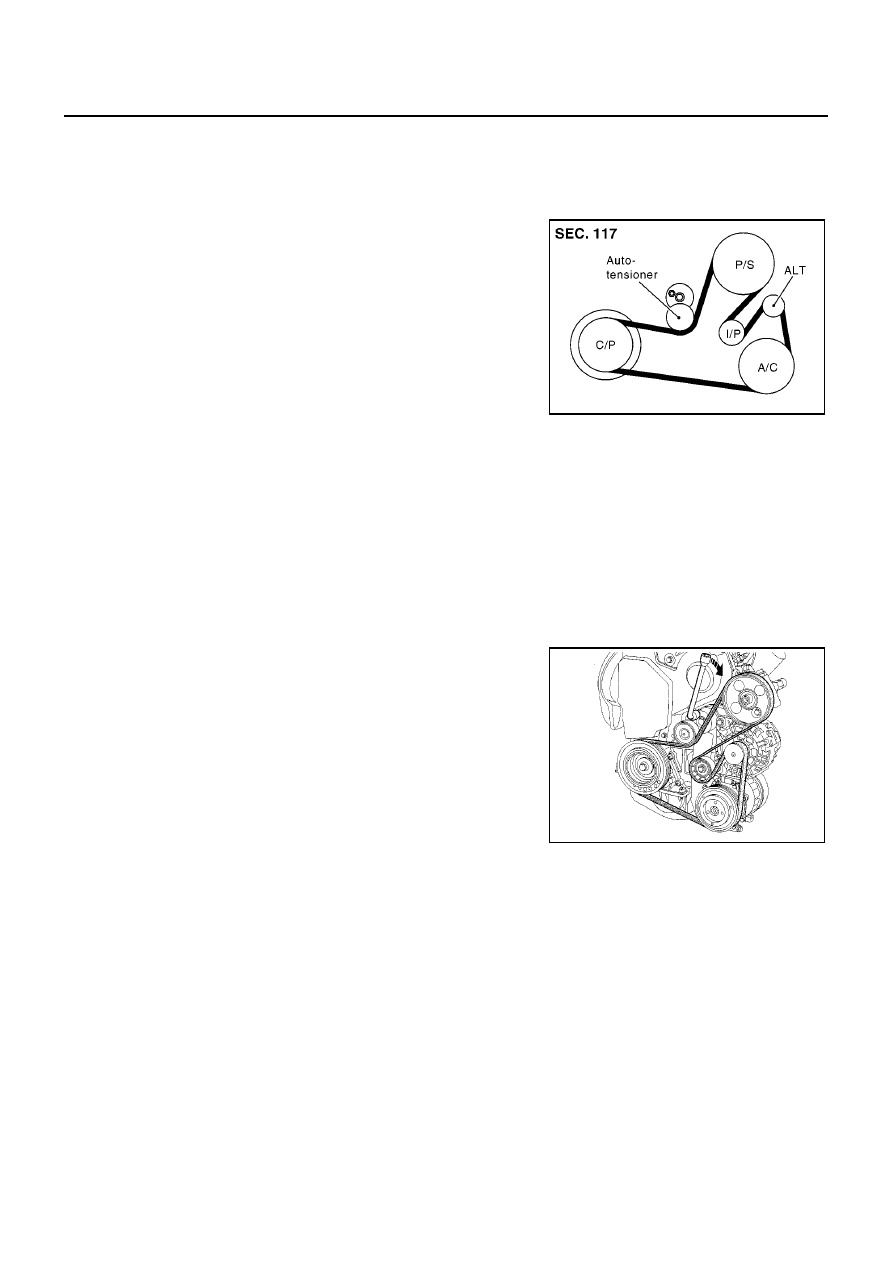
DRIVE BELTS
DRIVE BELTS
PFP:02117
Checking Drive Belts
EBS00SK2
WARNING:
Be sure to perform when the engine is stopped.
●
Inspect belts for cracks, fraying, wear and oil. If necessary,
replace.
Tension Adjustment
EBS00SK3
Belt tensioning is not necessary, as it is automatically adjusted by auto-tensioner.
CAUTION:
●
Keep oil and water away from belt.
●
Do not twist or bend belt excessively.
Removal and Installation
EBS00SK4
REMOVAL
1.
Remove engine undercover.
2.
Remove RH front wheel.
3.
Remove right side splash cover.
4.
Remove drive belt by turning the spanner to the right to loosen
the belt as shown.
INSTALLATION
Install in the reverse order of removal.
MBIB0944E
MBIB0714E