содержание .. 817 818 819 820 ..
Nissan Tiida C11. Manual - part 819
GW-14
< ON-VEHICLE REPAIR >
FRONT DOOR GLASS AND REGULATOR
FRONT DOOR GLASS AND REGULATOR
Removal and Installation
INFOID:0000000001716843
DOOR GLASS
Removal
1.
Remove the front door finisher. Refer to
INT-13, "Removal and Installation"
2.
Disconnect the front door speaker electrical connector.
3.
Position aside the sealing screen.
NOTE:
If sealing the screen is reused, cut the butyl-tape so that a part of butyl-tape remains on the sealing
screen.
4.
If equipped, reconnect the power window switch electrical con-
nector. Operate the power window main switch to raise/lower
the door window until the glass bolts can be seen.
5.
Remove the door glass bolts.
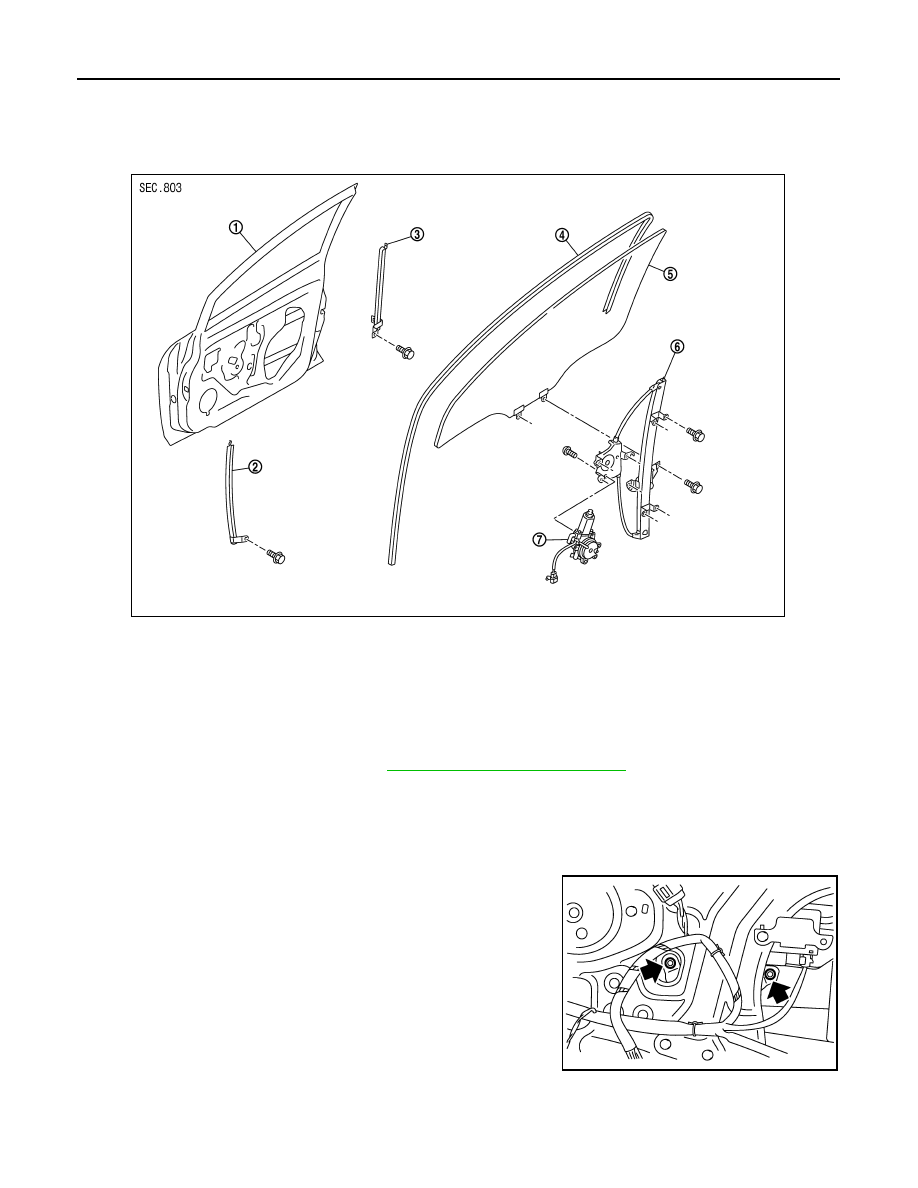
1. Door panel
2.
Lower sash (front)
3.
Lower sash (rear)
4.
Door glass run
5.
Door glass
6.
Regulator assembly
7.
Power window motor (if equipped)
PIIB2631J
PIIB2632J