содержание .. 1384 1385 1386 1387 ..
Nissan Tiida C11. Manual - part 1386
ASSEMBLY
TM-595
< DISASSEMBLY AND ASSEMBLY >
[TYPE 2 (4AT: RE4F03B)]
C
E
F
G
H
I
J
K
L
M
A
B
TM
N
O
P
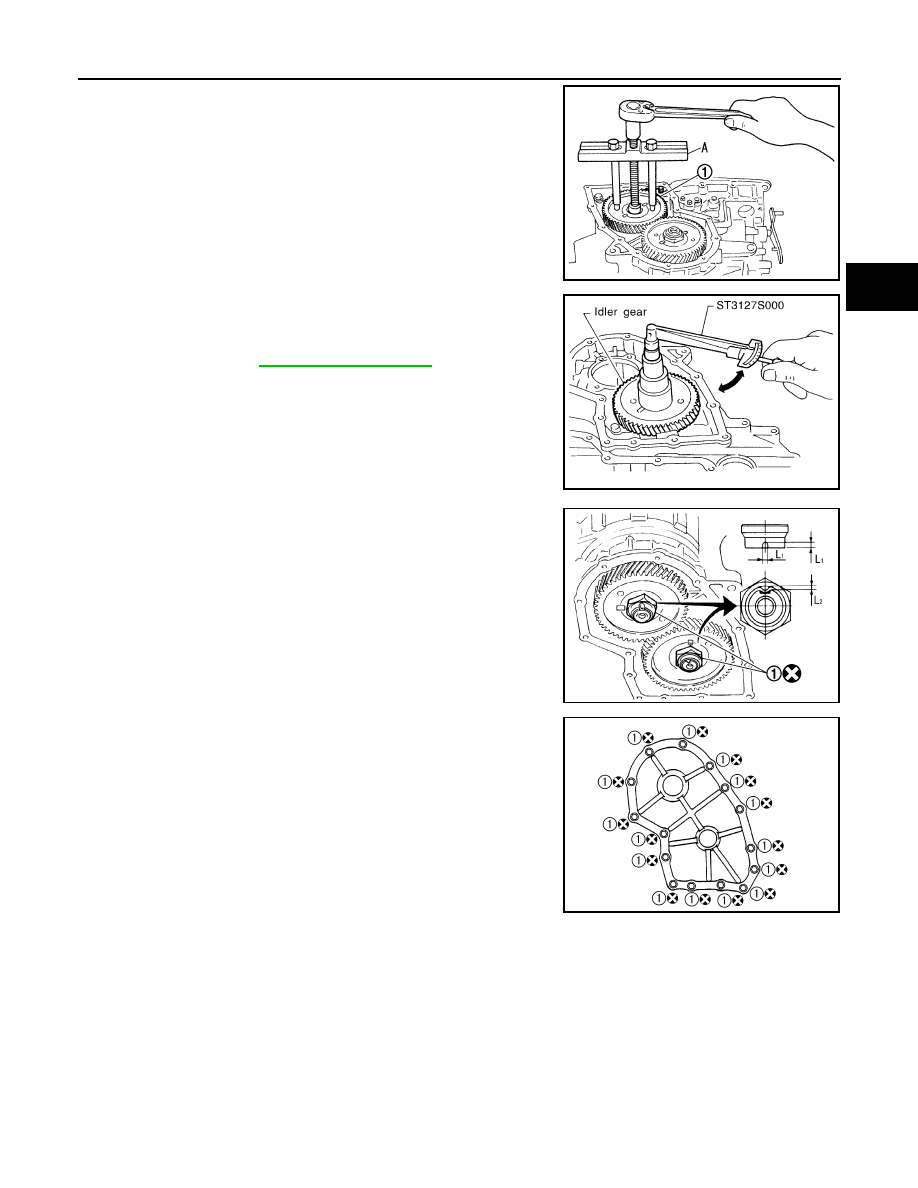
9.
Remove idler gear (1) using Tool (A) to measure output shaft
bearing preload.
10. Measure turning torque of output shaft.
• When measuring turning torque, turn output shaft in both
directions several times to seat bearing rollers correctly.
• If turning torque is out of specification, decrease or
increase thickness of output gear adjusting spacer.
11. Press idler gear on reduction pinion gear.
12. Tighten lock nut (1) of idler gear to the specified torque.
13. After properly adjusting turning torque, clinch lock nuts (1) of
idler gear and output gear as shown.
14. Install side cover gasket and side cover on transaxle case.
CAUTION:
• Do not reuse side cover gasket.
• Completely remove all moisture, oil and old gasket, etc.
from the transaxle case and side cover mating surfaces.
15. Tighten side cover bolts (1) to the specified torque.
Tool number:
ST27180001
SCIA5921J
Turning torque of output shaft:
SAT190FB
L
1
: 3 mm (0.12 in) or more
L
2
: 1 mm (0.04 in) or more
SCIA5922J
SCIA6039J