содержание .. 134 135 136 137 ..
Nissan Tiida C11. Manual - part 136
CO-62
< ON-VEHICLE REPAIR >
[K9K]
RADIATOR
ON-VEHICLE REPAIR
RADIATOR
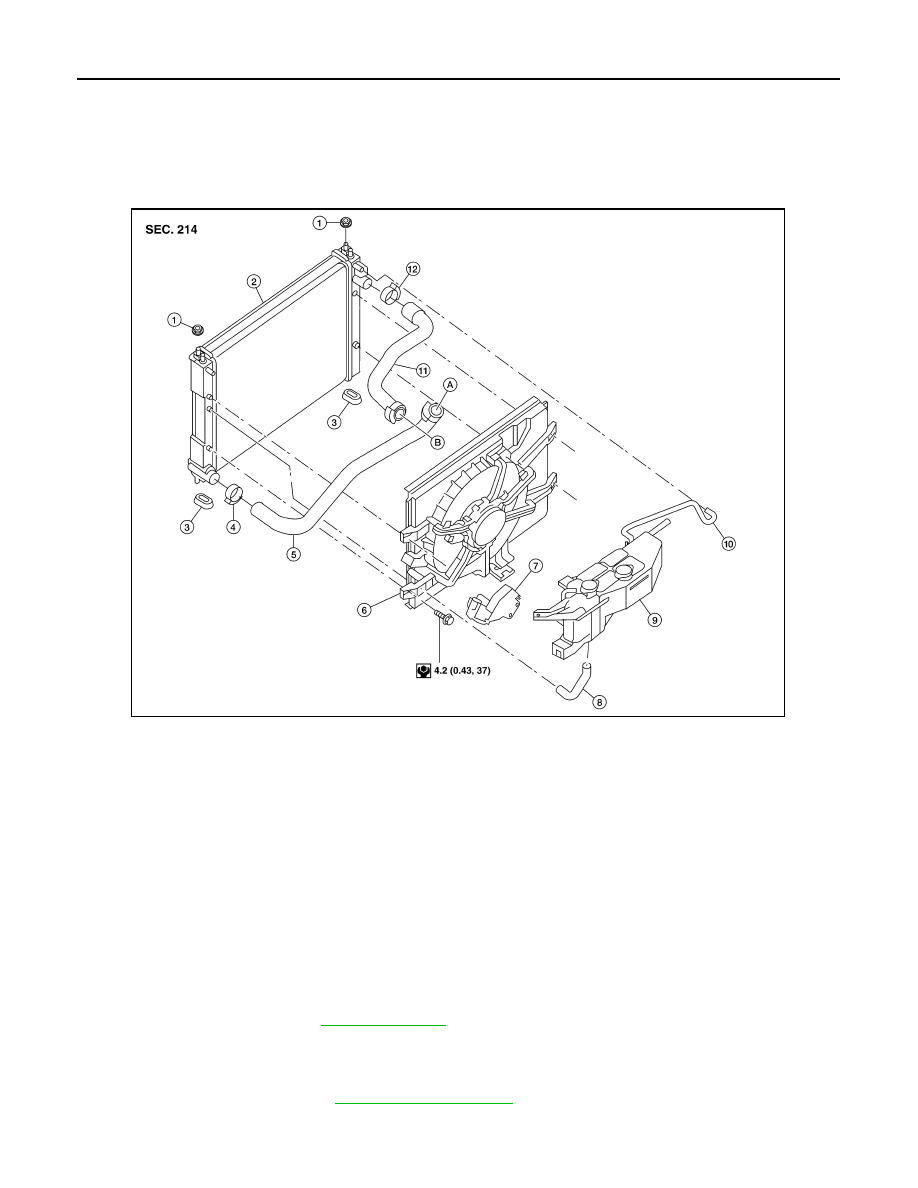
Exploded View
INFOID:0000000001381591
Removal and Installation
INFOID:0000000001381592
WARNING:
Never remove the reservoir tank cap when the engine is hot. Serious burns could occur from high
pressure coolant escaping from the radiator. Wrap a thick cloth around the cap. Slowly turn it a quar-
ter turn to allow built-up pressure to escape. Carefully remove the cap by turning it all the way.
REMOVAL
1.
Remove engine undercover using power tool.
2.
Drain engine coolant. Refer to
CAUTION:
Perform when engine is cold.
3.
Remove engine cover.
4.
Remove air duct (inlet). Refer to
.
5.
Remove reservoir tank hoses and reservoir tank.
1.
Mounting rubber (upper)
2.
Radiator
3.
Mounting rubber (lower)
4.
Clamp
5.
Radiator hose (lower)
6.
Cooling fan assembly
7.
Cooling fan control module
8.
Reservoir tank hose (lower)
9.
Reservoir tank
10. Reservoir tank hose (upper)
11. Radiator hose (upper)
12. Clamp
A.
To water inlet
B.
To water outlet
ALBIA0423GB