Mitsubishi Eclipse. Manual - part 549


  Index      Mitsubishi     Mitsubishi Eclipse - service repair manual 2004 year


Search            


Content   ..  547  548  549  550   ..


Mitsubishi Eclipse. Manual - part 549


MULTIPORT FUEL INJECTION (MFI) DIAGNOSIS

TSB Revision

MULTIPORT FUEL INJECTION (MFI) <3.0L>

13B-739

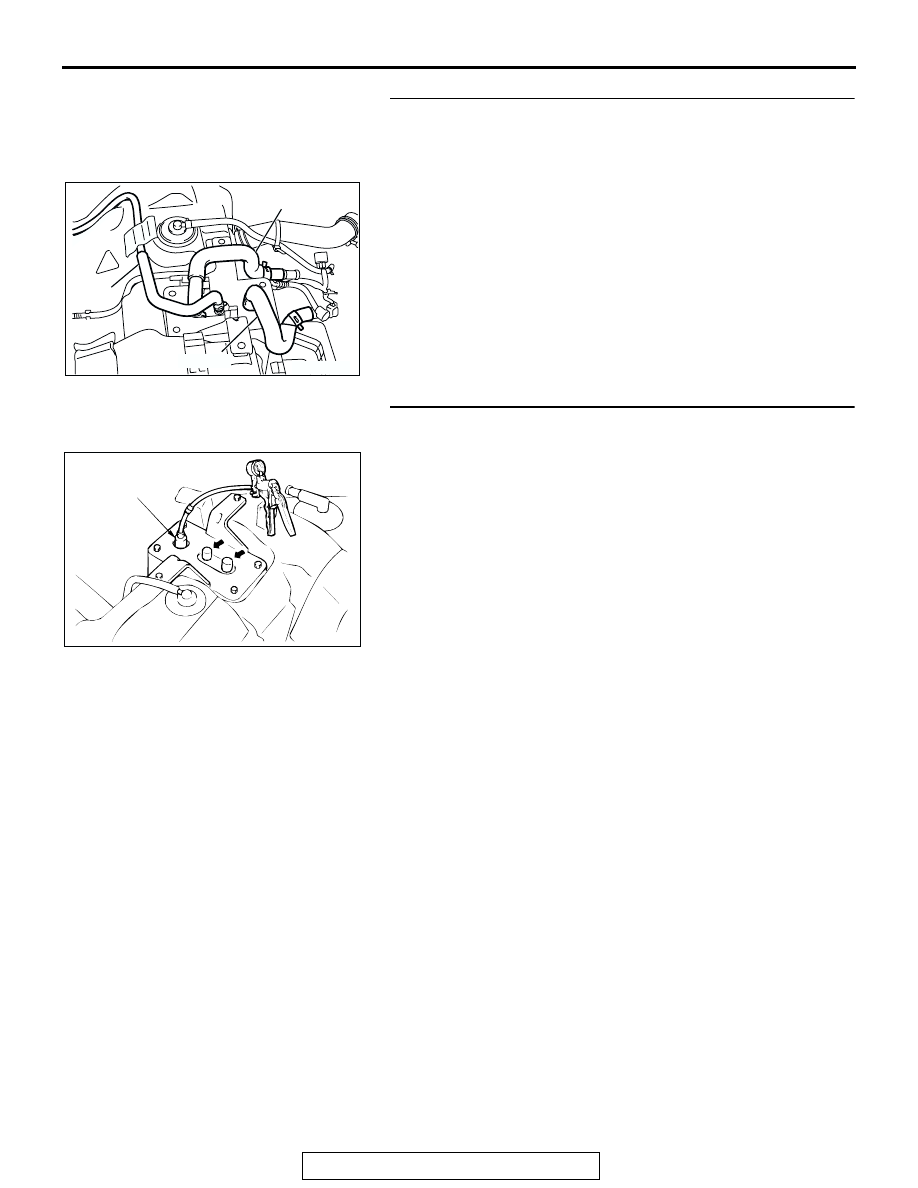
STEP 7. Check for leaks in the evaporator line from hose F 
to hose H.
(1) Remove the fuel tank. (Refer to GROUP 13C, Fuel Tank 

P.13C-13

.)

(2) The leakage test with a hand vacuum pump on each hose 

from hose F to hose H.

Q: Are the hoses in good condition?

YES : Go to Step 8.
NO :  Replace the inferior hose, and reinstall the fuel tank. 

(Refer to GROUP 13C, Fuel Tank 

P.13C-13

.) Then go 

to Step 26.

STEP 8. Check for leaks in the evaporative emission 
canister.
(1) Connect a hand vacuum pump to the vent nipple of the 

evaporative emission canister.

(2) Plug the other two nipples or loop a hose between the other 

nipples.

(3) Apply a vacuum with the hand vacuum pump, and confirm 

that air is maintained.

Q: Is the evaporative emission canister in good condition?

YES : Go to Step 26.
NO :  Replace the evaporative emission canister (Refer to 

GROUP 17, Evaporative Emission Canister and Fuel 
Tank Pressure Relief Valve 

P.17-117

,) and reinstall 

the fuel tank. (Refer to GROUP 13C, Fuel Tank 

P.13C-13

.) Then go to Step 26.

AC002037

HOSE F

HOSE H

AB

HOSE G

AC000191AB

VENT
NIPPLE

MULTIPORT FUEL INJECTION (MFI) DIAGNOSIS

TSB Revision

MULTIPORT FUEL INJECTION (MFI) <3.0L>

13B-740

STEP 9. Check for leaks in the evaporator line from hose J 
to hose K.
(1) Remove the fuel tank. (Refer to GROUP 13C, Fuel Tank 

P.13C-13

.)

(2) Disconnect hose J at the liquid separator side, and then 

connect a hand vacuum pump to the hose.

(3) Plug the hose K at the fuel tank side.
(4) Apply vacuum by using the hand vacuum pump, and 

confirm that the applied vacuum does not fluctuate.

Q: Is air maintained?

YES : Go to Step 10.
NO :  Replace the inferior hose, and reinstall the fuel tank. 

(Refer to GROUP 13C, Fuel Tank 

P.13C-13

.) Then go 

to Step 26.

STEP10. Check for leaks in the evaporator line hose I, L, M, 
N and O.
(1) Remove the fuel tank and fuel filler neck assembly. (Refer 

to GROUP 13C, Fuel Tank 

P.13C-13

.)

(2) The leakage test with a hand vacuum pump on each hose 

from hose I, L, M, N and O.

Q: Are the hoses in good condition?

YES : Go to Step 11.
NO :  Replace the inferior hose, reinstall the fuel tank and 

fuel filler neck assembly. (Refer to GROUP 13C, Fuel 
Tank 

P.13C-13

.) Then go to Step 26.

AC02040 AB

HOSE J

AC002038 AB

HOSE K

AC002032

AB

HOSE I

AB

AC002039

AB

AB

HOSE O

HOSE L

HOSE N

HOSE M

MULTIPORT FUEL INJECTION (MFI) DIAGNOSIS

TSB Revision

MULTIPORT FUEL INJECTION (MFI) <3.0L>

13B-741

STEP 11. Check the check valve A.
(1) Only when you blow the check valve from the direction 

shown, it should pass air.

(2) When you blow the check valve, air should leak from the 

check valve body.

Q: Is check valve A in good condition?

YES : Go to Step 12.
NO :  Replace the check valve A, and reinstall the filler neck 

assembly. (Refer to GROUP 13C, Fuel Tank 

P.13C-13

.) Then go to Step 26.

STEP 12. Check the check valve B.
(1) When you blow the check valve from the arrow direction 

shown above, it should pass more air.

(2) When you blow the check valve from the arrow direction 

shown below, it should pass less air.

(3) When you blow the check valve, air should leak from the 

check valve body.

Q: Is check valve B in good condition?

YES : Go to Step 13.
NO :  Replace the check valve B, and reinstall the filler neck 

assembly. (Refer to GROUP 13C, Fuel Tank 

P.13C-13

.) Then go to Step 26.

AC002039

CHECK VALVE A

AE

AC002076 AB

CHECK VALVE A

AC002039

CHECK VALVE B

AF

AC002078

CHECK VALVE B

AB

MULTIPORT FUEL INJECTION (MFI) DIAGNOSIS

TSB Revision

MULTIPORT FUEL INJECTION (MFI) <3.0L>

13B-742

STEP 13. Check for leaks in the evaporator line from hose 
P.
(1) The leakage test with a hand vacuum pump on the hose P.
Q: Is the hose P in good condition?

YES : Go to Step 14.
NO :  Replace the hose N, and reinstall the fuel tank. (Refer 

to GROUP 13C, Fuel Tank 

P.13C-13

.) Then go to 

Step 26.

STEP 14. Check for leaks in the fuel tank.
(1) Visually check for cracks and leaks, etc.

NOTE: Carefully check the fuel pump assembly and the 
inner pressure sensor installation section in the fuel tank.

AC000195AB

HOSE P

AC000196


Content   ..  547  548  549  550   ..