Mazda Protege 5. Manual - part 319


  Index      Mazda     Mazda Protege 5 - service repair manual 2002 year


Search            


Content   ..  317  318  319  320   ..


Mazda Protege 5. Manual - part 319


GLASS/WINDOWS/MIRRORS 

09–12–31

09–12

REARVIEW MIRROR INSTALLATION

A3U091269220W02

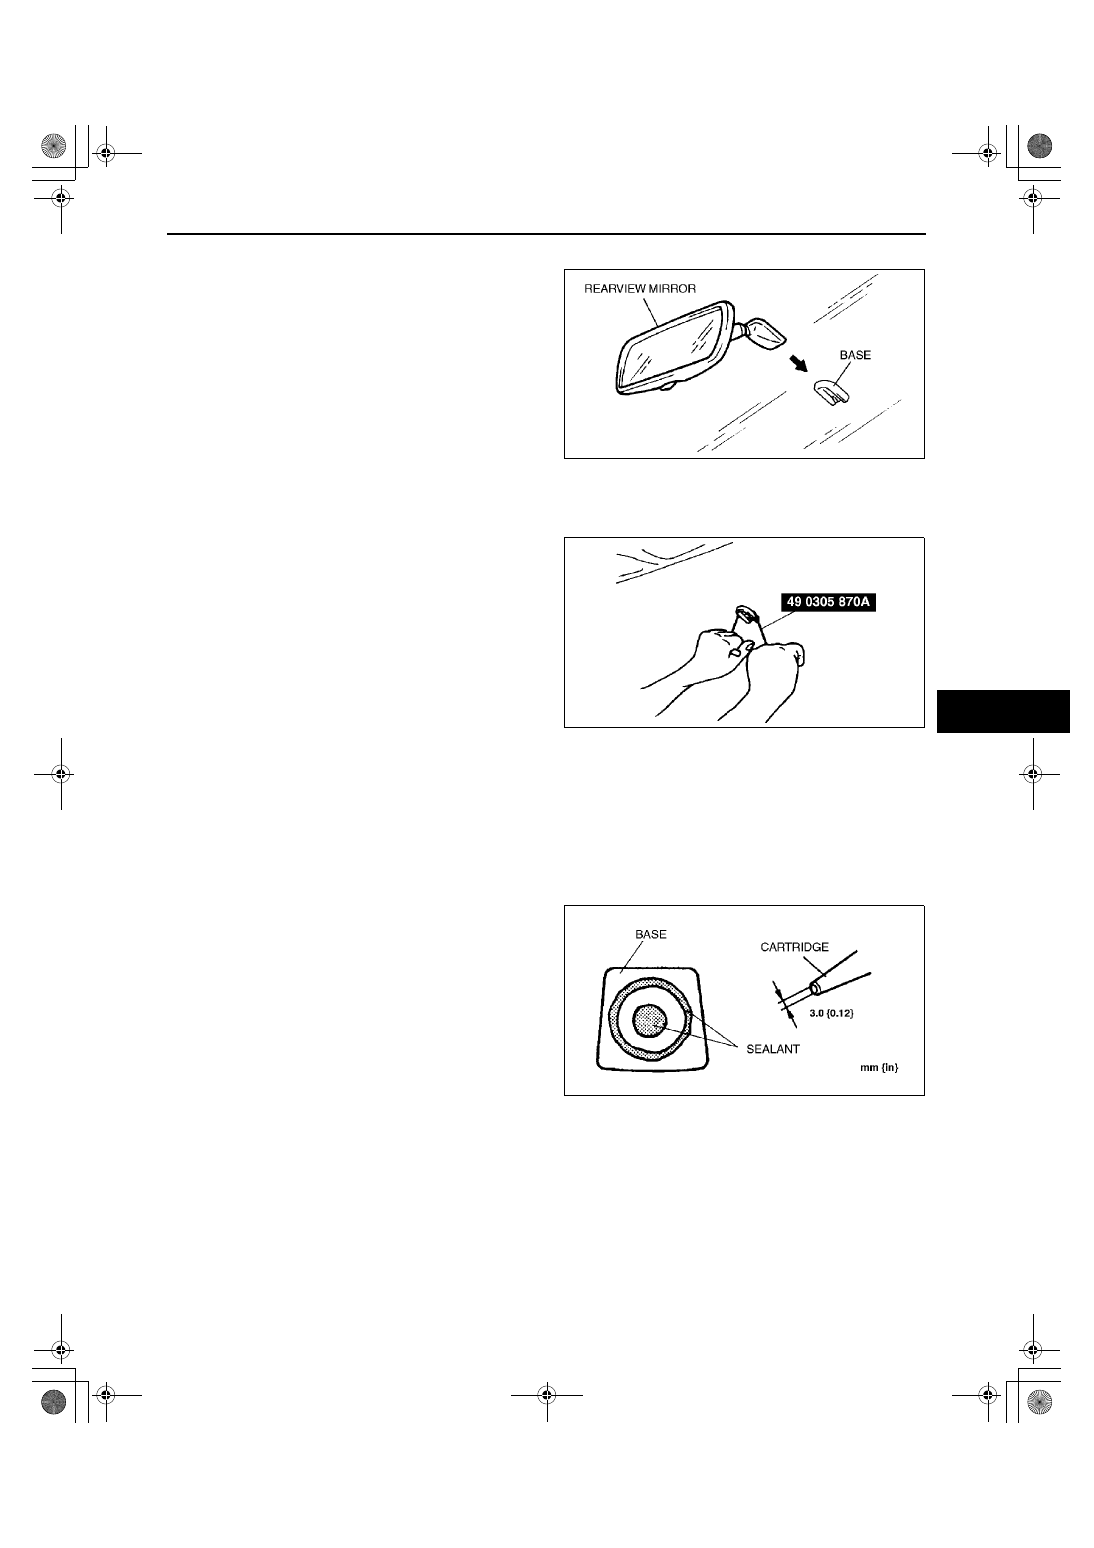
1. Install the rearview mirror onto the base.

End Of Sie

BASE REMOVAL

A3U091269240W01

1. Remove the rearview mirror.
2. Wind each end of a wire around a bar.
3. Saw through the sealant to remove the base.

Note

Use a long sawing action to spread the work 
over the whole length of the SST (piano 
wire) to prevent it from breaking.

End Of Sie

BASE INSTALLATION

A3U091269240W02

1. Cut away all of the original sealant using a razor.
2. Clean and degrease the ceramic coating on the glass and the base.
3. Apply primer to the bonding area of the glass and the base.

Caution

••••

Keep the area free of dirt and grease, and do not touch the surface, otherwise the primer may not 
properly bond to the surface of the glass.

4. Apply a height of 3.0 mm {0.12in} sealant to the 

base.

Note

Use only glass primer on the glass, and 
body primer on the base. Allow the primer to 
dry for approximately 30 minutes.

X3U912WE6

X3U912WE7

X3U912WE8

1712-1U-01G(09-12).fm  31 ページ  2001年6月29日 金曜日 午前10時30分

GLASS/WINDOWS/MIRRORS 

09–12–32

5. Center the base in the ceramic coating and press 

it onto the glass.

6. Use isopropyl alcohol to remove any excess 

repair sealant.

Hardening time of sealant

7. Install the rearview mirror.

End Of Sie

Temperature

Surface 

hardening time

Time required 

until car can be 
put into service

°

C {41 

°

F}

Approx. 1.5 h

Approx. 12 h

20 

°

C {68 

°

F}

Approx. 1 h

Approx. 4 h

35 

°

C {95 

°

F}

Approx. 10 min.

Approx. 2 h

X3U912WE9

1712-1U-01G(09-12).fm  32 ページ  2001年6月29日 金曜日 午前10時30分

SEATS 

09–13–1

09–13

09–13

SEATS

FRONT SEAT 

REMOVAL/INSTALLATION . . . . . . . . .  09–13–1

Side Air Bag Module Connector 

Removal Note  . . . . . . . . . . . . . . . . . .  09–13–1

Side Air Bag Module Connector 

Installation Note . . . . . . . . . . . . . . . . .  09–13–2

Buckle Switch Connector 

Installation Note . . . . . . . . . . . . . . . . .  09–13–2

FRONT SEAT 

DISASSEMBLY/ASSEMBLY . . . . . . . . . 09–13–2

Driver's Seat . . . . . . . . . . . . . . . . . . . . . 09–13–2
Passenger's Seat  . . . . . . . . . . . . . . . . . 09–13–4

REAR SEAT REMOVAL/INSTALLATION09–13–5

4SD . . . . . . . . . . . . . . . . . . . . . . . . . . . . 09–13–5
5HB . . . . . . . . . . . . . . . . . . . . . . . . . . . . 09–13–5

REAR SEAT DISASSEMBLY/ASSEMBLY09–13–7

4SD . . . . . . . . . . . . . . . . . . . . . . . . . . . . 09–13–7
5HB . . . . . . . . . . . . . . . . . . . . . . . . . . . . 09–13–8

End of Toc

FRONT SEAT REMOVAL/INSTALLATION

A3U091357100W01

Warning

••••

Handling the front seat (side air bag) improperly can accidentally deploy the side air bag, which 
may seriously injure you. Read AIR BAG SYSTEM SERVICE WARNINGS before handling the front 
seat. (See 08–10–3 AIR BAG SYSTEM SERVICE WARNINGS.)

1. Turn the ignition switch to the LOCK position.
2. Disconnect the negative battery cable and wait for more than 1 minute.
3. Remove in the order indicated in the table.

4. Install in the reverse order of removal.

Side Air Bag Module Connector Removal Note

1. Remove the connector from the seat cushion frame, then disconnect the side air bag module connector.

1

Side air bag module connector (Vehicles with side 
air bag)
(See 09–13–1 Side Air Bag Module Connector 
Removal Note)
(See 09–13–2 Side Air Bag Module Connector 
Installation Note)

2

Buckle switch connector
(See 09–13–2 Buckle Switch Connector Installation 
Note)

3

Cover

4

Front seat

Z3U0913W001

1712-1U-01G(09-13).fm  1 ページ  2001年6月29日 金曜日 午前10時31分

SEATS 

09–13–2

Side Air Bag Module Connector Installation Note

1. Be sure to pass the side air bag module 

connector (vehicle-side harness connector) under 
the slide connecting wire before connecting it to 
the harness connector of the side air bag module.

2. After connecting the connectors, secure them to 

the seat cushion frame.

Buckle Switch Connector Installation Note

1. Be sure to pass the harness connector of the 

buckle switch under the slide connecting wire 
before connecting it to the buckle switch 
connector (vehicle-side harness connector).

End Of Sie

FRONT SEAT DISASSEMBLY/ASSEMBLY

A3U091357100W02

Driver's Seat

Warning

••••

Handling the front seat (side air bag) improperly can accidentally deploy the side air bag, which 
may seriously injure you. Read AIR BAG SYSTEM SERVICE WARNINGS before handling the front 
seat. (See 08–10–3 AIR BAG SYSTEM SERVICE WARNINGS.)

1. Remove the driver-side side air bag module. (See 08–10–5 DRIVER-SIDE AIR BAG MODULE REMOVAL/

INSTALLATION.)

2. Disassemble in the order indicated in the table.
3. Assemble in the reverse order of disassembly.

Y3U913WA1

Y3U913WA2

1712-1U-01G(09-13).fm  2 ページ  2001年6月29日 金曜日 午前10時31分


Content   ..  317  318  319  320   ..