Isuzu Amigo / Axiom / Trooper / Rodeo / VehiCross. Manual - part 1148


  Index      Isuzu     Isuzu Amigo / Axiom / Trooper / Rodeo / VehiCross - service repair manual 1999-2002 year


Search            


Content   ..  1146  1147  1148  1149   ..


Isuzu Amigo / Axiom / Trooper / Rodeo / VehiCross. Manual - part 1148


4C–4

DRIVE SHAFT SYSTEM

If abnormal conditions are discovered during
inspection, go to Step 6. If there are no abnormal
conditions,  reassemble the front disc rotor and
caliper.

NOTE:  Hub, wheel bearing and spindle is integrated to
the hub unit bearing so it must not be disassembled.  If
it has abnormal rattle or noize, replace the hub unit
bearing.

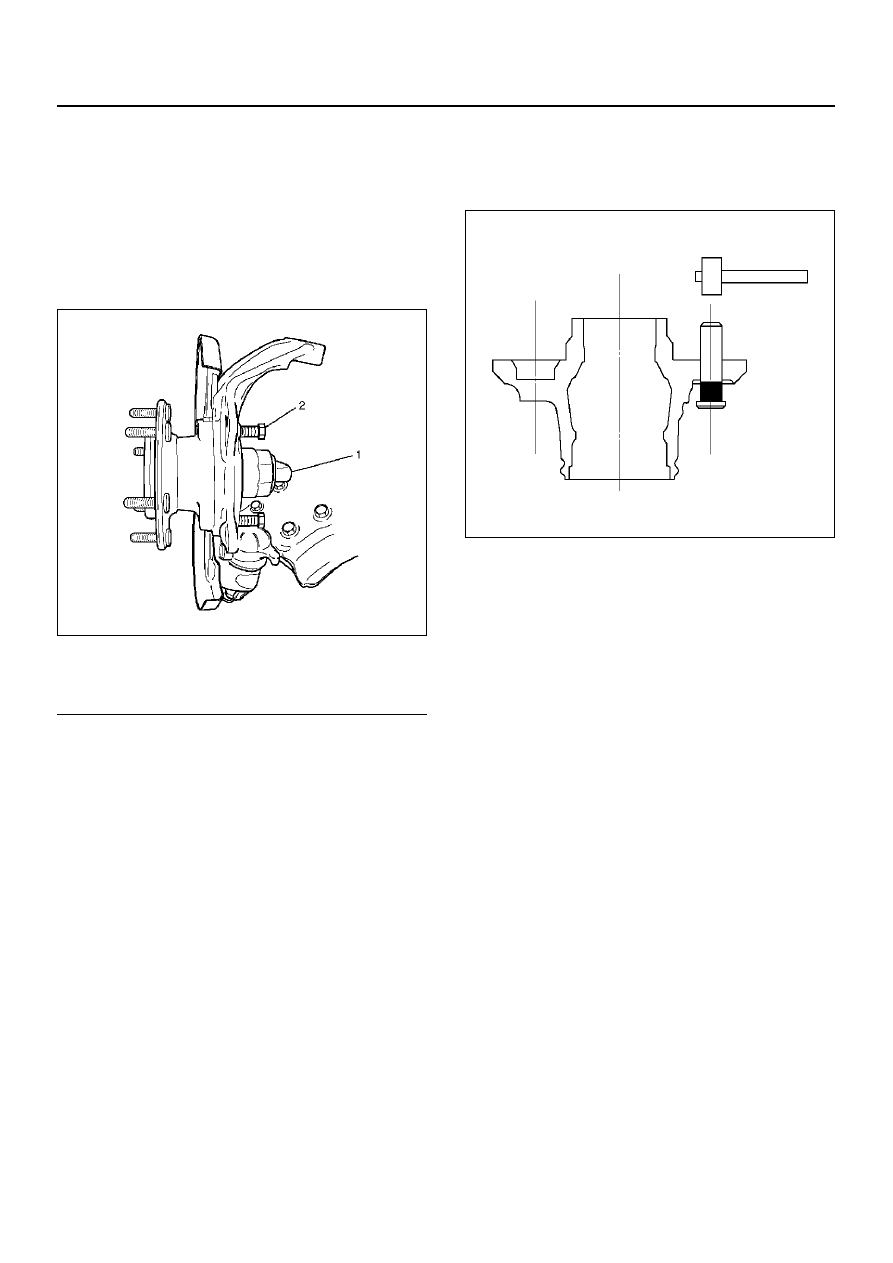
6. Remove the ABS sensor connector.

411R200004

EndOFCallout

7. Remove the 4 bolts fixing the hub unit bearing to the

knuckle.

Apply penetrating oil to the bearing and knuckle contact
surfaces if the surfaces are stuck together because of
rust.

8. Temporarily install long bolts to 2 of the fixing bolt

holes (the bolts must have the same diameter and
thread width).

9. Strike the long bolts with a hammer to loosen and

remove the hub unit bearing from the knuckle.

Take care not to drop the bearing.

10. If necessary, replace the wheel pin in the following

manner.

• Place hub on a suitable work surface and remove

wheel studs, as required, using a hammer.

411RS004

Inspection

Inspect the parts listed below for abrasion, breakage,
and other abnormal conditions.
Repair, or replace the parts as required.

• Disc

• Caliper

• Wheel pin

• Hub unit bearing

Legend

(1) ABS Sensor Connector
(2) Bolt

DRIVE SHAFT SYSTEM

4C–5

Reassembly

1. Install wheel pin.

411RS005

• Place hub on a wood workbench or a block of

wood approx.  6" by 6" to protect the wheel stud
ends and threads.

• Install wheel stud, using a hammer.

NOTE:  Be sure wheel stud is started squarely and
seats completely.

2. Install the hub unit bearing to the knuckle.

Tighten the bolts to the specified torque.

Hub unit bearing bolt

Torque: 103

±10 N·m (10.5 ± 1 kg·m)

If there is rust on the bearing and knuckle contact
surfaces, use sandpaper to remove it before installation.

3. Install the ABS sensor connector.

4. Install the disc rotor.

5. Install the brake caliper to the bracket.

Refer to Front disc caliper assembly in Section 5C of
this Manual.

4C–6

DRIVE SHAFT SYSTEM

Front Hub and Disc (4WD Model)

Disassembled View

411R200010

EndOFCallout

Disassembly

1. Move the transfer case lever to the 2WD position.

2. Raise the vehicle with a jack. Support the frame with

chassis stands.

3. Remove the brake caliper from the bracket. Secure

the caliper with a wire that it does not interfare with
the work process.

Refer to Front disc caliper assembly in Section 5C of
this Manual.

4. Remove the disk rotor.

Apply penetrating oil to the bearing and disc rotor
contact surfaces if the surfaces are stuck together
because of rust.

5. Inspect the hub unit bearing. Refer to inspection

below.

6. Use a dial gauge to measure the bearing axial rattle.

Bearing axial rattle: 0.05 mm max

Legend

(1) Disc Rotor
(2) Hub Unit, Bearing

(3) Wheel Pin
(4) ABS Sensor Ring
(5) Bolt

DRIVE SHAFT SYSTEM

4C–7

411R200002

If abnormal conditins are discovered during inspection,
go to Step 7. If there are no abnormal conditions,
reassemble the front discrotor and caliper.

7. Loosen the caulking around the front drive shaft

nuts.

8. Remove the nuts and discard them (they cannot be

reused).

9. Remove the 4 bolts fixing the hub unit bearing to the

knuckle.

Apply penetrating oil to the bearing and knuckle contact
surfaces if the surfaces are stuck together because of
rust.

10. Temporarily install long bolts to 2 of the fixing bolt

holes (the bolts must have the same diameter and
thread width).

411R200012

EndOFCallout

11. Strike the long bolts with a hammer to loosen and

remove the hub unit bearing from the knuckle.

• Take care not to strike the front drive shaft.

• Take care not to drop the bearing.

12. Remove the ABS rotor sensor from the bearing.

13. Remove the wheel pin.

411RS004

Inspection

Inspect the parts listed below for abrasion, breakage,
and other abnormal conditions.
Repair or replace the parts as required.

• Disc

• Caliper

• Drive shaft oil seal

• ABS sensor rotor

• Wheel pin

• Hub unit bearing

Legend

(1) Bolt


Content   ..  1146  1147  1148  1149   ..