Content .. 1007 1008 1009 1010 ..
Isuzu Amigo / Axiom / Trooper / Rodeo / VehiCross. Manual - part 1009
8F–86
BODY STRUCTURE
Roof Moulding
Parts Location
645RX002
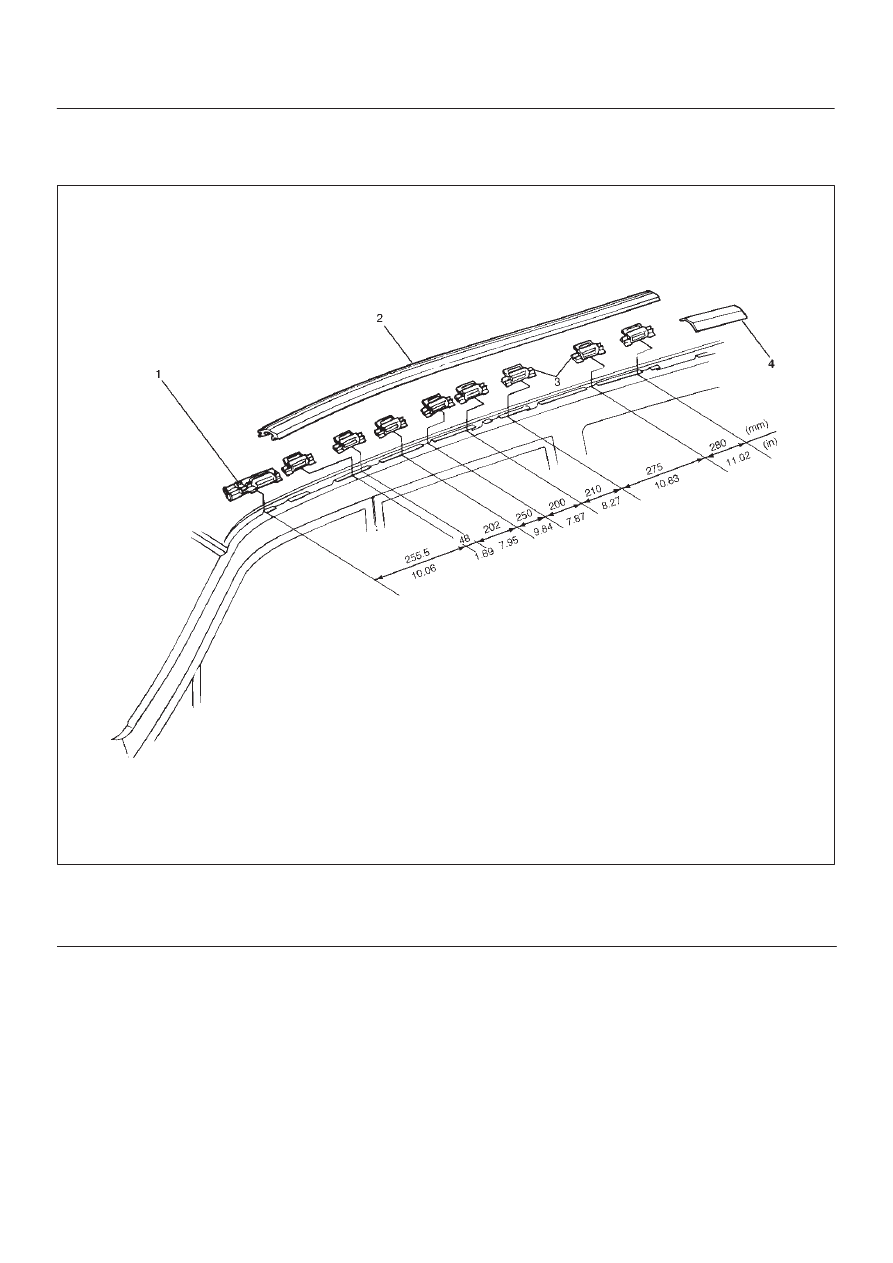
Legend
(1) Windshield Side Moulding Upper Clip
(2) Roof Moulding
(3) Roof Moulding Clip
(4) Roof End Moulding
Removal
1. Disconnect the battery ground cable.
2. Remove roof moulding.
3. Remove roof end moulding.
D
Remove the sealing adhesive and the adhesive
tape of the roof end moulding from the panel using a
knife or scraper while you peel them off.
4. Remove roof moulding clip.
D
Remove the clips.