Content .. 1440 1441 1442 1443 ..
Infiniti EX35. Manual - part 1442
T
M
- 1
5
6
< ON-VEHICLE REPAIR >
[5AT: RE5R05A]
CONTROL DEVICE
2WD : Removal and Installation
INFOID:0000000003130601
REMOVAL
1.
Remove control rod from control device assembly.
2.
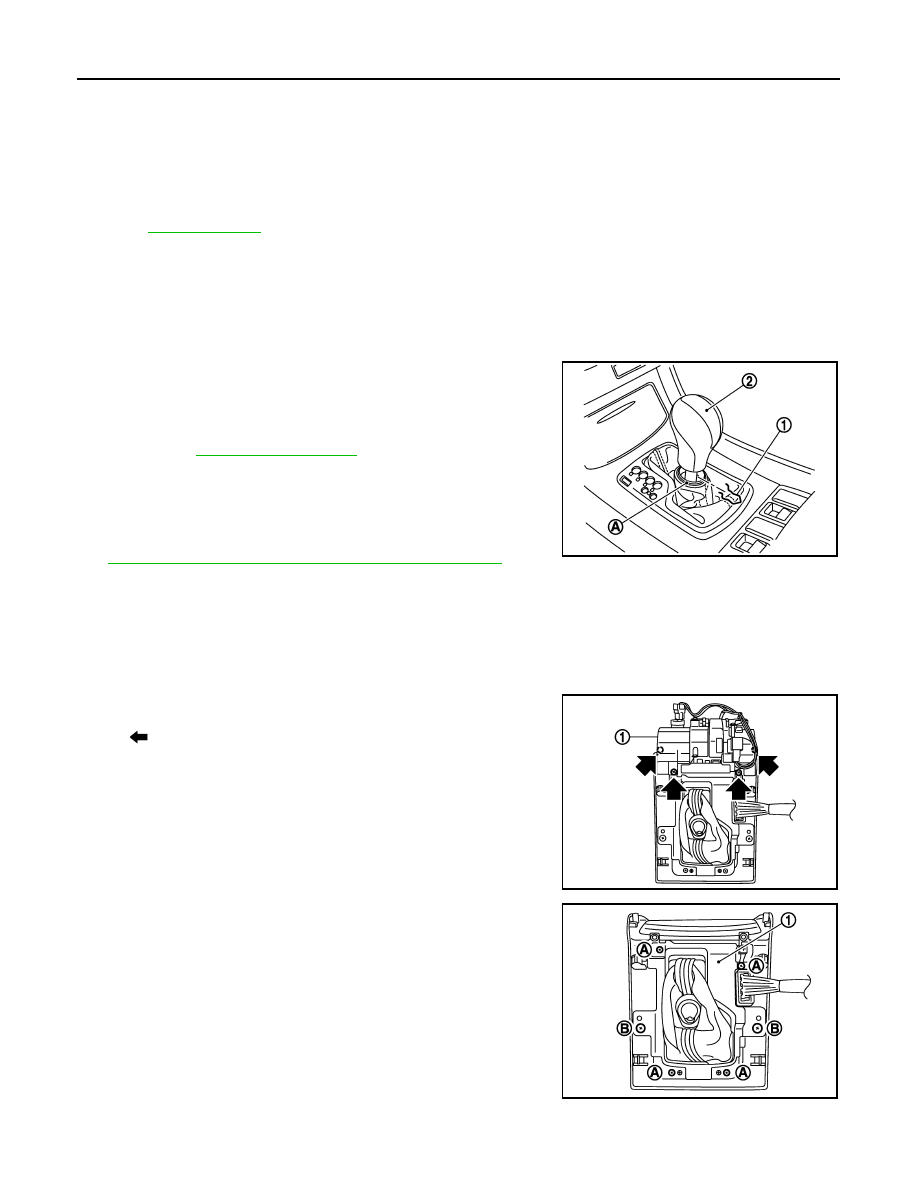
Shift the selector lever to “N” position.
3.
Remove knob cover (A) below selector lever downward.
4.
Pull lock pin (1) out of selector lever knob (2).
5.
Remove selector lever knob.
6.
Remove console finisher assembly and center console assem-
bly. Refer to
CAUTION:
when disconnecting selector lever position indicator con-
nector from shift position switch, never twist or apply an
excessive load to the connector.
7.
Remove the rear ventilator duct 1 (with rear ventilation). Refer to
VTL-58, "REAR VENTILATOR DUCT 2 : Exploded View"
.
8.
Disconnect control device harness connector.
9.
Remove harness clips from control device assembly.
10. Remove control device assembly mounting bolts.
11. Remove control device assembly.
12. Remove selector lever position indicator from console finisher assembly.
a.
Remove ashtray (front) (1) from console finisher assembly.
b.
Remove insert finisher (1) from console finisher assembly.
1.
Selector lever knob
2.
Lock pin
3.
Console finisher
4.
Ashtray (front)
5.
Selector lever position indicator
6.
Insert finisher
7.
Dust cover plate
8.
Dust cover
9.
Bracket
10.
Control rod
11.
Pivot pin
12.
Plain washer
13.
Collar
14.
Snap pin
15.
Insulator
16.
Shift lock unit
17.
Control device assembly
18.
Adapter
Refer to
for symbols in the figure.
JPDIA0634ZZ
: Screw
JPDIA0635ZZ
A
: Screw (small)
B
: Screw (large)
JPDIA0636ZZ