Hummer H3. Manual - part 131


  Index      Hummer     Hummer H3 - service repair manual 2006-2009 year


Search            


Content   ..  129  130  131  132   ..


Hummer H3. Manual - part 131


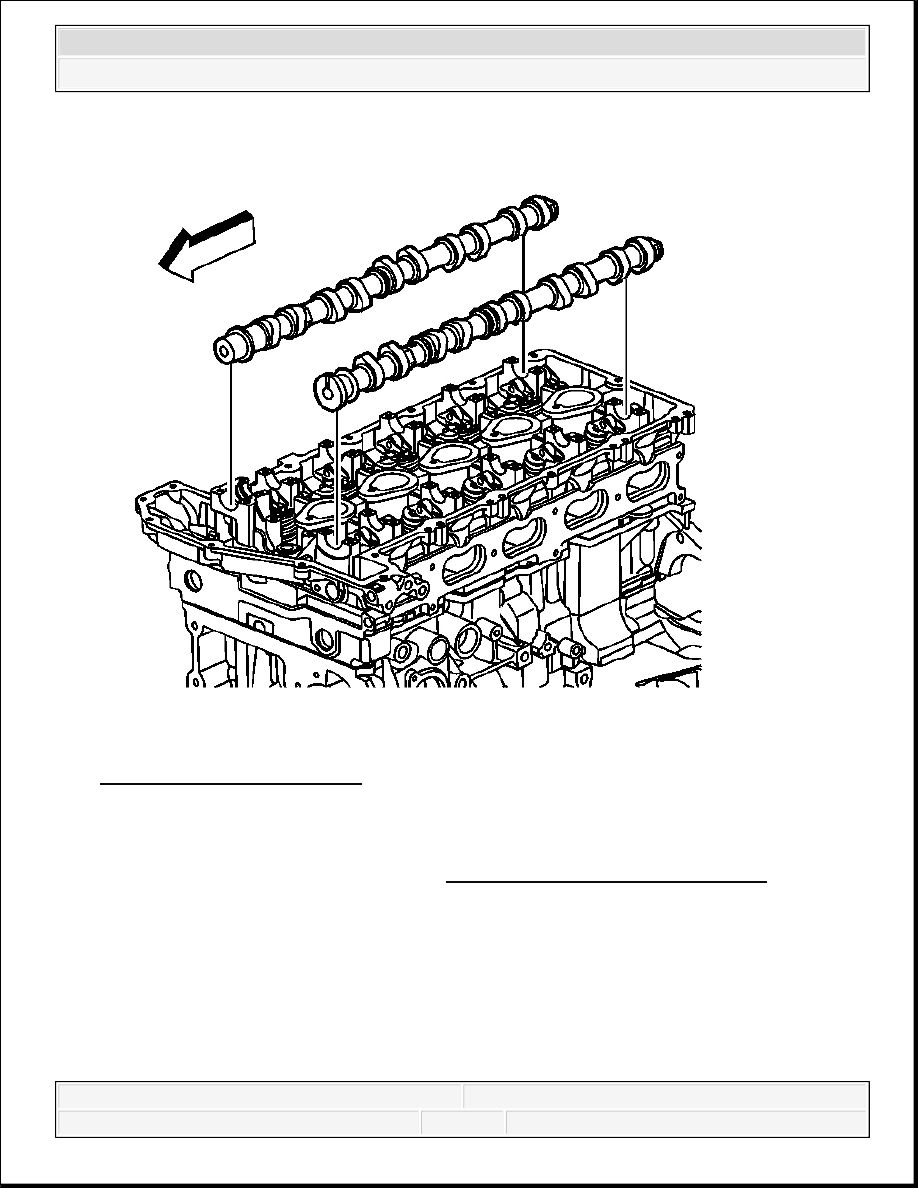
Fig. 173: View Of Camshafts 
Courtesy of GENERAL MOTORS CORP. 

12. Remove the camshafts from the cylinder head.  

13. Clean and inspect the camshafts. Refer to Camshafts Cleaning and Inspection.  

Installation Procedure 

1. Coat the camshaft journals, camshaft journal thrust face, and camshaft lobes with clean 

engine oil. 


2006 Hummer H3 

2006 ENGINE Engine Mechanical - 3.5L (L52) - H3


Fig. 174: Installing J 44221 To Camshafts 
Courtesy of GENERAL MOTORS CORP. 

2. Install the J 44221 with the camshaft flats up and the #1 piston at TDC. See Special Tools.  

3. Install the intake and exhaust camshafts to their original positions. 


2006 Hummer H3 

2006 ENGINE Engine Mechanical - 3.5L (L52) - H3


Fig. 175: Identifying Camshaft Bearing Cap Markings 
Courtesy of GENERAL MOTORS CORP. 

4. Observe the markings on the camshaft caps. Each camshaft cap is marked in order to 

identify its location. The markings have the following meanings: 


The arrow should point to the front of the engine  


The number indicates the position from the front of the engine  


The "E" indicates the exhaust camshaft.  


The "I" indicates the intake camshaft.  


2006 Hummer H3 

2006 ENGINE Engine Mechanical - 3.5L (L52) - H3


Fig. 176: View Of Camshaft Caps 
Courtesy of GENERAL MOTORS CORP. 

5. Install the camshaft caps according to the identification marks. 

6. Install the camshaft cap bolts. Tighten the bolts evenly in order to compress the valve 

springs before final torque. 

Tighten: Tighten the bolts to 12 N.m (106 lb in). 

NOTE:

Refer to Fastener Notice in Cautions and Notices.


2006 Hummer H3 

2006 ENGINE Engine Mechanical - 3.5L (L52) - H3


Content   ..  129  130  131  132   ..