Honda Ridgeline. Manual - part 523
04
05
01
02
SJC8AN1J10311116281KDAT02
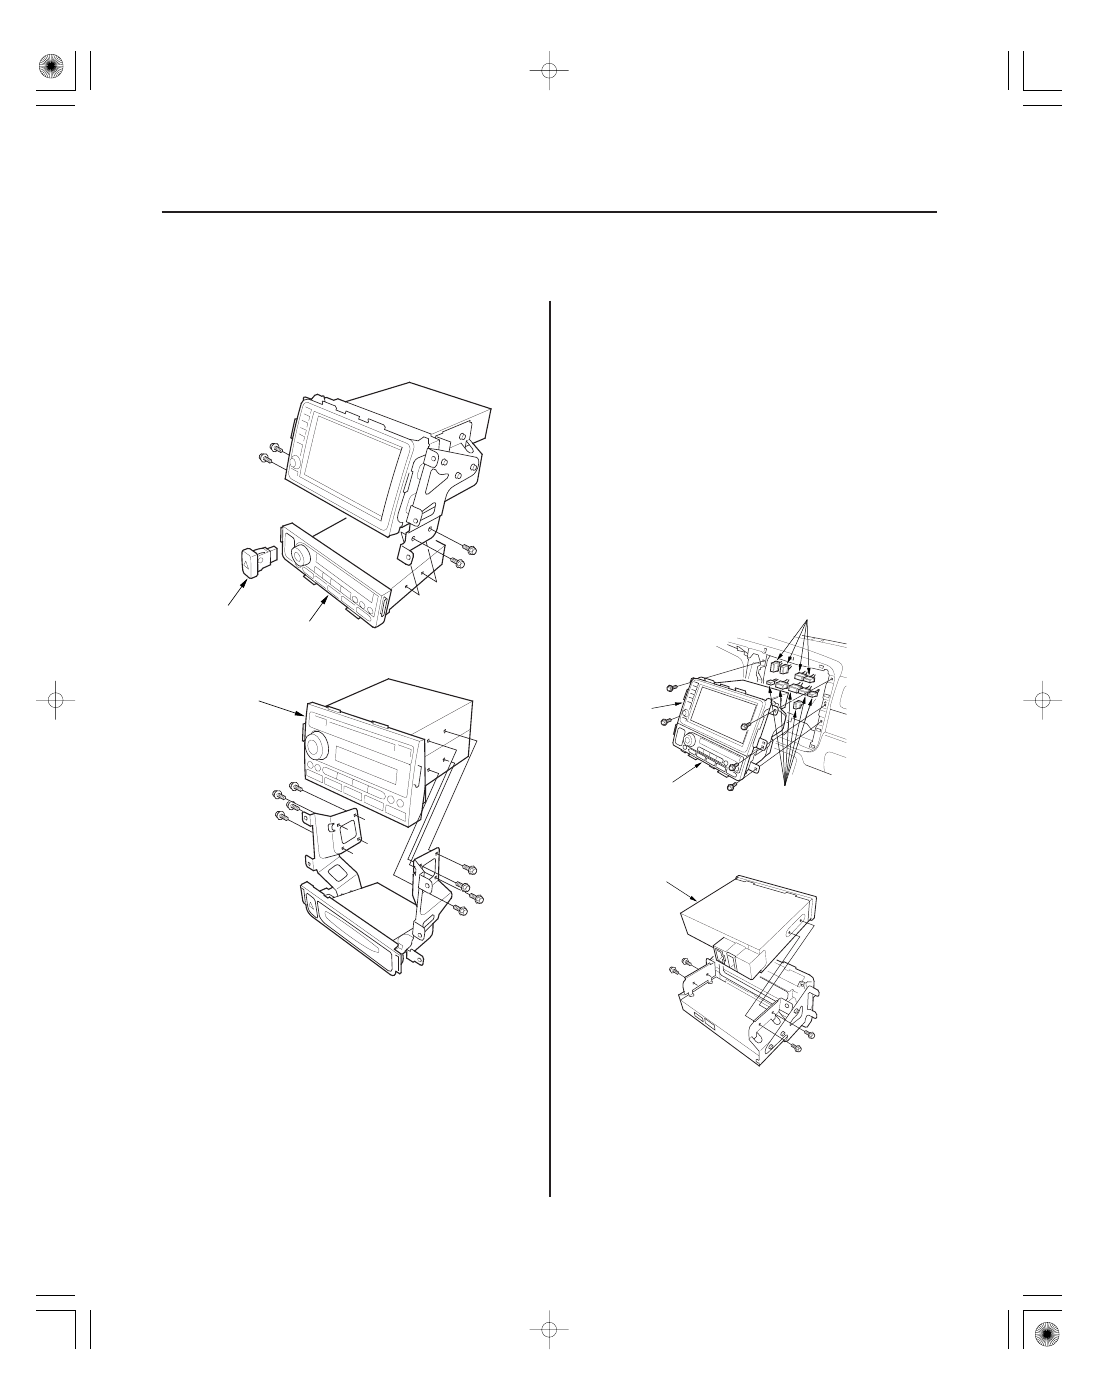
With navigation
Without navigation (6CD type and 1CD type)
23-58
23-58
Audio System
Audio Unit Removal/Installation
(cont’d)
Audio Disc Changer Removal/
Installation
A
B
A
A
B
D
D
A
5. Remove the bolts, and the audio unit (A) and the
hazard warning switch (B) (with navigation).
6. Install the audio unit in the reverse order of
removal, and note these items:
• Make sure all connectors and antenna lead are
secure.
• Enter the anti-theft codes for the audio system
and the navigation system (if equipped).
• Set the clock (on vehicles without navigation).
7. Give the new anti-theft codes to the customer.
NOTE:
• Put on gloves to protect your hands.
• Take care not to scratch the dashboard and related
parts.
• Lay a workshop towel under the parts when working
on them to protect the face panel from scratches or
other damage.
• Eject all the CDs before removing the audio unit and
CD changer to prevent damaging the CD player’s load
mechanism.
1. Make sure you have the anti-theft codes for the
audio system and the navigation system.
2. Remove the instrument panel (see page 20-81).
3. Remove the bolts, then pull out the audio unit (A)
and navigation display (B).
4. Disconnect the connectors (D), then remove the
audio unit.
5. Remove the bolts, and the CD changer (A).
6. Install the CD changer in the reverse order of
removal, and note these items:
• Make sure all connectors and the antenna lead
are secure.
• Enter the anti-theft codes for the audio system
and the navigation system.