Great Wall Hover. Manual - part 60


  Index      Great Wall     Great Wall Hover - service repair manual


Search            copyright infringement  


Content   ..  58  59  60  61   ..


Great Wall Hover. Manual - part 60


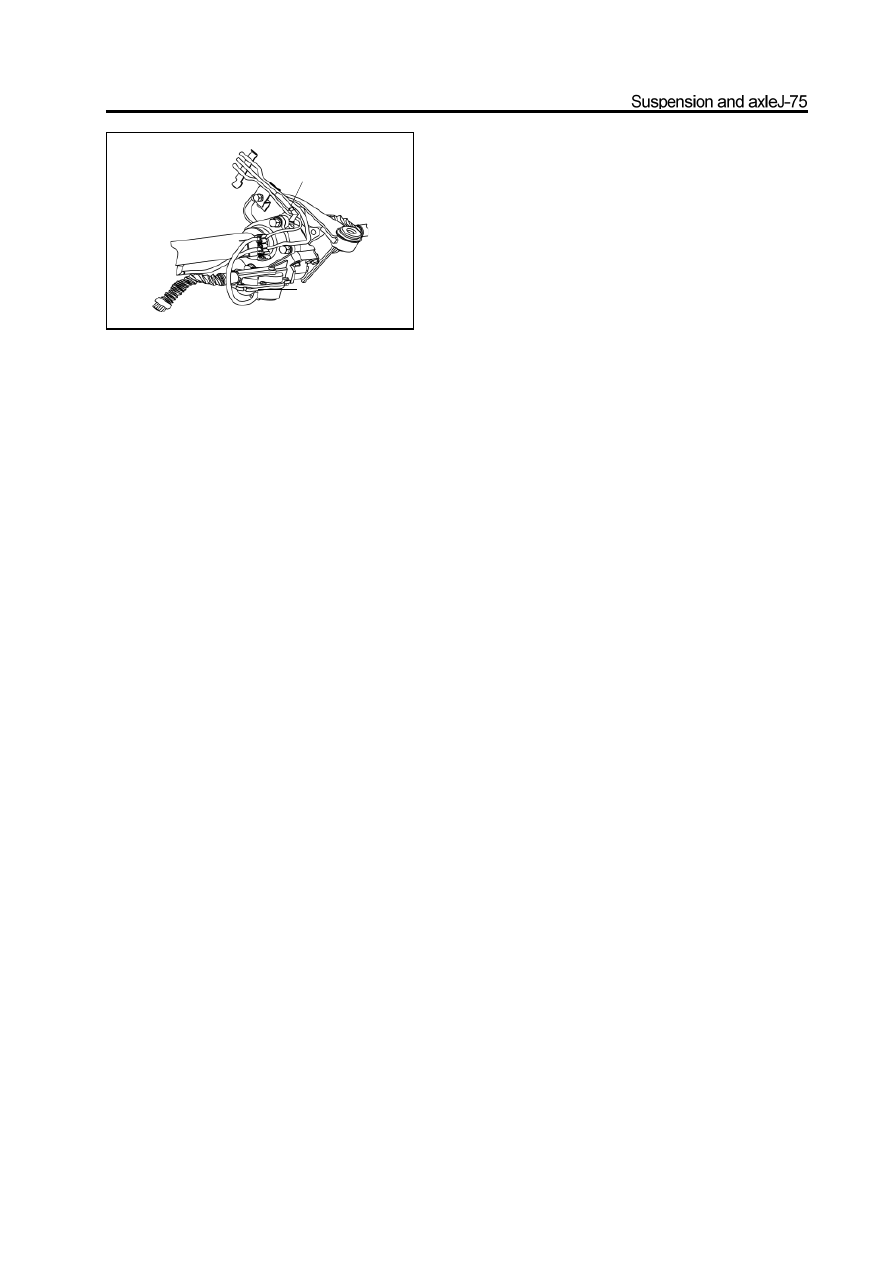
20. Connect the vent tube on the electric clutch

housing to the front axle vent tube connector

assembly.

21. Connect the electric clutch vent tube to the

front axle vent tube connector assembly.

connect the place

connect the place

Disassembly and assembly of front reducer assembly and electric clutch

adjusting shim

bearing gland

differential housing

driven bevel gear

front drive axle housing

washer

oil filling plug

vent tube

clip

front axle vents tube
connector assembly

major semiaxle

needle bearing

electric clutch

location pin

vent tube

mechanical wheel of separator

declutch shift sleeve

electric clutch housing

oil filling plug

circlip

major semiaxle oil seal

half axle gear thrust plate

half axle gear

planetary gear shaft

planetary gear

bolt  

clump

weight bracket

clump weight and bush
assembly

clump weight bracket
welded assembly

front reducer
housing

adjusting washer

spacer 

drive bevel gear

small bearing

oil seal

front drive gear flange and

dustproof cover assembly

drive bevel gear

adjusting washer

Pregummed component

 N 

m:  Specified torque

Used component which

can not be used any more.

bearing

circlip

big bearing

Disassembly of front reducer assembly

1. Remove the front drive axle and left and right

front drive shaft assembly.

(Refer to “Removal of Front Reducer Assembly”

and “Removal of Front Drive Shaft Assembly”)

2. Disconnect three interface positions of front drive

axle vent tube connector assembly.

3. Use the flat screwdriver to pry off the clip fixed

the vent tube connector assembly and take out

the vent tube connector assembly.

4. Screw off the bolt fixed the electric clutch and use

the brass bar to knock down the electric clutch.

5. Use the wrench to remove the oil filling plug;

remove the washer and pull out the vent tube.

6. Use the wrench to remove the bolt connected to

the electric clutch housing and front axle tubeflange;

take out the shift fork sleeve and mechanical wheel

of separator.

Caution: The leaked gear oil during disassembly

should be stored in the container to avoid the

pollution for environment.

disconnected in

this place

disconnected in this place

disconnected in this place

7. Use the circlip pliers to remove the circlip fixed

the major semiaxle bearing outer race.

8. Use the special tools to pull out the major semiaxle

and major semiaxle bearing with the major semiaxle

inner race circlip.

 (Refer to “Replacement of Major Semiaxle Oil Seal”)

9. Use the special tools to remove the major semiaxle

oil seal.

 (Refer to “Replacement of Major Semiaxle Oil Seal”)

10. Pull out the vent tube on the front axle tube.

11. Use the circlip pliers to remove the circlip. Fasten

the major semiaxle bearing inner race.

12. Press out the major semiaxle bearing on press

machine. (Or knocked out by hand hammer)

Caution: Don’t damage the end spline of major

semiaxle.

13. Use the special tools to pull out the needle bear-

ing in major semiaxle.

Caution: It should use the pad when use the vise to

clamp the major semiaxle.

14. Use the wrench to remove the bolt which is used

to fix the clump weight and axle bush assembly, take

off the clump weight and axle bush assembly.

special tools


Content   ..  58  59  60  61   ..